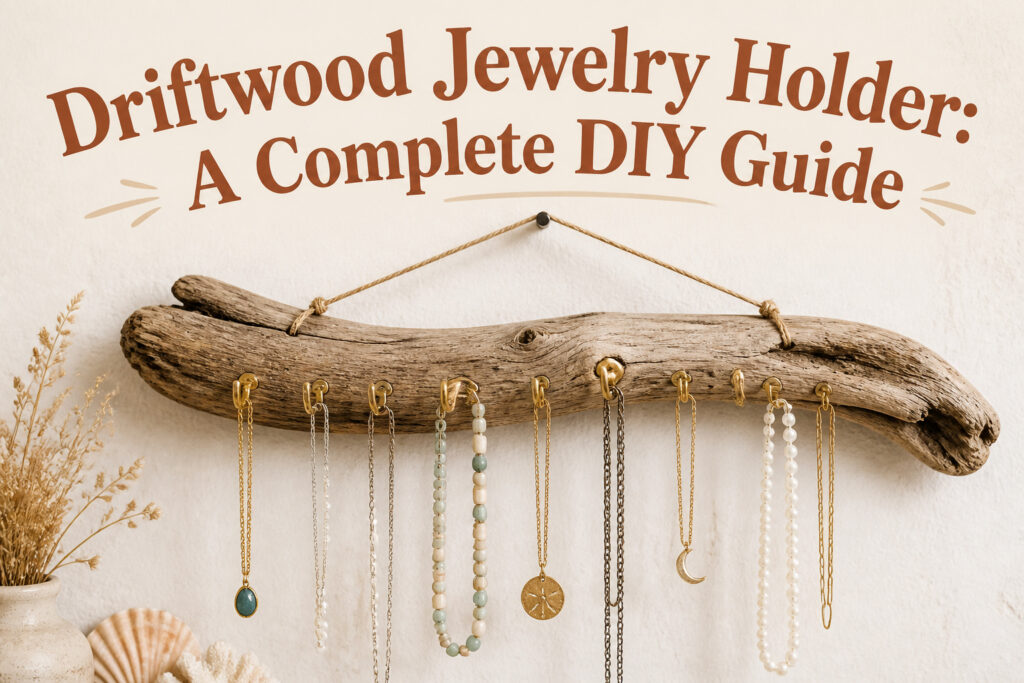
A driftwood jewelry holder is a wall-mounted organizer made from a single found branch, with cup hooks for necklaces and a cord loop for hanging. The catch is that most beach wood is still rotting inside even when it looks solid. Pick up the piece and tap it: a dull thud means the interior has held up, while a crack means hollow decay. The whole build runs under $10 if you already own a drill, and the 1/2 inch cup hooks spaced 3/4 inch apart keep chains from tangling into a single crowded cluster.
Gathering What You Need

Most of what sits on a hardware-store shelf works fine for a driftwood jewelry holder. The total runs under $10 if you already own a drill, and every item below is widely available.
- Driftwood: beach finds work, or search Etsy for sellers who have already cleaned and dried pieces to your size
- 1/2 inch cup hooks, the screw-in kind; a pack of six to ten covers most projects
- Rope or string for hanging; leather cord and twine both hold weight without slipping
- Drill plus a drill bit one size smaller than your hook diameter; a 3/8 inch bit pairs with standard 1/2 inch hooks for a snug fit
- Measuring tape and a marker for spacing hooks evenly
- Optional: pliers for extra grip on stubborn hooks, paint if you want color instead of natural wood
I skip the tiny screw-in eyes some tutorials add; chain looks pretty but rope hangs straighter and costs nothing extra.
Finding the Right Driftwood

Shape matters more than size when you are standing on a beach sorting through driftwood for a jewelry holder. A piece that looks dramatic in your hands can turn out to be rotten inside or shaped so awkwardly that nothing hangs straight. What convinced me, reading through a dozen of these builds, is that the best pieces share two qualities: a stable base that sits flat without rocking and branch forks or knobs that already suggest where hooks will go.
Weight is your first test. Lift the driftwood; waterlogged pieces stay heavy even after surface drying, and they will keep shrinking and warping indoors. A piece that feels surprisingly light for its bulk has already shed most of its moisture. Tap it gently against something hard: a dull thud instead of a crack means the interior is still solid, not hollowed by rot.
Branch structure is where most people trip up. Look for a main limb with at least one or two lateral branches thick enough to take a screw without splitting. The sources describe drilling pilot holes because driftwood goes soft after long immersion; a branch narrower than your thumb will likely crumble under a hook’s pressure. One builder spaced hooks about three quarters of an inch apart along what she called the "bottom" of her piece, which tells you she chose a fairly straight edge to work with. That straight edge is worth hunting for.
Cleaning and Drying

A slightly damp cloth works for surface dust, but most pieces pulled from a shoreline need more than that. Scrub the driftwood under running water with a stiff brush, working with the grain to loosen sand, salt, and whatever else the tide left behind. If the wood still smells like the ocean or feels greasy, a soak in plain water for a few hours helps draw out residual salt and organic matter. Change the water once if it clouds up.
Air drying takes longer than most people allow for. The surface can feel dry in a day or two while the interior stays wet enough to split when drilled, or to grow mold once sealed behind a wall. I lay pieces on a rack in a dry spot with air circulating and give them a week, sometimes more for thick or forked sections. The old check still works: press your cheek against the wood. If it carries any coolness, it is not ready. Rushing this step is the mistake that ruins the project before the first hole is drilled.
Marking Hook Placement

A tape measure is your best defense against the lopsided jewelry holder that haunts every DIY forum. For cup hooks, mark each spot roughly 3/4 inch apart along what will become the bottom edge of your driftwood. That tight spacing keeps necklaces from tangling and bracelets from sliding into a single crowded cluster.
Knobs demand more breathing room. If you are going that route instead, plan for about 6 1/2 inches between each one. Anything tighter and you will be bumping rings against each other every time you reach for a pair of earrings.
The mark itself matters less than the measuring. A Sharpie dot or a light pencil tick both work, but skip the eyeballing that feels tempting after the third mark. One source I read through admitted to spacing knobs by guess on her first attempt, and the result still hangs slightly crooked in her bedroom. The numbers exist because wood does not forgive; once that pilot hole is drilled, the mistake is permanent.
Drilling the Holes

Driftwood splits without warning if you drive a screw straight in, so a pilot hole is non-negotiable even on pieces that feel solid. The drill bit should sit one size smaller than the diameter of your hook; this leaves enough grab for the threads to bite without stressing the grain.
For the hanger itself, 3/4 inch screws will hold, though 1 to 1.5 inches gives noticeably more stability if the back of your piece is thick enough to take the extra length. On my first attempt I used a bit that matched the hook exactly and watched the hook spin freely in a wallowed-out hole. The smaller-bit rule exists because someone else made that mistake first.
Drill from the back when you can. Shaving off the excess with a rotary tool, or trimming the screw end if it pokes through, lets the organizer sit flush against the wall instead of rocking on protruding metal.
Attaching the Hooks

Cup hooks turn a cleaned piece of driftwood into something you will actually use. I like the 1/2 inch size sold at hardware stores or on Amazon; anything longer risks splitting older wood, and anything shorter struggles to hold a chunky necklace clasp.
Driftwood that has been floating tends to go soft, so hand-turning usually gives enough purchase without stripping the grain. If your hook starts to slip or the wood feels dense at one spot, needle-nose pliers add the torque to finish the job. Do not over-tighten. The hook should sit flush with its curved end facing out, but forcing it past that point can crack the surface or widen the hole until the threads no longer grip.
Spacing is forgiving. About 3/4 inch between hooks works for most collections, though a knot or a soft patch might force you to shift an inch in either direction. That irregularity is the point of using a natural material. One hook might sit slightly crooked; another might need a second try if a chip flakes off. The piece still holds jewelry, and the wall hides the back anyway.
Adding the Hanging Mechanism

Leather cord or sisal twine both work for the hanger, and the choice comes down to the look you want. I tie the cord around each end of the driftwood at whatever length puts the holder where I need it on the wall, then trim the ends flush.
Finding the balance point before you knot anything saves the headache of a lopsided hang. Hold the piece by the cord and shift it until it sits level; mark that spot with a pencil or a piece of tape. For a single cord loop, a simple overhand knot at each end is enough if the wood is light. Heavier pieces need a lanyard knot or a figure-eight so the cord does not slip under load.
If you are after two tiers, screw eyes into the back of two separate driftwood pieces and link them with chain. Two pairs of pliers open and close the links. The upper piece carries the wall hanger; the lower one swings from it, giving short bracelets a home up top and longer necklaces room below. A command hook handles the wall side if you are renting and avoiding holes, though a regular hook driven into a stud holds more weight without question.
Arranging Your Jewelry

Wall placement matters more than most people expect. The first driftwood holder I hung sat above my dresser, and within a week the longer necklaces had swung into each other every time I opened a drawer. Moving it to a spot with clear front clearance, about eye level, solved that completely.
Weight distribution determines whether the piece stays level over time. Driftwood is rarely uniform, so heavier necklaces belong on the shorter, thicker branches while lighter chains and bracelets balance the longer, thinner ends. I group by length, shortest to longest left to right, which keeps the visual line clean and prevents tangling when I’m rushing in the morning.
Earrings work best on the straightest sections, spaced so pairs don’t knock together. Small ceramic cups or tiny brass dishes set along the base of the driftwood catch rings and studs that won’t hang.
The finished holder reads as intentional wall decor even when empty. The bleached grain and organic shape draw the eye the same way a small sculpture would, which means it earns its wall space in a bedroom or bathroom that doubles as a dressing area. Mine hangs in the guest room now, and visitors usually assume it was gallery-bought before they notice the jewelry on it.
Natural or Painted Finish

Raw driftwood carries the water stains, salt lines, and grain patterns that made you pick up that specific piece in the first place. A matte clear coat deepens the color slightly without hiding any of it, and that honest surface pairs well with brass or black hooks. Paint, on the other hand, lets the driftwood read as pure shape. Soft white or sage turns it into something closer to a wall sculpture, and the jewelry against it pops in a way metal against brown bark does not.
What convinced me, reading through a dozen of these builds, is how split the results are. Half the finished pieces I liked kept the wood naked; half relied on paint to unify oddly colored branches into one deliberate object. Paint is optional, and this choice matters more than any other for how the holder lives in your room. Neither camp is wrong. Raw risks looking like unfinished craft if the grain is plain; painted risks looking like something bought at a big-box store if the color is too bright or the application too thick. My own leaning is toward clear finish, but only because I like the slight unevenness where the wood darkened unevenly. Someone with a more edited space might want the control that two coats of off-white latex gives them.
Sourcing Responsibly

Some beaches let you take driftwood home without a second thought; others treat it as protected habitat, especially in state parks or nesting areas. Check local regulations before you fill a basket, because the fine for a pocket full of sticks can run higher than the whole project costs.
If that uncertainty sounds familiar, buying online removes it entirely. Sellers on Etsy list cleaned and prepped pieces by length and shape, so you know exactly what arrives. I have paid under five dollars for beach-collected branches at dollar stores for hardware, but driftwood itself was never part of that total; the Etsy route adds a line item and subtracts the guesswork.
Either way, the wood needs cleaning before it touches jewelry. A tutorial from A Pretty Fix covers the prep steps in full, and that same process applies whether you gathered the piece yourself or unboxed it from a seller in Montauk.
Frequently Asked Questions
What materials do I need to make a driftwood jewelry holder?
You need driftwood, 1/2 inch cup hooks, rope or string for hanging, a drill with a bit one size smaller than your hook diameter, and a measuring tape with a marker. Pliers and paint are optional. The total cost runs under $10 if you already own a drill.
How do I hang my driftwood jewelry holder?
Tie leather cord or sisal twine around each end of the driftwood at the length you need, then find the balance point before knotting so it hangs level. For a single cord loop, an overhand knot at each end works on lighter pieces; heavier driftwood needs a lanyard knot or figure-eight so the cord does not slip under load.
Can I paint my driftwood jewelry holder?
Yes, though many builders prefer the natural look. Soft white or sage paint turns the driftwood into something closer to wall sculpture and makes jewelry pop against it. Raw driftwood with a matte clear coat keeps the water stains, salt lines, and grain patterns that made you pick that specific piece. Either choice is valid; paint risks looking mass-produced if too bright, while raw risks looking unfinished if the grain is plain.