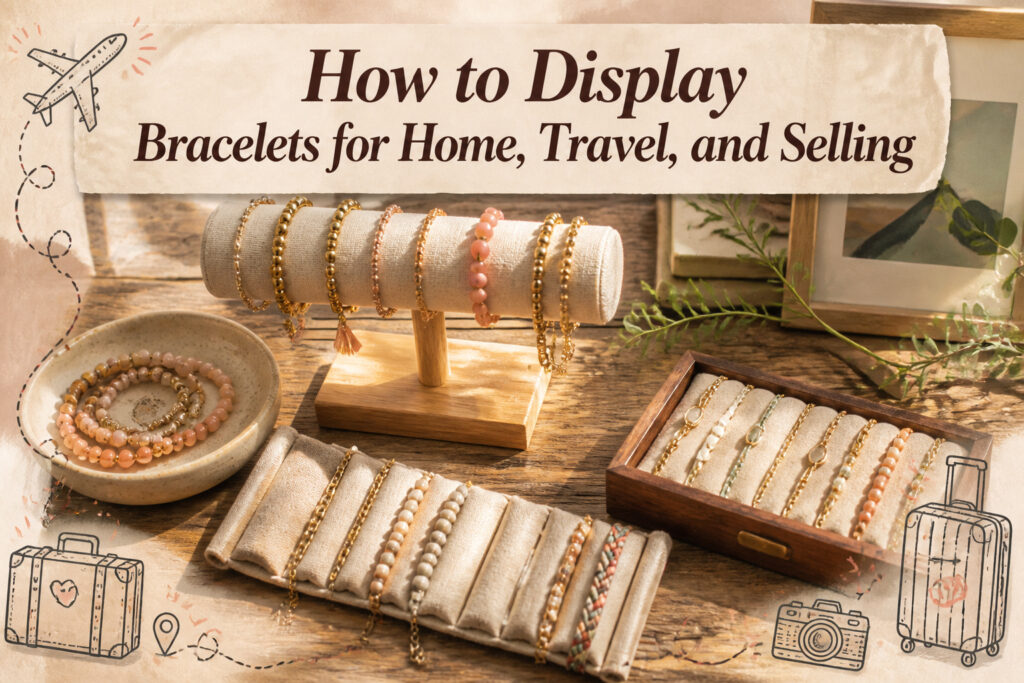
A bracelet display is any stand, tray, or mount that keeps pieces visible, untangled, and within reach of a customer or your own morning routine. The catch is that the right choice flips depending on where you use it: a T-bar that shines on a boutique counter turns into a traffic jam at a busy craft fair, and a velvet tray that looks luxurious can actually discourage shoppers from touching anything. A $2 dowel-and-plaque build from a craft store gives the same basic function as store-bought versions, though base weight and hook spacing separate the ones that last from the ones that tip.
T-Bar Stands
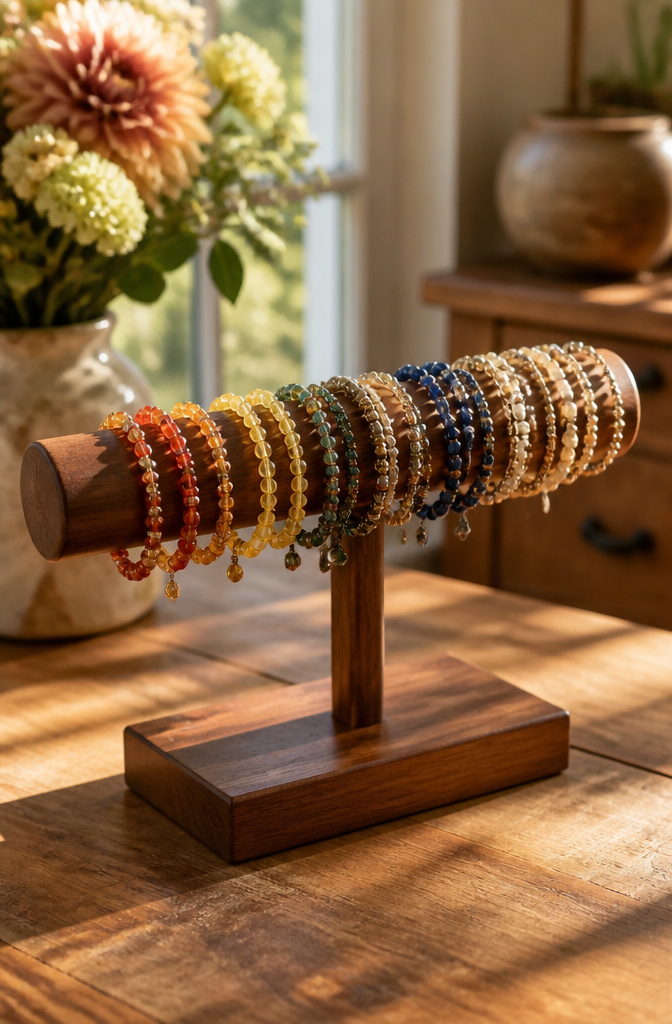
T-bar stands have stayed the classic bracelet display for a reason. The horizontal bar keeps pieces spread flat, so a customer can lift one off without the rest sliding into a pile. That matters more than it sounds at a busy table; I have watched shoppers walk away from a display the moment a bracelet tangle forms.
The tradeoff is real too. When a bracelet sits in the middle of the bar, everything in front of it has to come off first. Some makers solve this by loading only a few pieces on each stand, or by mixing T-bars with easier-access props like open stones or shallow bowls for lower-priced work.
If you are building your own, 1/2 inch dowel rods mounted into a wood base give the same function for a few dollars. A paddle bit and glue are all it takes. Manufacturers rarely publish exact height measurements for ready-made stands, so eyeballing against your own pieces at a hardware store is usually the only way to judge.
Tiered Jewelry Towers
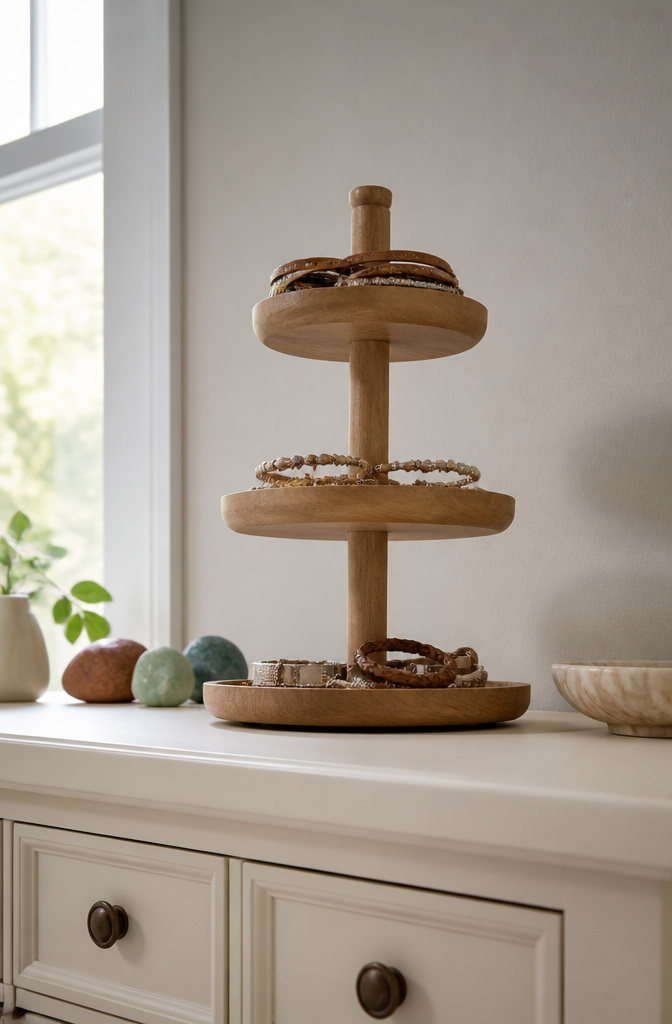
Vertical tiers let you see every bracelet at once without giving up the counter space you actually need for folding or wrapping. Each level sits a few inches above the last, so a bracelet on the bottom rung is still visible past the one above it. That layered spacing is what makes the difference between a display that sells and one that hides half your stock behind itself.
Weight matters more than height. A tower with a wide base plate or weighted metal core stays upright when customers pull a bracelet from the middle tier, which is the one they always reach for first. Resin or coated wood holds up to humidity better than raw MDF, and felt-lined bars keep pieces from sliding into a pile when someone bumps the table. I watched a vendor at a summer market lose three bracelets off an unlined acrylic tower in one afternoon; the wind did not even have to gust hard.
For home use, the same towers work on a dresser or vanity, though the stakes are lower. The layered look still does the job of making each piece easy to spot in the morning, which is the whole reason you bought a display instead of dropping everything in a drawer.
Velvet and Linen Display Trays

Velvet and linen trays solve the scratch problem before it starts. Chain bracelets slide against fabric instead of glass or wood, and charm bracelets settle without the metal-on-metal clatter that turns a display into a damage risk. I group mine by color because the tray itself stays neutral, a dark velvet or oatmeal linen that does not compete with what sits on top.
The tension shows up fast once you start using them. A deep velvet well cradles a gold bangle beautifully, but a customer at a show, or your own hand at 7 a.m., has to dig past the pile to reach the piece underneath. Linen is slightly less plush, which means bracelets lie flatter and lift easier, though you lose some of that cushioned presentation. Stackable trays help here: you can sort by collection vertically and pull only the tray you need, rather than disturbing the whole arrangement.
For travel, these trays fit inside shallow drawer inserts or hard cases. The fabric holds pieces in place during movement better than bare wood, though it adds bulk a plastic divider would not. At shows, I have watched shoppers hesitate at a velvet tray because it looks too finished to touch, which is the opposite of the rummage-through bowl Susan Anderson describes. The fix is leaving one corner slightly disheveled, a single bracelet askew, so the display signals permission to handle.
Wall-Mounted Pegboards

A pegboard turns the blank wall above your dresser or worktable into storage that flexes with your collection. Hooks spaced roughly four to six inches apart handle most bracelet widths without crowding, while narrow shelves or small baskets fill gaps for cuffs and bangles that refuse to hang flat. The spacing matters more than the board itself: too tight, and the pieces tangle; too loose, and you waste the vertical space you were trying to reclaim.
What sold me on this setup, reading through the craft-show threads, was how easy it is to reconfigure. A hook row for chain bracelets one season becomes a shelf line for leather wraps the next, no tools required. The same board works in a bedroom corner or a boutique booth, which is rare among display options that usually favor one or the other. Pegboards with hooks or clips save surface space while keeping every piece visible, and that visibility is what stops a bracelet from becoming the thing you forget you own. The retail-inspired grid panels follow the same logic with a sleeker face, mixing hooks, baskets, and shelves into one system that grows rather than caps out.
Repurposed Household Items
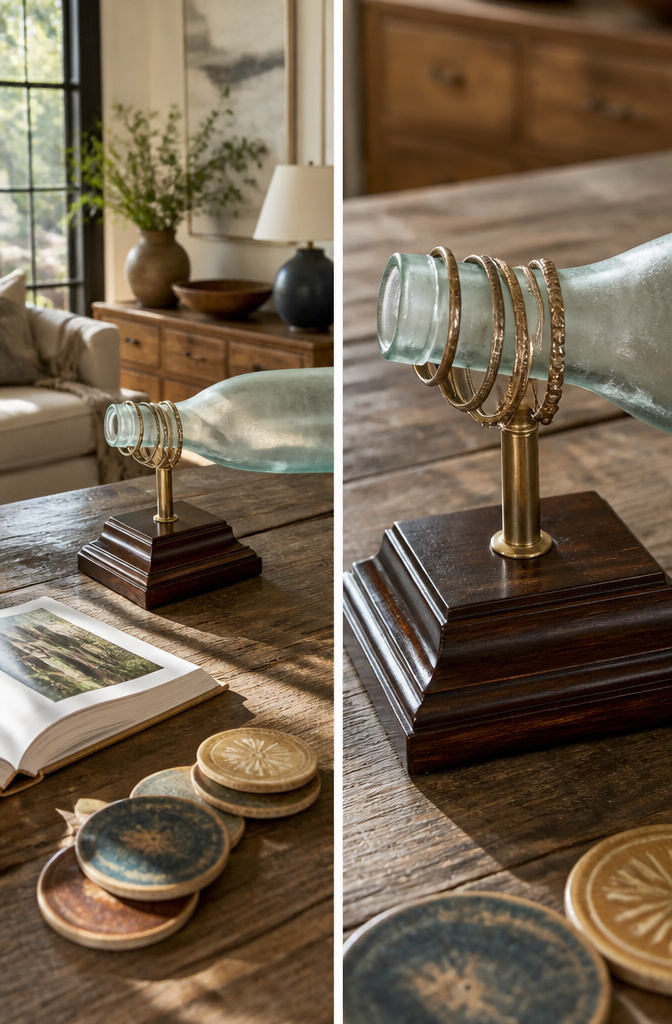
Wine bottles, mug trees, and trophy bases all share the same structural trick: a narrow upright with a wider foot that keeps bracelets from sliding to the floor. A standard wine bottle neck gives you about an inch of exposed glass above the shoulder, which is just enough for a few bangles if you do not mind them touching the table. The base is already weighted, so tipping is rarely the issue. The problem is access: you lift one bracelet and three more follow, because glass offers no friction.
Mug trees work better for cuffs and wider bands. The branching arms keep pieces separated, though the metal rungs can leave marks on soft gold or plated finishes over time. What convinced me, reading through a dozen of these projects, is that the best household conversions are the ones you do not have to alter at all. A trophy base with its original cup removed becomes a clean pedestal once you press a dowel into the existing socket. The marble or weighted base stays put, and the six-inch dowel from one build gives you enough height to see what you own without knocking it over.
Paper towel rolls wrapped in batting and fabric cost about two dollars and handle the same job, though the hollow core eventually softens and the whole bar starts to droop. The tipping point is stability versus visibility: a wine bottle hides half your collection in its own shadow, while a fabric roll on a trophy base sits low enough to let morning light hit every piece. If you already own the object, test it loaded before you paint, cut, or glue anything permanent.
DIY Wooden Bracelet Stand

A $2 build starts with a 7/16-inch dowel and a 3-by-5-inch unfinished wood plaque, both running about ninety-nine cents at a craft store. Gorilla Glue works for the joint, though wood glue is the traditional call; either way, the hole in the plaque should sit slightly undersized so the dowel bites when you press it in. Stain both pieces before assembly if you want a clean finish, and sand the plaque first or you’ll be touching up stain later with a craft brush like I ended up doing.
The 9-inch cardboard roll variation swaps the bare dowel for a paper towel tube wrapped in scrap fabric, Mod Podged in place and slit at the bottom to fit over the post. That extra width keeps cuffs and bangles from sliding into each other, but the whole thing topples if the base is too light. A narrow plaque looks elegant on a dresser, yet a single bump sends bracelets scattering. I learned to favor a wider footprint or weight the underside with a washer or two before the glue sets.
Bracelet Pillows and Rolls

Padded forms solve the shape problem that T-bar stands create. A cuff or bangle sits on a soft, raised surface without collapsing inward or sliding off, and the buyer can lift it cleanly without disturbing the rest of the row. Velvet and leather finishes read as finished retail rather than craft-fair provisional, which matters when the bracelet itself is the price anchor.
Travel versions roll flat and strap shut. The same padding that props a piece upright in a booth becomes protection in transit, so the display doubles as the case. Permanent versions use heavier bases and wider diameters; they stay put on a dresser through daily handling.
I have watched shoppers hesitate at T-bars, not wanting to unstack three pieces to reach the fourth. A pillow or roll removes that friction entirely. One seller at a market laid her stone bracelets across small fabric-covered bolsters like miniature landscape ridges. Each piece was visible, reachable, and held its curve without a clasp to secure.
The tradeoff is footprint. A roll takes more table depth than a vertical stand, and a bowl of rummage-priced pieces still wins for pure throughput at busy shows. For cuffs and thick bangles that need their shape respected, though, the padded form is the display that matches the object.
Drawer Inserts with Compartments

Drawer inserts with compartments keep a bracelet collection sorted and completely hidden from dust, which is exactly what I want for pieces I wear only on occasion. The divided sections let you organize by color, style, or material without the tangle that happens when everything shares one cavity. Stackable designs save vertical space inside a dresser, so the whole system grows without spreading across the room.
The trouble starts when you try to sell from them. At a show or even a home party, a buyer cannot see what you have until they lift the lid and dig through rows of velvet channels. Susan Anderson noticed this friction at art fairs: shoppers skip anything that asks them to fiddle with the display. A compartmentalized drawer protects beautifully, but it forces that friction. You trade visibility for preservation, and in retail that trade costs you the spontaneous try-on. For personal storage the drawer wins. For selling, it belongs behind the table as backup, not in the spot where first impressions happen.
Glass and Acrylic Display Cases

A sealed glass or acrylic case earns its place when the bracelet inside is worth more than the inconvenience of opening it. I learned this the hard way after a craft fair where a gust of wind sent dust through my open velvet tray, leaving a vintage gold chain bracelet looking like it had been stored in a garage. Now anything over a few hundred dollars lives under a clear lid, and the difference is immediate: the pieces read as precious, and buyers pause longer in front of them.
The real advantage for selling situations is the locking option. A case that locks lets you step away from your table without packing half your inventory into a bag, which matters at crowded shows where you cannot watch every angle. Clear panels on all sides keep the view open, so the bracelet still does the work of catching light and drawing someone over. For home use, the same construction keeps dust off pieces you do not wear daily, which is the difference between grabbing a bracelet and spending ten minutes cleaning it first.
Rotating Carousel Displays

A rotating carousel display lets a shopper spin the whole collection toward herself instead of picking up individual bracelets. That matters more than it sounds, because the moment someone lifts a piece off a bar, the ones behind it tangle or slide, and suddenly she is holding three bracelets when she wanted one. The spin saves her from that friction, which is exactly the point Susan Anderson noticed at shows: people pass displays that ask too much of them.
Not every bracelet stays put on a moving base, though. Rigid cuffs and bangles with a closed shape sit steady; they need only a shallow groove or a upright peg to keep them upright as the tray turns. Chain bracelets and anything with dangling charms are a different story. The centrifugal pull is slight, but it is enough to let a loose chain slide off a flat rail and coil underneath where the shopper cannot see it. If you are selling chain-heavy pieces, a carousel with individual hooks or a recessed channel works better than an open flat ring.
Space is the other trade. A carousel gives you 360 degrees of face-out display in roughly the footprint of a large salad plate, which beats a T-bar for density at a crowded craft table. The motion itself also draws the eye across a room in a way a static stand never will.
Travel Jewelry Cases

Compact cases with individual slots or bands keep bracelets from tangling inside a suitcase or tote, and the distinction between transport and presentation matters more than the price tag suggests. A roll-up case with snap bands works for personal travel because it flattens to almost nothing and the bracelets stay in the order you packed them, but unfolding it at a pop-up table eats time and looks temporary. Sellers need a rigid shell with a hinged lid and fitted slots, something that opens flat to become its own display stage and closes into a hard case the airline cannot crush. I learned that the hard way after watching a vendor at a Brooklyn market unpack a velvet roll while the booth beside her lifted the lid of a leather case and was selling in thirty seconds. Lightweight foldable stands travel well too, though they protect less and setup still takes longer than the hinged option. For personal use, any of the three works; for selling, the rigid case wins unless your pop-up space is so small that a stand folding to pocket size is the only physical possibility.
Lighted Display Shelves

LED strips built into shelving turn a dim booth corner or a bedroom wall into something that actually sells the bracelet rather than hiding it. The light catches the facets in a gemstone setting and gives polished metal a depth you do not get under overhead room lighting alone. Backlit shelves add that gallery-like feel the high-end retailers use, and the hardware has become cheap enough for home setups.
Power runs the whole decision. Battery-powered strips avoid the cord problem for travel shows or rented booth spaces where outlets are scarce, but the brightness drops as the cells fade through a long day. Plug-in strips stay consistent and cost less per hour, which matters if you are running a permanent home display or a shop fixture. Either way, the color temperature changes what the customer sees. Cool white LEDs can drain the warmth from rose gold and make amethyst look flat; warmer strips around 3000K keep the tones honest on most birthstones.
The strips themselves mount with adhesive backing or small clips. Adhesive fails in humidity, so clipped channels hold better long-term, especially on wood shelves that breathe and shift with the season.
Over-the-Door Racks

Behind a door sits the most ignored real estate in a room, and an over-the-door rack turns it into storage that costs almost nothing. Hanging organizers with clear pockets let you see every bracelet without opening a drawer, while hook styles keep chains from tangling into knots you spend Sunday morning unpicking.
The catch is weight distribution. A rack loaded heavy on one side pulls the hooks away from the frame until the whole thing swings when the door moves. Heavier cuffs and metal bangles belong near the center, not dangling from the outer pockets where they act like a lever against the hook’s grip. Clear pockets sewn from thin vinyl start to sag after a few months of holding anything thicker than cord, so the bracelets end up resting against the door itself and scratching paint.
Door-mounted hooks vary in quality. The ones that hang from a single metal bracket over the top of the door handle more weight than adhesive strips or screw-in models, but they also raise the rack higher, which matters if you are short enough that the top row becomes unreachable. In rentals, this is usually the compromise you make: accept the height, or accept the risk of a strip failing and dumping thirty bracelets onto tile at six in the morning.
Framed Cork and Mesh Boards

Shallow frames with cork, linen backing, or wire mesh turn wall space into eye-level bracelet storage that stays readable from across a room. Pushpins work for leather cords and bangles with solid clasps, but chains catch on the barbed end and elastic stretches if the pin pierces it. Better options are small S-hooks hung over the frame lip, or flat-headed map pins pressed in at an angle so the shaft holds the loop without snagging. For mesh boards, the grid itself becomes the hook; bracelet clasps slip over a single wire and hang freely.
The frame finish matters more than the backing material. A painted wood border in a color pulled from your wall keeps the display from reading as office supply. At shows, this setup solves the T-bar problem Susan Anderson noticed: shoppers can lift one piece without sliding six others off a bar first. The trade is visual density. A board crowded with twenty bracelets looks like a flea market stall; eight to twelve, spaced to let each one breathe, reads as curated inventory.
DIY Bracelet Storage Display Bar

A horizontal bar mounted to the wall or weighted on a counter changes everything for bracelets that tangle in drawers. The rod itself can be a simple dowel, and S-hooks or loops spaced three to four inches apart keep cuffs and bangles from sliding into each other. Stability matters more than it looks. A marble trophy base, scavenged from a thrift store and stripped of its figure, gives a countertop version the heft to stay upright when someone pulls a bracelet free. For wall mounting, the bar needs to sit far enough from the surface that wider cuffs don’t knock against paint or tile. Spacing is the detail that makes this usable: too tight, and removing one piece means sliding off everything in front of it; too loose, and the display looks empty at craft fair tables where every inch counts. The versions I have seen that failed were top-heavy or crowded, tipping when a customer reached, or hiding half the stock behind a tangle of chains.
Building Displays That Last

A bracelet stand that tips over the first time someone bumps the table teaches its lesson fast. The base needs to weigh at least as much as everything above it, and that ratio only matters more as the dowel or post gets taller. I have watched narrow wooden dowels rock in their holes after a few months of seasonal humidity, so the seating depth matters as much as the glue. A hole drilled too shallow leaves the upright wobbling even when the glue is fresh; go deeper than the diameter of the dowel itself and the joint holds longer.
Cardboard tubes wrapped in fabric look charming in the build photos. Six months in, the cardboard softens at the ends where hands grip it, the fabric pills or frays at the contact points, and the whole cylinder starts to bow if bracelets sit heavy on one side. Soft woods like pine take dents from clasps and catch on rough hardware; the surface looks tired before the structure fails. Fabric glued over padding traps skin oils and dust in layers you cannot wash apart.
Weight distribution is the part you control after the build. Load heavier cuffs low and spread across the width rather than stacking at one end. A stand that balances empty will not balance once half your collection sits left of center.
What I Have Broken and Fixed
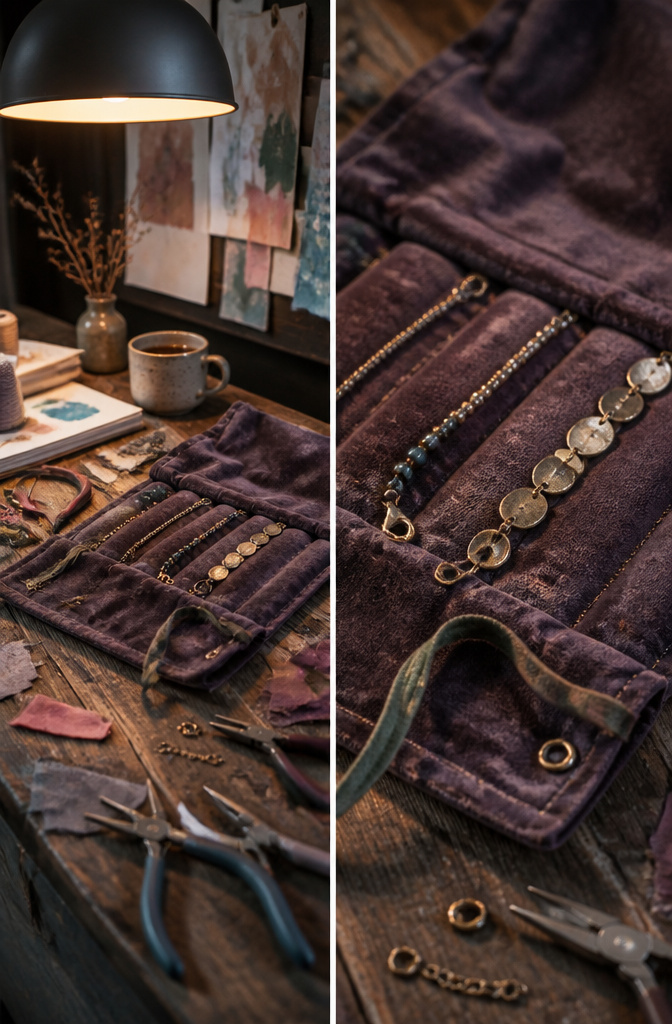
A velvet-lined bracelet roll I bought three years ago taught me what sunlight does to foam padding in under six months. The roll sat on a windowsill in my bedroom, looked elegant for maybe two weeks, then the internal cylinder started to crumble. By month five the velvet sagged where the structure had collapsed, and bracelets I thought were protected were sliding into a lopsided heap. I spent about forty dollars on that roll, then another twenty-five on a replacement before I understood the problem was placement, not product.
Now I keep display pieces away from direct light and check the internal supports every few months by pressing gently along the spine. For travel, I switched to cases with rigid walls after that same crumbling foam turned a carry-on bag into a jewelry box with no shape. The hard cases cost more upfront, but I have not replaced one yet.
One Display for Bracelets and Necklaces
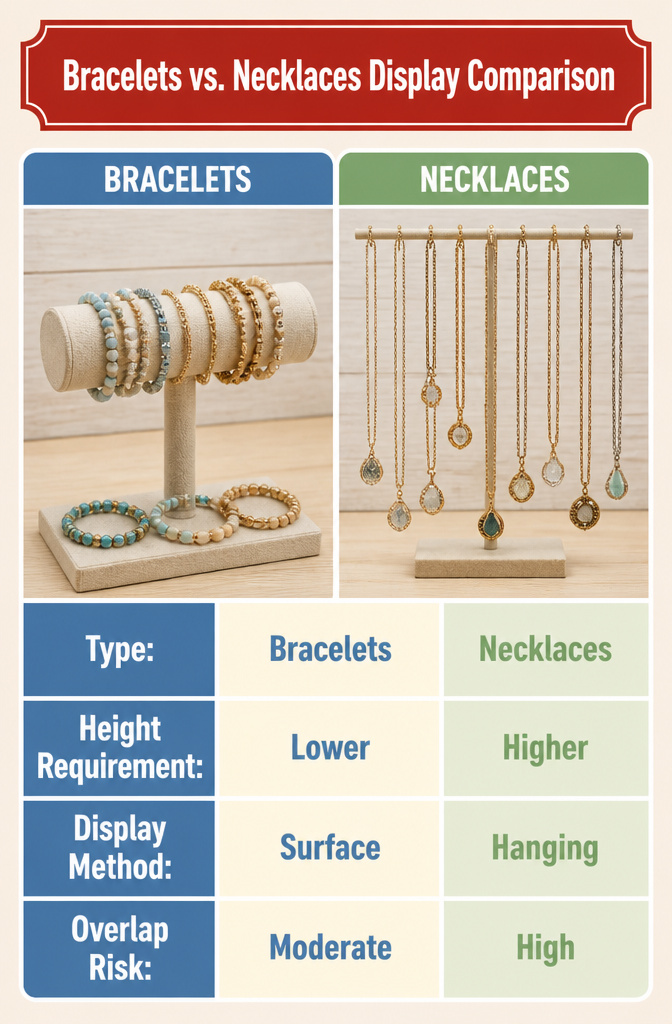
A multi-purpose stand saves table space at shows, but the wrong one turns into a tangle of chains every time the wind shifts. Adjustable height matters most: necklaces need more vertical room than bracelets, so a fixed bar set low will leave your pendants bunched at the bottom or your bracelets sliding off the top. Tiered or extended-height designs keep both pieces visible without overlap.
The real trouble spot is the bar end. Bracelets on a T-bar sit fine until a necklace loop slips between them, and then the customer is picking apart a knot instead of trying anything on. Susan Anderson noticed this at art shows, where shoppers would pass rather than wrestle with a crowded display. Her fix was keeping bracelets on stones or bookends instead, reserving the T-bar for just a few pieces.
If you are using one stand for both, load necklaces on the upper tier and bracelets below, or hang necklaces on the sides and lay bracelets flat across the base. Never drape both from the same horizontal bar. The necklace wins that fight every time, and the bracelet underneath disappears.
Frequently Asked Questions
How do I display bracelets for selling at craft fairs?
T-bar stands and tiered towers work best for busy tables because shoppers can lift one piece without causing a tangle. A tower with a weighted base stays upright when customers pull from the middle tier, which is the one they always reach for first. Leave one corner of a velvet tray slightly disheveled so buyers feel permission to handle the pieces.
How do I display bracelets at home?
Wall-mounted pegboards reclaim blank wall space and reconfigure easily as your collection changes. Drawer inserts with compartments keep occasional pieces dust-free and sorted by color or material. Bracelet pillows on a dresser let morning light hit every piece so you actually wear what you own.
How do I travel with bracelets without tangling?
A roll-up case with snap bands flattens to almost nothing and keeps bracelets in packed order, though it looks temporary when unfolded. For selling on the road, a rigid shell with a hinged lid and fitted slots opens flat to become its own display and closes into something the airline cannot crush.
How do I display bracelets and necklaces together?
A multi-purpose stand saves table space at shows, but the article cuts off before detailing which designs work for both. Adjustable or multi-purpose stands are the general direction to look.
How do I clean bracelet displays without damaging them?
Use a soft, lint-free cloth for regular dusting. For acrylic or glass displays, a gentle glass cleaner works well, but avoid abrasive pads that could scratch the surface.
How do I keep bracelets secure at a craft fair?
Opt for displays with locking cases or ones that can be placed behind your table. You can also use cable ties or discreet hooks to deter quick grab-and-run theft.
What is the cheapest DIY bracelet display?
A two-dollar build starts with a 7/16-inch dowel and a 3-by-5-inch unfinished wood plaque, both about ninety-nine cents at a craft store. Gorilla Glue or wood glue works for the joint if the hole sits slightly undersized so the dowel bites when pressed in.
How do I keep a bracelet stand from tipping over?
The base needs to weigh at least as much as everything above it, and that ratio only matters more as the post gets taller. Load heavier cuffs low and spread across the width rather than stacking at one end. A stand that balances empty will not balance once half your collection sits left of center.
How do I light bracelets for display?
LED strips built into shelving catch facets in gemstone settings and give polished metal depth. Battery-powered strips avoid cord problems at shows with scarce outlets, but brightness fades through a long day. Warmer strips around 3000K keep tones honest on most birthstones; cool white can drain warmth from rose gold.