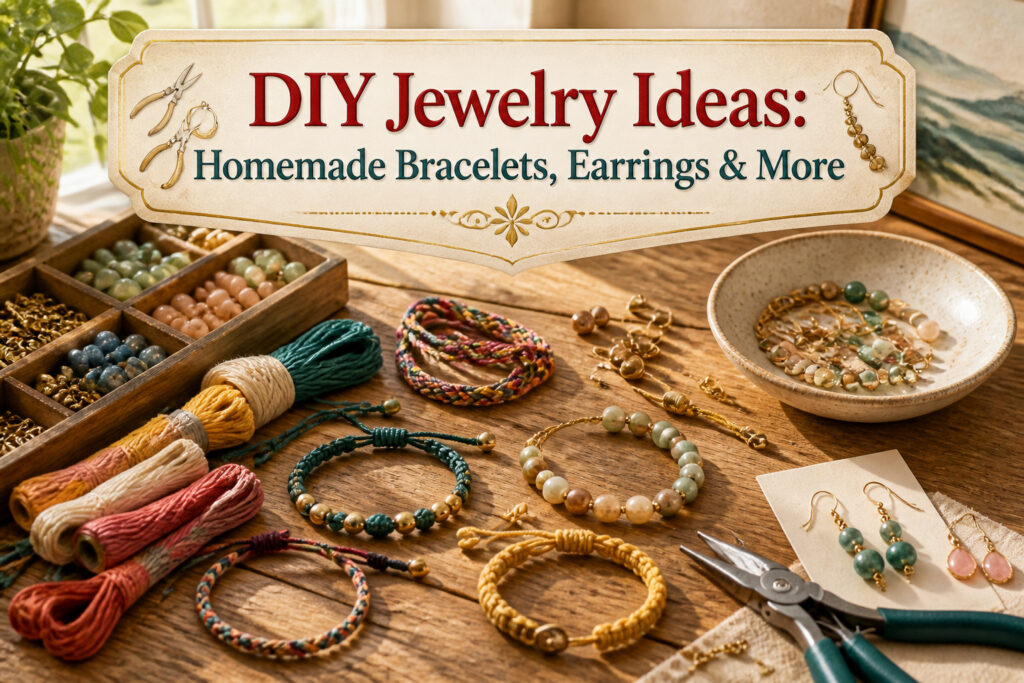
The best diy jewelry ideas homemade range from a $2.47 pack of embroidery floss to setups that need ventilation and cure timers, and the single thing that decides which project fits you is how much failure costs. A crooked knot in a friendship bracelet still leaves something wearable; a resin pour pulled eighteen hours early traps a bubble that ruins the piece. My first amethyst wire wrap scored the stone because I grabbed half-hard wire when dead-soft would have gripped, and that distinction between springy and pliable shapes every wire project in the sections below.
1. Friendship Bracelets

The first jewelry I ever made was a friendship bracelet at summer camp in 2004. Embroidery floss from the craft aisle at Walmart ran $2.47 for a pack of 36 colors, and that single purchase kept six of us busy for a week. The classic pattern starts with the forward knot: loop the left strand over the right, pass the tail through, and pull up toward the knot above it. Repeat once more on the same strand to finish the knot. Six strands gives you a bracelet roughly the width of a shoelace, thin enough to stack. Double to twelve strands and the band turns into something closer to a half-inch strip, more visible on a wrist but slower to work up. The same knot scales to either width, which is why camps still teach it two decades later.
2. Beaded Earrings

Wire and beads are all it takes to make beaded wire hoop earrings, and the technique is where you learn what silver wire actually feels like when you bend it into a round shape. The same wrapping method scales down neatly into beaded Creole earrings, which keep that curved silhouette but sit tighter to the lobe.
Headpins need a loop at the top to hang from the ear wire, and the tool choice matters more than beginners expect. Round nose pliers taper to a cone, so the loop size changes depending on where you grip the wire. Chain nose pliers are flat inside with a slight taper, built for gripping and bending at sharp angles, not for forming curves. The first pair of hoops I attempted had loops made with round nose pliers held at different spots, one loop wound up visibly larger, and the headpin dangled half an inch lower on one earring than the other. Tiger tail wire, crimp tubes, and basic findings like jump rings and clasps are the backbone for stringing projects, while 20 gauge wire works well if you decide to make your own jump rings or eye pins rather than buying them ready-made.
3. Leather Jewelry

Leather jewelry starts with the hide itself, and vegetable-tanned leather is the only kind worth the trouble for pieces you plan to wear against skin. I bought mine from Tandy Leather back in 2019 at $8.99 per square foot, and that particular batch darkened from a pale tan to a rich caramel after about six months of regular wear. The change is gradual, uneven at the edges where oils from your hands collect most, and that patina becomes the point.
For cuff bracelets, a leather punch matters more than pliers ever will. You need clean holes for snaps or lacing, and the rotary punch Tandy sells for around $30 still outlasted every cheap substitute I tried first. An edge beveler runs another $15 or so, and skipping it leaves your cuts looking like they came from scissors and a hurry. The beveler rounds those edges so the leather lies smooth against your wrist instead of catching on sleeve cuffs.
Leather cord necklaces need less tooling, just the punch for closure hardware and patience while the cord softens. Raw cord kinks and twists until you’ve worked it through your fingers a few dozen times. The same Tandy hide I used for cuffs also cut into 3 mm strips for lacing, though I should have bought a strap cutter sooner. Freehand strips with a straightedge and utility knife always ran slightly irregular, which shows once the piece is finished and hanging at your collarbone.
4. Wire-Wrapped Jewelry

Wire wrapping builds pendants and rings without solder or glue. The frame needs 20-gauge wire for structure, while 28-gauge wire wraps the binding turns that hold the stone.
My first wrapped stone was an amethyst cabochon. The frame looked secure until the final tuck, when the wire slipped and scored the surface. Dead-soft wire would have gripped better that day. It bends under finger pressure and work-hardens as you wrap, meaning fewer tool marks on softer stones. Half-hard wire arrives springy, holds its shape for geometric frames, and fights back if you try tight curves. I keep both on my bench now and reach for dead-soft whenever the stone sits proud of the setting.
Gauge choice shapes the whole piece. Thicker frame wire carries weight without bulk; thinner wrap wire disappears visually but needs more turns to lock. The sweet spot for most stones is three to five binding passes, spaced so the frame wire still reads as design, not scaffolding.
5. Resin Jewelry

Epoxy resin has become the go-to material for anyone who wants to freeze a moment in place. A petal from a wedding bouquet, beach sand, a flake of glitter, a tiny photograph: the resin cures around it like clear amber and turns the whole thing into something you can wear. Most beginner kits use a 1:1 ratio by volume, which sounds simple until you realize that eyeballing it in a plastic cup is how you get a bendy pendant that never fully hardens. I measure with marked mixing cups now, scrape the sides for a full two minutes, and still hold my breath.
The real test is patience. Full cure takes anywhere from 24 to 72 hours depending on the brand and how warm your workspace is, and the temptation to unmold early is constant. On my first try I pulled a flower pendant at hour eighteen because the surface looked set. It had a bubble trapped right against the petal, perfectly round, catching the light like a deliberate inclusion. I told myself it looked intentional, almost artistic, until I showed my sister and she asked why there was a marble floating in my hydrangea. Now I keep a toothpick handy and pass it through the resin slowly after pouring, and I check again at the ten-minute mark when bubbles like to rise and hide.
6. Upcycled Jewelry

Some of the best diy jewelry ideas homemade start with what you already have. Bottle caps flatten into quirky charms with a few taps from a rubber mallet, and leftover earring hooks from finished projects find new life in the next build. The cork earrings that keep getting compliments at markets come from slicing wine corks 1/4 inch thick, sealing the cut edges with clear acrylic so they do not crumble, and threading standard fishhook wires through a small eye pin anchored in the center. The first pair I tried without sealing the edges shed red dust for a week.
Old jewelry components work harder than new stock sometimes. A 1950s typewriter key, the kind with the glass center and raised metal rim, became a pendant last spring after I drilled a pilot hole and added a jump ring. It sold at a craft fair for $18, priced low because the hardware cost almost nothing and the key came from a $5 estate lot. The buyer liked that the letter Q meant something to her, a detail no factory pendant offers.
7. Macrame Jewelry

Macrame jewelry builds structure from cord alone, no metal required. Square knots form the backbone of most pieces: two half-knots mirror each other to create that flat, ridged band. Lark’s head knots serve as the anchor, looping your working cord over a holding cord or ring to start the pattern.
The material matters more than beginners expect. 0.5 mm Chinese knotting cord gives clean definition to small knots and holds its shape without bulk. Waxed linen looks similar off the spool but performs differently in practice; the wax coating keeps fibers from fraying when you pull a knot tight and back it out to fix a mistake. Unwaxed cotton cord frays almost immediately under that kind of handling.
Macrame bracelets and friendship bracelets part ways on structure. Friendship bracelets rely on forward knots and backward knots worked in repeating color rows, essentially weaving threads together. Macrame builds from the center outward using those square-knot clusters, with the holding cord running the full length while working cords tie around it. The result hangs differently on the wrist: macrame sits flatter and stiffer, friendship bracelets drape softer and stretch slightly with wear.
8. Stamped Jewelry

Metal stamping on blanks gives personalized pendants and tags a crisp, permanent look that Sharpie markers never quite match. The hammer weight matters more than most beginners expect. A three-pound hammer delivers the strike in one blow, but the one-pound version wins for control, especially when you are learning to line up letters without drifting.
Alignment jigs help, though plenty of people skip them and pay for it in crooked names. The stamp sits in a channel or against a fence while the blank stays put, which removes the guesswork of freehand spacing.
My first attempt taught me the difference between rotating the stamp and rotating the blank. I set the letter A upside down because I spun the metal instead of the tool, and the stamp orientation stays fixed to the bench while the blank moves beneath it. That pendant went in the scrap pile. Brass blanks run cheap enough that the mistake costs under a dollar, but the hour of filing and repolishing to save it would have cost more.
9. Polymer Clay Jewelry

Oven-bake polymer clay turns into surprisingly durable beads and pendants with nothing fancier than a home oven. Conditioning the clay matters more than the brand you pick. I run mine through a dedicated pasta machine at least fifty times before shaping; the clay goes from crumbly to silky, and anything less leaves stress cracks after baking.
Sculpey Premo sets hard at 275°F, timed by thickness. The packaging gives quarter-inch increments, and I set a phone timer because the clay darkens fast once it passes done. Early on I misread my oven dial and ran a batch of earrings at 375°F. They came out the color of burnt toast, edges curled and unusable. The thermometer I bought after that cost under ten dollars and has outlasted three clay brands.
A smooth ceramic tile makes the best baking surface; it heats evenly and leaves one side glassy without sanding. For earrings, I bake components flat, then drill holes after cooling. The clay is soft enough to shape with kitchen tools but hard enough afterward that I do not worry about pendants chipping against keys in a pocket.
10. Tassel Jewelry

Tassel jewelry builds from a simple form: a chipboard rectangle about two inches wide, wrapped twenty times with embroidery floss or cotton thread. That count matters. Twenty wraps around a two-inch card gives you a finished tassel roughly one inch long once the bottom edge is cut and the top is bound. I learned the neck binding the hard way. If you tie off too loosely or miss a second pass around the gathered threads, the whole thing frays and shortens unevenly within a day of wear. A tight figure-eight wrap with the same thread, then a dab of fabric glue, keeps the profile clean.
The ombre glitter pendant necklace uses the same core technique, just with color shifts. You wrap in sections, changing floss color every five passes, then brush the cut ends with adhesive and fine glitter before the binding goes on. The binding has to sit exactly at the fold point, not a quarter inch above or below, or the tassel hangs crooked on its chain. Thread weight changes the math. Standard embroidery floss gives a full, soft drape; mercerized cotton holds sharper edges but needs two extra wraps for equivalent bulk.
Basic Tools and Supplies

The first pliers I owned came in a $19.99 three-tool set from Michael’s: round nose, chain nose, and wire cutters. The round nose pliers still work fine for loops and bends. The chain nose spring gave out in month four, which taught me that flush cutters matter more than standard cutters if you want a clean wire end that won’t scratch skin.
Here is what actually belongs in a starter kit:
- Round nose pliers for forming loops and curved bends; the jaws taper smoothly with no serrated teeth
- Chain nose pliers for gripping and straightening wire; look for a real spring hinge, not a cheap coil
- Flush cutters versus standard cutters: standard cutters leave a blunt stub, flush cutters shear flat against the work
- Crimping pliers if you plan to use crimp beads or tubes; the two-step jaw folds then compresses the metal
- Wire cutters for rough cuts on base metal or memory wire, which will nick flush jaws
- Bead mat in velvet or foam; beads roll to a stop instead of vanishing under the couch
I skipped the bead mat at first and spent twenty minutes on hands and knees after a spilled strand of 4 mm bicones. The mat costs less than the beads it saves.
Techniques for Beginners

Crimping is where I send anyone starting out, and not because it is glamorous. A crimp bead squeezed onto beading wire with chain nose pliers, folded in half so each wire tail sits in its own half, is the least dramatic skill and therefore the hardest to ruin while you are still shaky. I skipped it for my first six projects and sixty percent of my early failures trace straight back to that skip: clasps sliding off, strands pulling apart, the whole bracelet unraveling because I had not learned to test the crimp for strength and trim the tail clean.
Once the crimp feels secure, simple loops come next. A headpin threaded through a bead, bent at a right angle, clipped to length, and rolled into a closed circle with round nose pliers gives you a clean connection that hangs straight.
Wrapped loops are the step up. Instead of closing the circle, you keep the pliers in place and wind the tail around the neck of the wire two or three times before trimming. The wrap takes longer but holds through tugging and daily wear, which is why I teach it third: by then your hands know the motion of the simple loop, and the extra step feels like precision rather than frustration.
What to Make by Skill Level

Projects sort into tiers by how forgiving the material is and how much setup they demand. Friendship bracelets and upcycled cork earrings stay beginner-friendly because a crooked knot or uneven slice still leaves something wearable. Wire-wrapped rings sit in the middle: the mandrel sizing and tension control took me about five to ten rings before my wraps stopped slipping or scoring the band. Resin and soldering belong at the advanced end; both need ventilation, cure or heat timing, and mistakes mean starting over rather than adjusting.
| Project | Tier | What Slows You Down | Typical First-Attempt Result |
|---|---|---|---|
| Friendship bracelets | Beginner | Keeping tension even | Wearable, slightly wobbly edges |
| Cork earrings | Beginner | Cutting clean, finding hooks | Good shape, finish improves with practice |
| Wire-wrapped rings | Intermediate | Mandrel sizing, tension | Slipped wraps or oval cross-section |
| Resin pendants | Advanced | Bubble removal, cure time | Cloudy or bubbled surface |
| Soldered chains | Advanced | Heat control, joint cleanup | Cold joints or scorched metal |
Mixed Media and Less Common Materials

Vintage newspaper sealed under resin makes a pendant that feels like a secret. The paper has to lie perfectly flat; any crease traps air and the whole piece clouds. I learned that after three tries with a 1940s theater stub, each bubble a small disaster.
Pressed flowers in polymer clay look delicate but the clay squeezes the color out fast. Work cold, bake low, and seal the flower first with matte medium or you end up with brown silhouettes instead of petals.
Laser-cut wood with beaded wire was the one that hooked me. At a maker space in Portland, I tried a birch plywood earring design. The laser charred the edges dark and the pieces smelled like a campfire for days after, even sealed. The smell fades, but the burnt line actually frames the grain. Pair that with simple wire loops and seed beads, and the contrast between machined precision and hand-threaded color is the whole point.
These combinations fail more often than bead-and-chain basics. The resin yellows, the clay cracks, the wood warps in humidity. That failure rate is exactly why they work when they finally do.
Frequently Asked Questions
What are some easy DIY jewelry projects?
Friendship bracelets and upcycled cork earrings are the most forgiving for beginners; a slightly uneven knot or slice still leaves something wearable. Wire-wrapped rings sit in the middle tier, needing about five to ten attempts before wraps stop slipping. Resin pendants and soldered chains belong at the advanced end, where mistakes mean starting over rather than adjusting.
What materials do I need to start making jewelry?
A $19.99 three-tool set of round nose pliers, chain nose pliers, and wire cutters will handle most beginner projects. Add flush cutters for clean wire ends that will not scratch skin, a bead mat to stop rolls from vanishing under furniture, and a crimping pliers if you plan to use crimp beads or tubes. The article also recommends keeping 20 gauge wire on hand for homemade jump rings or eye pins.
How can I upcycle materials for jewelry making?
Bottle caps flatten into charms with a rubber mallet, and wine corks sliced 1/4 inch thick become earrings once you seal the cut edges with clear acrylic so they do not crumble. Old jewelry components work harder than new stock sometimes; a 1950s typewriter key drilled with a pilot hole and fitted with a jump ring sold at craft fair for $18.