A DIY dart board backboard can run from a single sheet of plywood thrown up this evening to a backlit hardwood cabinet that anchors the whole game room, and the ideas below cover that full range.
The deciding factor is not skill or budget alone; it is whether you need the wall to disappear when the darts go away, which shapes whether you choose a simple plywood sheet, a framed surround, or a cabinet-style build.
For anyone in that second camp, the picture frame surround with hinged doors that fold back during play and close over the board afterward is the build that solves 2 problems at once.
1. Pallet Wood Dart Board Backboard
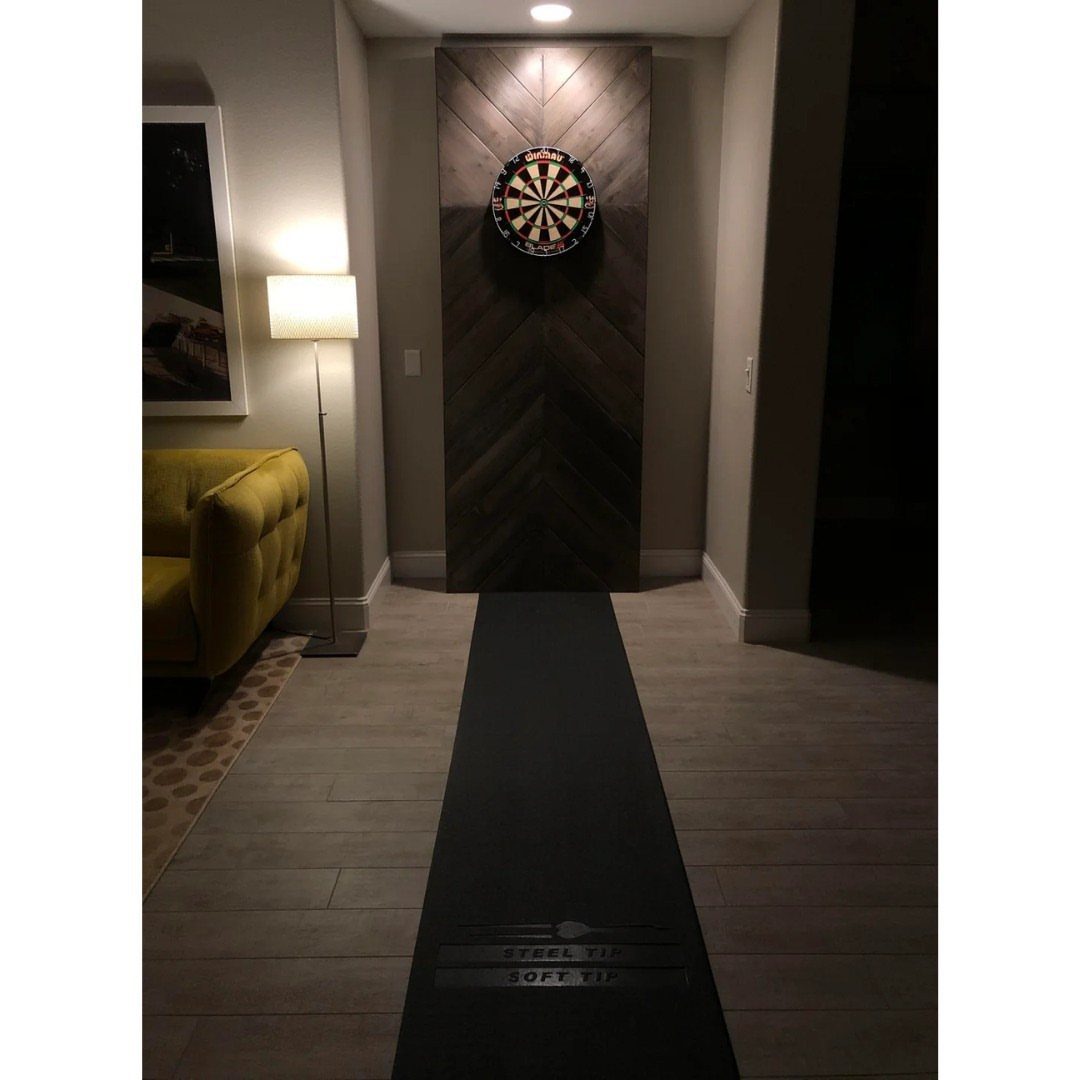
Chevron-cut pallet boards give stray darts something to bite into besides drywall. A dark stain hides scuffs that lighter woods show within a month of regular play.
I like this approach for anyone who already has a pallet source, a circular saw, and an afternoon.
The angles look harder than they are: rip boards to equal widths, cut mitered ends, and face-nail in rows. No frame needed if you trim the perimeter clean.
Budget runs low if the wood is free, though plan on buying sandpaper, stain, and a box of brad nails.
2. Picture Frame Dartboard Surround
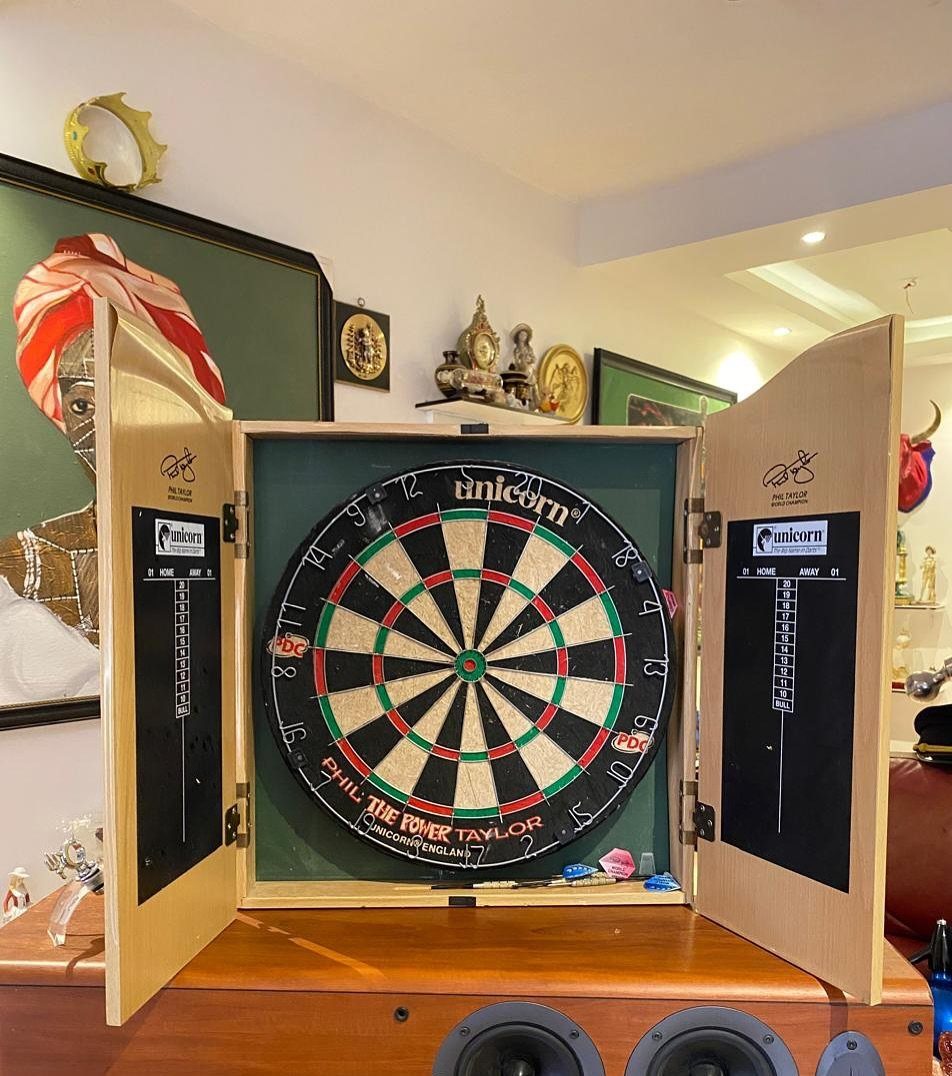
A cabinet frame turns the dartboard into something you can close away. A branded surround with doors folds back while you play, then covers the board when guests who do not throw darts come through.
This suits renters or anyone who wants the game room to read as something else on off nights.
Building it means sizing the interior depth to your board plus 1 inch of clearance all around, then hinging doors that clear the outer ring when they swing.
I would add magnetic catches so the doors stay put in a draft. Cost scales fast with hardwood and hardware; a softwood build with basic butt hinges stays cheaper if you already own a router for the door panels.
3. Wine Cork Dartboard Backboard
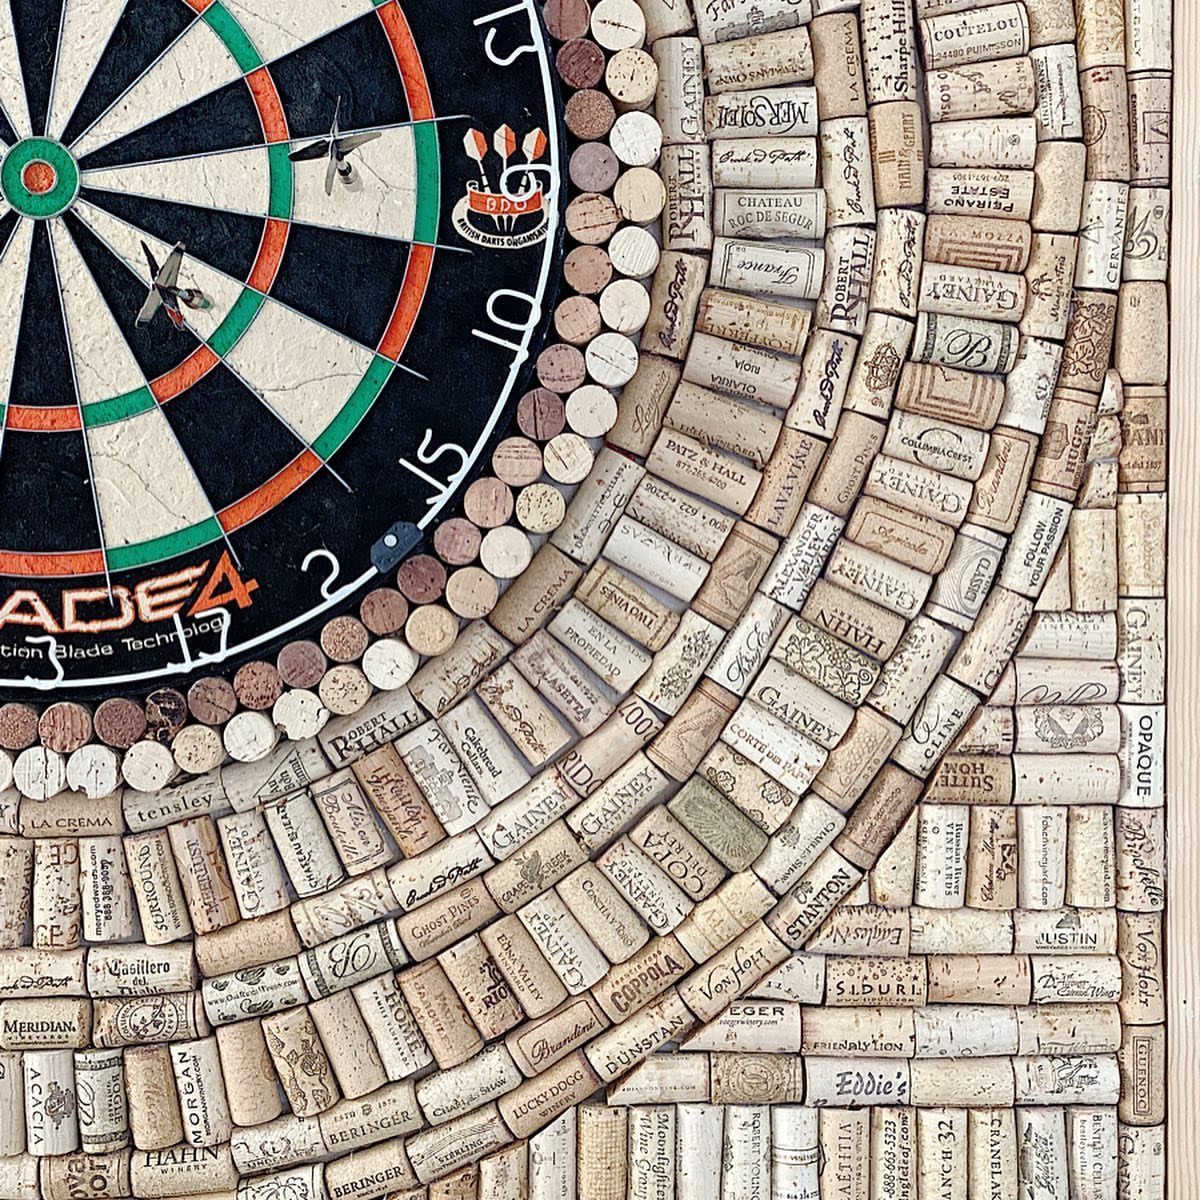
Wine corks arranged tight make a backboard that absorbs steel tips without complaint. Corks still carrying their brand stamps read as either charming or cluttered depending on the room.
Collecting enough takes time unless you know a restaurant or two.
For a square backboard, figure a lot of corks standing on end, glued to plywood in rows. A mitered frame holds them in and cleans the edge.
Depth is the real issue: corks stand proud of the wall once glued in place.
I would not hang this where people brush past. On the plus hand, a cork that splits pulls out and swaps fast.
4. Fabric Covered Dartboard Backboard
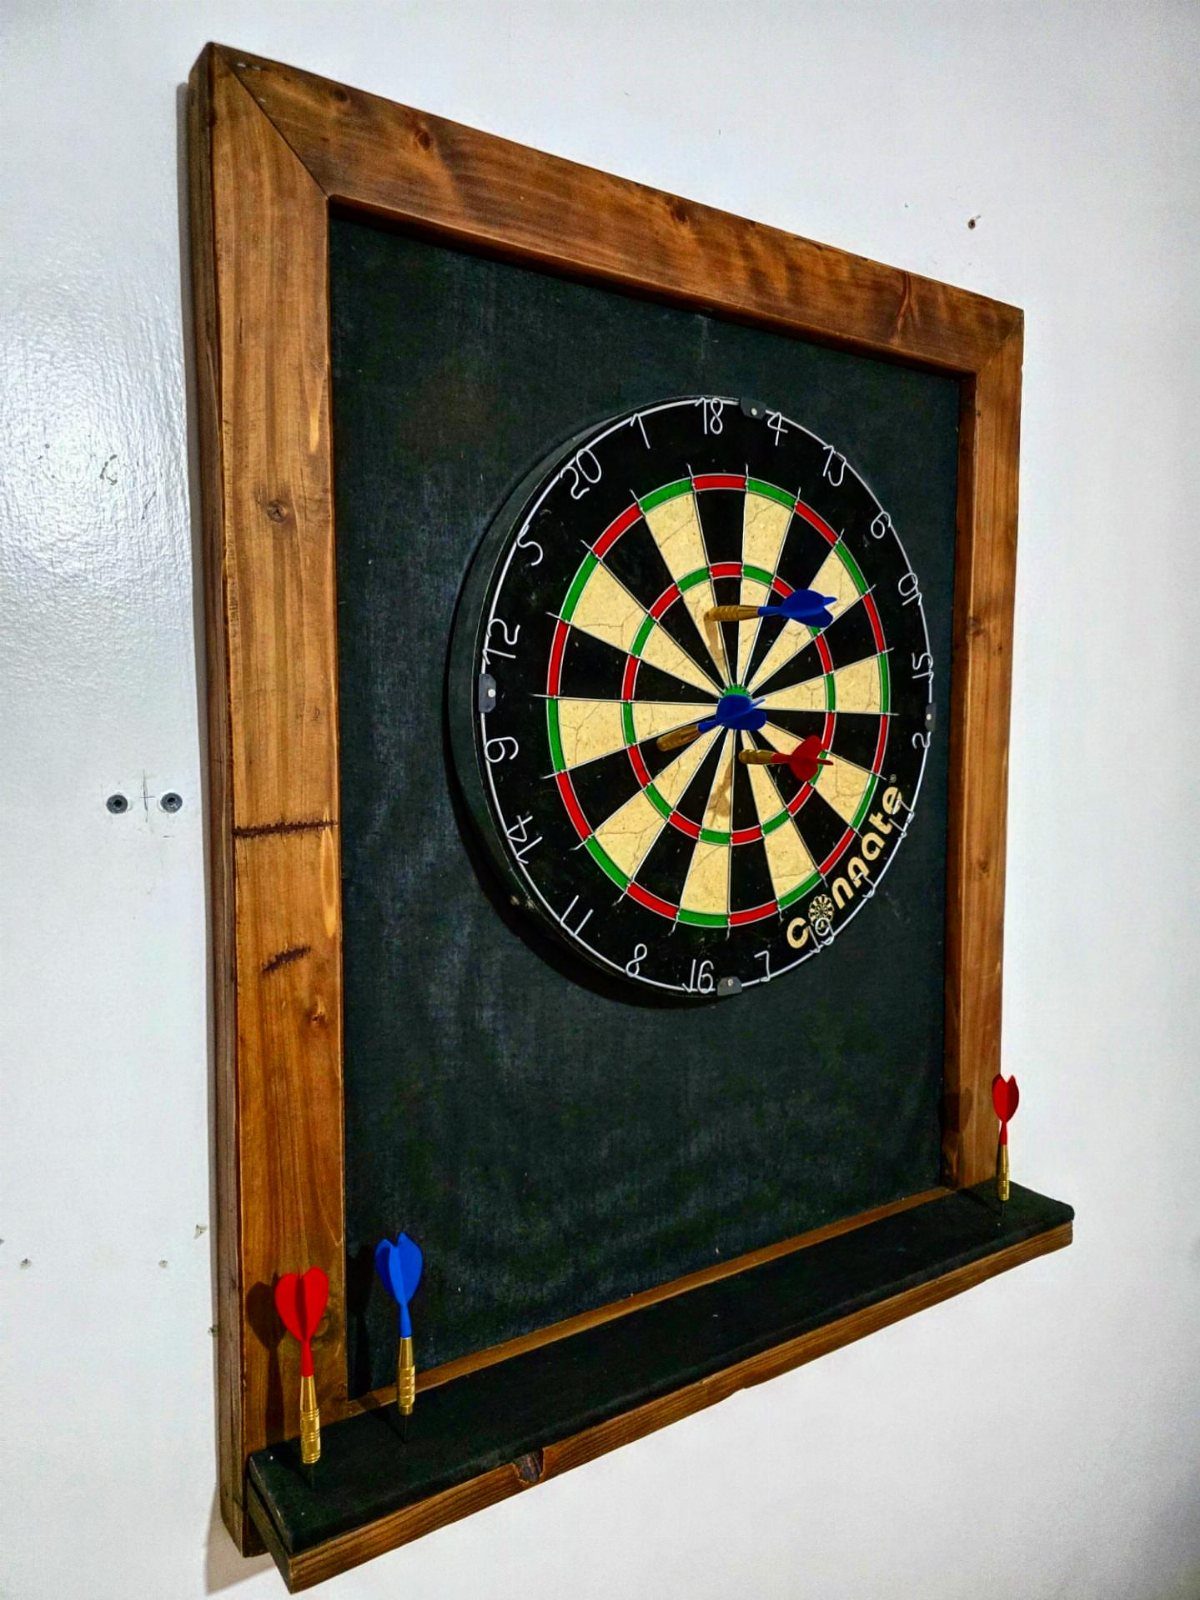
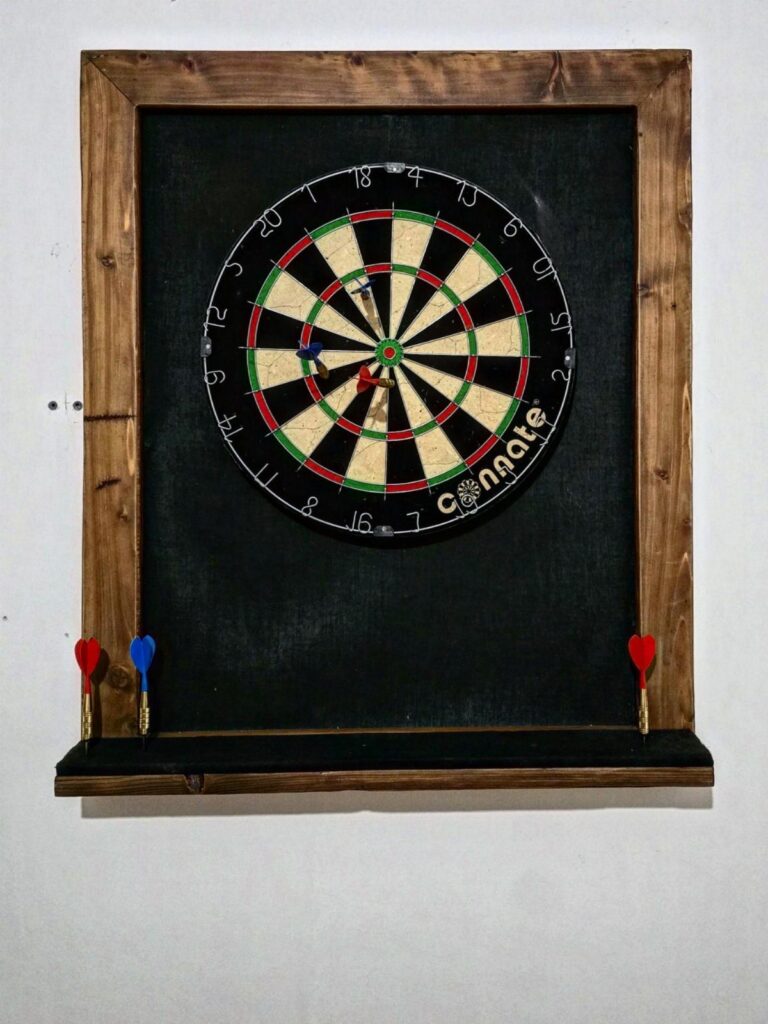
Dark felt over a framed backboard kills bounce-outs and keeps the wall behind it anonymous. A simple wood frame with a lower shelf for spare flights is worth copying exactly.
Thin upholstery felt works; thicker craft felt pills under repeated hits.
Stretch it tight over 1/2-inch plywood, staple from the back, then drop that panel into a frame made from 1x3s. The shelf is just a wider bottom rail with a lip screwed underneath.
Black shows chalk dust and lint, so I lean toward charcoal or navy in practice. Total cost stays modest if you buy the frame stock new, less with scrap.
5. Modern Wood Slat Backboard
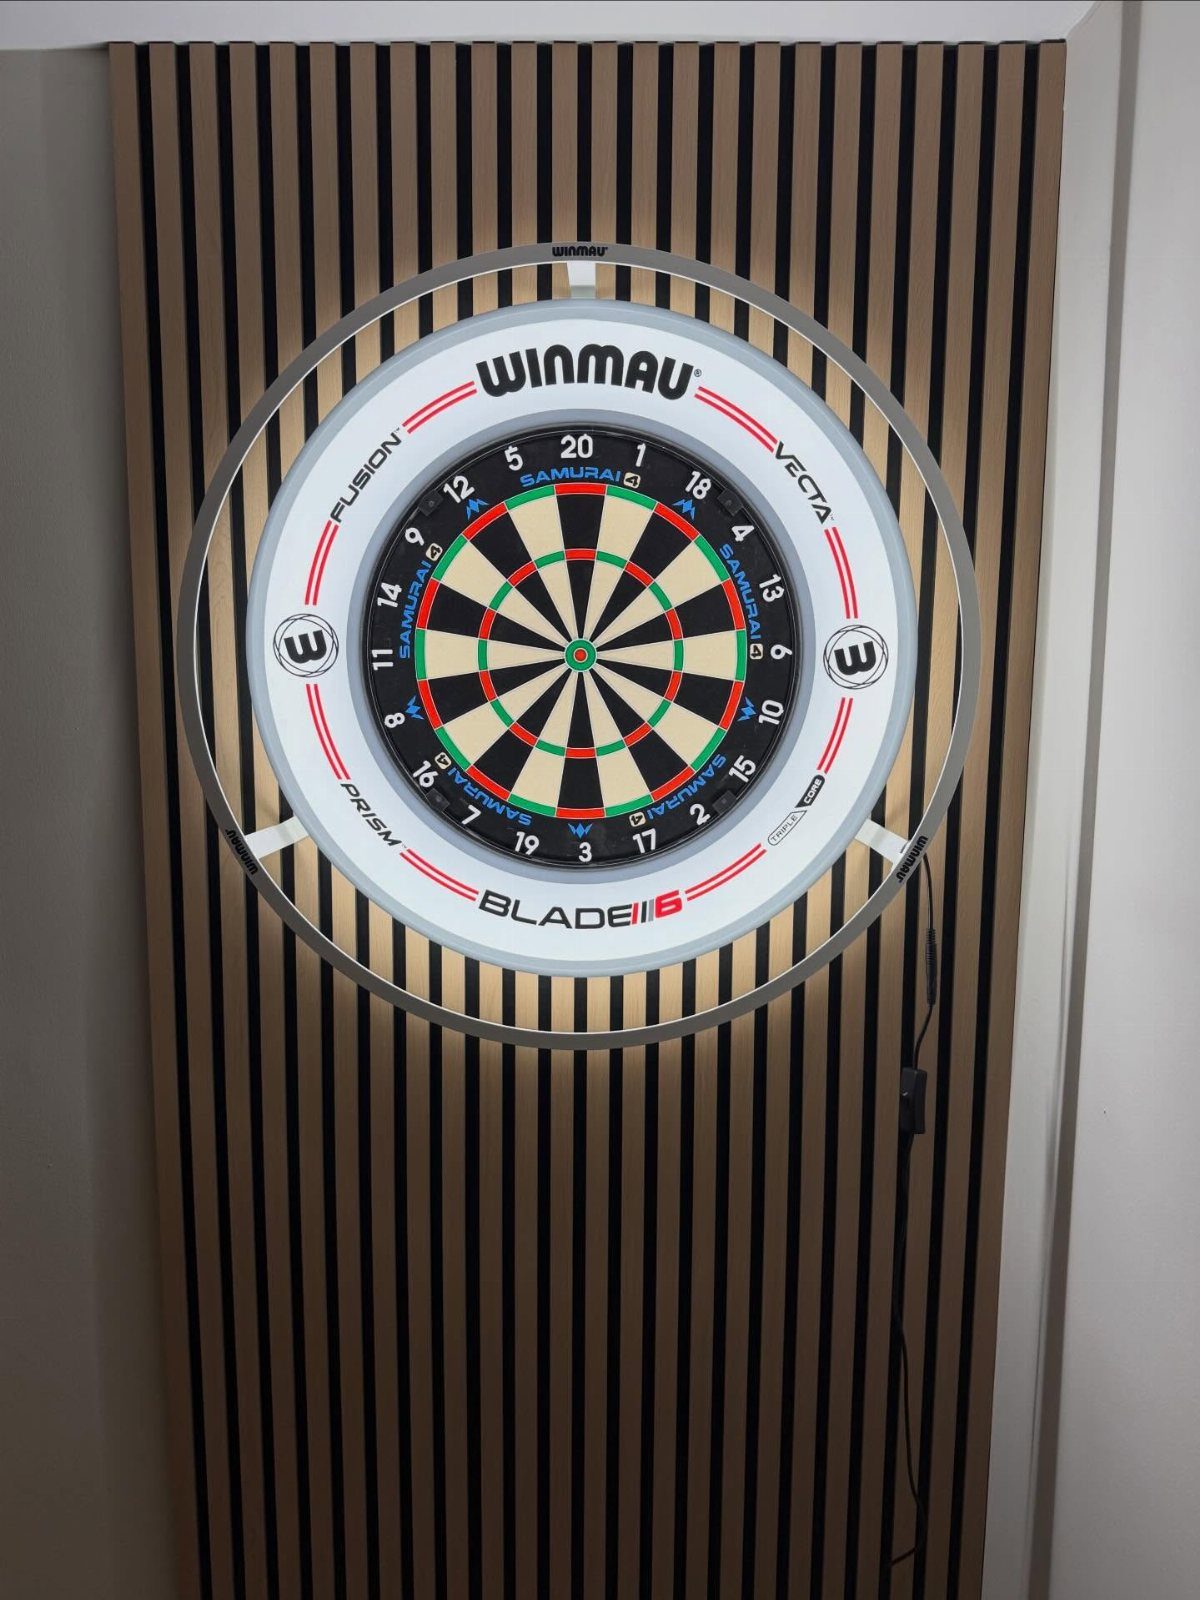
Vertical slats over a dark backing give the board a gallery-wall feel. Light wood spaced to let the black behind it read as shadow lines gives the modern slat look its punch.
This is the build for someone with a table saw and a desire to waste nothing.
Rip slats narrow, leave small gaps, and screw them to a painted plywood panel from behind so no fasteners show. The backing color matters more than the slat species; charcoal or soft black makes almost any wood look deliberate.
I would finish the slats with matte polyurethane so dart pricks do not raise grain. The whole thing hangs French-cleat style, which I prefer for anything this wide.
6. Backlit Wooden Backboard
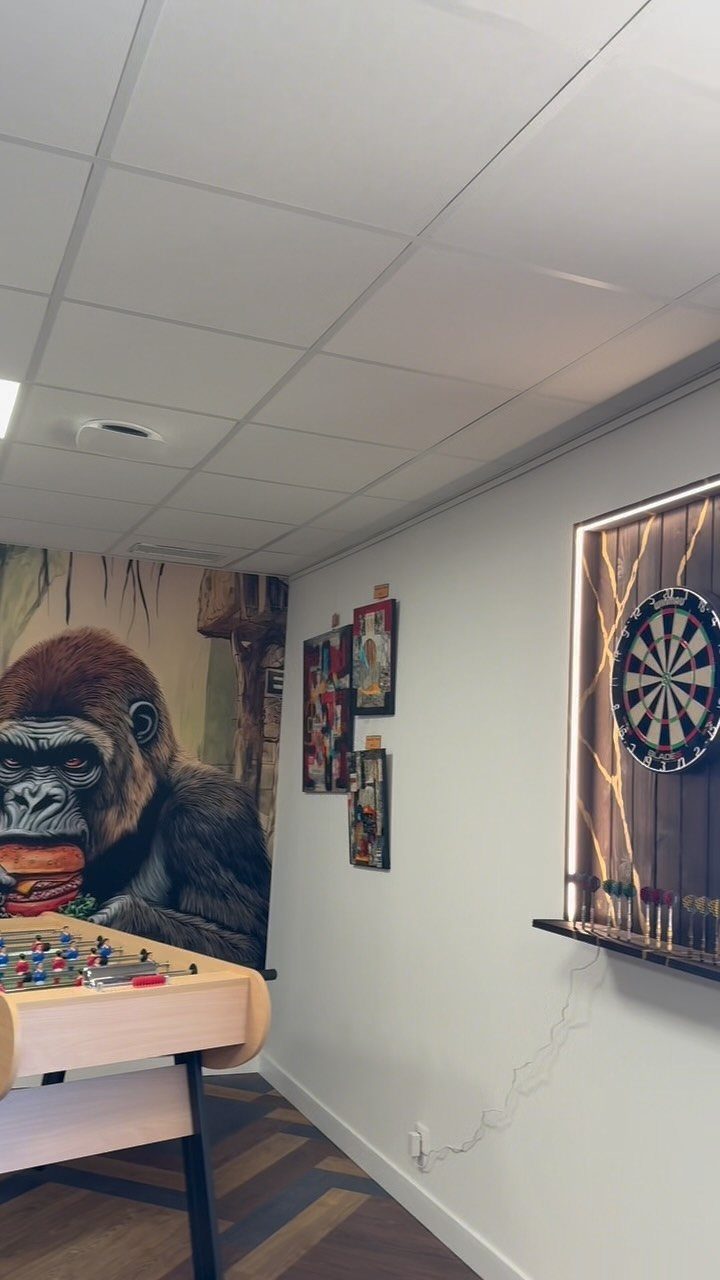
LED strips tucked behind the perimeter turn a plain backboard into the room’s focal point after dark. The glow catching the gorilla mural nearby tells me the light is warm white, not the blue that cheap strips default to.
Wiring this means a recessed channel around the back edge, deep enough that the strip sits below the face so darts never nick it.
A power supply with a remote dimmer is easy to find; I would add a switched outlet so the whole thing turns off with the room lights.
Stained softwood takes the glow evenly without the blotching you get from dense hardwoods. Build the box from standard plywood, miter the corners, and sand the inside face where light catches it, or the strip will show every ripple.
7. Simple Plywood Dart Backboard
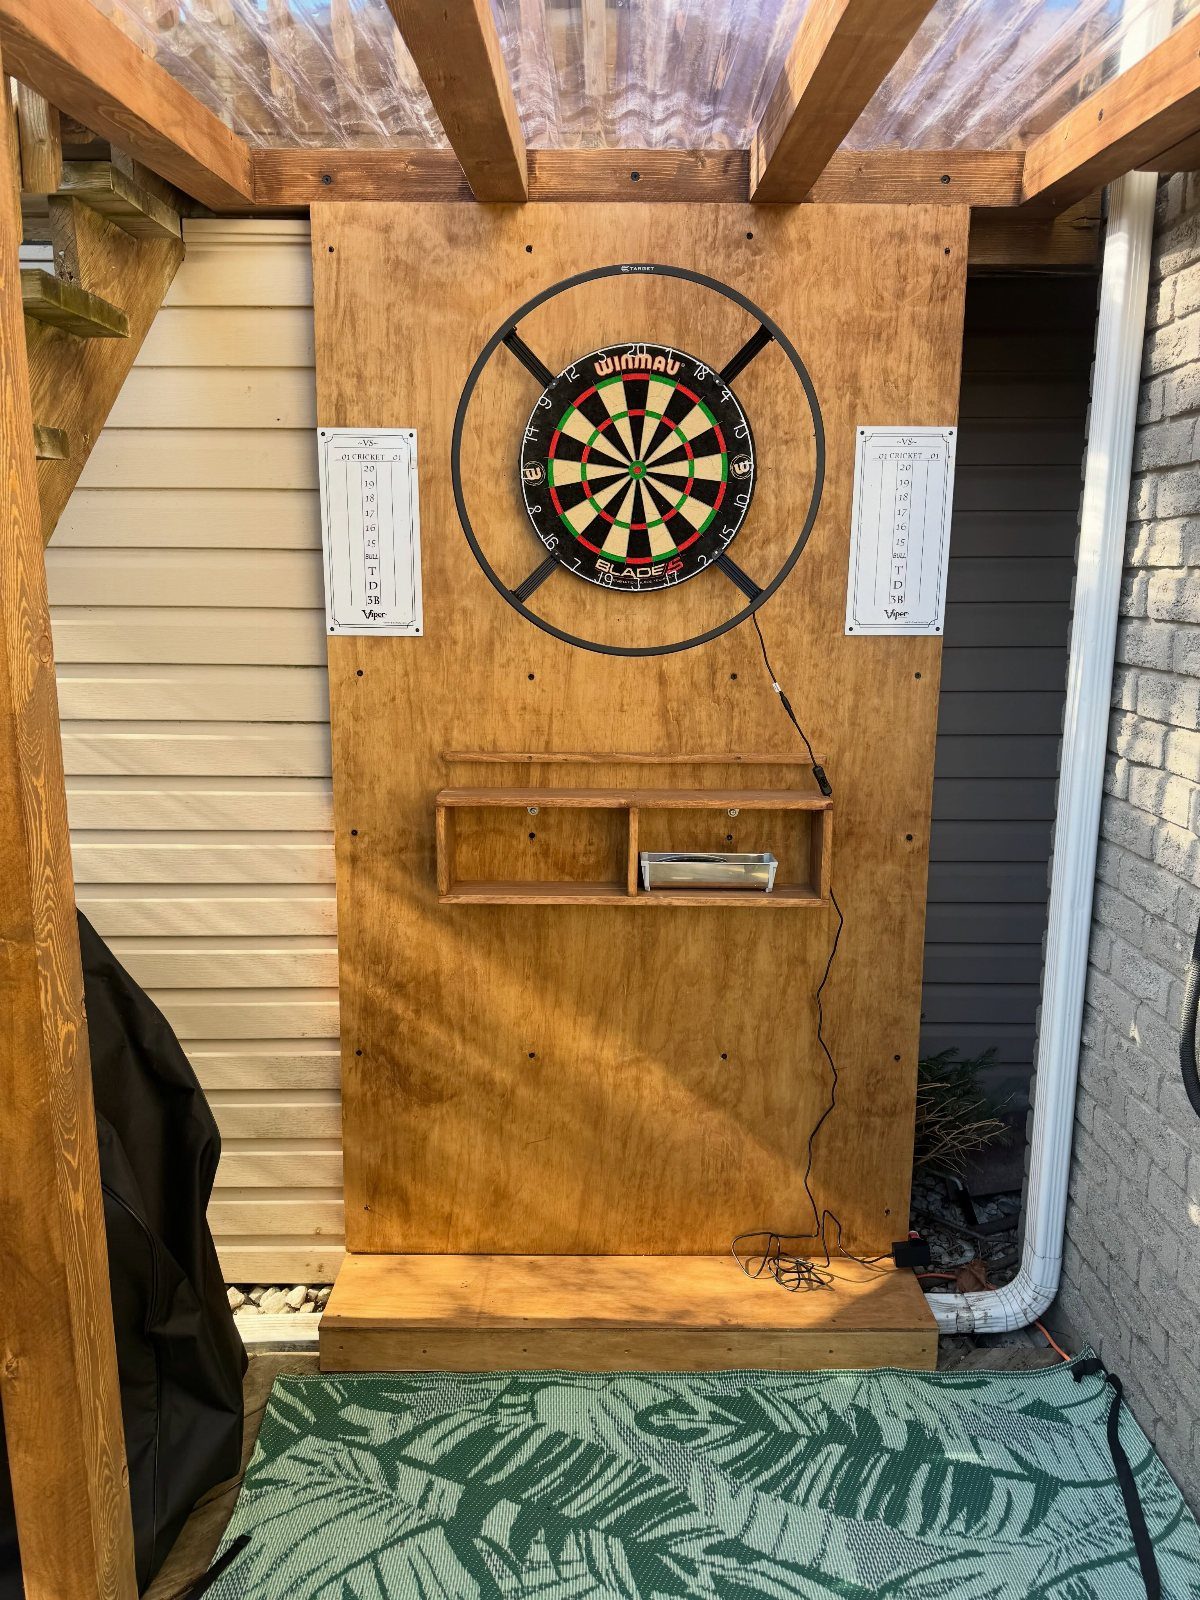
A single sheet of plywood does the job without ceremony.
Exterior-grade ply with a coat of deck paint survives seasons that interior ply warps through, so the finish matters more than the species if your setup sits under a clear roof outside.
I would add the side panels for score sheets, since they cost nothing extra in labor and keep paper off the ground. The shelf below catches stray darts and holds a chalk line for throwing.
This is the build for someone who wants to throw tonight, not next weekend.
A 4×4-foot sheet covers most misses, and 2 screws through the center into a stud carry the weight. Sand the face smooth or splinters grab your flights.
Cost stays lowest here, and speed wins over style.
Materials for Dartboard Backing
High-density rubber, thick cork, or plywood layered with rubber each absorb darts well and keep the wall behind from taking damage.
I would layer plywood with rubber for anyone playing daily; cork works for lighter use but compresses over time and needs patching.
Rubber mat backing from horse-stall or gym stock absorbs impacts better than paint alone, though the weight means stud mounting is non-negotiable.
Removable solutions sacrifice some protection for portability, which I accept as the trade-off.
Installation Tips
Measure twice before cutting anything; a backboard too small teaches this lesson once. Mount to wall studs whenever the build carries weight, especially rubber-backed plywood or any boxed frame with doors.
Keep touch-up paint and spare cork near the board.
Darts miss, corks split, and scuffs accumulate faster than most people expect. A repair kit within arm’s reach means fixing now instead of meaning to later.
Cost Considerations
Basic cork or softboard runs $20–$60. That covers peel-and-stick sheets, enough wine corks if you know a restaurant, or a simple fabric wrap over plywood.
Rubber mats plus plywood backing land at $80–$200. Horse-stall or gym rubber is the durable choice here, and the resilience pays off for frequent play despite the weight.
Custom builds start at $150 and climb with hardwood, hardware, lighting, or cabinetry. I would softwood-frame a picture surround and spend the savings on a decent router bit for clean door panels.





