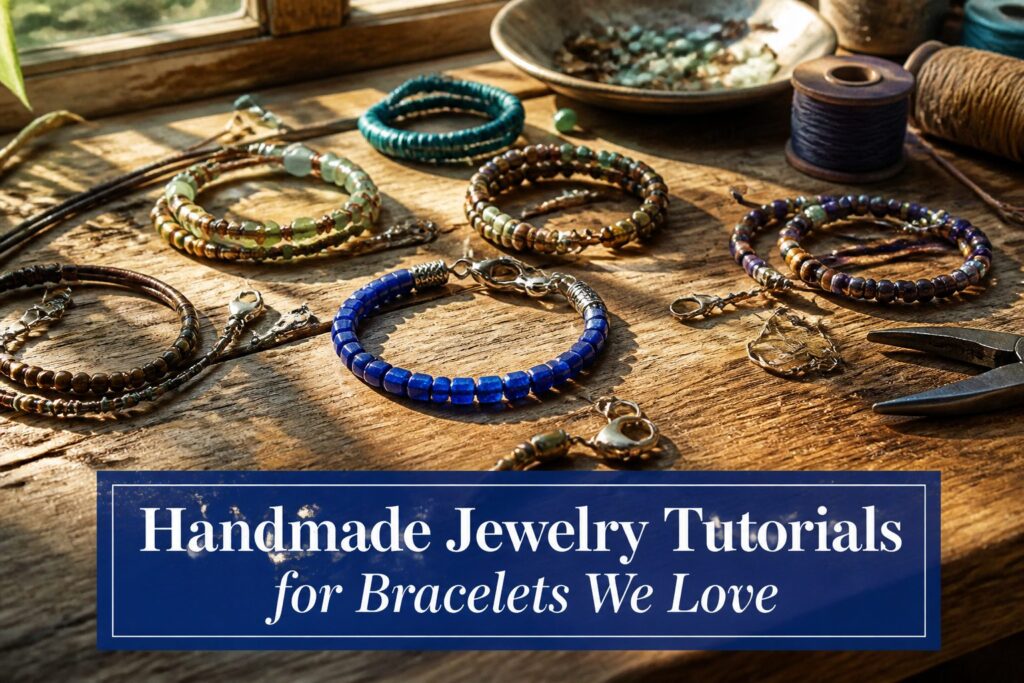
These tutorials span from a single strand of nylon cord to multi-layer gemstone builds, and the one you start with should match the tension control you already have. Seed-bead peyote will punish loose hands; clustered cord work forgives them.
The difference between a bracelet that sits in a drawer and one in regular rotation is usually the clasp choice, not the beads: lobster claws hold smooth cord where ties slip, and multi-strand box clasps keep layered stones from twisting into knots you fight all day.
1. Blush & Bubbles Bracelet
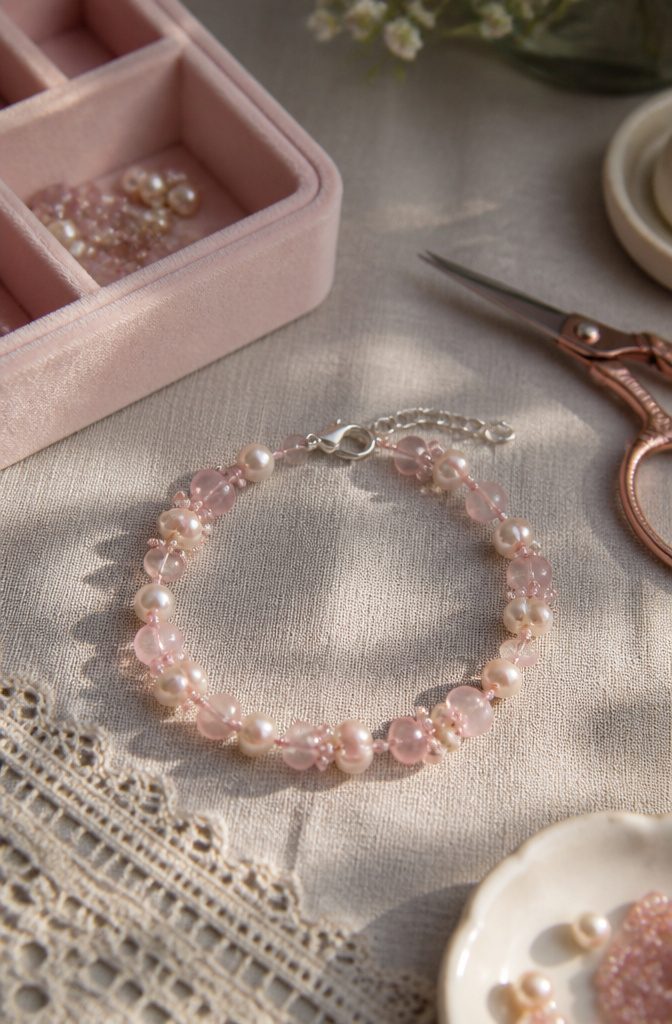
Soft pink seed beads and 4 mm round glass beads give this bracelet its color story, with a few 6 mm pearls tucked in for the opaque, bubble-like lift that makes the clusters read as dimensional.
I like working on .5 mm nylon cord rather than elastic; the knotting stays cleaner, and the drape lands somewhere between a bangle and a loose chain.
Work in 5-bead clusters, doubled back through the first so each sits like a tiny flower on the cord. Alternate sizes within the cluster, two rounds and one pearl, or mirror the pattern every third cluster for rhythm.
Leave 8–10 mm between groupings so the cord shows and the piece breathes. The cord itself becomes part of the design, not just infrastructure.
This is one of the tutorials that looks fragile until you handle it.
The nylon knotting holds tension well, and the clustered structure keeps the beads from sliding into a lump. Start with a lobster clasp rather than a tie, which slips against the smooth cord.
2. Lavender Fields Bracelet
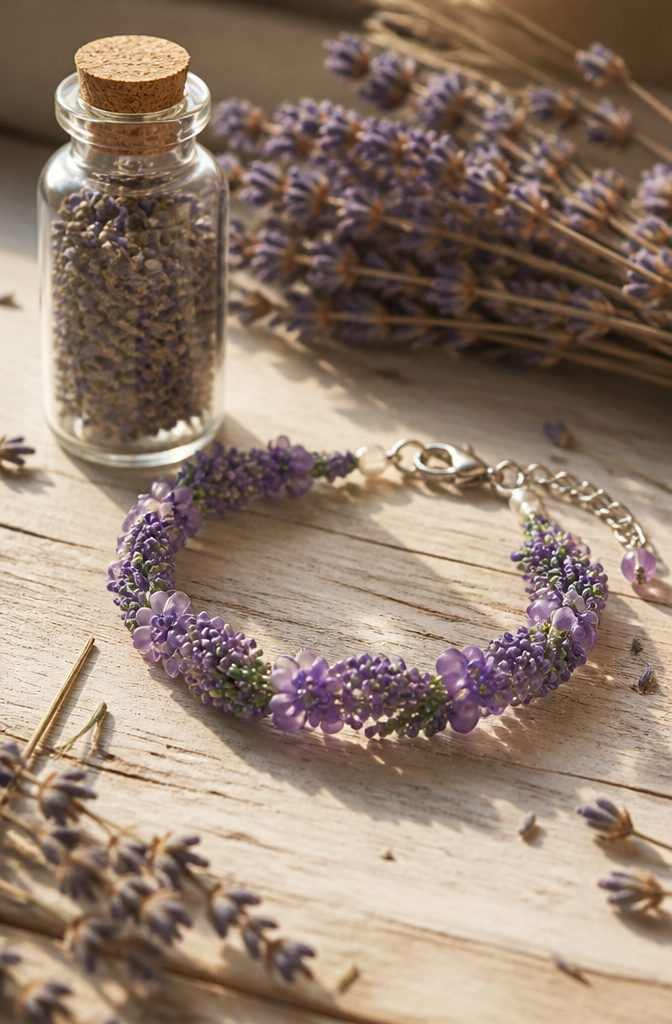
Purple seed beads in size 11/0 and 8/0 build the rows that read as lavender stems from a distance.
I run the smaller beads along the outer edges and drop the 8/0s at regular intervals to form the thicker flower heads; spacing those larger beads every five to seven seed beads keeps the field from looking polka-dotted instead of organic.
Matte finishes work better than glossy here, since real lavender reads as soft color rather than shine.
The texture comes from a simple two-drop peyote or ladder stitch, nothing that requires a specialty needle.
I leave the thread slightly visible between rows on purpose, that pale gray or ivory acting like the haze of dust and sky between true lavender plantings.
Pull too tight and the bracelet turns stiff as a ruler; keep the tension loose enough that the strip curves slightly when you lift it, and it will settle against a wrist the way an actual field settles into a valley.
For closure, a copper toggle plays against the purple without competing. Silver reads cold against this palette, and gold feels like a different season entirely.
3. Desert Mosaic Bracelet
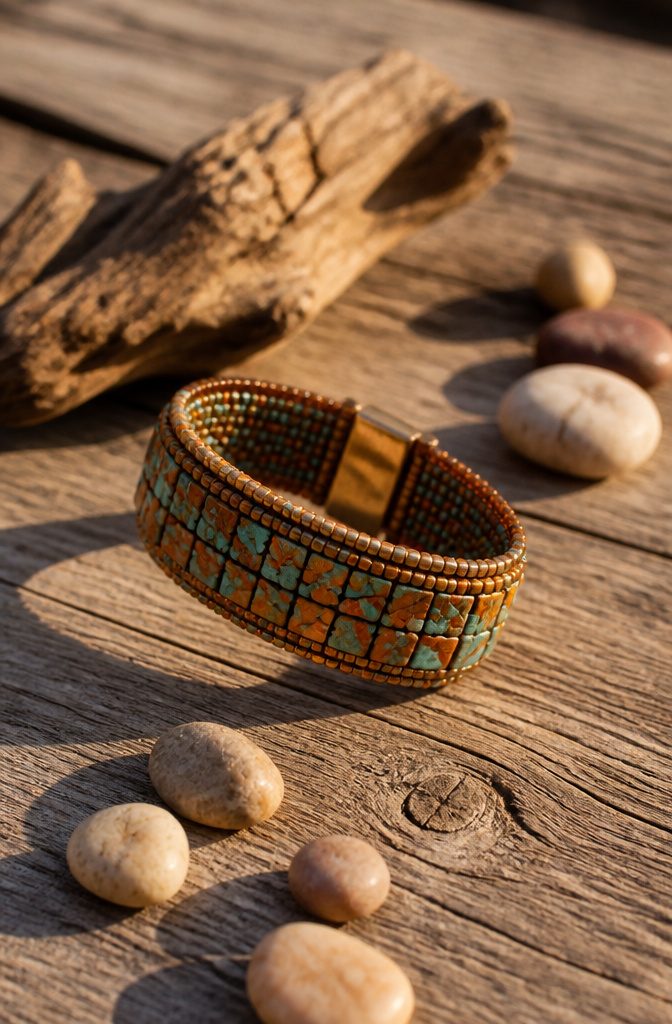
Flat tile beads, tiny cubes, and rounded drops sit at different heights to build the mosaic surface, and that variation does the visual work.
I would lay the tiles in a brick pattern rather than a strict grid; the slight offset reads more like cracked desert earth.
The palette stays narrow to keep it from looking busy: burnt sienna, sand, rust, and a single accent of dusty turquoise pulled from oxidized copper deposits.
Matte finishes on most beads let the turquoise catch light and recede exactly where you want the eye to land. Avoid glossy gold spacers here; they fight the weathered quality that makes the desert reference land.
Nylon thread with a thin needle handles the tight spacing between irregular shapes better than beading wire, which kinks when you double back through the same hole.
The finished bracelet reads as intricate up close but soft and unified from a few feet away, which is the balance that earns it a place in regular rotation rather than sitting in a drawer as a once-worn project.
4. Gemstone Layered Bracelet
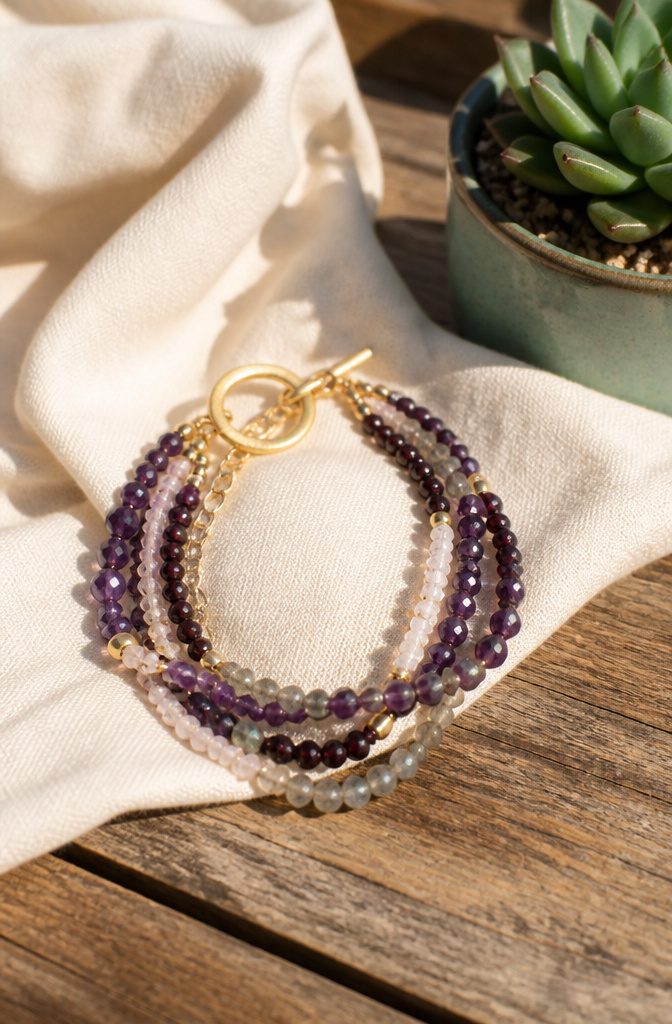
A gemstone layered bracelet builds depth by stringing several strands at staggered lengths rather than one uniform loop.
I like starting with a base strand that sits at the wrist bone, then adding two more that fall 0.5 to 0.75 inch below it.
Wider chain links at the clasp end keep the strands from stacking on top of each other and twisting into a knot you will fight all day.
The findings matter more than the stones here. Multi-strand clasps with three separate loops beat juggling three individual clasps, which always end up closed in the wrong order.
Magnetic slides work if you layer lightweight materials, but anything with heft needs a box clasp or lobster claw that locks.
Stone choice is where most layered bracelets fail.
Smooth rondelles tangle less than chunky freeform nuggets because they sit flush against each other. Mixing amethyst with labradorite or garnet with goldstone gives you contrast without fighting, since the surface finishes match.
Pairing raw-cut turquoise against polished onyx is asking for snags; the texture difference catches and pulls. Stick to one finish across all strands, vary the size instead of the texture, and the bracelet falls in clean lines.
5. Moroccan Dreams Bracelet
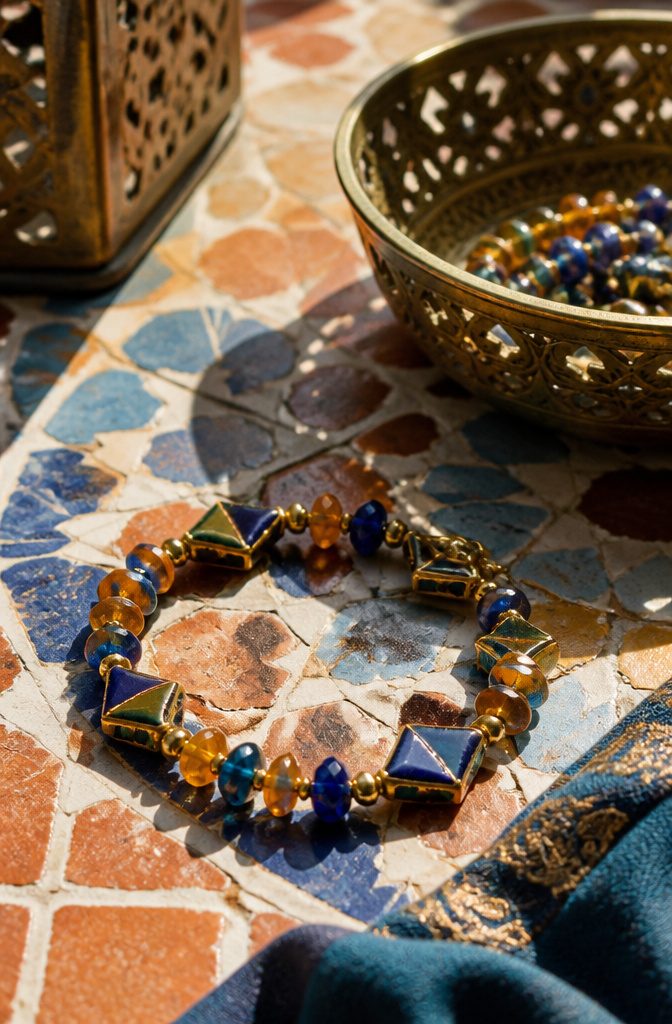
Geometric beadwork from North Africa relies on repetition to create its characteristic rhythm.
The khettara tile patterns translate cleanly into bracelet form using four-hole square beads or flat diamond-shaped tiles at center points, ringed by smaller round seed beads in two alternating colors.
Fire-polished rondelles catch light the way hammered Moroccan lanterns do, and their elongated shape bridges the gaps between geometric clusters better than plain rounds.
I arrange these in a simple four-count structure: one central diamond tile, two rondelles flanking it, a seed bead border that locks the unit square. Repeat that unit six to eight times around the wrist depending on your clasp choice.
The thread path matters more than the beads themselves here; skipping through the square bead’s second and fourth holes lets the motif sit flat rather than cupping, which is the usual mistake and the one that makes a geometric bracelet look handmade in the wrong way.
Color follows the same restraint.
Cream and indigo read Moroccan. Terracotta and turquoise do too, though louder.
I would pick one metallic accent, antique brass or copper, and let it appear only in the clasp or as a single accent bead every fourth unit. More metal than that competes with the tile geometry instead of framing it.
6. Autumn Wonder Bracelet
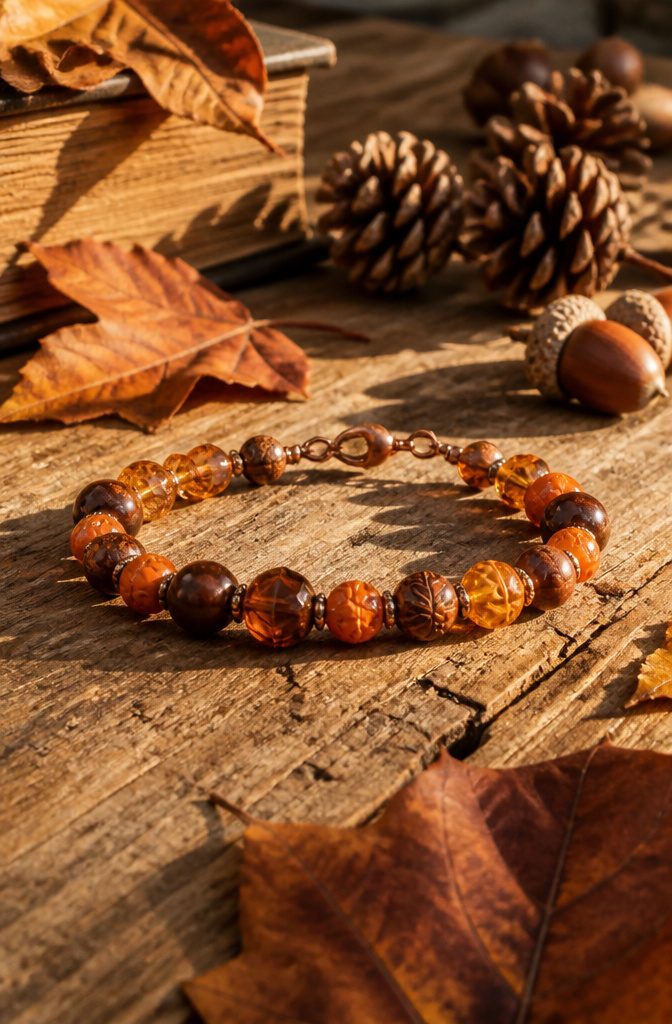
The Autumn Wonder Bracelet lives or dies by its palette, and the difference between autumn and generic warmth is narrower than most tutorials admit.
What reads as seasonal is a specific trio: burnt orange that leans toward rust rather than tangerine, amber with visible clouding or inclusions that catch light like late-afternoon sun through haze, and brown that sits at milk chocolate rather than espresso.
Together these three create the sense of leaves mid-turn, not a sunset or a harvest festival poster.
Stringing order matters more than pattern complexity here. I place amber at the center as the anchor tone, flanking it with burnt orange in gradually decreasing bead size toward the clasp, then intersperse the chocolate brown at irregular intervals.
Random spacing reads as natural; symmetrical alternation kills the seasonal effect and lands you back in craft-fair territory. The brown beads should never outnumber the orange, or the bracelet shifts from autumn woods to plain earth tones.
For material, faceted Czech glass in 6 mm and 4 mm sizes gives you that slightly uneven, caught-in-nature texture without requiring hand-forged metalwork. Fire-polished rounds catch light the way actual wet autumn leaves do.
Skip crystal, which throws too much rainbow and breaks the muted mood. Finish with antiqued brass findings rather than bright gold; the slight tarnish ties the browns together and keeps the whole piece from reading as costume jewelry.
7. Sunburst Bracelet
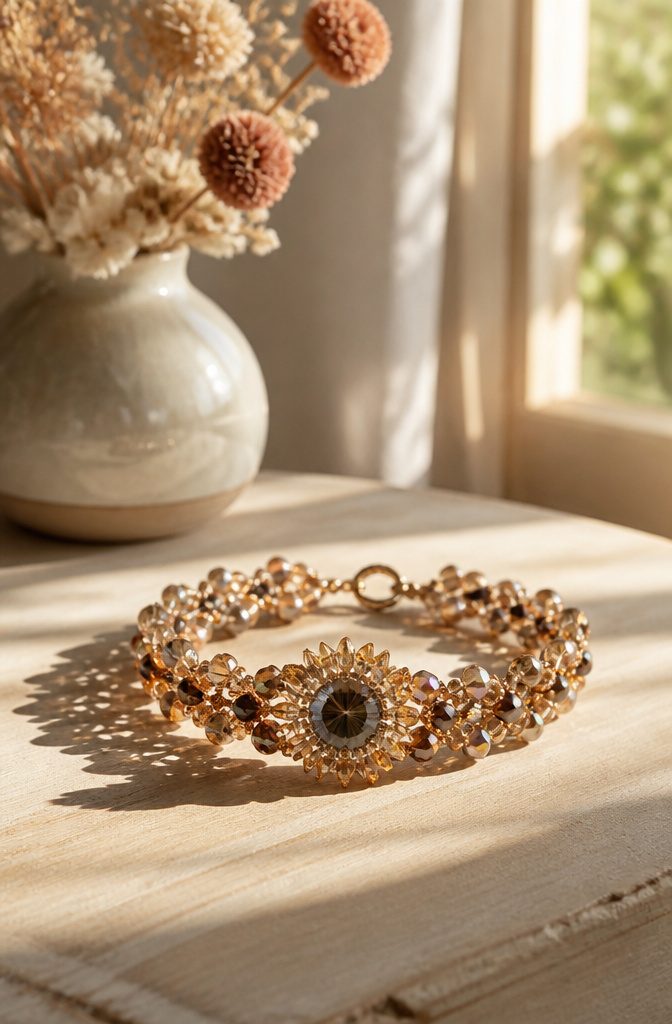
A sunburst bracelet builds outward from a single focal bead in a radial pattern that looks harder to balance than it actually is.
The center-finding technique starts with laying your focal bead on a flat surface and pressing a strip of beading wire through its drill hole so the ends split evenly, giving you two equal spokes to work from.
Anchor that first bead flat against the band with a surgeon’s knot, not a simple overhand, so it does not torque sideways and throw the whole design off center.
Symmetry comes from working in pairs. You add one small element to the left spoke, mirror it exactly on the right, then rotate the piece 180 degrees and repeat.
Fire-polished Czech beads or tiny metal spacers work best for the radiating arms because their consistent size lets you eyeball even spacing without measuring each gap.
Seed beads in a single matte color behind a shiny focal piece will read as texture, not clutter, keeping the starburst clean.
Where this design fails is in overloading the arms. Six radiating elements look intentional; ten look like a bead spilled and you glued around it.
8. Vintage Bronze Bracelet
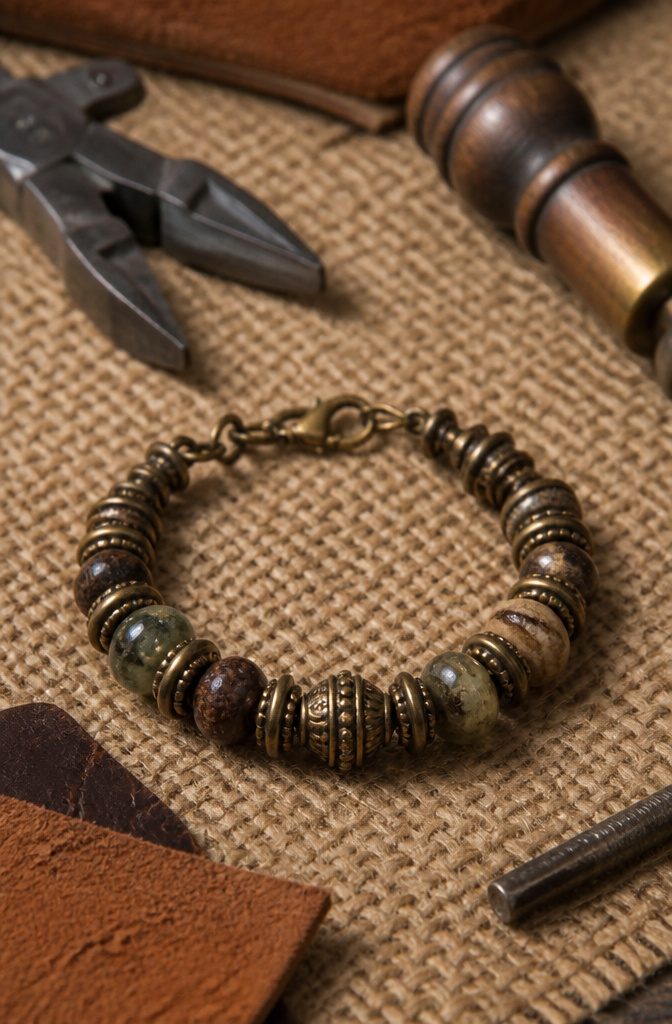
Bronze carries warmth that bright copper or cold steel cannot fake, but raw bronze from the craft store usually arrives too orange and too shiny to pass for something aged.
I start by sorting findings into two groups: pieces that already carry a factory patina, which I leave alone, and bright castings that need knocking back.
For those, a bath in liver of sulfur solution darkens the recesses in under two minutes; I pull the piece early, polish the high points with 0000 steel wool, and seal the result with clear microcrystalline wax.
The contrast between dark crevices and rubbed highlights reads as genuine wear rather than costume grime.
Skip the plastic-coated "antique bronze" beads whose color sits on the surface like nail polish. Solid brass or genuine bronze beads cost more per strand, but they take real patina and they do not chip at the drill holes.
When I string vintage-style bracelets, I mix in a few darker beads, maybe gunmetal or oxidized silver, to keep the palette from going flat.
The eye reads variety as time and handling. Finish with a lobster clasp in matching tone, not a bright spring ring that undoes the illusion in one glance.
9. Woodland Owl Bracelet
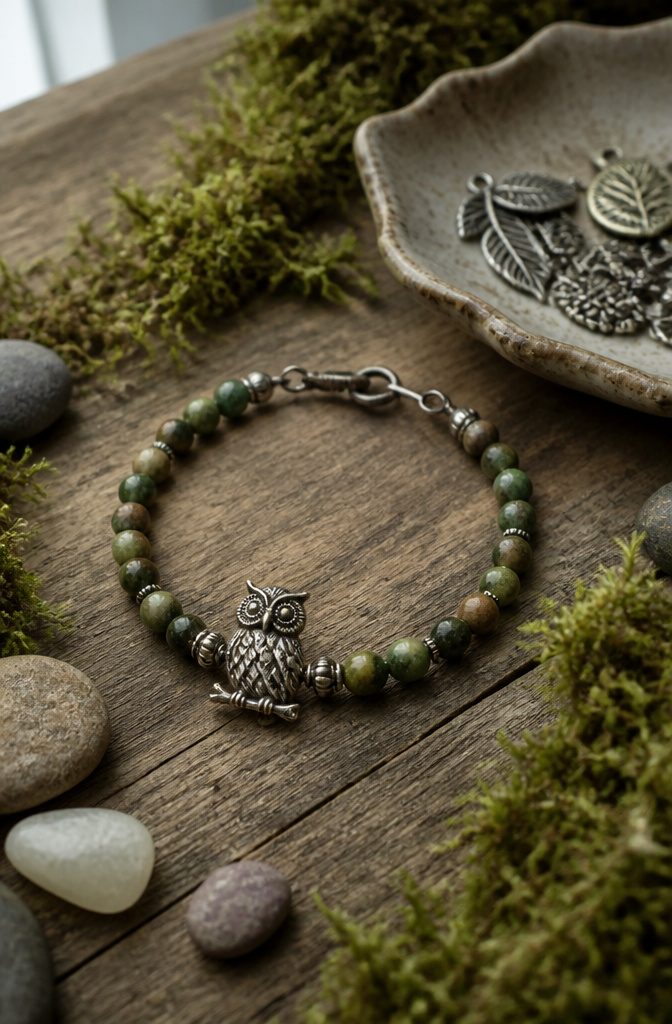
A 3–5 mm owl charm in oxidized pewter or antiqued brass gives the bracelet its weight without feeling costume-heavy.
The metal patina reads as weathered branch rather than shiny toy, which matters if the piece sits against a wool sleeve or bare wrist in equal measure.
Centering that charm takes two crimp beads, not one. I thread the owl onto the cord first, slide a crimp flush against each side, and flatten them with chain-nose pliers so the bird cannot drift toward the clasp.
Two keeps the spacing honest through a full day of typing and reaching.
Woodland beads should stay small enough that the owl remains the sentence.
I prefer 4 mm Czech glass in moss green, bark brown, and a single amber accent every inch or so. Leaf charms work if they face sideways, not dangling; anything that hangs below the bracelet line catches on sweater knits.
Waxed linen in dark olive holds shape better than elastic for this design. It frays at the knot, so I burn the cord end with a lighter and press it flat while warm.
The bracelet lasts longer, and the matte fiber looks like something found on a forest trail rather than made at a kitchen table.
10. Aqua Aura Bracelet
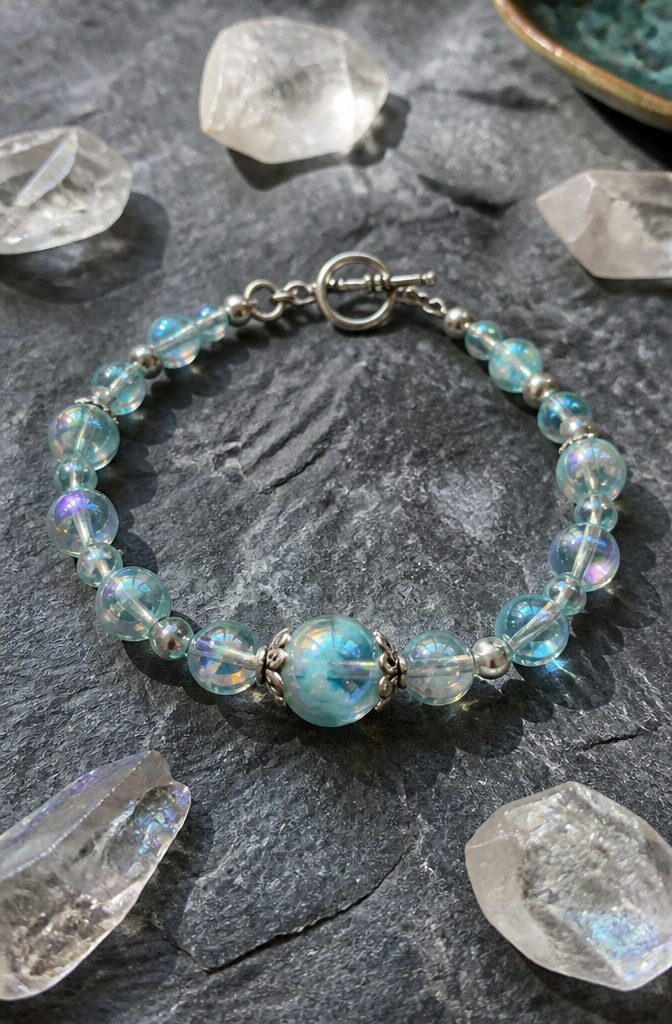
The flash in aqua aura comes from a thin metallic coating fused to the surface of glass or crystal, not from within the stone itself.
In genuine aqua aura quartz, gold and other trace metals bond to the crystal through vapor deposition, and the best bead imitations replicate that same interference effect with titanium or niobium oxide layers.
Look for beads labeled "AB" or "aurora borealis" finish, though the specific aqua tone needs a cooler base than the warmer rainbow AB you see on cheaper crystals.
Pair these beads against matte silver findings or brushed gunmetal; high-polish settings fight the color shift and turn the bracelet gaudy.
I keep the metal minimal, one or two small spacers between larger aqua aura rounds, and never mix them with other coated beads that have their own flash.
The color travels from electric blue to seafoam to pale violet depending on the angle, so the bracelet does the work without extra elements competing.
If you want texture, add raw quartz chips in plain white or very pale blue, something uncoated that reads as negative space.
11. Bluebell Skies Bracelet
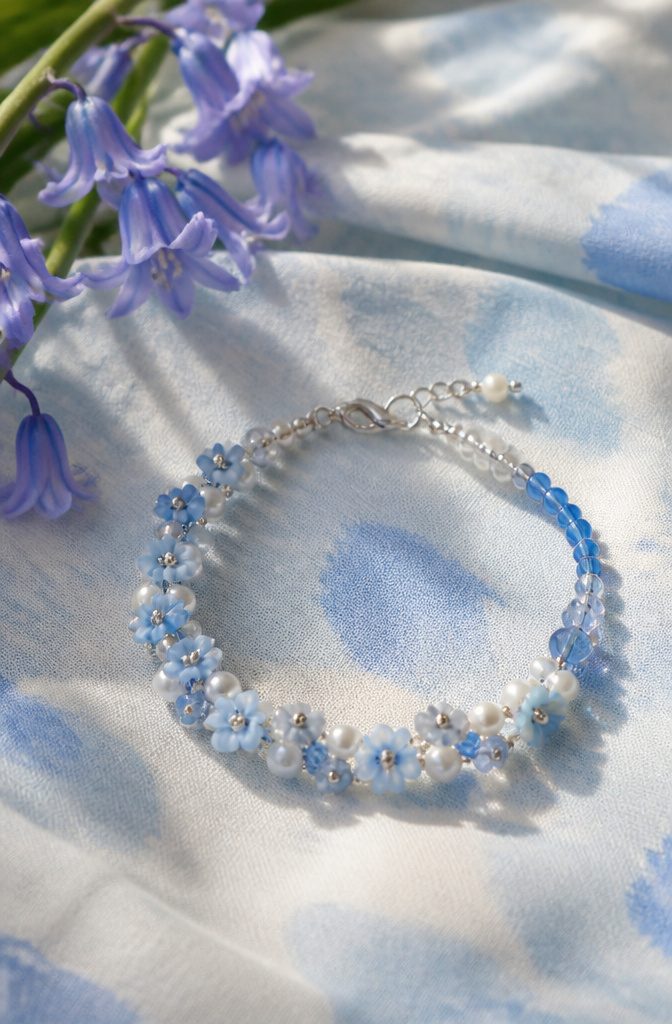
The blue that reads as bluebell carries a faint violet undertone, cooler than a straight sky blue and slightly dusted rather than saturated.
I look for beads in the cornflower-to-periwinkle range, avoiding anything that tips toward turquoise or navy, because either shift breaks the spring-meadow illusion. White sections need gradation to keep the bracelet from reading as two stripes fighting each other.
I place opaque white seed beads at the center of each white cluster, then ring them with beads that carry a whisper of the same blue, maybe one part blue to four parts white in the mix if I am working with custom blends.
The transition should happen over three or four beads, not one, so the eye moves gently from cloud to flower rather than snapping between them. Abrupt color shifts are what separate craft-show bracelets from pieces that sell at gallery prices.
For the pattern itself, alternating bluebell clusters with gradated white sections in a simple right-angle weave gives enough structure that the colors do the talking without the technique competing.
12. Butterfly Charm Bracelets
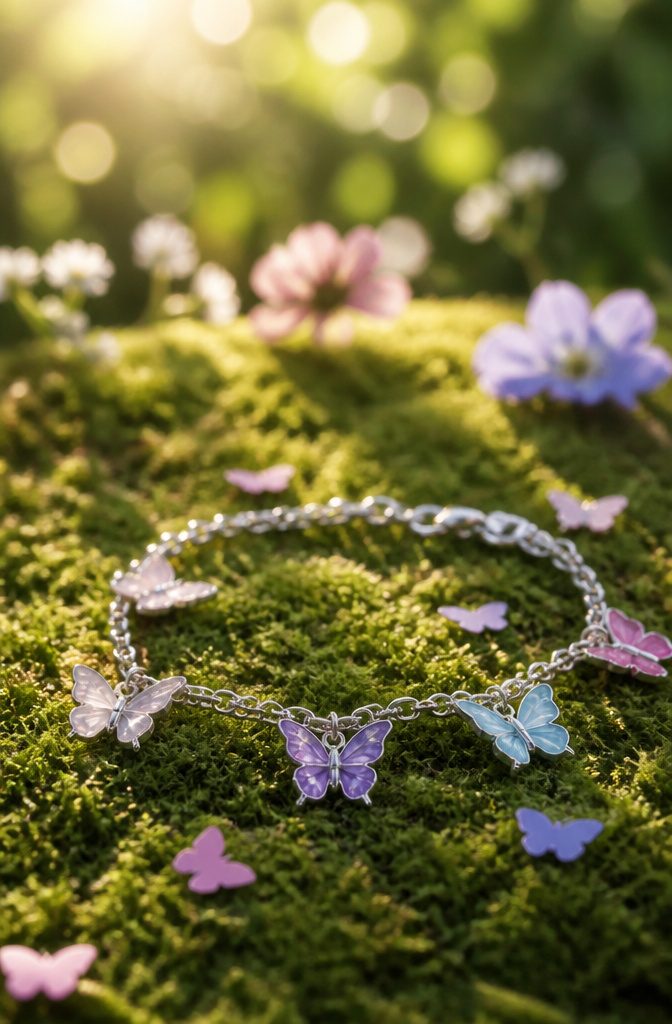
Butterfly charms work best when they can flip and catch light, which is why spacing matters more than the charms themselves.
I leave roughly 1.5 inches between each butterfly on a standard 7-inch chain, enough for them to settle at slightly different angles without drifting into a pile at the wristbone.
Anything closer and the wings tangle; anything wider and the bracelet looks like an afterthought.
The bigger problem is charms landing face-down.
That comes down to link style, not charm weight. A standard jump ring lets the dangle swivel freely, so gravity wins every time and the reverse side shows.
A wire-wrapped loop or a split ring gripping the charm’s bail keeps the face forward, because the connection is stiff enough to resist easy rotation.
Flat cable chain with small loops also helps, since the charm can’t rock past the link width.
For movement without clumping, I thread charms onto the chain rather than hanging them from below. The charm sits at the chain’s level, not below it, so it slides along the length instead of falling to the low point.
On a linked base like curb or rolo chain, the gaps between links act as natural spacing guides. One charm every four or five links usually stays balanced through a full day of wear.
13. Crystal Cove Bracelets
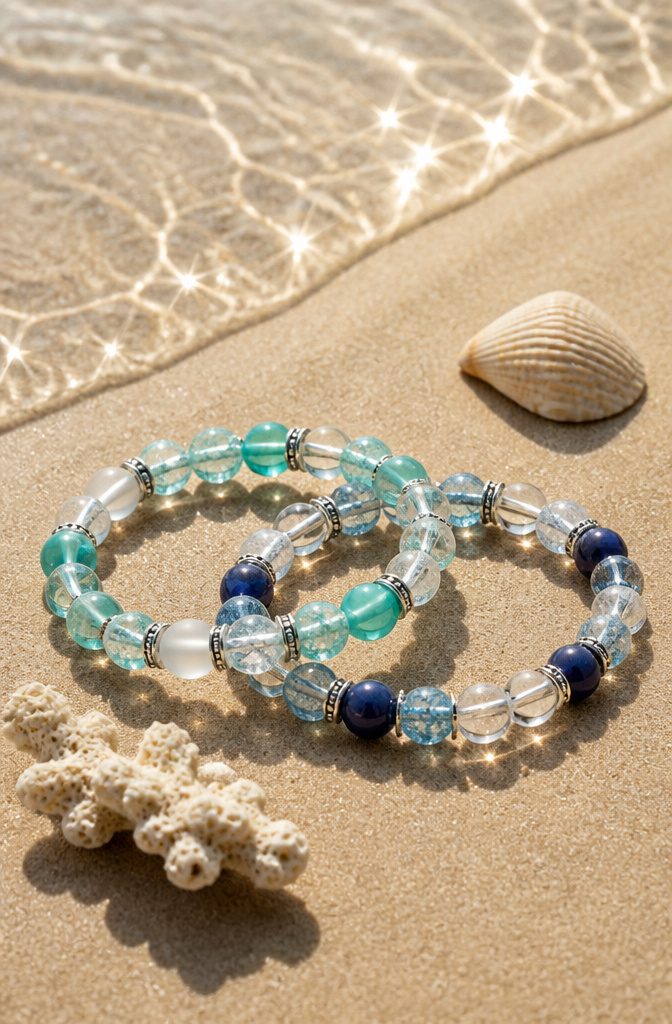
Transparent beads catch light like shallow surf, while frosted ones swallow it the way deeper water does.
I mix the two in uneven clusters, usually three or four clear crystals against one etched piece, so the bracelet reads as tide pools rather than uniform glass.
The etched beads need to be slightly larger, maybe 8 mm against 6 mm crystals, or the eye misses the depth trick entirely.
Sea-glass finish works best on rondelle or nugget shapes; rounds look too manufactured.
I string frosted beads at the center where a wrist curves, then graduate to clearer ones toward the clasp so the piece feels like it is dissolving into air.
Avoid coating real crystals with matte sealant to fake the effect; it dulls their facets permanently and the bracelet ends up looking foggy rather than intentional.
Frosted spacers between clear stations give the cleanest water-depth variation without cluttering the design. I use plain silver daisy spacers, nothing ornate, because the beads themselves are doing the visual work.
14. Gemstone Ombre Bracelet
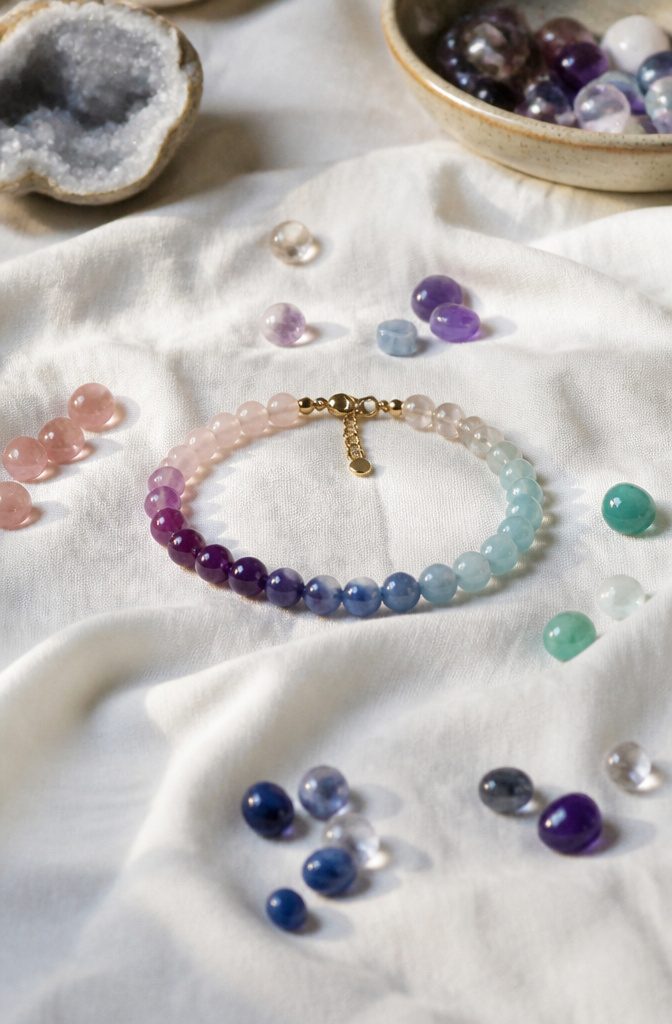
The ombre technique lives or dies on how many distinct shades you actually source.
Five to seven color steps give a smooth transition that reads as a gradient rather than a striped bracelet; fewer than that and the eye picks each bead as an individual block.
I plan my strand before I buy a single stone, laying the chips or rondelles in order on white paper to check that each neighbor is close enough in value to blur together at arm’s length.
Some stone families make this easier than others. Sapphires occur naturally from near-white through cornflower to deep navy, so a single trip through a good supplier’s bins can yield the full range without dye lots fighting each other.
Garnet runs from pale rhodolite to burgundy pyrope on a natural continuum.
Tourmaline is the classic choice because one mine parcel can produce every step from blush to forest green, though matching saturation levels across those hues takes more trial than working within one color family.
I skip ametrine for ombre; the purple-to-yellow shift is too sharp even in the raw crystal and fights the gradual fade you’re building toward.
15. Halloween Charm Bracelet
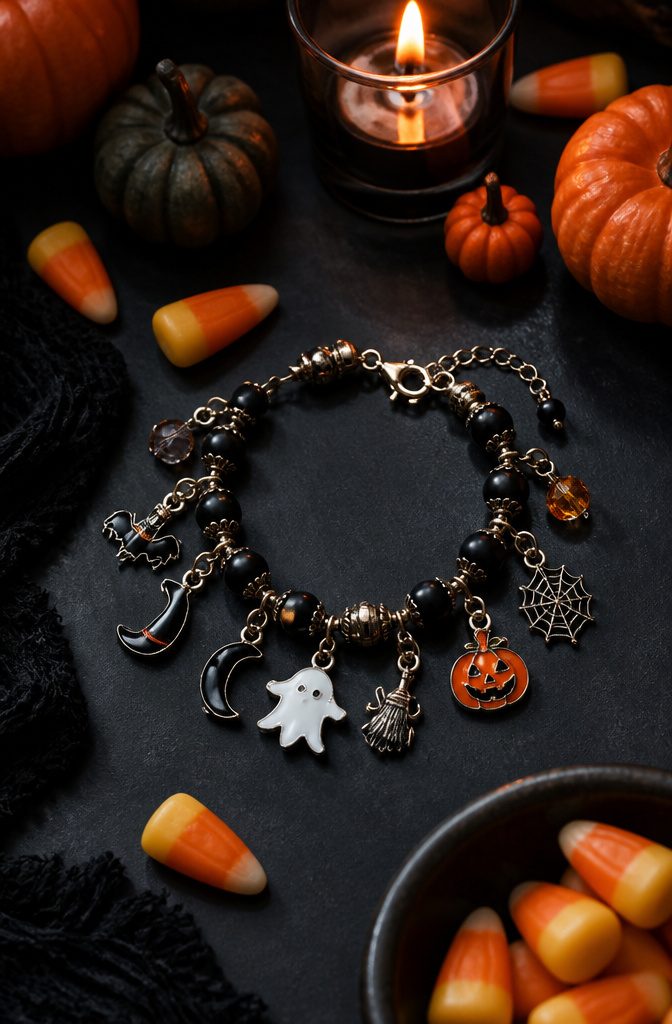
A Halloween charm bracelet walks a thin line between costume and jewelry, and the difference comes down to which charms you choose and how you arrange them.
I like splitting the bracelet into quarters: one section carries the obvious seasonal pieces, the pumpkin or tiny ghost, while the other three stay understated with matte black beads, a smoky glass rondelle, or a simple skull in oxidized silver.
That ratio keeps the holiday spirit readable without making the piece unwearable on November 1.
For the base metal, seasonal storage is where most charm bracelets die. The piece sits in a drawer eleven months a year, and humid air turns cheap findings green before next October.
I reach for stainless steel chain or a titanium toggle clasp every time. Both hold up to the temperature swings of closet storage without the maintenance that plated copper demands.
Brass and bronze look warmer going on, but I have watched too many seasonal projects come out of storage with a dull film that no polishing cloth fixes.
The clasp itself is worth attention. A lobster claw in 316 steel gives you a clean closure and enough weight to balance heavier charms.
Skip magnetic clasps here. The charm weight pulls against them, and losing a bracelet full of hand-picked beads to a subway grate is the kind of lesson you learn once.
16. Harvest Bracelet
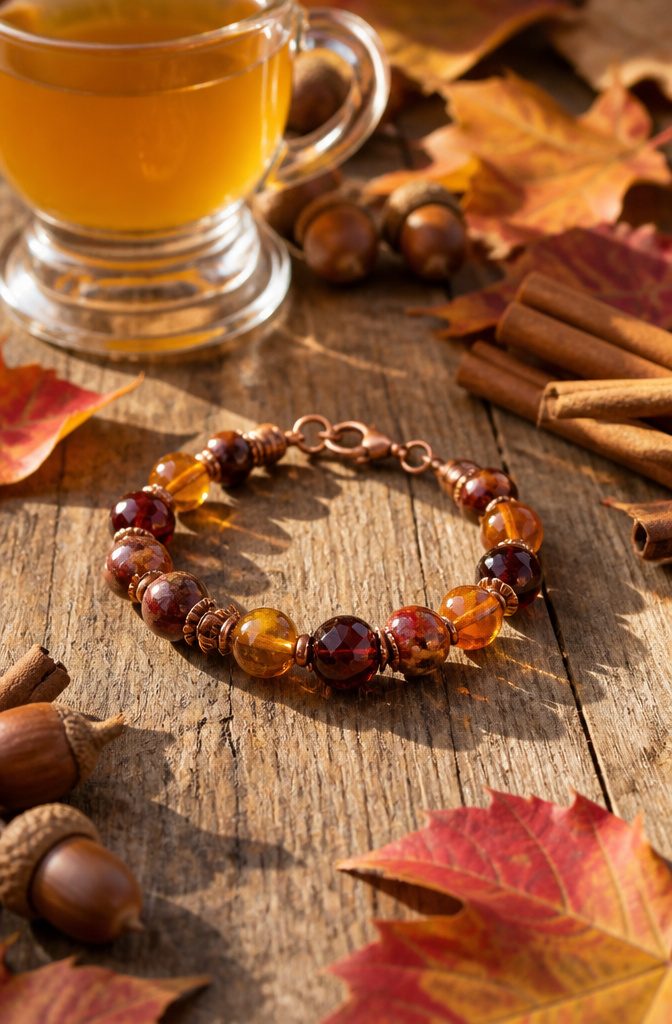
A harvest bracelet lives or dies on how the weight feels against your wrist.
I reach for 8 mm and 10 mm beads as the anchor sizes: large enough to carry the visual heft of amber, copper, and deep red, small enough that the finished piece does not slide around like a cuff or knock against a keyboard.
Six millimeter beads work for spacer rows, but anything under that gets visually eaten by the richer tones and starts to look like an afterthought.
The color sequence matters as much as the sizing.
I lay copper-toned metal beads between amber and deep red to keep the palette from muddying into a single autumn blur. Without that metallic break, three warm earth tones collapse into something that reads as brown from two feet away.
For daily wear, I keep the overall width under an inch. A substantial harvest design can still taper at the clasp so it does not flare at the ends.
Leather cord or thick waxed linen carries the weight better than multiple strands of thin beading wire, which kinks and twists when you load it with 10 mm stone or resin beads.
17. Mermaid Whispers Bracelet
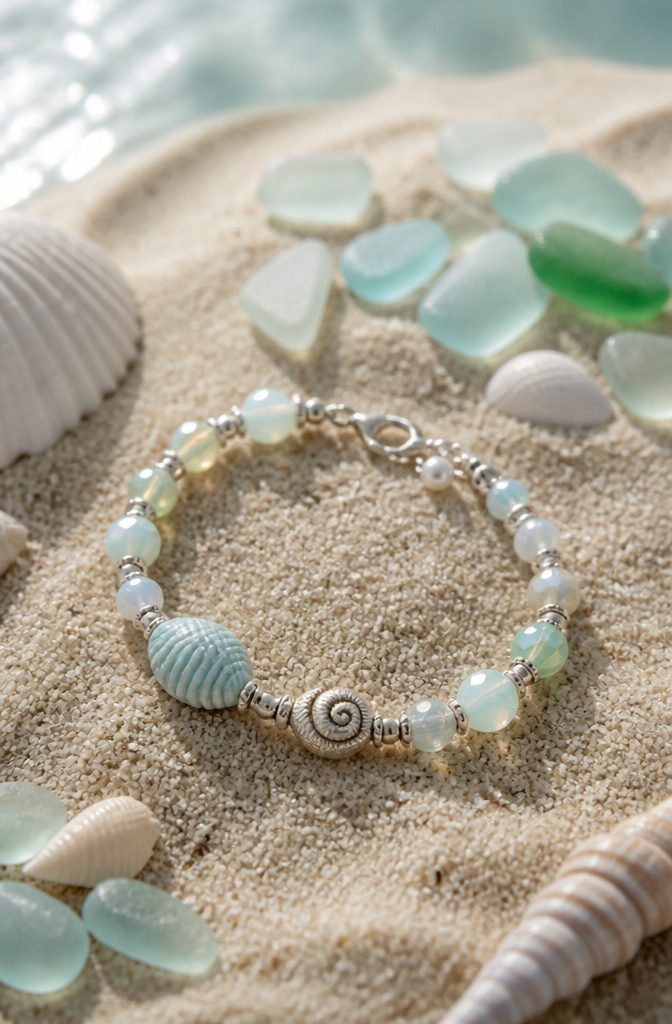
Iridescent bead finishes are where this bracelet lives or dies. The whisper effect comes from** AB (Aurora Borealis) or semi-transparent coatings over a pale base**, not full mirror chrome.
Full mirror reads as costume immediately; a restrained shimmer catches light like fish scales actually do, shifting between seafoam and soft violet without announcing itself.
Shell or pearl accents should sit at intervals, not clustered. A single flat coin pearl at the closure, or three small abalone chips spaced along the strand, gives the ocean reference without beach-kitsch overload.
I keep shell pieces under 8 millimeters for this reason. Larger, and the eye reads "souvenir."
Scale pattern beads work best in matte or satin metallic, not glossy.
Pair them with smooth round beads in between so the texture has room to breathe. Too many shaped beads in a row, and the bracelet turns into a toy.
Color discipline matters more than color choice.
Pick two oceanic tones, maybe three, and let the iridescence provide the variation. Teal plus silvered aqua holds together.
Teal, aqua, navy, jade, and sand fights itself and looks cheap. The finishes do the work if you let them.
18. Midnight Mallard Bracelet
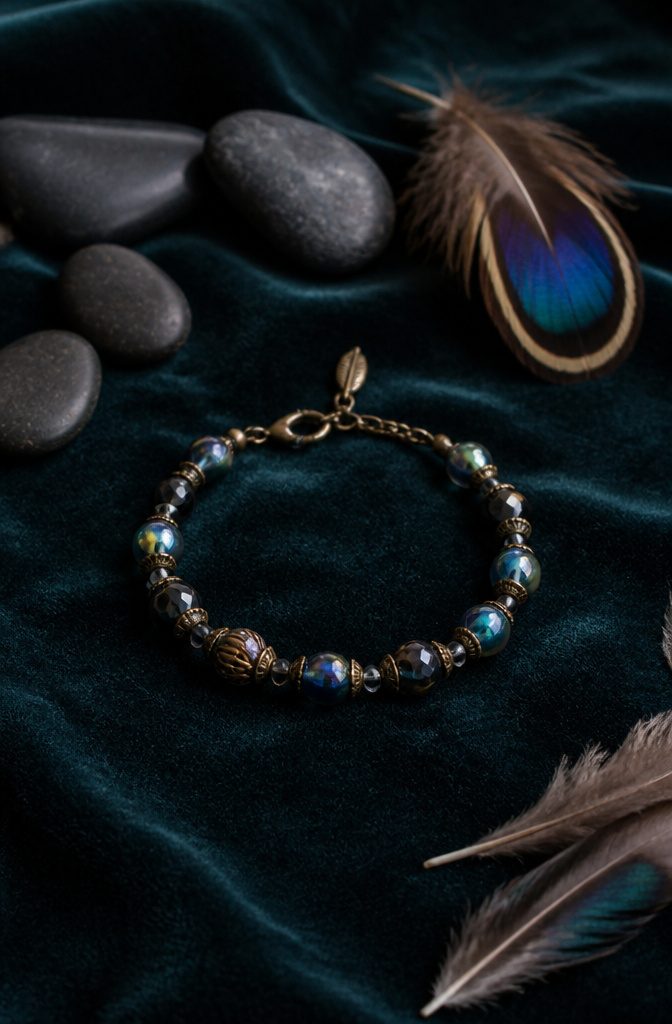
The iridescent flash on a mallard’s wing comes from structural color, not pigment, so you have to fake it with materials that do the same work.
Aurora borealis crystals or color-shift glass beads in the 4–6 mm range give you that green-to-violet flip without the feather.
The bead shape matters more than the size; faceted rounds throw light around better than smooth rondelles, and the effect dies in dim rooms if you go too small.
Dark gunmetal or oxidized brass wire, matte black cord, or deep charcoal silk thread acts as the base.
Anything lighter reads as pastel; the color lives in the contrast. I would skip jet black, though.
It absorbs too much and the bracelet turns into a flat stripe on the wrist. A little warmth in the dark tone, like a darkened antique bronze, keeps the iridescence from going cold and costume-y.
String the color-shift beads in clusters of three separated by single dark spacers so the flashes compete and flare against each other rather than blending into a muddy average.
19. Midnight Wish Bracelet
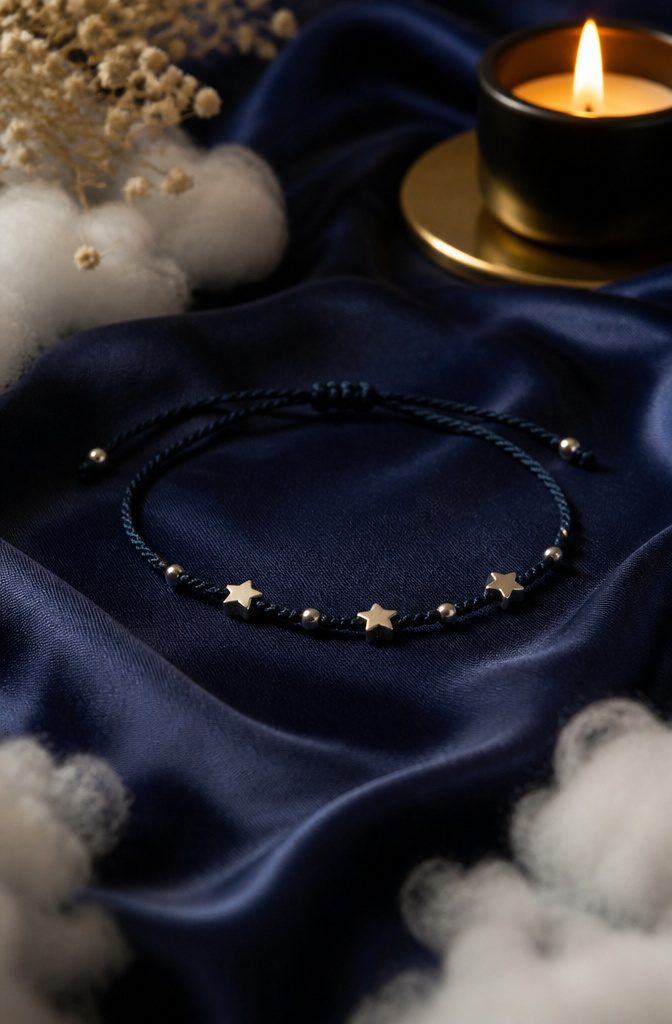
Deep midnight cord reads closer to black than to navy, with just enough blue to catch candlelight. I stick with 1 mm waxed cotton in a shade called charcoal-sea or night-sky; true navy pulls too sailor, too daytime.
Against that ground, silver star beads scatter like an actual sky, which means placing them with deliberate care so they look accidental.
I thread three stars within the first third of the bracelet, then a gap of plain cord, then two stars clustered slightly closer than the first group.
The last star sits almost at the clasp, off-center by a finger’s width. That asymmetry keeps the eye moving.
For the stars themselves, 6 mm silver-plated metal beads catch light without reading as costume; gold works if your skin tone carries warmth, though silver against midnight cord gives the sharper contrast.
Leave at least two inches of plain cord between any two stars, or the pattern tightens into a constellation you did not mean to draw.
The finished bracelet should look like someone glanced up, made a wish, and caught the moment in thread.
20. Misty Heather Bracelet
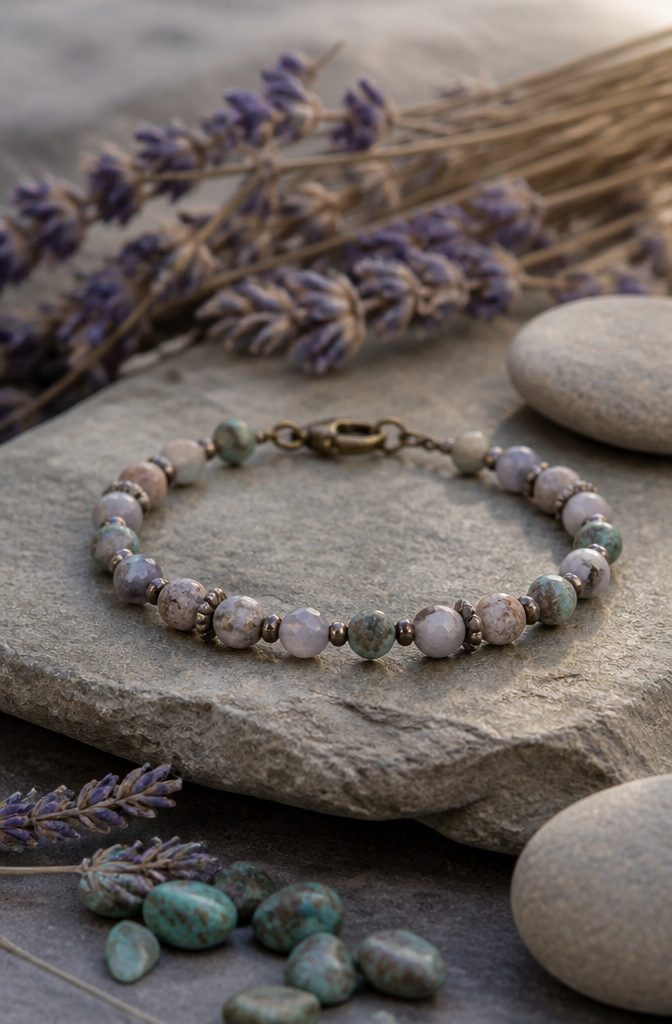
The misted look of this bracelet comes from pairing matte and satin bead finishes rather than relying on gray dye lots alone.
Frosted glass or etched seed beads scatter light instead of reflecting it, which reads as haze even when the underlying color is a definite lavender or slate.
I build the fade by alternating three finishes in the same tonal family: a chalky opaque, a velour-like satin, and one true matte.
The contrast between them creates depth without demanding a full gradient of separate colors. Too many competing pigments would break the fog; three finishes of one hue keeps the eye moving while the palette stays quiet.
For the base, I prefer a two-hole tile or superduo shape.
The flat planes catch just enough light to show off the finish variation, and the wider surface reads the muted tone at a distance better than a tiny round would.
Stringing on soft beading wire rather than thread also helps, since the slight stiffness holds the beads in their intended planes instead of letting them bunch and darken.
Frequently Asked Questions
What are some ideas for handmade bracelets?
Styles include charm bracelets, ombre gemstone strands, layered multi-strand pieces, and nature-inspired designs with owl or butterfly motifs.
How do I make a bracelet?
The Sunburst starts with a surgeon’s knot anchoring a focal bead flat against two beading-wire spokes.
What materials do I need for bracelet making?
The tutorials call for beads in sizes from 3 mm seed beads to 10 mm anchor stones, plus nylon cord or beading thread, findings such as lobster clasps and toggle closures, and tools like chain-nose pliers for crimping.
Specific pieces add leather cord, waxed linen, or beading wire depending on the design’s weight and drape.





