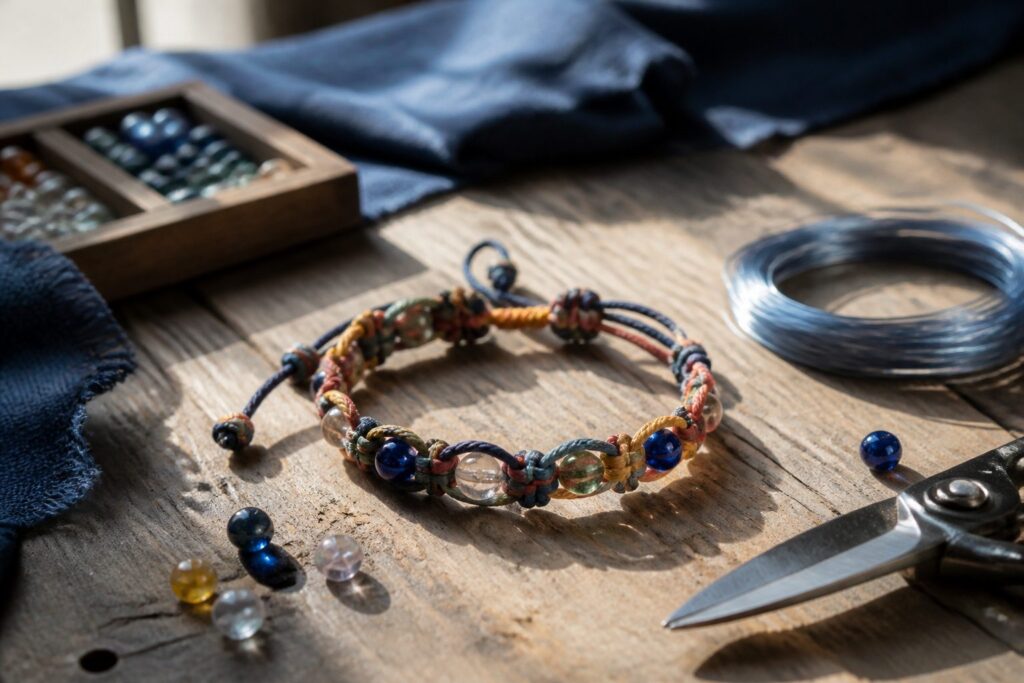
Ten bracelet styles, from knotted cotton to stacked leather, each built with materials that cost under twelve dollars for a first piece and techniques that need no tools beyond scissors and pliers.
The mistake most beginners make is buying plated findings and elastic cord that fail within a month, when nylon-coated wire and a few grams of glass beads would have lasted years.
1. Friendship Bracelets
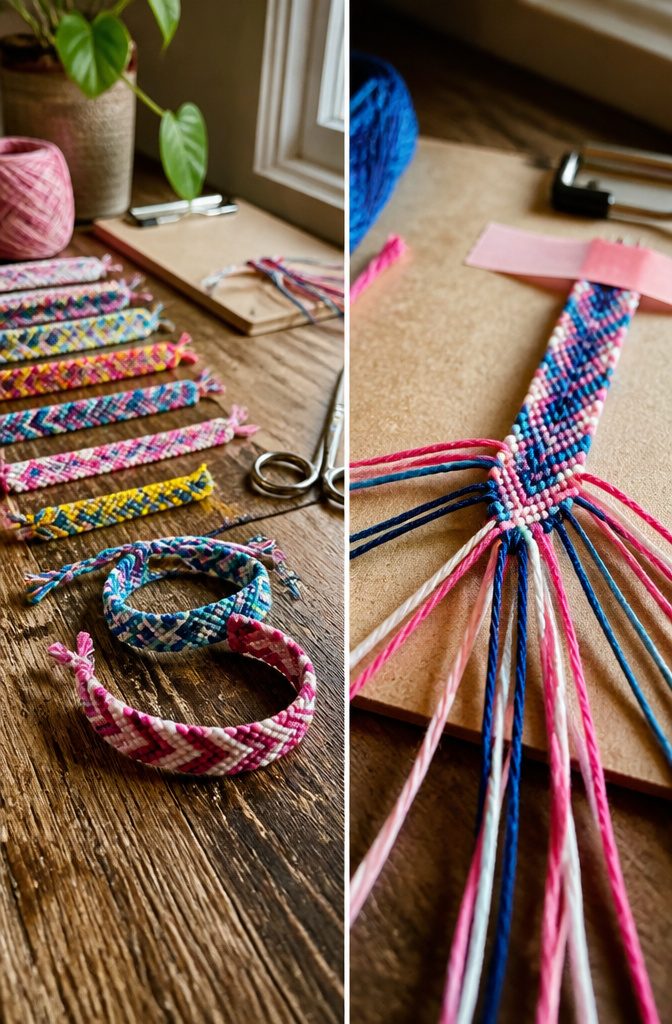
Friendship bracelets are macrame built from four knots that control which way the pattern travels. The Forwards Knot ties two forward knots in a row with the same pair of strands, pushing the working thread to the right.
The Backwards Knot does the same in reverse, moving left. The Forwards-Backwards Knot and Backwards-Forwards Knot each stack one of each direction; these reverse the thread’s path mid-row so a stripe can bend or zig.
Cut each strand to about 32 inches, long enough to lose a few centimeters to knots and still finish a standard wrist length.
Anchor the bundle to a clipboard or tape it flat; tension matters more than speed. Loop the left strand over the neighbor, pass the tail through, and pull snug.
Repeat that same motion for a true Forwards Knot. Switch hands for the backwards version, and alternate the two halves for the mixed knots.
New crafters often pull unevenly and get a curved bracelet; the fix is simply re-tying the last knot tighter before moving on. No beads, no extra tools, just cotton, patience, and the four directions the thread can go.
2. Beaded Bracelets
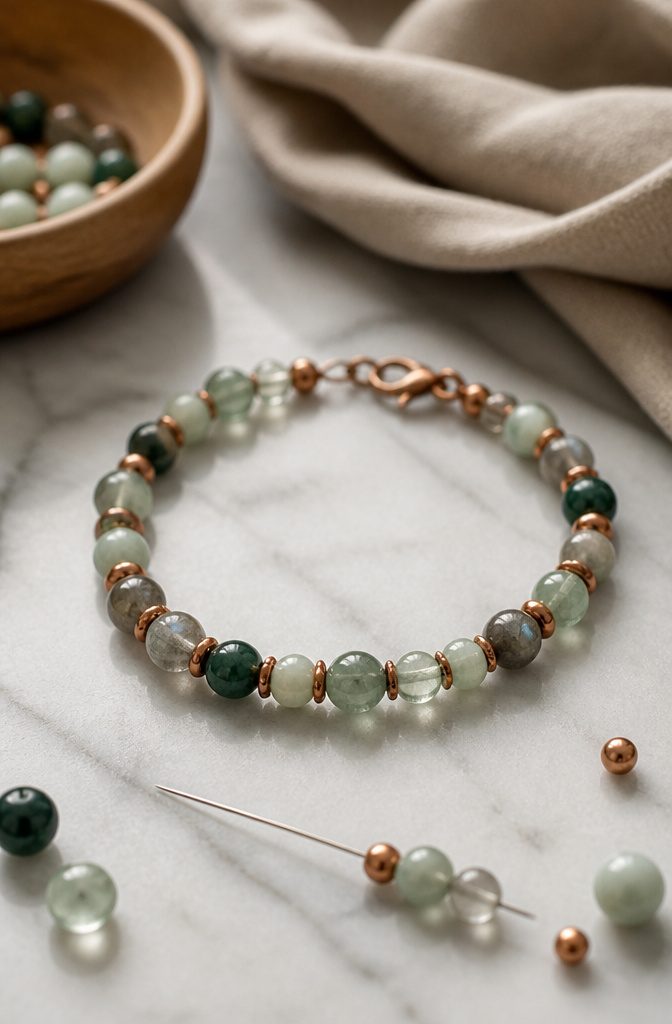
Seed beads strung on cheap elastic will crack and fray within a month.
I learned that the hard way on my first attempts, and the lesson stuck: shell out for nylon-coated stainless steel wire or high-grade beading thread if you want the bracelet to survive daily wear.
For cord, bonded nylon ranks above plain cotton for abrasion resistance, though waxed linen wins on drape andThat softness that sits well against the wrist.
Glass and pressed Czech beads give consistent hole sizing, which matters more than their pedigree.
Natural stones look richer but their irregular drill holes will fight cheap needles and split thread, so budget for a bead reamer or skip them until your tension is reliable.
The basic technique is ladder stitch, worked in rows. String two beads, pass back through the first, add the third and pass back through the second, building a flat strip.
For a decorative accent, weave in a single row of contrasting color every eight rows, or add a top thread of right-angle weave along one edge to create a scalloped border.
Both stay secure without glue if you bury the tail through seven or eight adjacent beads and split the thread path coming back.
Start with a simple odd-count peyote band, two beads wide. It teaches thread management, shows tension problems early, and finishes into a strip you can clasp or loop over a button.
Metal findings cost under four dollars for a basic set; thread and beads for your first piece run another eight to twelve.
3. Leather Bracelets
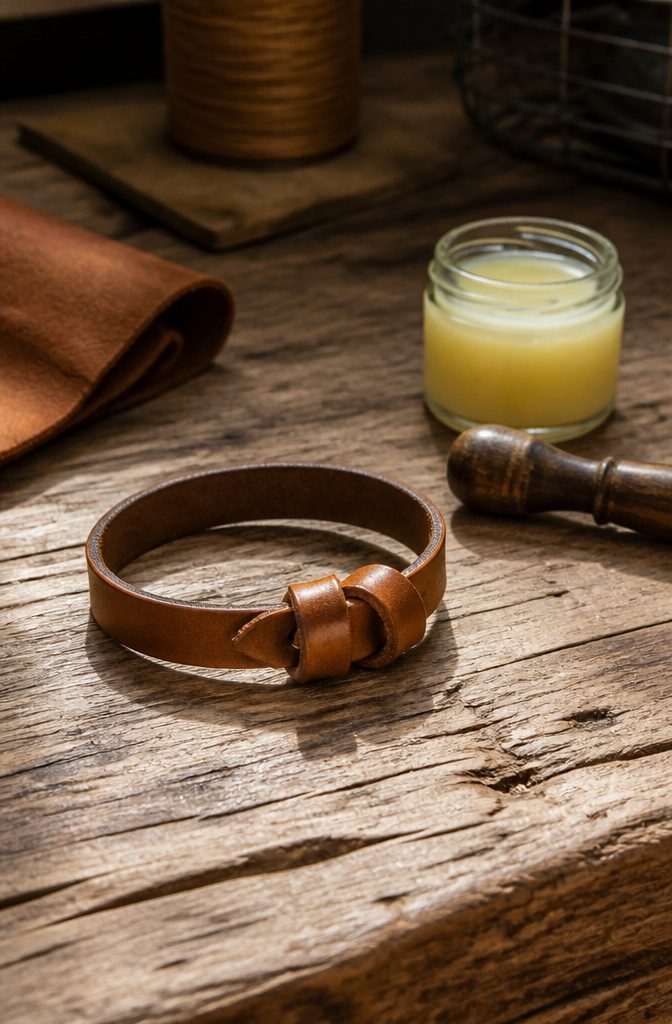
Full-grain veg-tan leather is what I reach for first, though chromexcel from a reputable tannery wins for comfort against skin if you can stomach the price jump.
That same chromium content is why I will not work it in my kitchen; the smell lingers and the dust settles where my coffee goes.
Construction is simpler than the tooling blogs suggest. A straight strap with a wrap-and-tuck closure needs only an x-acto, a rotary punch for sizing holes, and contact cement.
Skiving, not skimming, is what makes this work: thin the end that passes through the loop so it lies flat without bulking. Burnish with water and a slicker, or use beeswax if you want a matte edge that ages faster.
Leather darkens, softens, and picks up oils from your wrist.
That patina is exactly what you are after. Heavy daily wear will crack a cheap split-hide inside of six months, while decent full-grain gets suppler and gains character through year three.
The trade is water: rain spots become permanent scenery, so oil occasionally with mink or neatsfoot, never silicone.
Skip the stamping and carving at first. A hand-cut tapered end with clean burnishing looks more deliberate than a half-learned geometric pattern ever will.
4. Macrame Bracelets
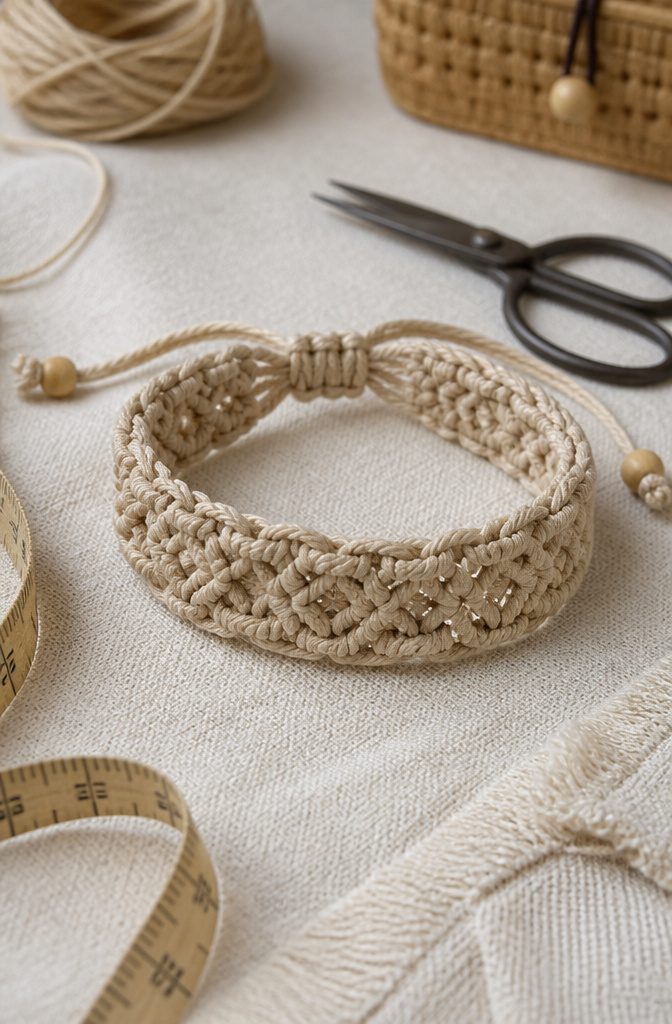
Macrame bracelets extend the same knot logic that drives friendship bracelets into thicker, more sculptural territory.
Where friendship patterns rely on forward and backward knots arranged in rows, macrame adds square knots, half-hitches, and lark’s heads worked around a core cord to build raised, rope-like bands.
The two crafts share a foundation: both are knot-based fiber work, and the rhythm you develop counting "one, two, tie, switch" transfers directly.
For a first project, a simple square-knot bracelet with two filler cords and two working cords gives you a flat, even strip that looks intentional rather than accidental.
The pattern repeats every four moves, so mistakes show immediately and can be undone back to the last complete knot.
Cotton cord between 1 and 2 mm keeps bulk reasonable for everyday wear; anything heavier turns bulky at the wrist and limits layering.
The gap between friendship bracelet technique and finished macrame piece is mostly material choice.
Switching from embroidery floss to cotton cord, and from a tied closure to ribbon crimps with a lobster clasp, moves the result from camp craft to something that reads as deliberate jewelry.
The knotting itself does not change in difficulty, only in scale.
5. Chain Bracelets
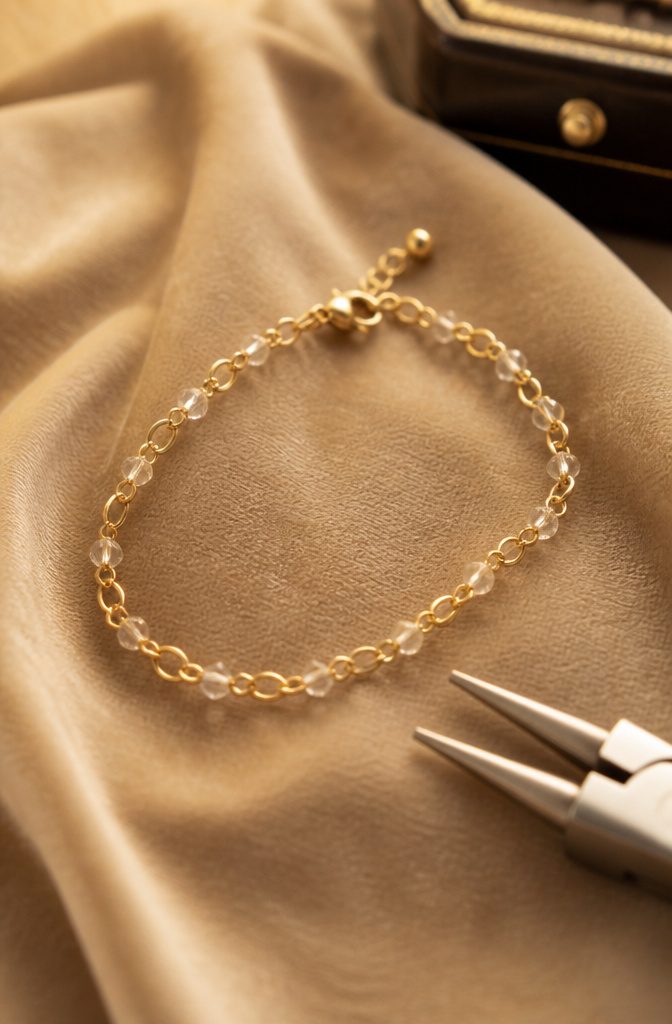
Chain construction starts with two decisions: the link style and the metal.
For a first bracelet, I like cable chain. The uniform oval links lie flat, take a jump ring without twisting, and the finished piece looks deliberate rather than improvised.
Cut a length that wraps your wrist with about 3/4 inch of overlap for the clasp, then open a link at each end with flat-nose pliers. Twist parallel to the chain length, never pull outward, or you deform the link profile.
Metal quality matters more here than in strung styles because the chain itself is the entire visual.
14K gold-fill wears like solid gold for a fraction of the cost; the thick outer layer of real gold resists rubbing at the clasp, where plate would fail within months.
Sterling silver tarnishes but polishes back; brass and bronze carry warmth that some skin tones pull off better than cool silver, though they can turn a collar green in humid weather.
I skip base-metal chains entirely for gifts. The small cost jump buys a piece the recipient does not have to explain.
For variation without wire work, thread small beads onto individual links before closing them, or suspend a single charm from a centered jump ring. A lobster clasp adds security; a spring ring looks lighter but asks for more frequent replacement.
6. T-Shirt Bracelets
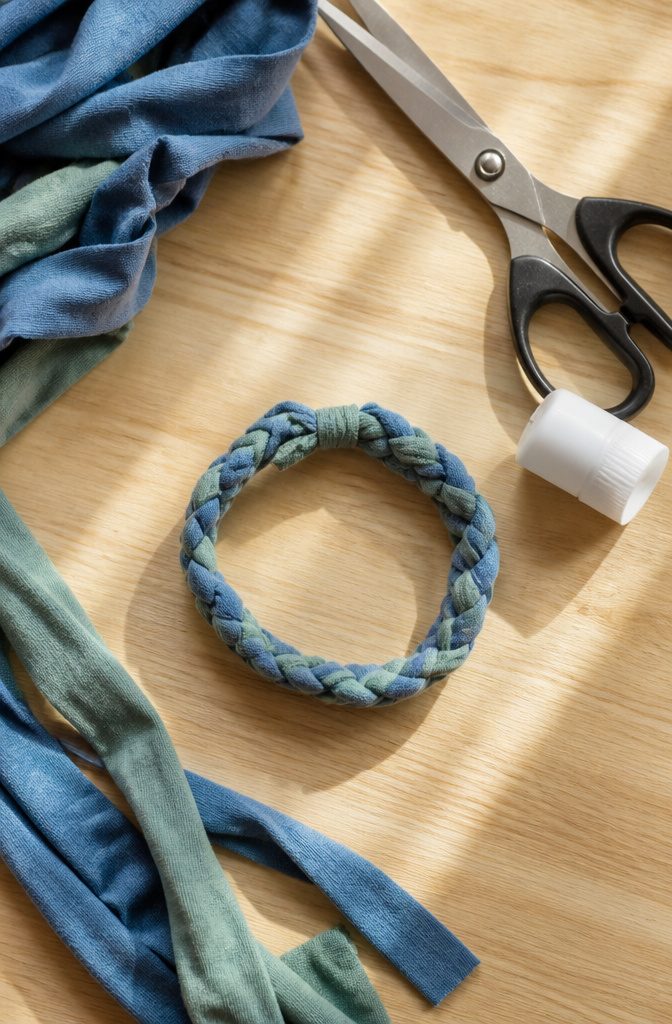
Old cotton jersey has the right stretch to sit flat against a wrist without rolling, which is why a worn-out tee beats most fabric-store knits for this project.
I cut strips about an inch wide across the body of the shirt, pull them so they curl into tidy ropes, then braid three together the same way I would hair.
A tighter braid keeps its shape for weeks of daily wear; a looser one goes slouchy and boho within a day or two, so tension is the detail that decides the look.
For a wider cuff, five or six strips woven in a simple over-under pattern build something closer to a cuff bracelet. The raw edges do not fray on jersey, so there is no need to hem or seal anything.
A dot of fabric glue or a few hand stitches at the ends holds the final shape; clasps are optional and, in my view, mostly unnecessary since the stretch lets you slip the bracelet on and off.
Color-wise, band tees and faded solids both work, though I tend toward the latter for stacking.
The whole project costs nothing if the shirt was already bound for the donate pile, and a single large tee yields enough material for four or five bracelets depending on how wide you cut.
7. Diffuser Bracelets
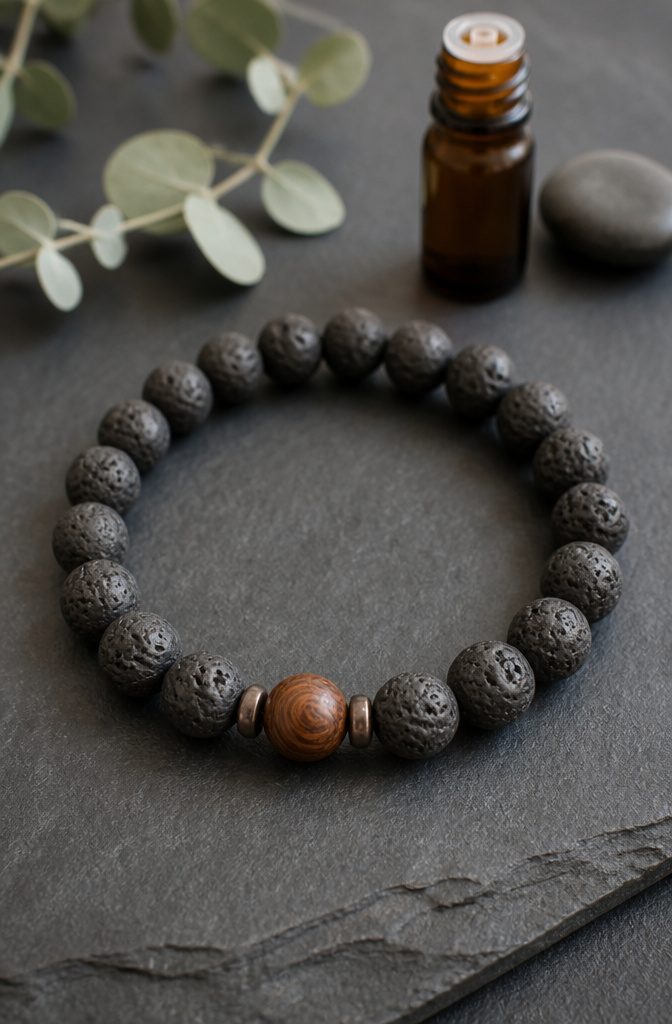
Porous beads turn a bracelet into something that works while it sits on your wrist.
Lava stone is the obvious choice here: the volcanic rock is naturally riddled with tiny channels that wick up essential oils and release them slowly across several hours.
Other options include unglazed terracotta, certain raw woods, and matte-finish clay beads, though none hold scent as long.
For assembly, string the porous beads on nylon cord or elastic with a few spacer beads between them. Metal spacers work, but they will warm against your skin and speed evaporation.
Knot securely; these get handled more than average because the wearer reapplies oil every few days, usually with a drop or two directly onto one or two beads rather than the whole strand.
The practical function makes this a stronger gift than it first appears.
Someone who already owns decorative jewelry gets something they will actually reach for during a workday or before bed. A drop of lavender or peppermint on the wrist beats a bottle rolling around in a purse.
Just warn the recipient that the scent will fade in a day or two and that citrus oils can photosensitize skin if they wear the bracelet straight into sunlight.
8. Charm Bracelets
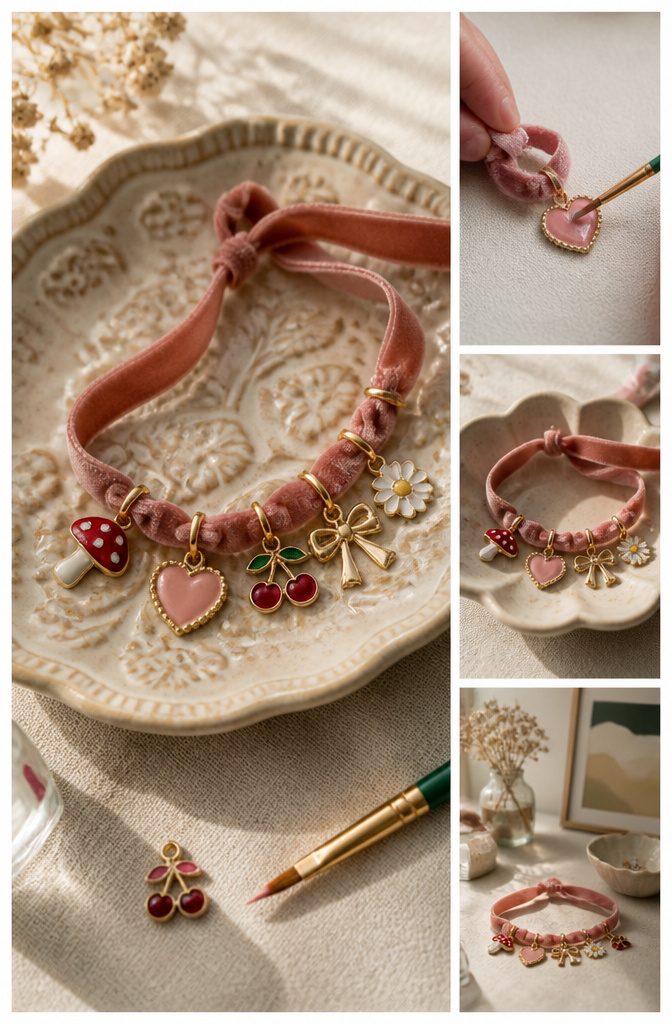
A charm bracelet built on ribbon or thin fabric gives you the most room to experiment without welding torches or heavy gauges of wire.
The Dimensional Magic method turns flat paper or fabric charms into domed, glass-like pieces: you brush the liquid onto a printed shape, let it cure, then seal it with a second coat so the surface hardens into a soft bubble.
Two thin coats beat one thick coat every time, since puddles stay tacky for days and dust settles into them like glue.
For the band itself, velvet ribbon at about half an inch wide holds jump rings securely without folding over at the edges.
I attach charms with split rings rather than open jump rings; the extra coil means they do not slide off when the bracelet twists against a desk or sleeve.
Spacing matters more than count. One charm every inch looks considered, while crowding them shoulder-to-shoulder reads like a souvenir shop display.
Personalization is where this style earns its keep as a gift. Birth months, coordinates in tiny type, a clipped map of a first apartment: all of it fits under that domed finish.
The recipient sees the reference, and everyone else sees an odd, pretty object. Keep the backing fabric light so the bracelet drapes rather than stacks stiff on the wrist.
9. Upcycled Bracelets
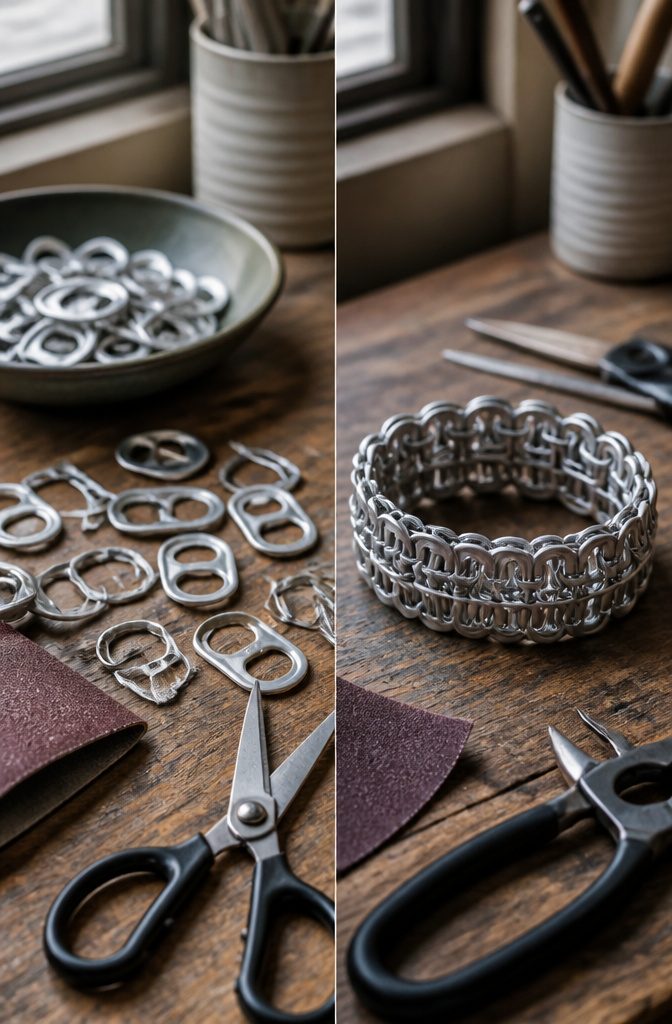
Soda can tabs stack into a surprisingly solid chain once you learn the interlocking weave, and that aluminum stays lightweight through years of wear.
I favor the method because the metal already passes the bend test: it is thin enough to shape with household scissors yet thick enough to hold a clasp.
Prep matters more than the weave itself. Sand every edge, even the ones that look smooth, then seal with a clear coat so the ink does not transfer to skin or shirt cuffs.
Other recycled stock works on the same principle. A strip from a worn leather belt, cut to even widths and punched for rivets, gains character the store-bought hide cannot fake.
Keys from dead locks, flattened slightly, string into a graduated line that jangles faintly. Choose material that was already engineered to take abuse: drive belts, hose clamps, the steel ring from a spent keychain.
Costume jewelry using found objects fails when the base breaks, so test the flex before you commit time. A bracelet that outlasts its first summer earns its place in the rotation.
10. Stacked Bracelets
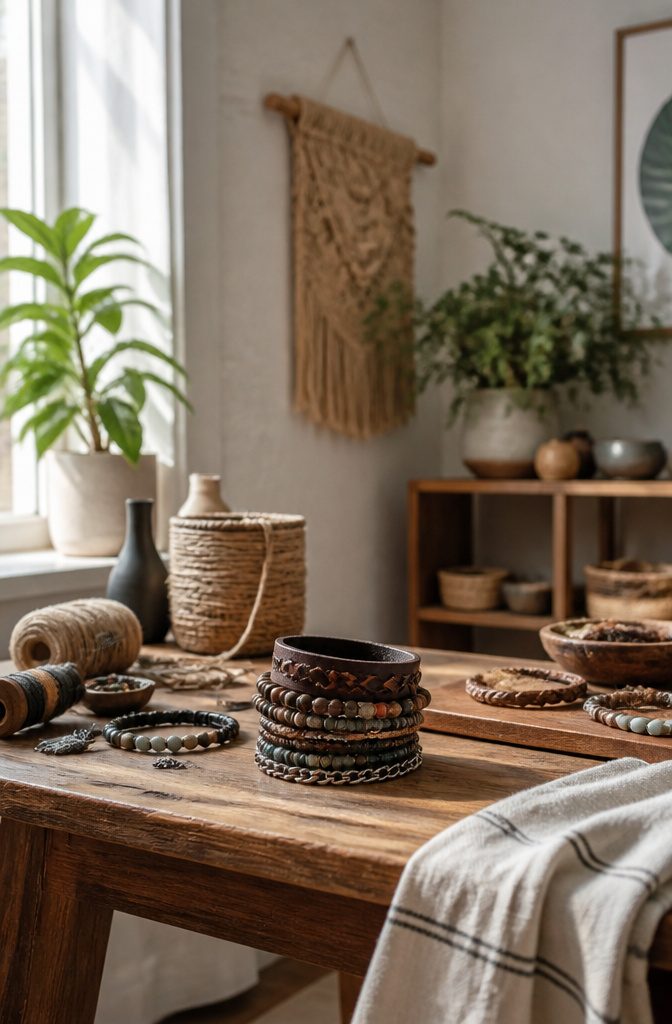
A single bracelet sitting on bare skin rarely carries the full weight of a look.
The Chan Luu wrap bracelet changed that for me: five loops of leather cord threaded with small stone beads, fastened with a single button, creating the density of a stack but born from one continuous thread.
Imitating that recipe piece by piece lets you control every layer yourself.
Start with widths. A thick leather cuff needs a 2–3 mm chain beside it, not another band the same heft; equal widths compete for the same visual space and read as a tangle.
Next, texture: matte suede against polished silver, or waxed linen against faceted glass, gives each layer its own light instead of flattening into one dull plane.
Color works the same way. I keep one metal consistent, usually silver or gold, then let the stones shift from cool to warm as the stack climbs the wrist.
The risk is overloading the elbow. Three bracelets sit securely, four with mixed textures, five only if at least two are thread-fine chains.
Beyond that, the stack slides toward costume territory fast, and the sound alone, metal clinking on a keyboard or countertop, becomes its own distraction.
Materials and Where to Find Them
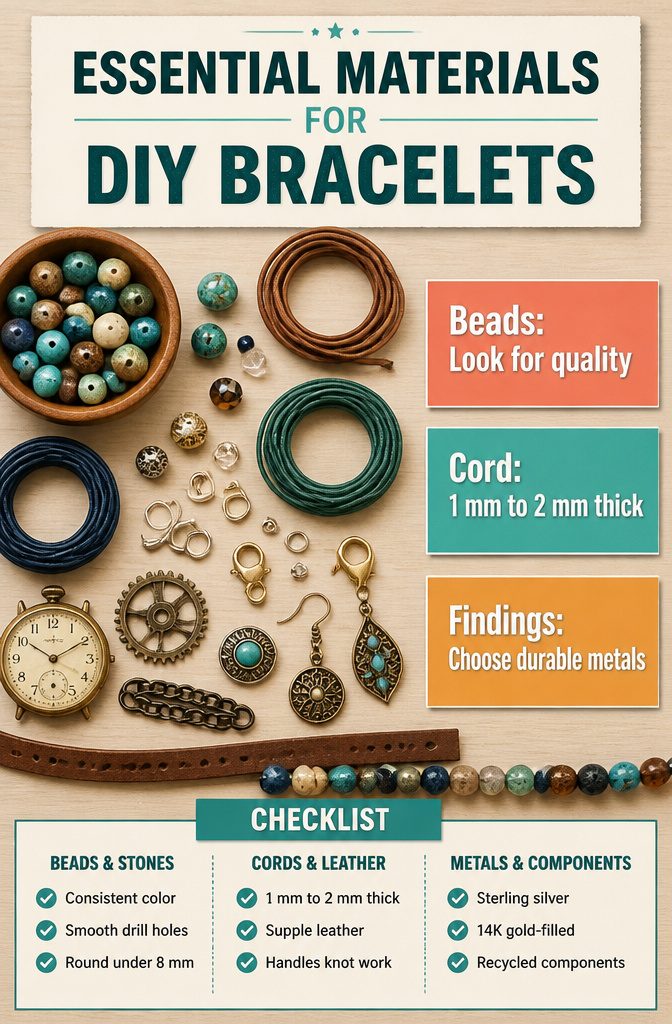
Beads, cord, leather, and the odd bit of recycled metal form the backbone of most bracelet styles worth making.
Sterling silver or 14K gold-filled findings cost more upfront but hold up to daily wear; plated base metal turns skin green inside a month.
For stones, look for consistent color saturation and drill holes that do not flake at the edges, which signals soft or treated material that will not last.
Leather should feel supple, not plastic-stiff, and cord thickness between 1 mm and 2 mm handles most knot work without bulk.
I find beads in the craft aisles of big-box stores, though the selection runs toward acrylic and dyed howlite. Better stone and glass stock sits with the online bead wholesalers that specialize rather than generalize.
Recycled components, watch faces, vintage chain, and broken earrings turn up at estate sales and thrift stores priced by the bag. The hunt is slower, but the result is a bracelet no one else can copy.
For everyday comfort, round beads under 8 mm sit flat against a wrist and do not catch on sleeves. Sharp-edged cuts and heavy focal pieces work better on occasional pieces than on something you type in all day.
Techniques From Basic to Next Level
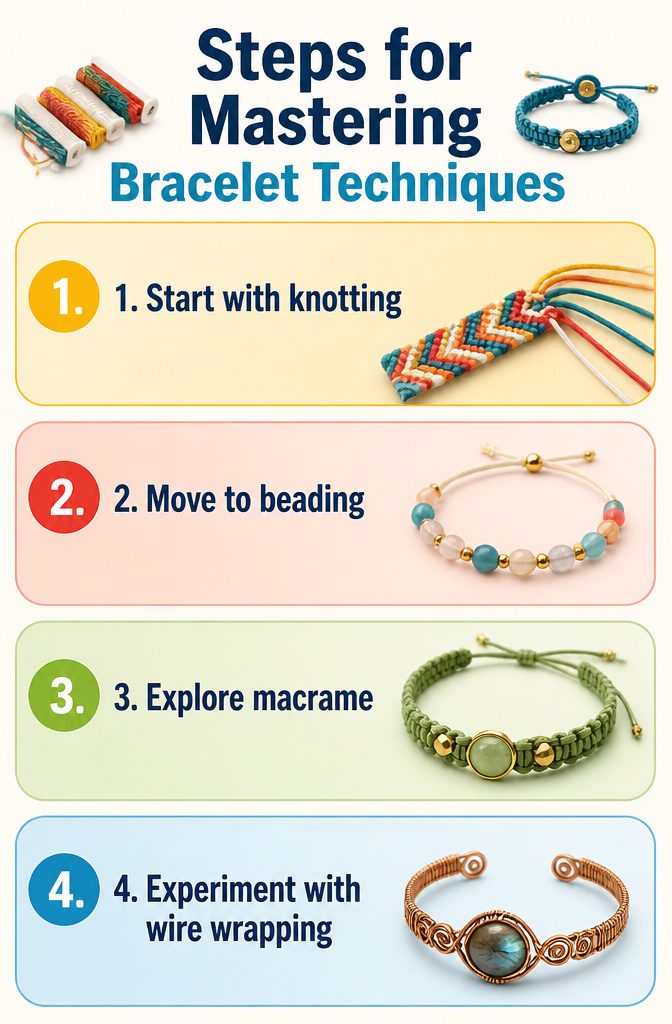
The thread running through almost every bracelet diy project falls into three camps: knotting, beading, and macrame.
I think of these as the foundation a beginner actually needs, because they match the materials already in most starter kits and they scale upward without forcing you to buy a new toolbox each time.
Knotting is where friendship bracelets live. The four basic knots (forward, backward, forward-backward, and backward-forward) create woven patterns using embroidery floss or Omegacryl yarn, and the same logic later builds into chevron and candy stripe variations.
Once those feel automatic, beading opens up daisy chains and solar system strands where the cord becomes a carrier for stones or charms rather than the visible design itself.
Macrame splits the difference: the knotwork is the structure, but you learn to space it around metal accents or glossy beads to keep the piece lightweight enough for stacking.
Wire wrapping sits a level above. It demands round jewelry pliers and some feel for shaping, and sources point to it as inexpensive once you own the tool but not a first-afternoon project.
Intricate macrame patterns follow the same pattern, taking the same knots into zig-zag and advanced friendship bracelet territory that reads as grown-up rather than summer-camp.
I would start with plain macrame and a simple closure, add ribbon crimps with clasps when you want a more finished look, and move toward wire only after the hand tension of knotting feels automatic.
Sizing, Fit, and Everyday Comfort
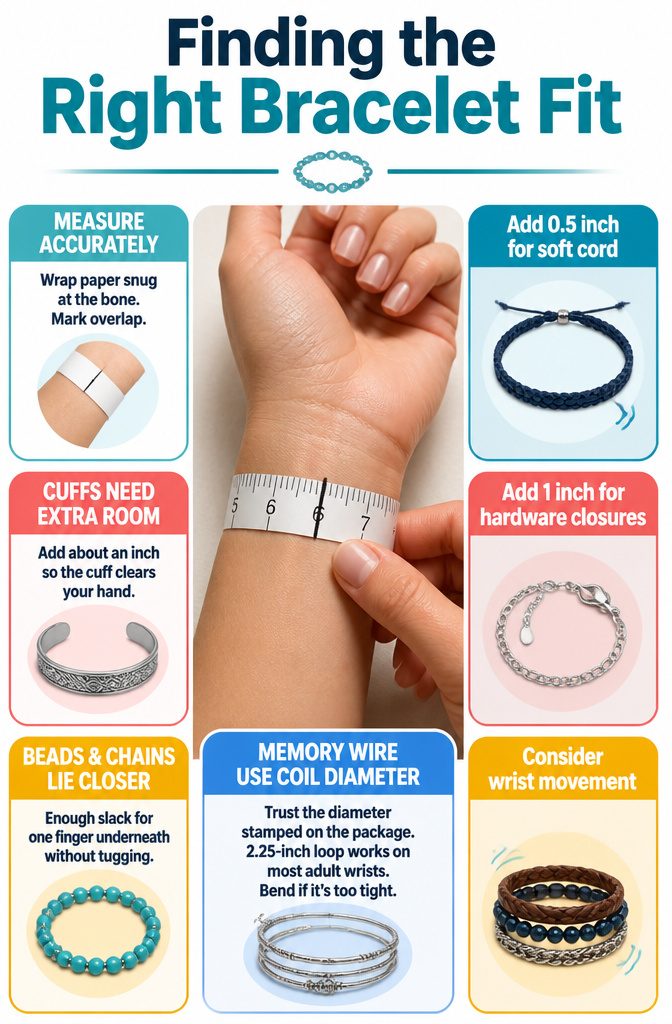
A bracelet sits wrong when the length does not match the style.
A cuff or bangle, being rigid, has to clear the widest part of my hand to get on, so I add about an inch to my actual wrist measurement for those.
Strung beads or chain lie closer, almost resting on the skin, and I prefer mine with just enough slack that one finger slips underneath without tugging.
I measure by wrapping a strip of paper snug where the bone bulges, then marking the overlap with a pen. Add half an inch for soft cord, closer to an inch for anything with closure hardware.
For memory wire, which springs open and shut, I trust the coil diameter stamped on the package; a 2.25-inch loop works on most adult wrists, and you bend it if it grips too tight.
Comfort through the day means checking motion. A stack of thin bracelets needs more room than a single thick band, or the layers pinch at the cuff of a sleeve.
My braided leather one stretched slightly after a week of wear, so I started the next a quarter-inch shorter and let the break-in do the rest.
Gifts That Carry Weight
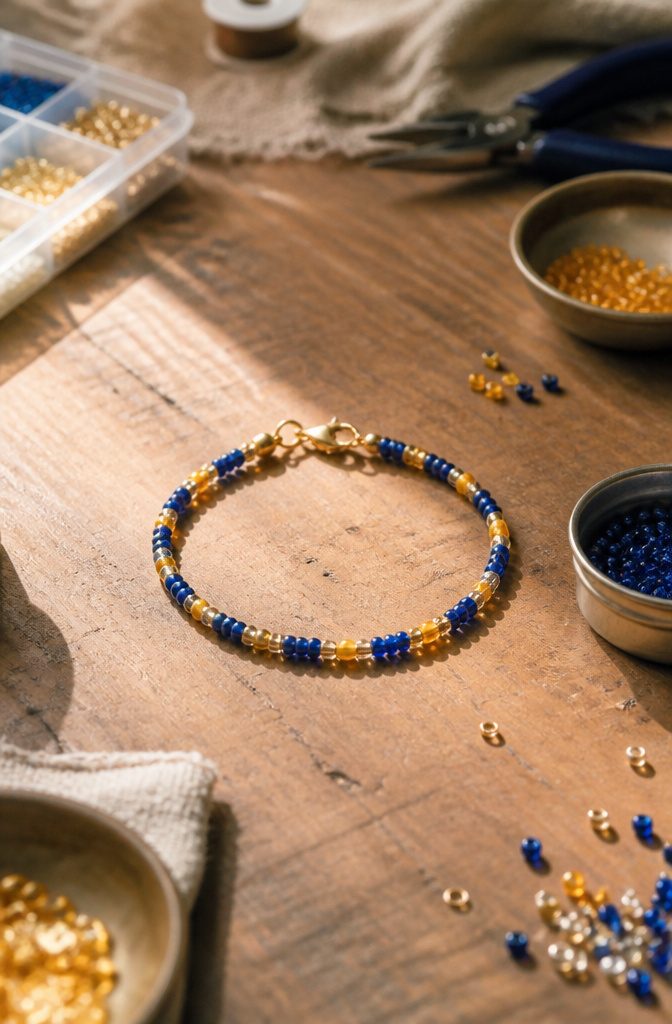
A handmade bracelet lands differently than something pulled from a display case. The person receiving it knows you measured your own time against their worth, and that weight carries even when the piece itself is delicate.
The design choices let you match the occasion without reaching for cliché. A single strand of seed beads in someone’s college colors reads as graduation memory, not merchandise.
For a friend who wears only warm metals, brass wire and carnelian feel seen rather than bought. The material itself becomes the message when you select it with the recipient’s habits in mind, not your own taste.
Sentimental value builds from specifics the maker controls. A clasp chosen because it opens one-handed, for a new mother.
A length that fits exactly, because you borrowed her everyday bracelet to measure. These details do not announce themselves, but they surface each time the piece is worn.
You pay in time and in the risk of misjudgment.
Store-bought returns easily; handmade does not. I think the gamble pays off for relationships where the effort itself matters, and I skip it for acquaintances where the gesture would scan as obligation rather than care.
Frequently Asked Questions
How do you make friendship bracelets?
Friendship bracelets are built from four knots that control pattern direction: the Forwards Knot, Backwards Knot, Forwards-Backwards Knot, and Backwards-Forwards Knot.
Cut strands to about 32 inches, anchor them to a clipboard or tape, and tie knots by looping one strand over its neighbor and pulling snug. The mixed knots let stripes bend or zig by reversing the thread’s path mid-row.
What materials do I need for DIY bracelets?
The core materials across styles are beads, cord, leather, and findings like clasps and jump rings. For knot-based styles, cotton cord between 1 and 2 mm or embroidery floss works best.
Beading calls for nylon-coated stainless steel wire or high-grade thread, plus glass or pressed Czech beads with consistent holes. Leather needs full-grain veg-tan or chromexcel, plus an x-acto and rotary punch.
Are DIY bracelets good gifts?
Yes, handmade bracelets carry weight because the recipient knows you spent your own time on them. Matching design choices to the person, like college colors or warm metals they already wear, shows attention rather than generic shopping.
Specific touches, such as a one-handed clasp for a new mother or a length borrowed from their everyday bracelet, create sentimental value that store-bought pieces rarely match.
How to make a DIY bracelet at home?
Start with one of three foundation techniques: knotting for friendship and macrame styles, beading for strung designs, or simple leather construction.
A basic friendship bracelet needs only embroidery floss and a surface to anchor it; a first beaded piece runs about $12–16 in thread, beads, and basic metal findings. No workshop or expensive tools are required for the entry-level projects covered here.
What are some cool homemade bracelet ideas?
Each scales from afternoon project to refined gift.
What do I need to make my own bracelet?
For your first project, pick a style and gather its specific short list. Friendship bracelets need only floss and tape; beaded styles add wire, beads, and a needle; leather needs a blade, punch, and contact cement.
Across all types, 14K gold-filled or sterling findings cost more upfront but avoid the skin discoloration that plated base metal causes within a month.
What is the two-finger rule for bracelets?
For fit, it recommends measuring with a paper strip snug at the wrist bone, then adding half an inch for soft cord or closer to an inch for pieces with closure hardware.
One finger should slip underneath a strung bracelet without tugging; rigid cuffs need about an extra inch beyond wrist size to clear the hand.





