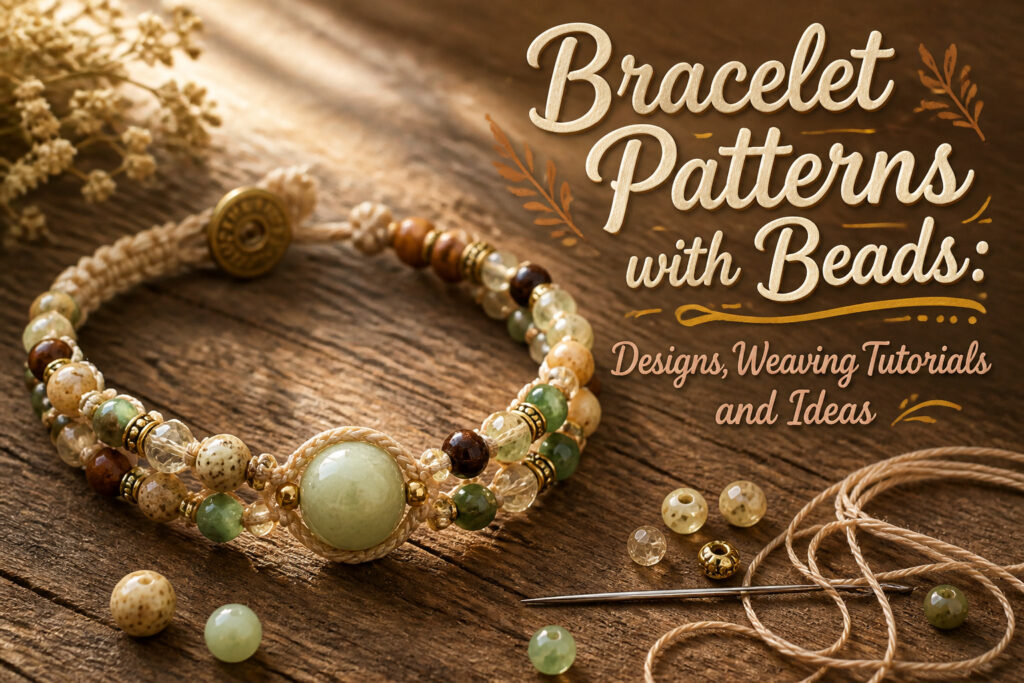
Bracelet patterns with beads range from simple strung designs to woven structures where tension and thread path determine whether the piece holds its shape or collapses.
The difference between a bracelet that lasts and one that saws through its own cord often comes down to a single modification: with jade, the knot must sit slightly back from the drill hole, not flush against it, so the stone’s harder polish does not abrade under movement.
Silk and Jade Bracelet
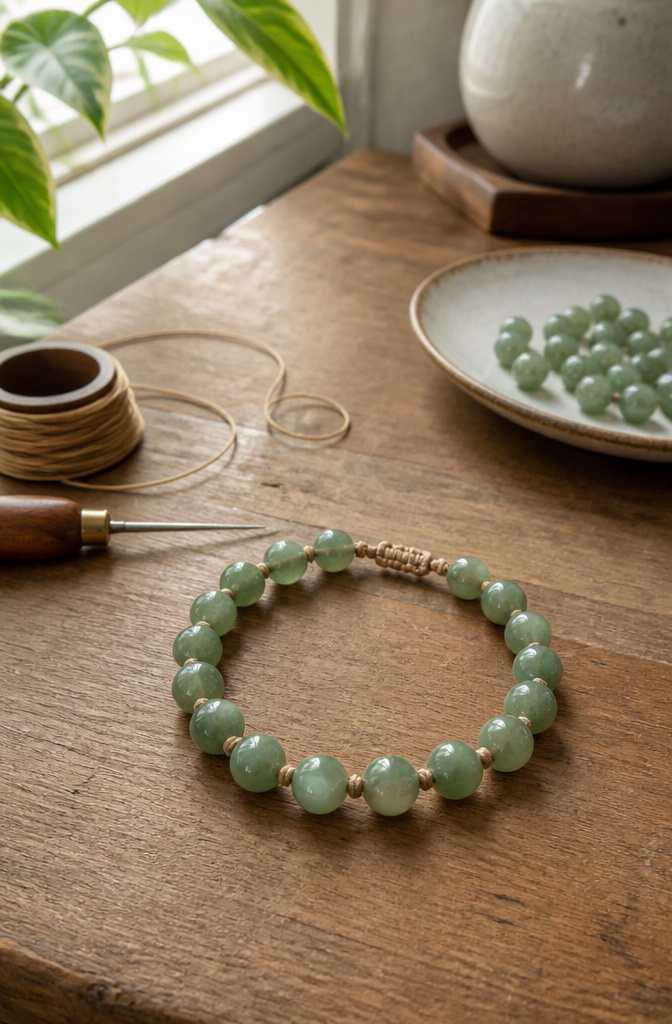
Silk cord gives jade beads a warmth that wire or chain never quite matches, but the pairing demands some restraint.
A 0.5 mm silk thread, the kind used for pearl knotting, sits cleanly through 6 mm jade rounds without bulking the holes or leaving the cord too proud of the bead.
Go thicker and the knot heads become obtrusive; go thinner and the weight of the stone, heavier than glass or most crystals, will saw through the fiber over months of wear.
The knot between every bead is non-negotiable with jade. Each 6 mm stone carries enough mass that a break anywhere in the strand turns into a scatter event rather than a controlled drape.
Traditional pearl knotting, where a single overhand knot is teased tight against the bead with an awl, works here but needs one modification: the knot should sit slightly back from the hole, not flush against it.
Jade’s polish is harder and more brittle than nacre, and a knot pulled too tight will eventually abrade the drill hole’s edge. That tiny gap, barely visible, absorbs the movement that would otherwise chisel the stone.
For a finished bracelet, nineteen 6 mm beads at that spacing lands near a standard 7 inch wrist. The silk stretches slightly in the first week of wear, so the initial fit should read a touch snug rather than perfect.


Processed From Green Taiwan Jade Stone.round shape, green consistency color with smooth surface .Size :6mm. Q’ty :63-66 Beads Per Strand (15"),Hole size:1mm

Size and quantity :6mm Round Beads, Hole Dia: 0.8mm, Approximately 60pcs / Strand
Winding Current Bracelet
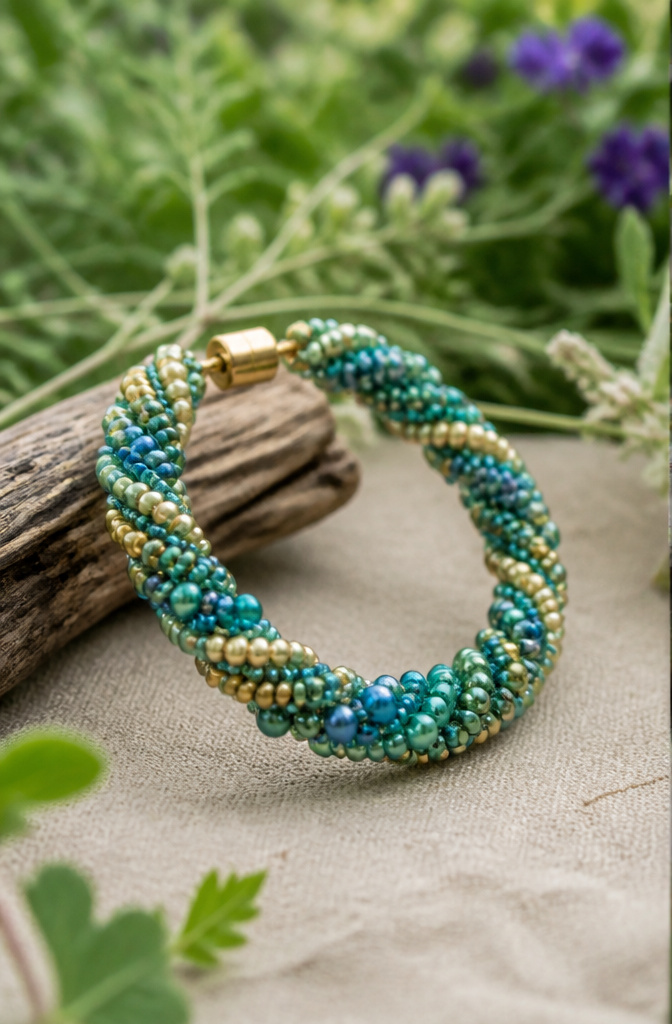
The winding effect in bracelet patterns with beads works best when each spiral sits at a slight diagonal rather than a true horizontal.
A single continuous thread carries seed beads in graduating sizes, letting the smaller ones pull the line inward while larger beads push the outer edge.
What convinced me, reading through a dozen of these tutorials, is that the tension matters more than the pattern itself. Pull too tight and the beads bunch like a slinky compressed; too loose and the gaps glare under light.
Two pounds of thread tension, tested against a fingertip, gives the steady drape that lets the spiral flow without collapsing.
Size 11/0 beads on the inner curve and 8/0 beads on the outer edge create the natural lean, but the real control comes from where you place the needle back through.
Enter one bead below center and the spiral tilts; enter dead center and the whole thing flattens into a plain stripe.
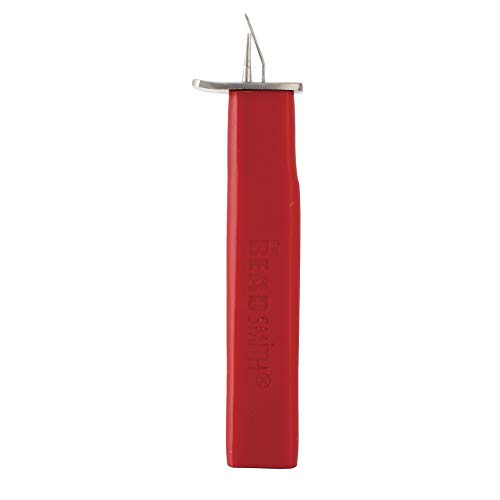
PROFESSIONAL KNOTTERS: Creates secure knots. Useful for stringing pearls and other types of beads.

KNOTTER KIT:Includes a knotter and 5 cards of 100% silk thread in random colors and random sizes.

┃100% SILK CORD┃: This silk thread contains five cards of white silk thread, 2#×1, 4#×2, 6#×2, (0.45mm/0.6mm/0.7mm) 2 meters per card.
Royal Ball Bracelet
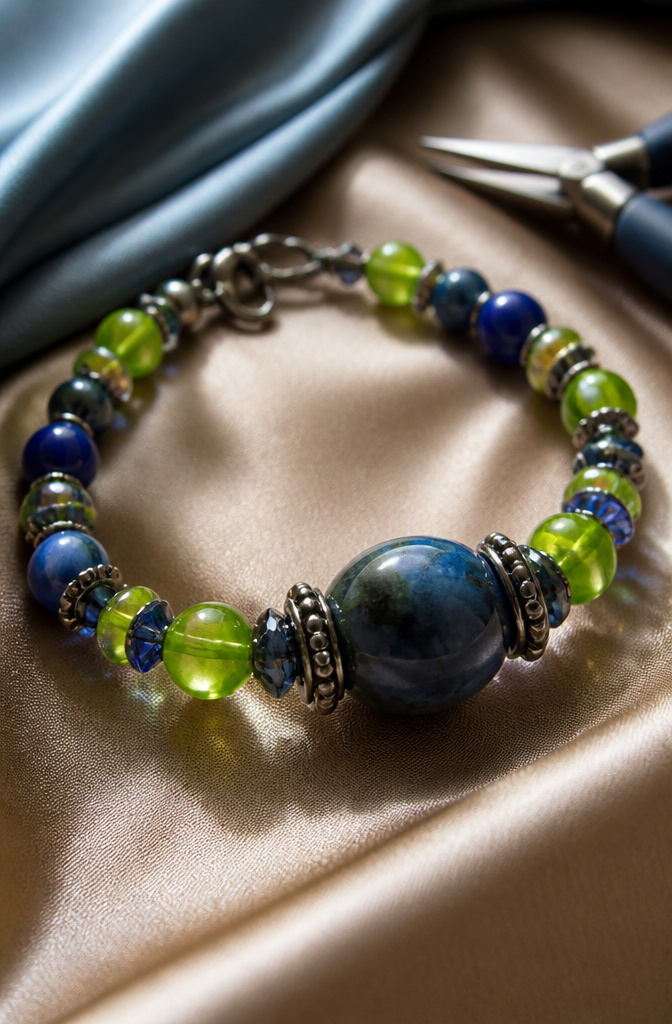
The Royal Ball bracelet pattern builds its whole look on a single ratio: one large focal bead flanked by much smaller accents. Focal beads run 6 mm to 10 mm, while the accent rondelles and bicones sit at 4 mm to 6 mm.
That gap in size is what creates the clustered, almost corsage-like effect.
Seed beads fill the remaining thread space and do the actual structural work. A 10 mm focal bead pairs with 6/0 and 12/0 seed beads; scale down to a 6 mm focal and you can run all 12/0.
The seed beads act as spacers and frame, letting the big beads sit proud without crowding each other.
Rondelles work particularly well here because their squashed profile leaves flat surfaces where the smaller beads can nest.
Two 6 mm rondelles bookending an 8 mm round, each capped with 4 mm bicones, builds a graduated cluster that reads formal from a distance and interesting up close.
The pattern repeats every few inches, so the bracelet keeps its rhythm without becoming a solid wall of beads.
Color blocking helps the size contrast read even stronger. One version pairs lime green focal rounds with dark green rondelles and slate blue small flats; another goes red and purple with gold seed beads.
The metal seed beads add warmth that clay or glass accents alone would flatten out.

♥Classic Boho Rice Bead Styling - Feature tiny glossy colorful seed beads paired with slim woven ropes, retro bohemian vibe. Delicate lightweight look, soft bright hues add subtle chic touch to your everyday casual outfits.

These Colorful Seed Beaded Bracelets are stunning!The size is suit for most women.

♥ Stackable Beaded Bracelets: Package have 30/36pcs beaded bracelets in different colors, stylish and simple, which can easily match your different outfits according to your moods. Suitable for all occasions with all kinds of outfits.
Raindrops Bracelet
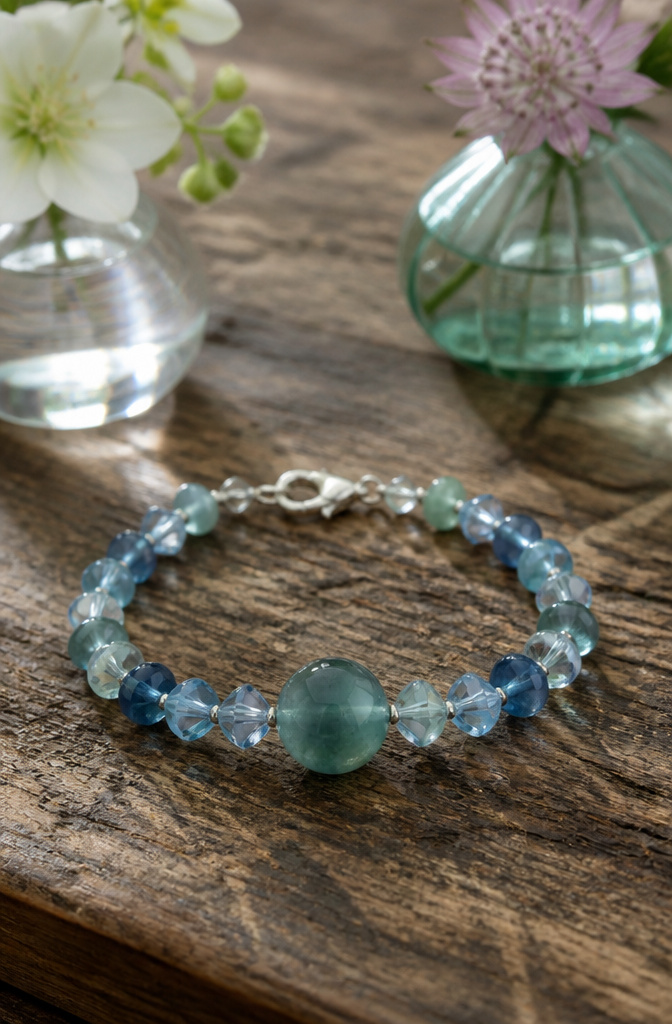
The Raindrops pattern lives or dies on graduated sizing.
Four bead sizes drop from large to small in a single unit: a 6–10mm round bead anchors the center, flanked by 6–8mm rondelles, then smaller flat rondelles or discs, and finally 4mm bicones at the tips.
The spacing between units is what sells the water effect. Seed beads fill the gaps, and their size shifts with your focal bead.
For a 10mm round center, 6/0 and 12/0 seed beads in combination keep the thread path tight; scale down to all 12/0s when your focal bead is 6mm.
I used twenty of the large rounds on my first attempt and ran short on a larger wrist. Twenty-four is the safer count if you are not working for a small frame.
The rondelles need only ten per bracelet, since each one sits between two focal beads, while the smaller flats and the bicones double that at twenty each. The color placement matters as much as the size.
Two ways to play it: keep the gradation in a single cool tone so the shape alone reads as falling water, or run the bicones in a flash of contrast that catches light at the points.
The single-tone version wins for everyday wear; the contrast version works when you want someone to ask where you got it.

┃METAL BEAD LOOM KIT┃: 1×Metal Bead Loom,3×Needle Threader,1×Cotton Thread,2×Needles,1×Bead Scoop,1 bag×Seed Beads,1×Instruction Manual.
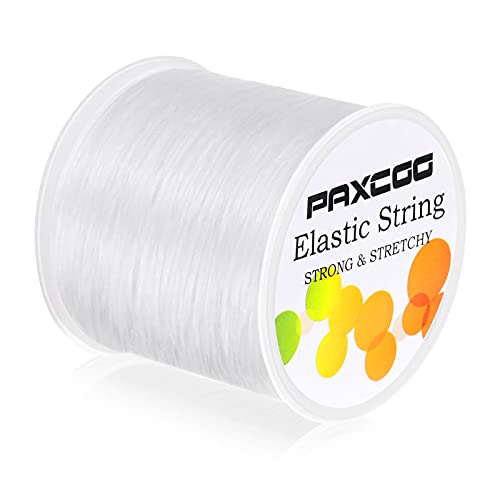
EASY TO TIE KNOTS: The elastic thread for bracelets is very flexible and can be threaded through both small and large beads, and is suitable for beads of all materials. The bead string is very simple to tie a knot to secure your bracelets and easily hide the knot among the beads

【TRIPLE PROTECTION BRACELET】- Crystal Vibe triple protection bracelet is made of high-quality real crystal stone brown tigers eye stone, obsidian stone and hematite stone beads, woven in the shape of a triangle, suitable for both men women, lightweight & easy to wear.
Moroccan Dreams Bracelet
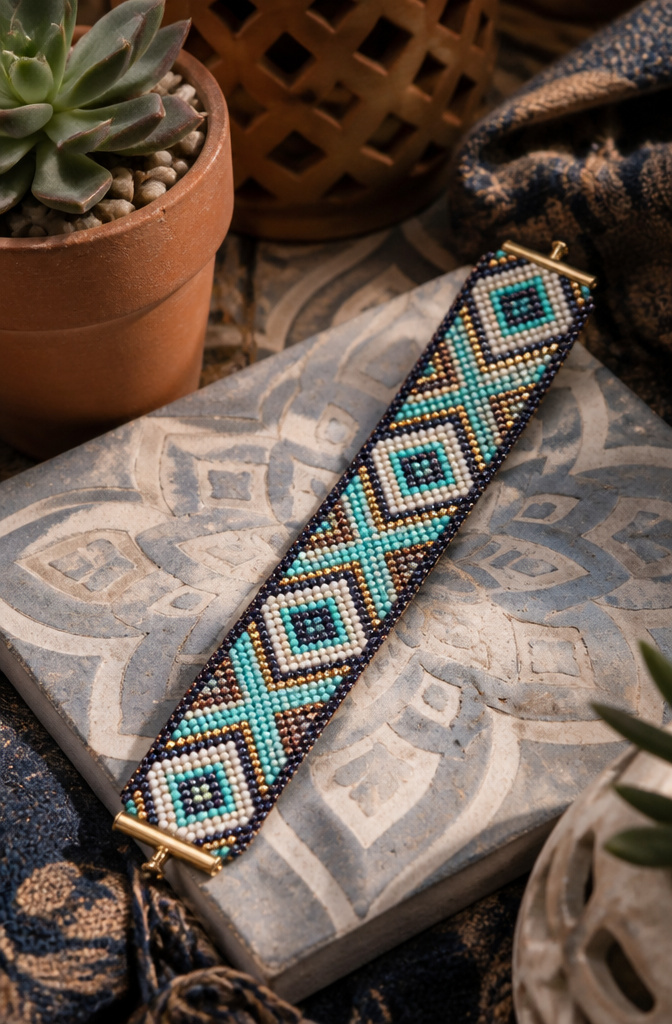
The Moroccan Dreams bracelet borrows its rhythm from the zellige tilework you see in Marrakech riads: repeating diamond blocks in two or three colors that read as geometry rather than stripe.
What convinced me, reading through a dozen of these patterns, is that the repeat length has to divide evenly into your finished bracelet length or the clasp lands mid-motif and the whole thing looks like a mistake.
Map your repeat before you string a single bead. Count out one full motif in your chosen colors, then multiply until you hit a number that matches your wrist size minus the clasp length.
For a 7-inch finished piece with a half-inch clasp, the repeat must fit into 6.5 inches exactly, whether that means four repeats or five.
If the math doesn’t work, adjust your bead size or add a narrow border row rather than forcing an awkward partial repeat at the ends.
A flat even-count peyote or herringbone weave carries this pattern best because the stepped edges echo the tile geometry.
The first few rows feel slow since you’re establishing the color logic, but once the repeat is muscle memory the work moves fast. The payoff is a bracelet that looks far more complex than the stitching actually is.

All-in-One Crafting Kit: A complete set for aspiring jewelry makers, featuring 3510pcs of 4mm seed beads, a convenient plastic organizer box with dividers, and a roll of durable 0.5mm elastic string.

Size: about 2.2mm in diameter; Hole: 0.6mm; 11/0 sliver line glass seed beads

ALL YOU NEED INCLUDED - This beads set includes everything you need to make jewelry, including 15500pcs 4mm glass seed beads 6/0, 400pcs letter beads, heart beads, evil eye beads, white shells and golden accessories in different styles. Jump rings, buckles, lobster buckles, scissors, tweezers, threading needles and crystal/nylon threads are also included
Sunburst Bracelet
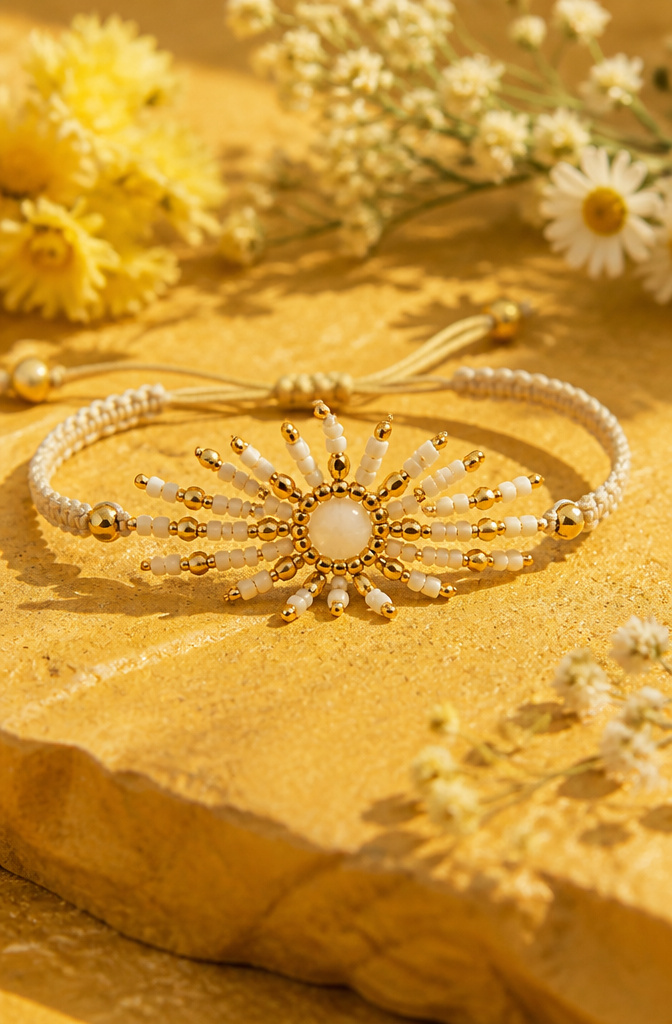
A sunburst bracelet lives or dies on one problem: the center bead wants to cup upward like a shallow bowl, and the rays splay unevenly across the wrist. The fix starts with the foundation row.
Most radial beadwork builds outward from a circular peyote or right-angle weave center. The mistake, made early and felt late, is treating that first ring like a flat disk.
It needs deliberate cupping, stitched two or three beads narrower than the final circumference so tension pulls the center flat when the rays are added. Without that negative space, the center pops.
The rays themselves, usually two-drop peyote or herringbone strips, attach at staggered intervals around the ring, not clustered.
Spacing them by skipping one bead between anchor points keeps the angle even and prevents the bunching that makes a sunburst look more like a ruffled collar.
Each ray gets its own small reinforcing ring of size 15 seed beads at the base, invisible from the front but critical for keeping the strip upright rather than flopping toward its neighbor.
Thread path matters here more than in linear bracelet patterns with beads. Back through the center ring twice after attaching every third ray, and the whole structure locks into a single plane.
Skip that step and the bracelet twists on the wrist, one ray riding higher than the rest.

Material:Natural Taiwan Green Jade
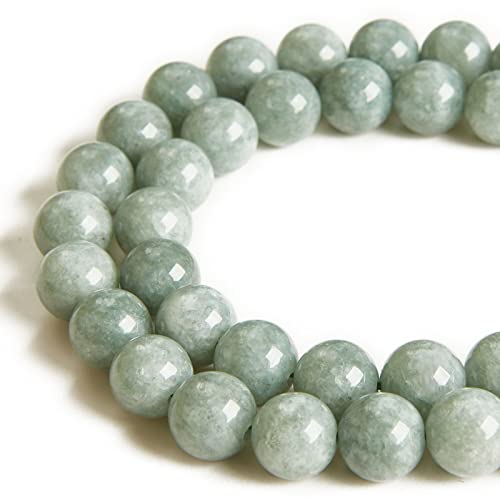
Our gemstone beads are 5A top quality, have energetic and healing properties, safty for heathy.

Color fast bright green color.
Vintage Bronze Bracelet
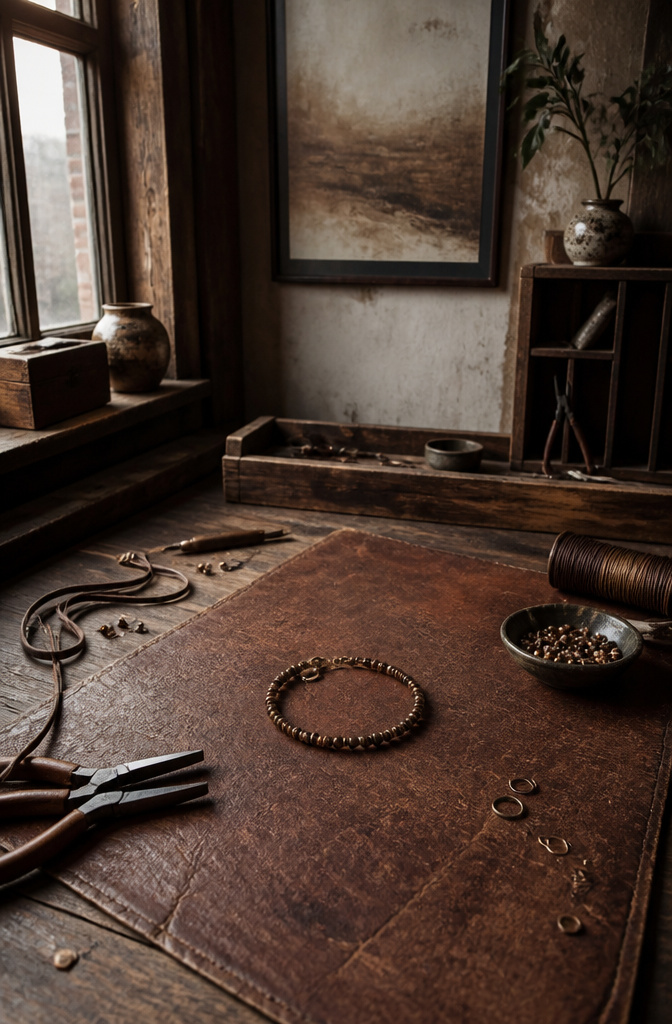
Bronze seed beads with a matte, oxidized finish read as genuinely old rather than merely brown.
The patina effect comes from uneven color distribution, so beads that vary slightly from coppery rose to near-black within the same strand work better than perfectly uniform tones.
Fire-polished Czech rounds in bronze Picasso coating pick up surface texture that catches light the way buried metal does once cleaned.
The costume-jewelry trap sits in pairing these beads with bright gold findings. Antiqued brass or gunmetal clasps and jump rings keep the timeline consistent.
Skip any bead with a mirror-like metallic coating; that factory shine fights the aged story you’re building.
A single strand of mixed bronze finishes, knotted on dark waxed linen rather than strung on beading wire, gives the weight and slight irregularity of a piece that existed before you made it.

Effortless Knotting: Pearl & Bead Knotting Tool with central peg for easy knot placement and even spacing

Woodland Owl Bracelet
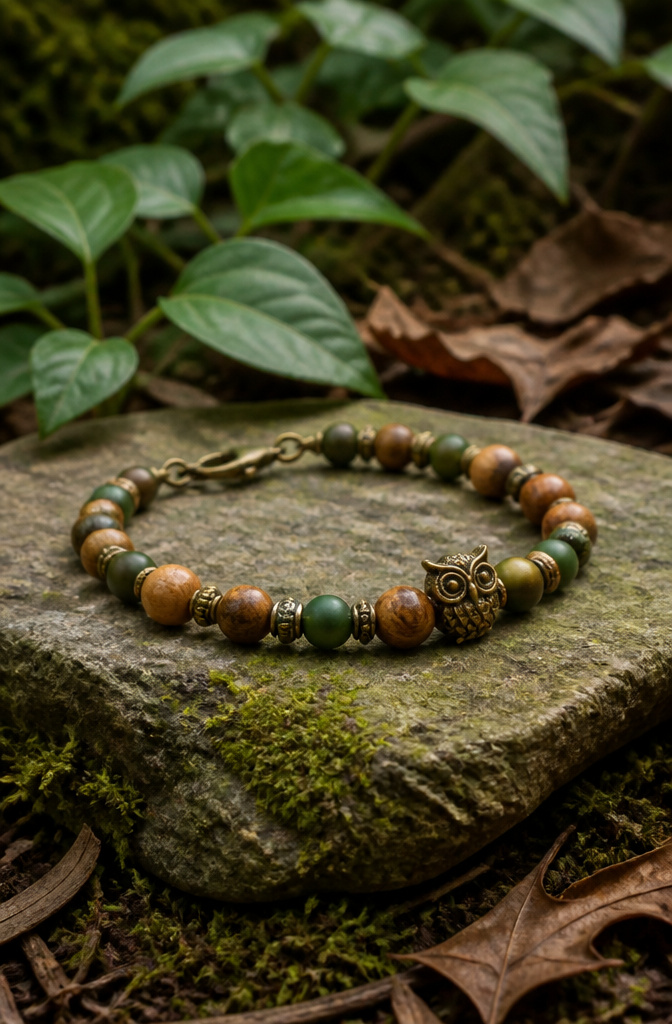
A nature bracelet needs restraint if it is not going to look like a toy from the zoo gift shop. The owl charm is the figurative anchor, but the surrounding beads do most of the visual work.
Wood-toned rounds in walnut and birch set the forest floor, while two or three matte green accent beads spaced unevenly suggest leaves without drawing them literally.
The charm belongs at the clasp side or slightly off-center, never dead middle; center placement reads as a pendant that slid down the wrist and stayed there.
The balance works best when about one fifth of the bracelet is representational and the rest stays abstract.
I have seen versions where every second bead tries to be a mushroom or an acorn, and the eye has nowhere to rest.
A single owl, maybe a small leaf charm at the opposite end for counterweight, keeps the story intact while letting the wood grain and the quiet green do their job.
The thread shows less with dark brown cord against these tones, which matters on patterns like right-angle weave where thread paths can gap.

♥ Stackable Beaded Bracelets: Package have 30/36pcs beaded bracelets in different colors, stylish and simple, which can easily match your different outfits according to your moods. Suitable for all occasions with all kinds of outfits.

Goldenlines Nepal bracelets

12 randomly selected large bracelets
Aqua Aura Bracelet
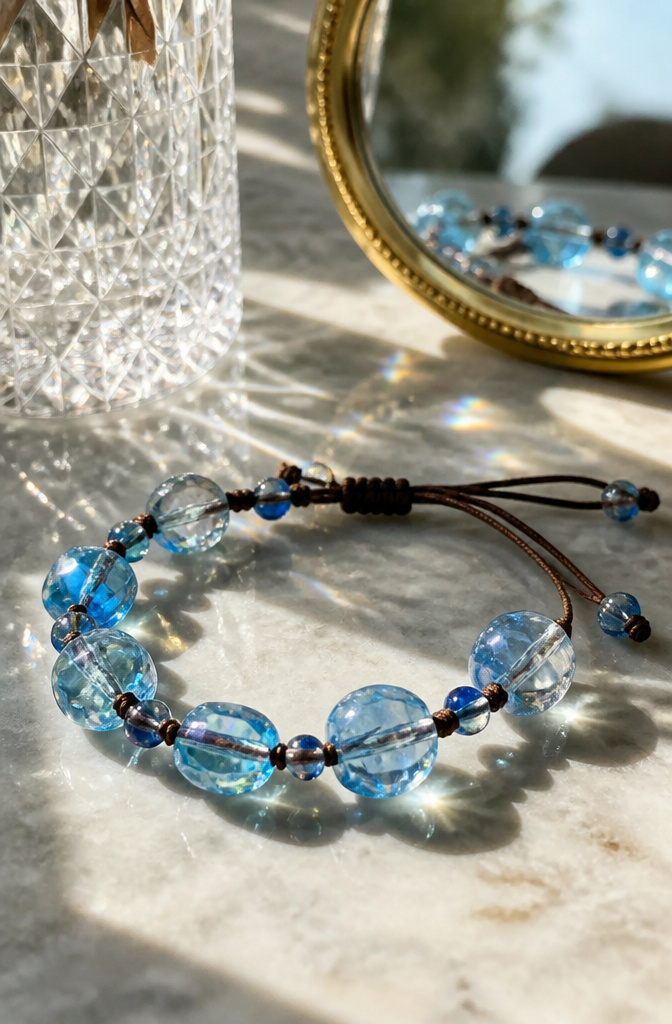
Aqua Aura quartz carries a thin coating of metal over clear crystal, which gives it that electric blue-silver flash but also keeps the beads surprisingly light.
The first time I worked with them, I strung them on standard waxed cord and the whole bracelet felt stiff and top-heavy, like the beads were floating above the wrist instead of settling onto it.
Switching to a lighter cord, something in the 0.5 mm range, fixed the balance completely.
The reduced weight lets the beads sit closer to the skin, and the flash actually reads better at that angle, catching light in short glints rather than glaring.
I use a simple ladder stitch with these, nothing elaborate, because the coating already does the visual work.
The metal surface can chip at the drill holes if you force knots through too tight, so a needle threader saves frustration here.
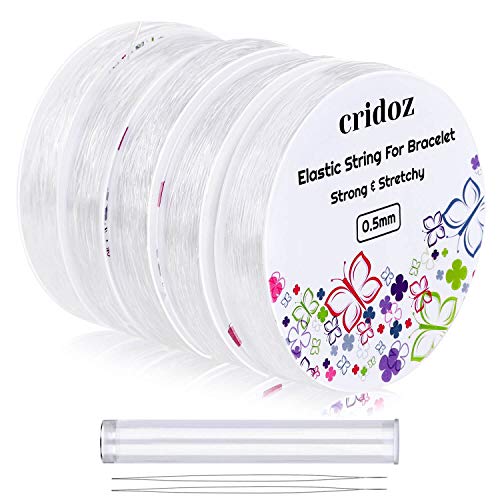
Stretchy String for Bracelets: Cridoz elastic string kit comes with 5 rolls of different sizes clear elastic cord for bracelets and 2 pieces of large eye beading needles, great for seed beads, pony beads, friendship bracelets, Kandi necklace, crafts and jewelry making

GREAT VALUE BRACELET MAKING KIT: The package comes with 12 rolls of stretch cord for bracelets in assorted colors that are perfect for seed beads, pony beads, clay beads, bracelets, necklaces, beading, jewelry making and DIY crafts

COMPLETE JEWELRY KIT: Includes the adjustable loom, assorted beads, durable threads, and beading needles. Everything needed to start creating custom jewelry, headbands, or belts right out of the box.
Gemstone Ombre Bracelet
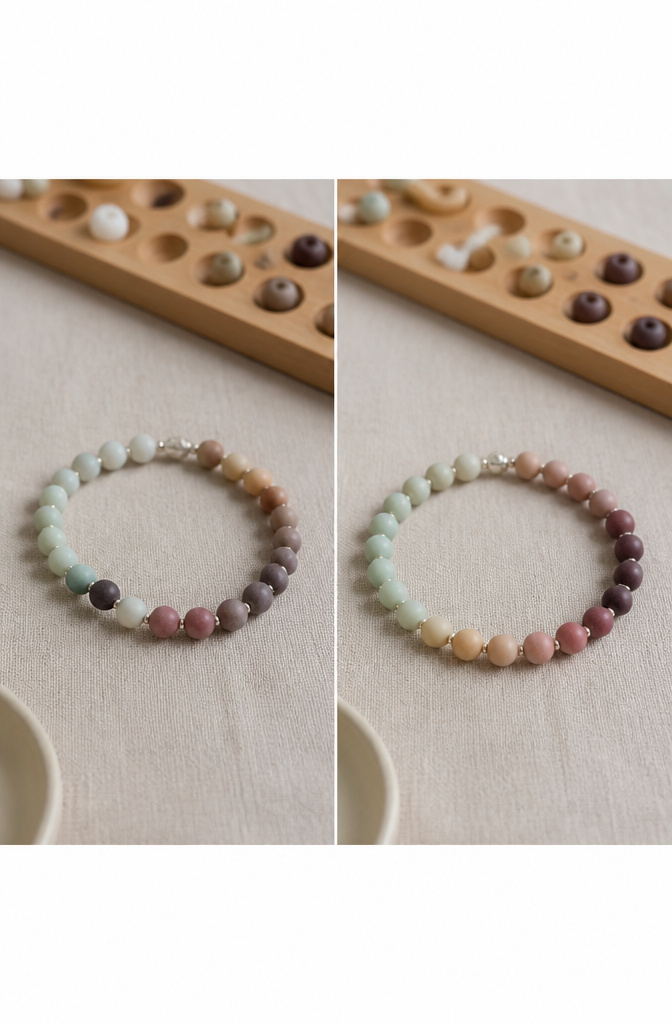
A gradient bracelet built from a single gemstone type lives or dies on how many shades sit between the palest and darkest bead.
Three tones will read as stripes; five to seven give the eye enough steps to read the shift as continuous color. The break points, where one strand ends and the next begins, are the danger zones.
They tend to show most where the wrist bends and the beads pull apart slightly, so the transition needs its mid-tone beads packed most densely at the bracelet’s center, not spaced evenly from end to end.
Threading order matters more than spacing. I lay the full sequence out on a bead board first, then move beads one position left or right until no two identical shades sit adjacent.
The wrist is small enough that the full gradient only completes about two-thirds of the way around; the clasp covers the rest, which is why starting at the palest end and darkening toward the center flatters most skin tones.
The back of the wrist catches light differently, and a too-dark band there can look like a bruise from a few feet away.
Silk thread shows the color transitions more cleanly than nylon, which has a slight sheen that competes with matte stones like rose quartz or matte-finish amazonite.
A size 8 bead is the practical minimum; anything smaller and the shade differences blur into mud at arm’s length.

Glass seed bead Material: Glass; 24 color Assortment in box

【GREAT VALUE KIT】 11/0 (2mm) glass seed beads in a total of 24 colors, with a 24 grid plastic storage box(bubble wrap on box lid), two rolls of 0.5mm clear bracelet string, 1 tweezer and 1 scissor. These impressive rainbow seed beads boast that every color is totally different and bright so that everyone will find their own color to make necklaces, bracelets, hair braids and other DIY projects.

Kit contains: 10000pcs 3mm seed beads, 80pcs jump rings, 40pcs buckles, 20pcs lobster clasps and 1 roll 0.6mm crystal threads. Great value set almost meet your needs of jewelry making and craft objects.
Harvest Bracelet
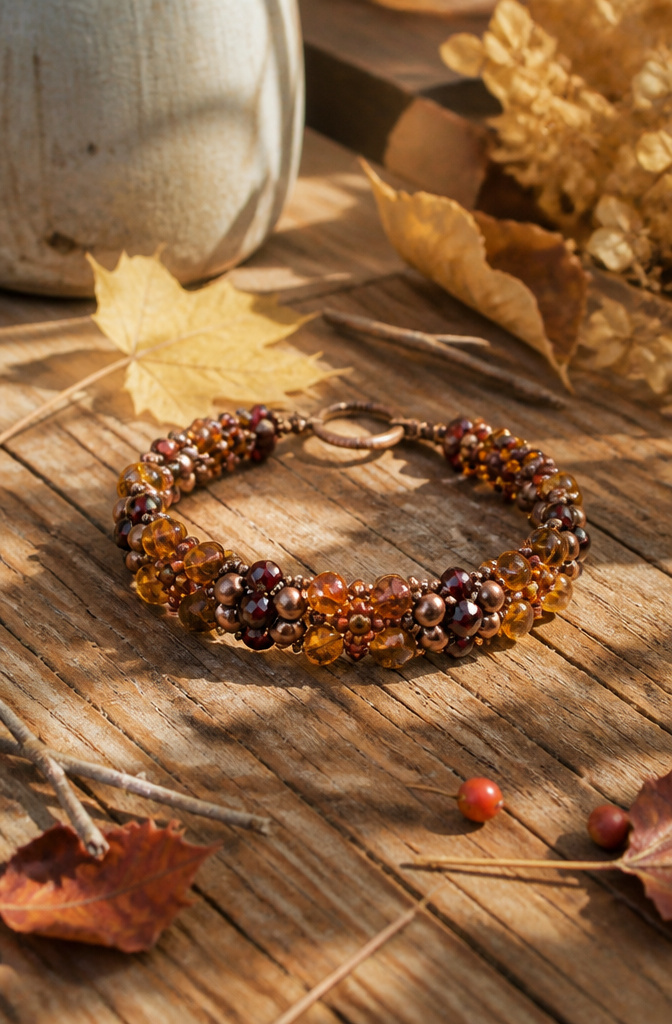
Amber beads catch light differently depending on their finish, and the Harvest Bracelet leans hard into that split. Matte honey-toned rounds sit next to glossy copper spacers and deep red faceted Czech glass, so the wrist never reads as flat.
The trick is deliberate placement. Matte beads need glossy neighbors to keep them from going dull, and glossy ones need matte beads to stop the whole piece from looking like costume jewelry.
I space matte amber every third bead, minimum, with copper tubes or red fire-polished rounds between. Too many mattes in a row and the bracelet looks dusty; too much gloss and it shouts.
Texture mixing also means varying the bead size in a controlled way. I use 6 mm rounds as the backbone, 4 mm copper cubes for rhythm, and occasional 8 mm red rondelles as accents.
The size jump has to be gradual or the weaving distorts. Flat herringbone stitch handles this well, since the thread path lets you nest smaller beads into the gaps between larger ones without showing the base.
Mermaid Whispers Bracelet
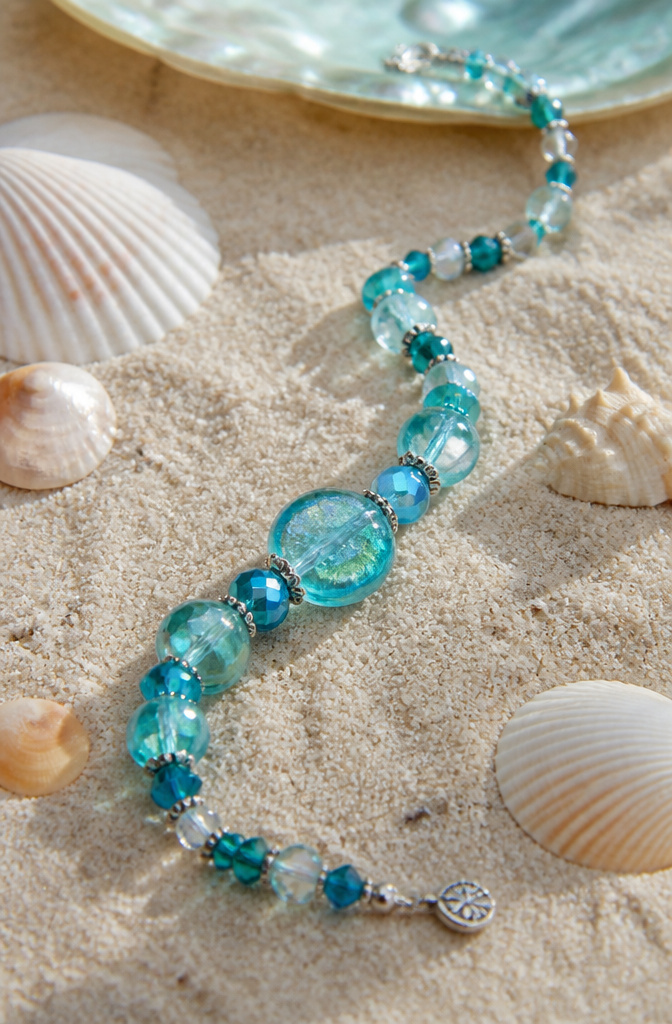
Aqua glass beads the size of watermelon seeds, interlaced with smaller teal fire-polished rounds and the occasional rice-shaped pearl, give this pattern its underwater shimmer. The trick is the drape.
I strung my first attempt on beading wire, and it hung like a curtain rod, every bead locked in place. Switching to a loose right-angle weave with size 11 seed beads as the thread path changed everything.
The base layer flexes, so the larger beads shift slightly with wrist movement, catching light at different angles the way sun slices through water.
Pearls sit only at the center and the two taper points. Any more, and the bracelet gets heavy enough to cancel the fluid effect.
The teal rounds graduate from 4 mm at the clasp to 6 mm at center, which sounds minor until you see the resulting slope.
It makes the whole piece read as descending rather than sitting flat, a distinction that took me three tries to get right.
For thread, ordinary Nymo works fine if you condition it well. The one detail I would not skip: wax the working length twice, not once.
Unwaxed thread in this weave fuzzes and jams at the turns.
Midnight Mallard Bracelet
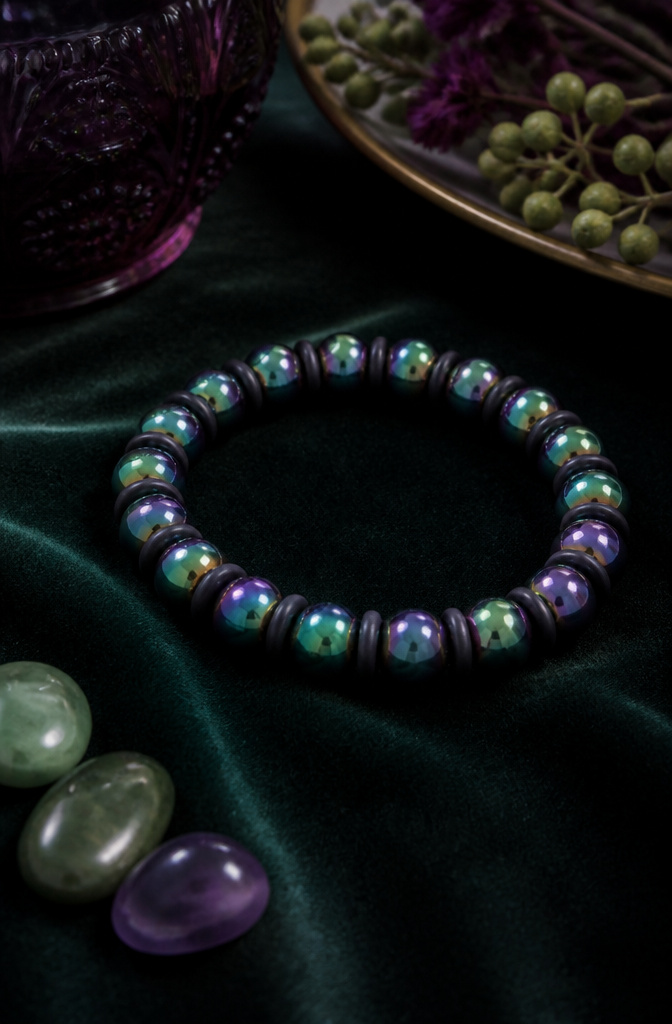
The first time I tried to weave with a green-purple color-shifting bead, the strand looked muddy under my kitchen light and almost electric by the window.
That bead is called Midnight Mallard, named for the iridescent neck feather of the duck, and it only shows its full shift against a dark base.
Without that black or deep navy foundation, the color play flattens into a dull olive that reads as cheap metallic rather than living iridescence.
Under warm incandescent bulbs, the green dominates and the bracelet reads as forest shadow. Move it into daylight or cool LED and the purple wakes up, sliding across each rounded surface as the wrist turns.
The effect is subtle, not costume, but only if the surrounding beads are matte black or very dark gunmetal. Glossy dark beads compete and steal the light.
I learned to test the whole strand under at least two light sources before committing to the pattern. A design that looks balanced at the bead table can read as half-dead under restaurant lighting.
The shift bead does the work; the dark base stays quiet and lets it happen.
Christmas Charm Bracelet
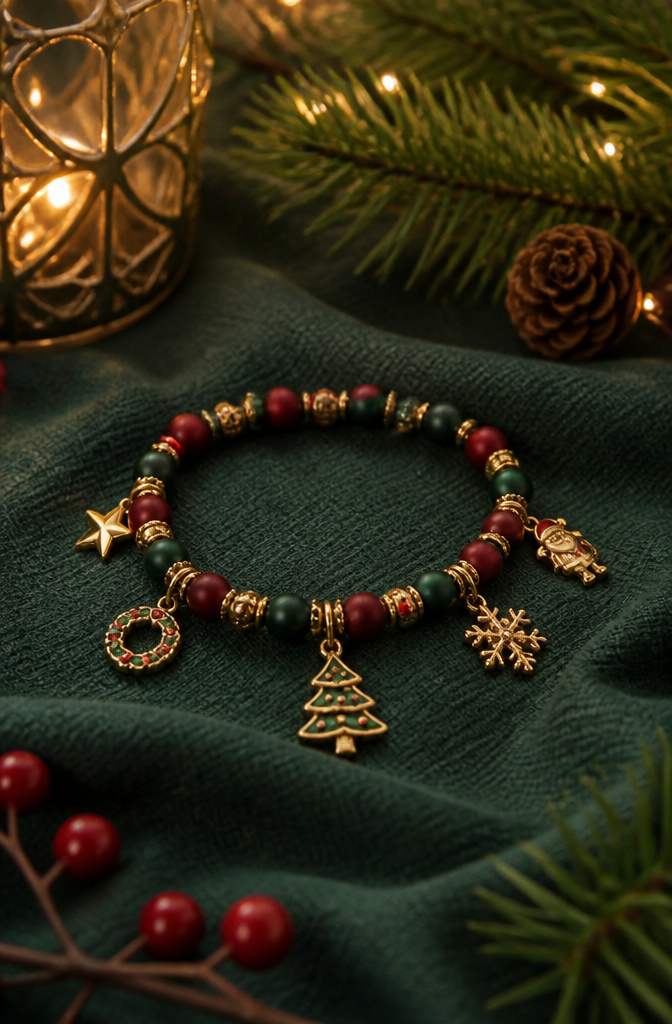
A Christmas bracelet lives or dies on restraint. Red, green and gold beads read festive in small doses; pack too many charms on and the thing drags like a pocket full of loose change.
I learned the weight lesson the hard way the first holiday I tried this pattern.
Metal snowflakes and tiny reindeer looked delicate on the table, but five of them on a single strand turned the bracelet into a wrist alarm clock, clanking every time I moved.
Now I limit metal charms to two or three per bracelet, spaced between lightweight seed beads in matte cranberry and forest green. The beads carry the color story; the charms just punctuate it.
For attachment, a simple jump ring works fine for flat charms. Anything three-dimensional, like a tiny bell or a wrapped gift, needs a split ring or it will torque sideways and snag sweaters.
I thread the charms directly onto the beading wire between bead clusters rather than dangling them from separate lengths of chain; this keeps the profile low and the weight distributed along the strand instead of concentrated at a few droop points.
Elegant Stacked Crystal Bracelet

Crystal beads in graduated sizes, stacked in clusters along a single strand, give the wrist a layered look without the tangle of multiple bracelets.
The technique sounds simple enough: thread a larger bead, then nestle smaller crystals around it like petals, securing the cluster with a tight pass back through the anchor bead.
What convinced me, reading through a dozen variations of this, is how quickly the whole thing collapses flat against the skin if the gradation is wrong.
The smallest crystals need to sit a full size below the anchor, not just one millimeter down. Anything closer and the cluster reads as a messy bump rather than a deliberate dome.
A dab of clear jeweler’s glue on the thread path between the anchor and its satellites helps too, though too much stiffens the strand so it won’t curve.
The bracelets that last keep the clusters spaced with a few plain seed beads between, letting each stack catch light from its own angle.
Crystal Heishi Bracelet
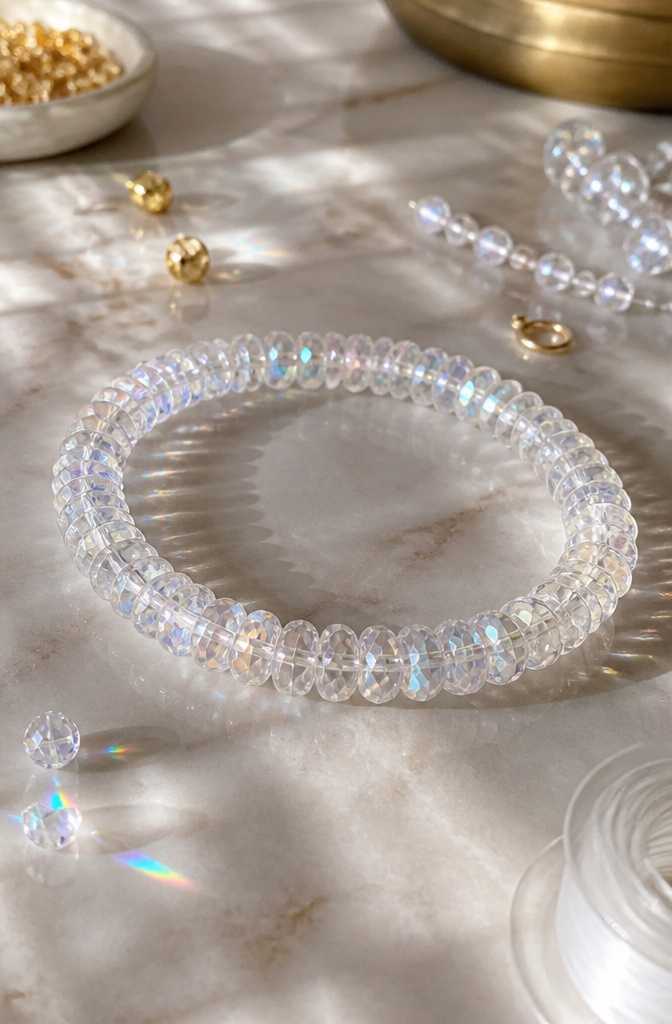
Crystal heishi beads sit almost flush against one another, so the cord between them needs to disappear without letting the beads slide into a wavy line.
Elastic cord, sometimes sold as crystal string, is the material that fills that hole snugly and still gives the bracelet enough stretch to pull over the hand.
I learned this the hard way after trying nylon thread on my first attempt; the beads collapsed into a zigzag the moment I moved my wrist.
Clear elastic cord works if you want the beads to read as a solid shimmer, though colored elastic string is easy enough to find and can add a subtle undertone when the light catches the edges.
The stretch means you skip the clasp entirely, which matters more than I expected on a band this thin, where a lobster claw would dwarf the whole design. Crimping beads and small jewelry pliers finish the ends.
A bead board or just a piece of felt keeps the tiny discs from rolling off the table while you work out the length.
Lapis Multistrand Bracelet

A lapis lazuli multistrand bracelet needs some kind of order, or the strands end up looking like dropped spaghetti.
Three to five strands of deep blue stone with gold spacer beads gives the right density without weight that drags at the clasp.
The bead-tip method is what keeps the ends clean. Each strand gets its own tip: knot the thread, add a drop of glue, then fold the metal over the knot with needle-nose pliers so the loop faces outward.
Repeat for every strand, then gather all the loops onto one jump ring at each end. The second jump ring holds the lobster claw clasp.
Keeping the strands from twisting means laying them out flat after every few inches of stringing, not finishing all five and hoping they behave.
A beading needle helps thread the smaller accent beads, and matching bead length to wrist size matters more here than on a single strand because the bulk changes how it sits.
Two looks are possible. Keep every strand identical for something formal, or stagger the gold spacers so the strands read as one rippling surface.
Twisting them together on purpose gives a different, bohemian result, but that only works if you planned it.
Memory Locket Bracelet
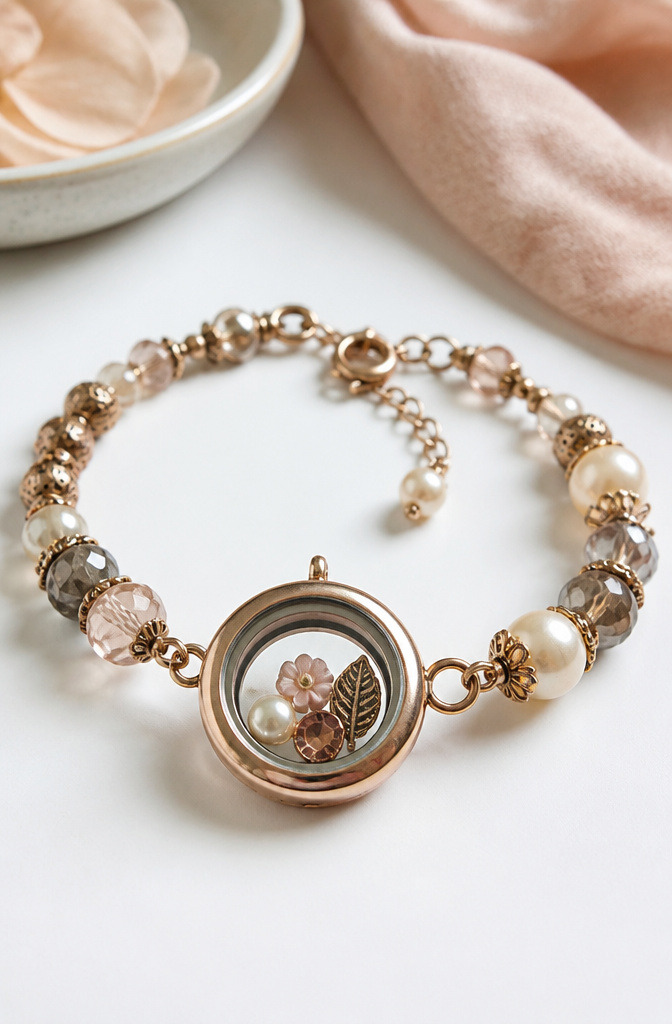
A memory locket bracelet pairs a small glass chamber with beaded strands, but the locket’s brass or silver frame throws off the balance the moment you lift your wrist.
The glass face wants to swing face-down, which defeats the whole point of wearing something meant to display.
What convinced me, reading through a dozen of these builds, is that the fix is counter-weighting the opposite strand, not padding the locket side. Seed beads alone will not do it.
You need something denser on the back half: metal heishi, small stone chips, or even a secondary locket if the design can handle the bulk. The goal is matching the locket’s gram-for-gram pull so the chamber settles naturally upright.
Placement matters as much as material. A locket set dead center fights gravity harder than one riding slightly above the wrist bone, where the arm’s natural curve cradles it.
Thread the locket onto a short beaded segment rather than wiring it directly to the clasp; that slight chain slack lets it self-level instead of locking into whatever angle the clasp dictates.
For the keepsake inside, flat objects beat chunky ones. A pressed flower or thin photo paper adds almost no weight, while a rolled note or tiny charm tips the balance you just corrected.
Resin the keepsake in place if you plan to wear this daily; the glass is not waterproof, and moisture inside shifts the weight unpredictably.
Twisted Macramé Bracelet
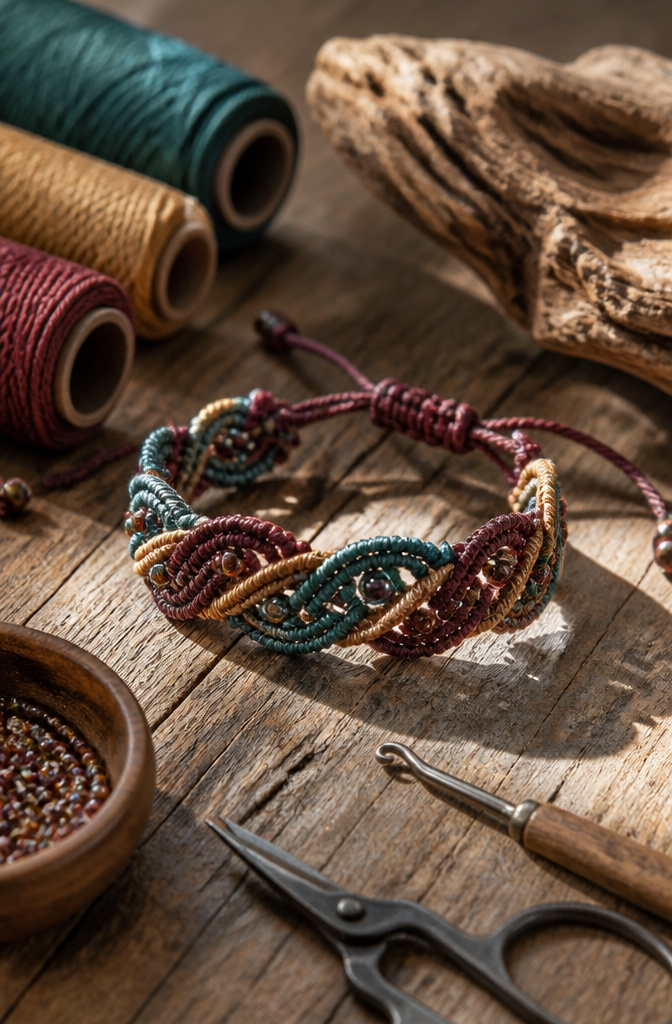
Twisted macramé bracelets live somewhere between fiber craft and jewelry, and getting the cord right makes or breaks the hybrid. Too thick and the beads won’t thread; too thin and the spiral structure collapses into a limp string.
Waxed cord around 0.8–1 mm hits the balance, stiff enough to hold a square-knot spiral yet narrow enough to pass through most seed-bead and small gemstone holes without a fight.
The bead placement matters more than the knot pattern itself. In a standard two-strand twist, you’re alternating half-knots left and right to build that corkscrew.
The moment a bead locks between strands, it arrests the rotation that forms the spiral. Slide beads onto one working cord only, not both, and set them in the gaps between half-knot pairs rather than at the knot itself.
Two plain half-knots right, one bead fed through the left cord, two half-knots left to resume the twist, bead again. The spiral keeps its geometry, the beads read as a dotted line running through it.
What convinced me, reading through a dozen tutorials that skipped this, was the ones that hid beads at the knot joints all ended up with that awkward lumpy tube instead of a clean twist.
Chunky Labradorite Bracelet
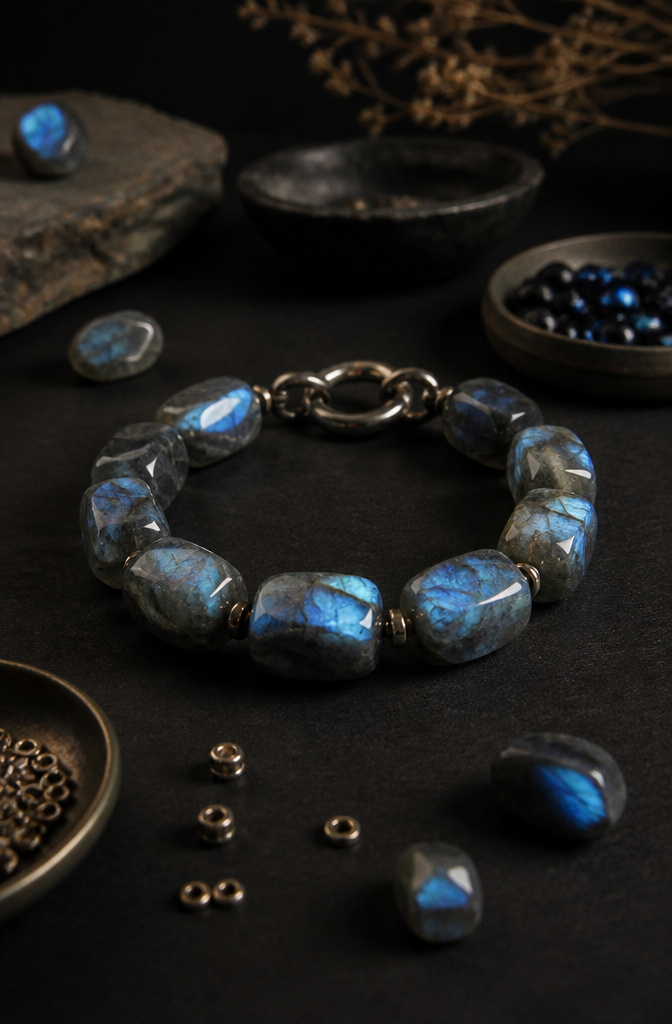
Labradorite’s blue flash lives or dies by how the bead sits against the wrist. Drilling through the broad face, what cutters call top-to-bottom orientation, buries that schiller effect where no one sees it.
Side drilling, straight through the narrow edge, catches light across the whole stone with every movement of the hand.
The first time I sorted a strand of these myself, the difference between the two orientations stopped me mid-count; same rough material, two completely different bracelets.
A heavy clasp, not stretch cord, is non-negotiable here. Large labradorite runs heavier than it looks, and the cumulative weight of twelve to fifteen stones will torque an elastic thread into a sagging oval within days.
A lobster claw or box clasp on bead wire distributes that load across the whole piece.
I learned this the hard way on a strand of 14 mm rounds that looked fine on the board and lasted one evening before the cord went slack.
Frequently Asked Questions
How many clay beads make a bracelet?
For an adult with small to medium hands, 125-150 clay beads will make a bracelet. You may need more or less depending on wrist size and how tightly you pack them.
What string do you use for clay bead bracelets?
Elastic cord, sometimes called crystal string, works best. It lets the beads sit close together while giving enough stretch to pull the bracelet over your hand without a clasp.
Are clay bead bracelets waterproof?
Polymer clay itself is waterproof, but the string, charms, and other materials on most bracelets may not hold up to soaking. Keep them dry to preserve the whole piece.
Can clay beads be washed?
Yes, wash them gently with soap and water. Avoid soaking the cord or any metal findings that might tarnish or weaken.
What materials do I need to make a beaded bracelet?
Basic materials include beads, elastic cord, scissors, and clasps. A bead board or piece of felt helps keep tiny discs from rolling, and jeweler’s glue or E-6000 can secure knots and ends.