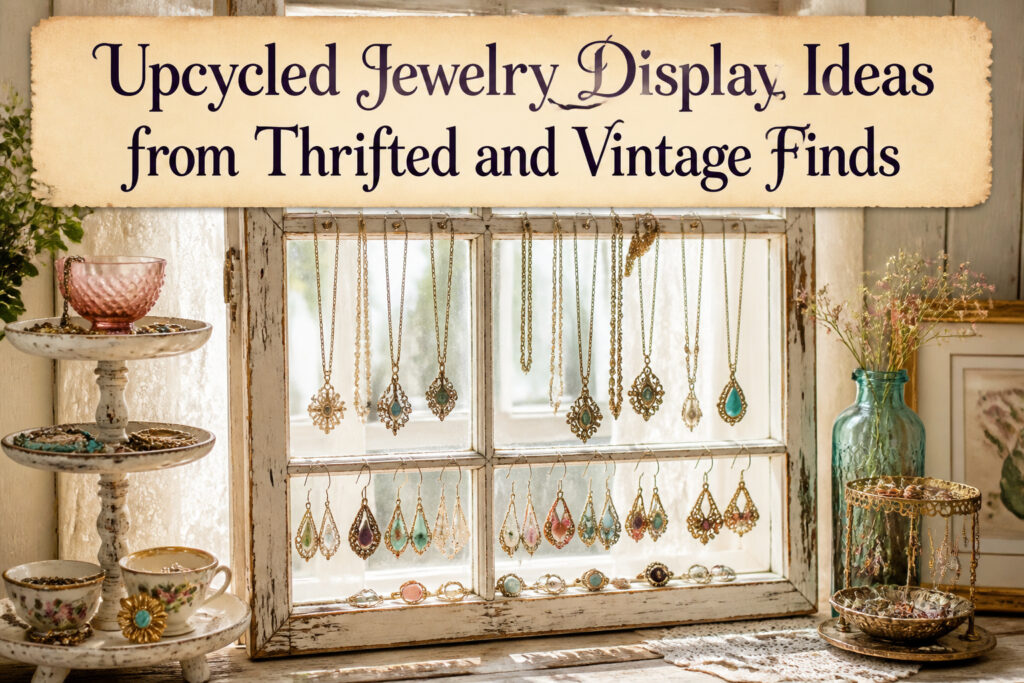
An upcycled jewelry display turns thrifted and vintage objects into fixtures that hold necklaces, earrings, and rings without the cost of manufactured stands.
The catch is structure: a piece needs flat surfaces or grip points that hooks and posts can actually use, and not every vintage find has them.
A three-dollar plant stand works because its tiered shelves stagger height naturally, but a Dremel may be needed just to start pilot holes in the hard old wood.
Vintage Plant Stands

A $3.00 vintage plant stand from a thrift shop already has the tiered structure jewelry needs. The round shelves sit at staggered heights, so necklaces hang at different levels instead of tangling together.
Small earrings and rings tuck onto the upper tiers where they stay visible.
The wood on older stands can run hard, which means cup hooks need a pilot hole first. A rotary tool with a small bit starts the opening without splitting the grain.
One hole in each corner and another halfway between gives five hooks per tier, enough to space pieces so they do not crowd.
Paint is optional. The original chipped enamel or aged wood fits a vintage jewelry line; a single coat of matte black pulls it toward modern instead.
The stand that cost three dollars and an hour of drilling becomes the backbone of a booth display or a bedroom corner.
I have seen vendors at Treasure Island Flea use nothing else, the plant stands doing all the work while the jewelry gets the attention.

Large-capacity Bracelet Holder Display:It can hold bracelets,key chains,etc.With a three-layer design,this Bracelet holder organizer allows flexible height adjustment for practical use and rotates 360°for easy item access.

3‑Tier Clear Visibility: Stepped design prevents blocking, so every item from LEGO minifigures to perfume bottles gets full view. No more hidden pieces in the back.

Package Included: 2 set of wooden tiered earring display stands; Wood Board Size: 15.35 x 3 x 0.63 inch; Card Groove Width: 2mm
Repurposed Drawers

A single drawer with inside measurements of about 10 by 11 inches makes an ideal shallow necklace holder. Shallow works better than deep here; the jewelry stays visible and the piece stays light enough to wall-mount without drama.
The hunt for drawers is its own skill. Thrift stores and flea markets stack them loose or sell the whole damaged dresser for next to nothing.
I look for solid fronts and sides that are not warped, since a twisted drawer will never sit flat against the wall.
Hardware stores charge for lumber what you will pay for the whole assembled piece, so the math favors patience.
For the finish, Rustoleum Chalked paint in Charcoal covers in about two coats with a decent brush. Prime first if you are going lighter; charcoal hides enough that I skip it.
A protective topcoat like furniture wax keeps the surface from looking tired after a few months of necklaces sliding across it.
Line the interior with a single 12 by 12 inch sheet of scrapbook paper. Tape the corners if you want to swap patterns later, or decoupage if you want it permanent.
Flip the drawer so you are drilling into what was the front face. Five pilot holes do the job: three across the front, two behind them staggered in a zigzag.
The staggered layout keeps chains from tangling and lets each piece breathe. Twist in cup hooks by hand; the pilot holes save you from splitting the wood but still need some grip.
Stop before you drill through to the front.

Package Included: this set includes 2 wooden wall hangers, complete with all necessary mounting hardware for immediate installation; Perfect for creating balanced and symmetrical displays on your porch, patio, or indoor wall; The ready-to-hang kit saves you time and effort, offering double the value and decorative impact in a single purchase
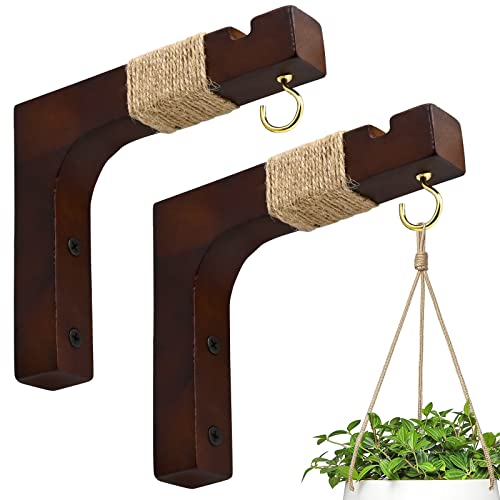
【Unique Rustic Farmhouse Style Design】The natural wooden plant hanger hooks especialy designed for plant lovers, these have a sleek design with an indent at the top and a hooks at the end to secure your plant ring or string in place to prevent it from sliding around. They are smooth with no rough edges or splinters, so you can place them wherever you'd like without the worry of getting poked. Unique hemp rope design attached on plant hooks for wall add more beauty for minimalist farmhouse decor.

1.Decorative & Functional:You will receive a set of 3 vintage white wall-mounted coffee cup organizers, each measuring 16.5x1x0.5 inch. These stylish coffee cup wall racks are designed in the shape of a coffee tree, offering a simple yet elegant addition to your home decor. Whether your style is modern, vintage, or industrial, these wall mounted coffee cup holders will seamlessly blend in. Display your mug collection while adding a warm and inviting atmosphere to your kitchen, coffee bar, or dining room.
Cardboard Portfolio Displays

A recycled portfolio with a cardboard core folds down to something you can carry under one arm and opens into a standing display that actually stays upright on a wobbly folding table.
The one I kept coming back to measured 28 inches high with each side 15 inches across and a 3-inch spine, which turned out to be just enough width to let a necklace hang without swinging into its neighbor.
The cardboard core matters more than the cover material. Fabric or vinyl on the outside is fine for looks, but the spine needs that 3-inch width to create a stable triangle when opened.
Anything narrower and the thing starts to fold in on itself by mid-afternoon, especially if humidity is doing its usual number on the venue.
Transport is where this pays off. Closed, it slides flat between bins or straps to a hand truck.
Open, it gives you two vertical panels without the weight of wood or the bulk of a picture frame.
I lined mine with leftover velvet from another project, though any fabric with a bit of nap will keep hooks from sliding.
The mistake most people make is loading both sides equally; leave one side lighter, or the portfolio slowly pirouettes toward the heavier end all day.
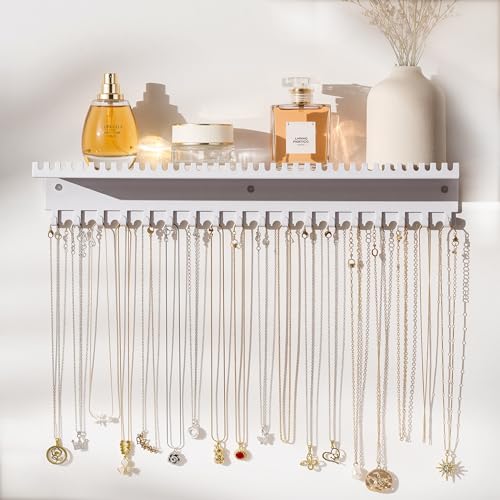
Ample Storage Capacity: Featuring 56 hooks, this organizer can neatly hold numerous necklaces, bracelets, and bangles. Say goodbye to tangled jewelry and hello to effortless organization.

Tangle Free Necklace Holder: This necklace organizer is designed for rings, necklaces, and bracelets, especially for longer necklaces that have to be folded up to fit inside the jewelry box, what a mess of necklaces. This necklace holder is perfect for keeping delicate chain necklaces separated & tangle free.

Wall mounted wooden necklace hanger in two color selection, perfect for keeping delicate necklaces separate & tangle free
Frames with Chicken Wire

Old frames with damaged glass or missing backing boards sell for next to nothing at thrift stores, and that damage is exactly what makes them useful.
The assembly is straightforward: remove the glass entirely, cut a piece of chicken wire to fit the opening, and staple it across the back.
Wire mesh with half-inch openings holds most earring posts without letting them slip through, though heavier statement pieces may need slightly tighter weave.
Frames with existing hanging hardware already point the way to wall mounting. For tabletop use, a small easel behind the frame does the work.
Paint the frame first if the finish clashes with your display, or leave the chipped gilt and water marks if the worn look suits the jewelry.
The real thrift store move is checking the frame’s depth. Deeper rabbit (the groove that holds the backing) means the wire sits recessed and earrings lie flat against the wall instead of tilting forward.
A shallow rabbit leaves hardware visible from the side, which reads as unfinished rather than rustic.
A quick test with the edge of a credit card against the groove tells you which kind you’re holding before you pay the three dollars and haul it home.

adhesive necklace hook necklace hanging storage white upgrage Extended

Multi-Functional Wall Storage Rack Set: Comes with 2 multi-functional storage racks, each with 3 square adhesive pads for easy wall or cabinet side installation. Dimensions: approx. 16.5cm (L) × 10.5cm (H) × 4.5cm (W) / 6.5"(L) × 4.13"(H) × 1.77"(W). Perfect for use as a headband organizer, glasses holder, cosmetics shelf, and accessory rack.
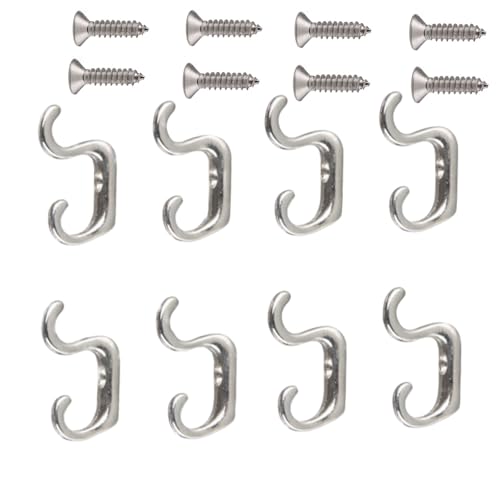
Size:35mm * 20mm * 8mm/1.4" * 0.8" * 0.3"(L * W * H)
Old Ammo Boxes

Old ammunition boxes turn up at flea markets and estate sales for a few dollars, and their small compartments happen to fit rings and brooches almost perfectly.
The metal latches and worn paint give them a weight and history that feels honest next to gemstone jewelry, not decorative in a forced way.
The lid is the part that needs thought.
A box that opens flat against a table works fine for browsing, but if you want it vertical on a shelf or table, the hinge has to stop at ninety degrees or the whole thing falls backward.
Some older boxes already have a small chain or leather strap inside that does this; if not, a short length of brass chain screwed to the inside rim solves it without visible hardware from the front.
I have seen sellers skip this step and lean the box against a stack of books, which works until someone picks up a piece from the front row and the rest slides.
Compartment sizes vary. The smaller boxes meant for pistol cartridges tend to have shallower trays that sit flush when closed, better for rings.
Rifle ammo boxes run deeper and can swallow brooches unless you lift them on a small velvet pad or a folded scrap of linen.
Either way, the original dividers are usually wood or pressed fiber and take stain or paint well if the color clashes with your display.

Common Size: Included most common sizes for Homeowners/Crafts, 5 PCS hole saws 1" (25 mm), 1-1/4" (32 mm), 1-1/2" (38 mm), 2" (51 mm), 2-1/8" (54 mm), 1 pc mandrels, 2 pc drill bits, 1 pc hex key in storage case for everyday home drilling hole projects

Cuts quick, precise holes in stainless steel, mild steel, iron, copper and brass sheet up to 3/16-Inch (5 mm) thick
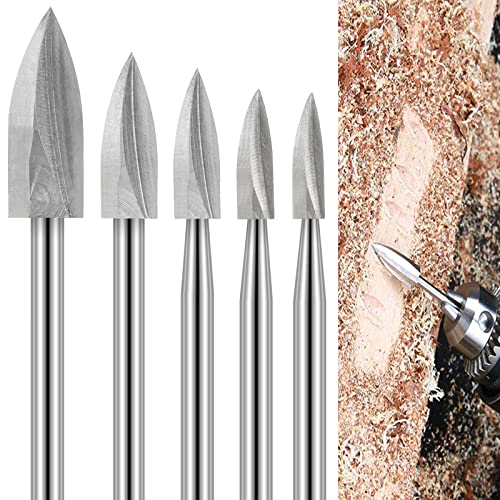
【Widely Application】:5 different sizes (3mm,4mm,5mm,6mm,8mm) meets your different working need. Widely use on various kinds woods for DIY crafts, wood carving, rootcarving, modeling, pet house making, house repair, micro sculpture and other wood working, a must-have carving tool to create your own masterpiece
Decorative Hooks on Walls

Vintage hooks carry the weight of their first life in every nick and patina, which is exactly what makes them worth mounting.
I look for cast iron coat hooks, brass curtain tie-backs, even ceramic kitchen pegs; the mismatch is the whole point.
A row of three or five at varying heights turns a blank stretch of wall into something that reads as intentional gallery rather than storage fix.
The spacing matters more than the hooks themselves. Six to eight inches apart keeps necklaces from tangling when you reach, and staggering two rows, one above the other, doubles your real estate without crowding the visual field.
Bracelets sit better on the lower hooks, necklaces on the upper, so gravity works with you instead of against.
What convinced me, reading through a dozen of these setups, is that the wall color behind the hooks does more work than the hooks themselves.
A dark or saturated paint behind brass or iron makes the metal pop without any extra lighting. White walls swallow vintage metal; you lose the contrast that sells the upcycled story.
The limit is weight. A single plaster anchor holds about fifteen pounds, but a heavy ceramic hook with three layered necklaces can hit that fast.
Toggle bolts cost more and take longer, yet they are what keep the hook, and the display, on the wall.

DESIGN: 3-tier T-bar jewelry stand with elegant velvet covering, perfect for organizing and displaying various accessories

VERSATILE DISPLAY RISERS – Display perfumes, small plants, collectibles, desserts, and spices. Compact set includes 3 sizes: 9.5 × 3.5 × 4.3 in, 8.5 × 3.5 × 3.2 in, and 7.5 × 3.5 × 2.1 in. Please measure before purchasing

Wood Tiered Display Stand: Crafted from wood, this durable 5-tier stand offers exceptional stability for displaying plants or delicate jewelry, perfect for home decor, office use, or as a succulent plant holder, ensuring long-lasting performance in various settings like holidays decor
Upcycled Antique Ashtrays

Small antique ashtrays with their stamped brass, scalloped edges, and worn ceramic glaze sit flat on a dresser and keep rings from rolling.
The varied shapes, about three to four inches across, let you cluster them in a loose grid: one holds studs, another hoops, a third stacks daily rings. Patina matters more than matching.
A tarnished copper tray beside a white porcelain one with hairline cracks gives the eye something to travel between, and the mix reads intentional rather than accidental.
Weight is the practical advantage. These pieces stay put when you drop jewelry in at the end of the day.
A shallow depression that once caught ash now catches an earring pair before it scatters. The best ones have a slight rim, enough to keep a post from sliding off but not so deep you lose the stone in shadow.
I look for sets of two or three at estate sales where mismatched lots sell cheaper than curated collections, and the hunt itself shapes the final look.

Package: includes a set of 4 rustic plant hanger hooks, complete with mounting screws and drywall anchors, and decorative hemp rope, packaged with installation convenience; L x H x T Size: 6 x 5 x 0.8 inch/15.24 x 12.70 x 2 cm.Tip: can hold up to 11" diameter or 15 pounds planter without touching the wall

Hook measures 7.75"H x 11.25"L

Reliable Material: the wall plant holders are made of beech wood, reliable and reusable, safe and sturdy, not easy to break or fade, which can provide high bearing capacity and high stability for your plants and items and serve you for a long time
Vintage Tins

Vintage tins with their built-in compartments solve the divided storage problem almost by accident. The shallow depth keeps necklaces from tangling, while the metal walls between sections let you sort by color or stone type without buying extra dividers.
What convinced me, looking through dozens of these, was how the lid changes everything.
Propped open at roughly 120 degrees, it becomes a second display tier: rings and small studs sit in the base, bracelets or longer chains lean against the angled lid where customers can actually see them.
A rolled-up dish towel behind the hinge holds the angle steady and cushions the metal from scratching anything delicate.
Transport is where the romance meets reality. A tin with a latch lid travels flat and closed, which is practical until you realize the contents will slide and scratch during movement.
My judgment: skip the ones with loose lids for craft fairs, even if the floral pattern is perfect. The hinged styles with a proper clasp cost maybe two dollars more at thrift stores and arrive intact.
Weight adds up faster than expected too; three full tins in a tote bag feel like carrying a bag of rocks by hour three.

ANTI-TRANGLING: With this wall mounted jewelry organizer, you'll never have to worry about your necklaces and bracelets getting tangled again. It saves time and adds a simple yet stylish touch to your home decor.
![Keebofly Hanging Wall Mounted Jewelry Organizer with Rustic Wood Jewelry Holder Display for Necklaces Bracelet Earrings Ring Set of 2 Carbonized Black,[Patented]](https://m.media-amazon.com/images/I/512gaoqJeJL._SL500_.jpg)
𝐓𝐰𝐨-𝐏𝐢𝐞𝐜𝐞 𝐒𝐩𝐥𝐢𝐭 𝐉𝐞𝐰𝐞𝐥𝐫𝐲 𝐇𝐨𝐥𝐝𝐞𝐫 𝐖𝐚𝐥𝐥: This wall-mounted jewelry hanger shelf combines an earring holder, necklace organizer, and bracelet holder. 𝐔𝐬𝐞 𝐟𝐥𝐞𝐱𝐢𝐛𝐥𝐲: 𝐏𝐮𝐫𝐞 𝐧𝐞𝐜𝐤𝐥𝐚𝐜𝐞 𝐝𝐢𝐬𝐩𝐥𝐚𝐲- Convert organizer bars when not storing earrings/bracelets; 𝐃𝐞𝐝𝐢𝐜𝐚𝐭𝐞𝐝 𝐛𝐫𝐚𝐜𝐞𝐥𝐞𝐭 𝐡𝐨𝐥𝐝𝐞𝐫 - Hang bracelets vertically on earring/necklace bars; 𝐀𝐝𝐯𝐚𝐧𝐜𝐞𝐝 𝐀𝐧𝐭𝐢-𝐓𝐚𝐧𝐠𝐥𝐞 𝐒𝐲𝐬𝐭𝐞𝐦: Stores long+large necklaces more securely than jewelry boxes;

Keep Jewelry Organized: Necklace holder keeps everything in order, saves space. Keep your desk clean, prevent jewelry from getting tangled and lost. Makes my daily routine much smoother
Pegboard Wall Displays

Pegboard reads industrial at first glance, but a jewelry display asks for something softer. I learned this the hard way after bolting raw MDF to my studio wall and watching silver chains disappear against that beige void.
Paint fixes everything. A muted sage or warm terracotta backdrop turns the board into a deliberate design choice, not a hardware-store afterthought.
The four-inch spacing of standard pegboard holes is generous enough for necklace hooks but tight enough that small shelves for rings and studs stay stable.
I cut half-inch plywood into six-inch squares, drilled two holes to match the grid, and suddenly had tiered platforms that lift delicate pieces to eye level.
Swapping a hook for a shelf takes under a minute, which matters when Tuesday’s earring-heavy inventory shifts to pendant necklaces by Friday.
The real advantage surfaces when seasons change. Last October’s Halloween charms came down in a single afternoon, replaced by amethyst-forward February birthstones without disturbing a single screw.
That adaptability justifies the initial hour of mounting and painting; most dedicated jewelry fixtures fight you every time you rethink the arrangement.
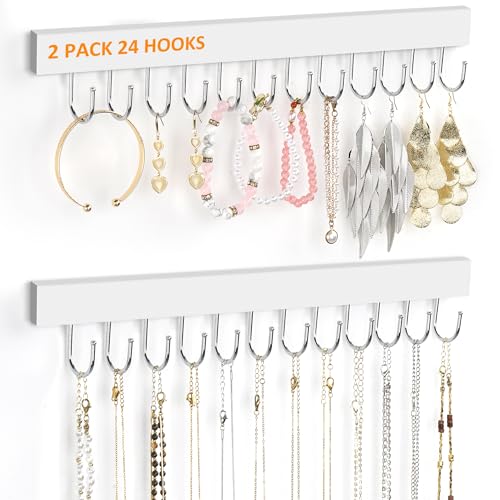
Large Capacity & Tangle-Free Storage: This 2 pack wall mounted jewelry organizer features 24 hooks designed to hold multiple necklaces or bracelets per hook. Keep every piece separated, easy to see, and tangle-free while freeing up your dresser space for a clean, organized look
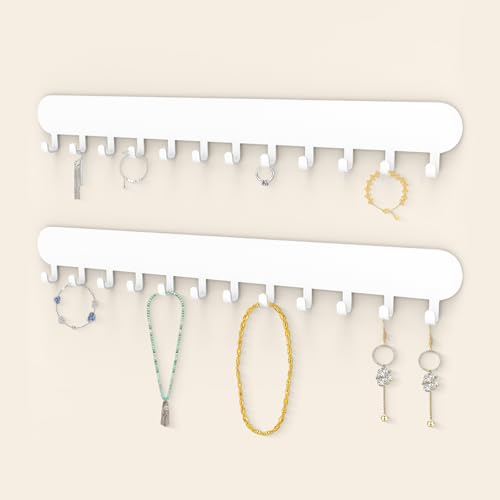
Anti-Trangling: This wall-mounted jewellery organiser is the perfect solution for keeping your necklaces and bracelets neatly organised and out of the way. It's a fantastic time-saver and adds a stylish touch to your home decor.
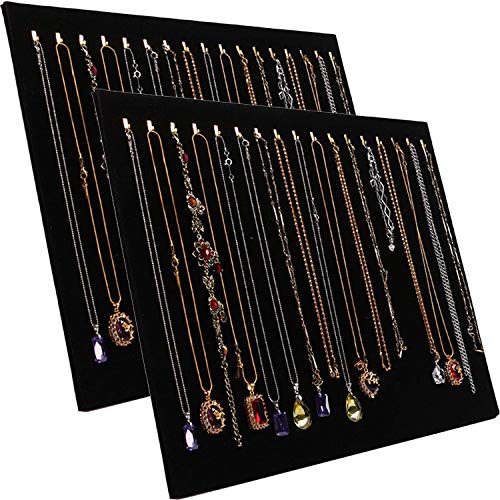
MATERIAL---Necklace Ddisplay Made of High quality velvet material front and paper board back supporter,
Wooden Hand Jewelry Holders

Wooden hand forms carry a quiet presence that metal and acrylic displays never quite match. The grain runs through each finger, the slight asymmetry of carved knuckles, the way light falls differently across oak than pine.
For rings, the taper from base to fingertip lets you stack three or four bands at staggered heights without any overlap. Bracelets settle at the wrist bone with the same natural drape they would on a person.
Finding them takes patience. Estate sales and auction lots sometimes yield glove molds from the 1940s, the fingers elongated for stretching leather.
More common are the blank pine forms sold for decoupage, which run cheaper but need sanding to lose their craft-store stiffness. I have had better luck with the former, though the price jumps accordingly.
What convinced me, reading through a dozen seller forums, was the photography angle. A hand form turns jewelry into a worn thing, not merely displayed.
The shadow beneath each finger gives depth that flat boards erase. For online selling, this matters more than most people account for.
One seller noted her click-through rate doubled when she switched from busts to hands, and while I cannot verify that, the visual logic holds.
The slight curl of a relaxed hand catches light behind a stone in a way that makes it glow.
The drawback is bulk. A single form takes shelf space equivalent to five ring dishes, and dust settles into the creases unless you store them in drawers between shoots.
For a small operation, two or three hands in varied finishes cover most needs without cluttering the workspace.

Durable Carbon Steel Construction:Made of heat-treated carbon steel with a black coated surface to help resist rust and wear. Provides steady cutting performance for common home materials and general DIY tasks

Application: Suitable for Woodworking and Wood Carving, such as grinding, polishing, shaping and burnishing soft wood, plastics and rubber surfaces or other DIY carving and woodworking.

Pilot drill bit for EZARC thin-metal cutting carbide hole cutter series
Rotating Jewelry Display Stands

A lazy Susan from a kitchen clearance aisle spins jewelry better than most purpose-built displays, and the ones with a wide, low profile stay upright when you load them.
The trick is keeping the center of gravity below the pivot point, which means heavier pieces sit on lower tiers and the base itself needs real weight.
I bolted a cast iron skillet to the underside of a wooden thrift store turntable once; it never tipped, even with brass cuffs stacked on top.
Tier height matters more than tier count. Three levels, each four to six inches apart, let someone browsing from any side see the front row without the piece behind it disappearing.
Shallow trays or pie tins screwed to the surface work as lips that hold cards or small dishes. The rotation should feel smooth, not loose; a wobble reads as cheap even when the jewelry is not.
If the hardware underneath rattles, a washer and a drop of household oil usually fix it.
Earring Holders

Earrings are the hardest pieces to keep paired and visible. One missing back turns a matched set into clutter, and a single post rolling behind a dresser means a morning lost to searching.
The fix that finally worked in my own upcycled jewelry display came from a vintage picture frame and a sheet of aluminum mesh from the hardware store.
Cut the mesh to fit the opening, staple it to the back of the frame, and studs hook straight through the grid. Pairs stay together because you see both at once, not one behind another in a dish.
Ribbon lines stretched inside shallow trays work for hook styles. The earrings dangle free, and the ribbon keeps metal from scratching.
Punched tin, salvaged from old ceiling panels or pie safes, gives a stiffer surface for heavier pieces. A standard paper punch makes holes close enough that wires slide in with slight pressure.
Mesh wins for volume. A 5-by-7 frame holds twenty to thirty pairs without crowding.
Ribbon lines suit a dresser top where you reach for the same three or four pairs daily.
Punched metal looks intentional enough to sell from, if that is the goal, though the holes fatigue after repeated changes and need re-punching every year or so.
The common mistake is spacing holes or mesh lines too far apart. Earrings cluster in the center, and the edges go empty.
Plan for half an inch between posts, minimum, or the display fills unevenly and you are back to hunting.
What I Look for at Thrift Stores and Flea Markets
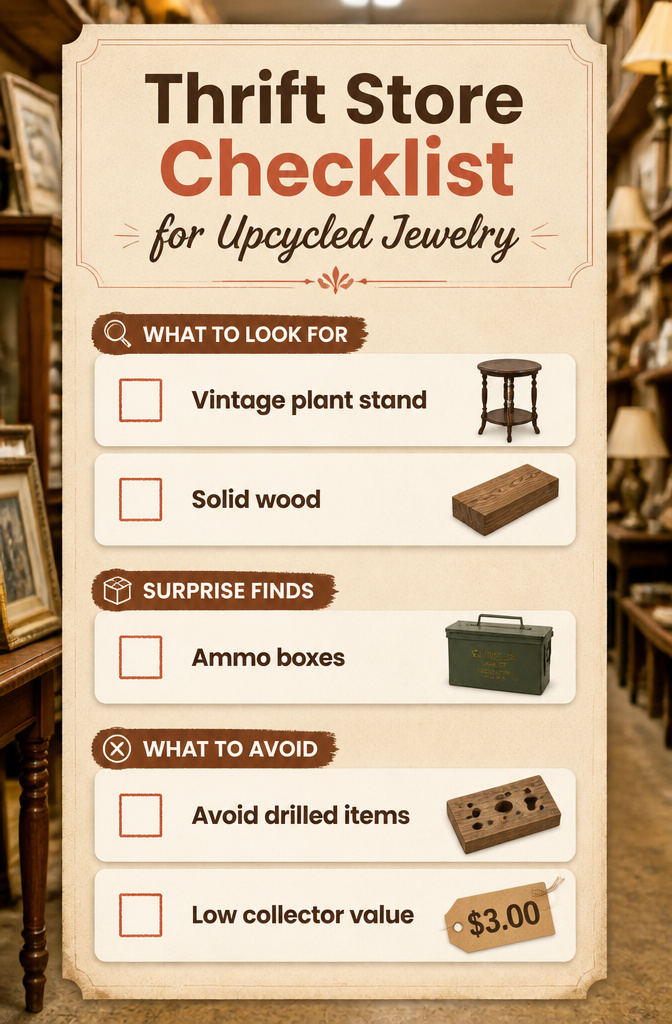
A small vintage plant stand from a thrift shop can become an upcycled jewelry display for about $3.00. That price is what convinced me to look past the intended use of things entirely.
Wood hardness matters more than finish. One piece I considered needed a Dremel just to start pilot holes for cup hooks, which turned a five-minute job into an afternoon.
Now I knock on frames and stands before buying; if my knuckles bounce, the piece stays on the shelf.
Ammo boxes are the surprise find that keeps proving useful. The same box that holds bracelets at a flea market becomes a photo backdrop by afternoon and a plant stand by evening.
Weight and flat surfaces matter more than original purpose.
What to avoid is anything already drilled with holes you cannot repurpose cleanly, or pieces priced for their collector value rather than their structure.
A vendor at Treasure Island Flea taught me that without meaning to: her booth full of vintage plant stands and small tables worked because she bought cheap and stacked function on top of function.
The creative mindset is simply asking what lies flat, what stands upright, and what a necklace hook or earring wire can grip. Tin, wood, glass, the spine of an old book pressed inward and super-glued for rings.
The material leads; the jewelry follows.
Painting Drilling and Assembling

- Fill both ends of any hole with putty, let it dry, then sand gently before you move to paint. Rustoleum Chalked in Charcoal covers well in two coats brushed on with a Purdy brush; prime first if you are going white or light.
- Drill pilot holes into the thicker wood, which in a drawer means the front piece, and stop before you break through the face. A Dremel starter hole keeps cup hooks from splitting harder wood.
- Attach hardware only after the protective topcoat has dried to the touch, half a day or overnight. Wax keeps the finish looking good, and the wait matters: soft paint will gum up the threads.
- Finish for jewelry safety means nothing sticky or freshly off-gassing near chains and earring posts. The wax layer, fully cured, sits between the metal and the piece.
Making Displays Work for Selling

A display that looks beautiful in your living room can fall apart the second you lift it into a car. Weight matters more than aesthetics when you are hauling forty pieces to a show.
Plywood bases with old drawer pulls screwed in as earring posts stay flat in a bin and set up in under two minutes.
I learned that the hard way after trying to transport a vintage window frame with chicken wire; the glass cracked against my cooler, and I spent the first hour of the fair sweeping shards instead of selling.
Crowding is the next trap. Twelve necklaces on one hook means customers touch three to get to the one they want.
Spread them to six inches apart minimum.
The same spacing rule holds for rings in a divided cutlery tray: if a shopper cannot lift a piece without knocking its neighbor sideways, they will usually walk away rather than risk the awkwardness.
Height gets overlooked. A display flat on a table hides everything behind the front row.
Risers built from stacked vintage books or small wooden crates lift the back pieces to eye level. From ten feet back, a customer should see color and shape, not just the tops of your stands.
Customer handling is the final test. If they cannot pick up a piece without dismantling your setup, you have designed for photography, not sales.
Magnetic clasps on display boards or open dishes for rings let people try things on without your help. That hands-off freedom sells more than any clever arrangement.
Frequently Asked Questions
What are some creative jewelry display ideas?
A vintage plant stand with tiered shelves keeps necklaces at different heights without tangling. Repurposed drawers with staggered cup hooks work for wall-mounted necklace storage.
Cardboard portfolios fold flat for transport and open into standing vertical panels. Old frames with chicken wire backing hold earrings, while ammunition boxes organize rings and brooches in their original compartments.
How do I make a DIY jewelry display?
Start with a shallow drawer about 10 by 11 inches and drill five pilot holes in a zigzag pattern across what was the front face. Twist in cup hooks by hand, stopping before you drill through to the front.
Line the interior with a 12 by 12 inch sheet of scrapbook paper, taping the corners if you want to swap patterns later. Prime first if painting light colors; charcoal covers in about two coats without primer.
What materials can I use for upcycled jewelry displays?
Thrifted vintage plant stands, old drawers, recycled cardboard portfolios, damaged picture frames, ammunition boxes, antique ashtrays, vintage tins, wooden hand forms, and lazy Susans all convert into functional displays.
Tin, wood, glass, and even the spine of an old book pressed inward can hold rings. The material leads; the jewelry follows.