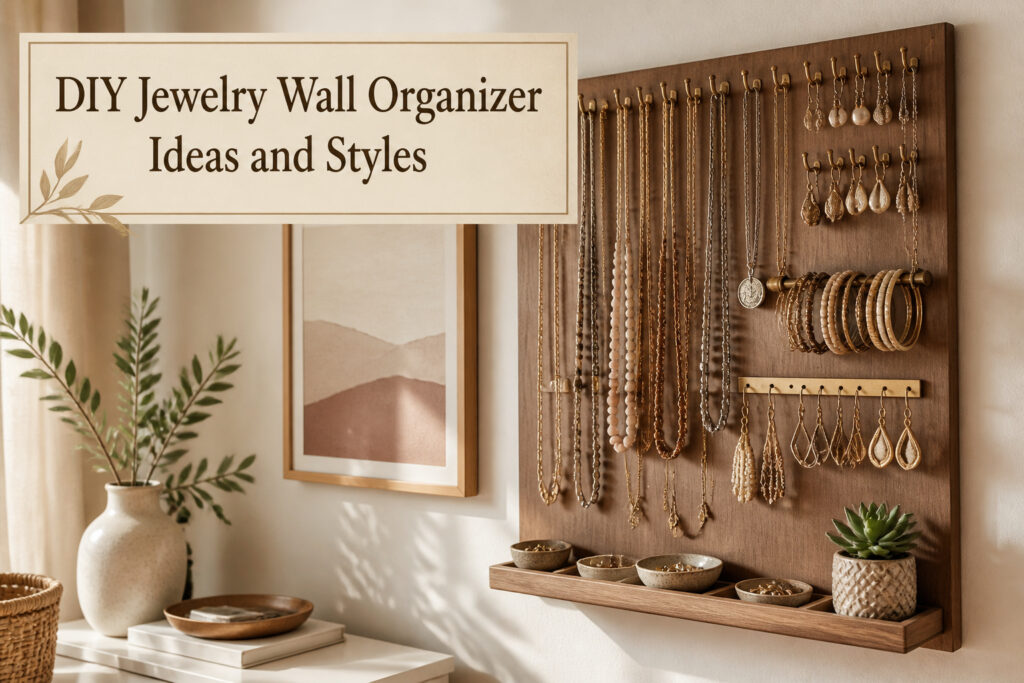
A diy jewelry wall organizer is a mounted storage system that keeps necklaces, earrings, and bracelets visible, untangled, and within reach. The catch is that most store-bought versions force a choice between function and style, while the builds that actually work require specific material choices most guides gloss over. One hidden organizer uses 1/4-inch luan plywood and a Kreg Jig to create a frame that looks like bedroom art until it swings open, with hinged earring racks that prevent tangling every time you close the door.
Hidden Jewelry Organizer

A framed wood sign hung on the bedroom wall looks like decor until you swing it open. Inside, pegs line the back panel for necklaces, a felt backing hides the pocket holes that hold the frame together, and a hinged earring rack folds out so you can reach the backs of studs without pulling the whole piece down. The front face mounts on 1/4-inch luan plywood, chip board, or MDF, attached with #6 screws at each corner. A Kreg Jig drills the pocket holes that make the box sturdy without visible fasteners.
The dual payoff is what sold me on this build. Visitors see bathroom art or a color-blocked modern sign; you see every chain untangled and every pair matched. The earring rack needs hinges, not fixed mounts, or dangly earrings tangle against the wall every time you close the door. Construction runs cleaner if you buy a premade frame for the front and build the shallow cabinet behind it, though a fully handmade door works fine with D-ring hangers on the back. Either way, the finished depth stays slim enough to hang where a picture would, not where a medicine cabinet would.
Geometric Wall Jewelry Organizer

Geometric wall organizers turn the whole idea of storage inside out by making the frame itself the decoration. Triangles, hexagons, and asymmetric grids replace the usual rectangles, so the negative space between pieces becomes part of the design. I kept coming back to one detail while reading through build logs: these frames hold up to 75 lbs, which means you are not limited to lightweight chains and stud earrings. Heavy statement pieces, thick leather cuffs, and even small handbags stay put without pulling the mount loose.
The balance works because the geometry does two jobs at once. A hexagonal grid gives each item its own cell, so necklaces do not tangle, while the repeating shape reads as wall art from across the room. Asymmetric designs with mixed angles need more planning, but the payoff is an organizer that looks intentional rather than utilitarian. Metal rod versions in brass or matte black keep the lines clean; painted wood softens the look for bedrooms with more texture.
What sold me on trying this style was watching how the same frame reads differently depending on what you hang. Sparse placement keeps it minimal; filling every angle turns it dense and almost textile-like. The risk is overbuilding: too many crossbars and the geometry gets busy, too few and the pieces sag. A mid-weight wire gauge, around 14–16, hits the middle where the shape stays true but the weight capacity holds.
Pegboard Jewelry Organizer

Pegboard gives a diy jewelry wall the one thing most organizers lack: the freedom to rearrange. Hooks slide from hole to hole, so a necklace that hangs too low today sits higher tomorrow without new holes in drywall. Standard pegboard runs 24 by 48 inches, which fills a bathroom wall or carves out a section of closet without dominating the room. Smaller panels, around 16 by 20 inches, work above a vanity where space is tight.
The raw edges betray the hardware-store origin fast. A wood frame glued to the perimeter fixes this; paint both frame and board before assembly, with painter’s tape guarding the seam. FrogTape holds the line cleaner than the cheap stuff, especially when the frame color differs from the board. Three coats covered the glossy factory finish on one build I read about, using Rescue Restore Paint in "Little Black Dress" for the board and "Blessed" for the frame. A stencil layer in ChalkArt over the surface pushes it further from workshop territory, though a single solid color already gets you most of the way there.
The hooks themselves are the cheap part. Standard pegboard hooks hold necklaces and bracelets; add small bins or dowels across paired hooks for earrings and rings. The whole system moves with you, frame and all, which beats reinstalling a fixed rack every time the bedroom layout changes.
Wall-Mounted Jewelry Organizer with Hooks

Cup hooks turn a plain board into a working necklace station, but the size matters more than most people expect. A one-inch hook gives a necklace enough clearance to hang in a loop without the clasp catching on the wood beneath it, and that extra length keeps chains from tangling because they hang free instead of overlapping. The sources that rank for this build all land on the same hardware: 1×2 boards and simple cup hooks, nothing fancier.
Hook placement splits by jewelry type. One board can hold earrings on short hooks spaced tight, while a second board carries necklaces on those one-inch hooks set wider apart. Bracelets need a different setup entirely. Two cup hooks placed an inch in from each end of the board hold a wooden dowel that acts as a rod, letting bracelets slide on and off without unclasping. The same one-inch inset that positions the dowel also keeps the rod from bowing outward when the bracelets load it up.
What convinced me, reading through the builds, is how the separation matters more than the material. Combining categories on one board works only if you map it first: earrings up high where the short hooks cluster, necklaces below with room to swing, bracelets off to the side on the rod. Skip that planning step and the chains find each other overnight.
Tabletop Jewelry Organizer

Wall mounting falls apart the second a landlord says no, or the studs in that one decent spot turn out to be sixteen inches off-center behind a window. A portable design that stays stable on a dresser or vanity fills the gap without asking permission.
Scrap wood keeps the build light enough to move but heavy enough to sit still. The trick is footprint versus height: a broad base, maybe ten to twelve inches deep, stops the thing from tipping when every necklace hooks on the same side. Mine lives on a vanity that gets bumped by elbows and cat tails; the lower center of gravity from a wide, shallow body means earrings stay where I left them.
What I liked about the wall version was display: everything visible, nothing tangled. The tabletop rebuild keeps that. Same pegs, same small ledge for rings, just housed in a box that travels. No drills, no anchors, no patching holes before a move. It costs a few inches of surface space, which is real estate on a small dresser, but the tradeoff is flexibility. A printable PDF plan exists for this form; the dimensions inside it account for the weight shift that wall mounts never think about.
For the renter or the hesitant DIYer, this is the path of least resistance. Build it Saturday, set it down Sunday, take it with you when the lease ends.
DIY Jewelry Wall Art

The wall itself can carry your jewelry if you treat the storage as part of the image, not a frame around it. A stretched canvas or wood sign gives you a surface to build on: paint or print something that reads as deliberate art from across the room, then embed the function into that design so it does not read as an afterthought.
Hooks work best when they repeat a shape already in the composition. If the print has branches, extend actual twigs or bent wire at the same angles to hold necklaces. If it is geometric, brass or painted floor flanges set at grid intersections turn hardware into pattern. The key is the hook must finish the design rather than puncture it.
Pockets need even tighter integration. A shadow box or shallow frame lets you line the interior with felt or cork and keep earrings or bracelets behind a hinged face. From the outside it is just wall art; opened, the interior keeps the backing color continuous so the storage feels planned, not patched in. Hinges along one side and a small magnetic closure keep the line clean when it hangs shut.
Scale matters more than ornament. A piece under 16 inches square tends to look like a craft project no matter how polished the surface. Go larger, let the art breathe, and cluster the functional elements in one zone so the rest of the surface stays open. That negative space is what sells the piece as design first, storage second.
Magnetic Jewelry Organizer

Strong rare-earth magnets hold heavier chain necklaces without sliding, but lighter stud earrings need only modest pull to stay put yet release easily. The real headache is keeping pairs together; small neodymium discs set in matching rows let you park left and right earrings side by side, though a thin strip of steel behind the board works better than mounting magnets directly in drywall. That backing also solves the wall damage problem. A steel sheet glued to ¼-inch plywood spreads force across studs and lets you move the whole unit later with only small anchor holes to patch. Without that buffer, individual magnet mounts pry paint loose within months from the constant tug of removal. Plywood with a steel face gives you portability and a surface that will not ghost when you rearrange your collection, which you will. For renters, Command strips between the plywood and wall skip drilling entirely up to about fifteen pounds total load, though the adhesive fails in humid bathrooms faster than you’d expect.
DIY Jewelry Holder with Copper Pipes

Copper pipe brings a warmth to industrial style that raw steel never quite manages. The first time I handled half-inch Type M at a local hardware store, the weight and that faint pink gleam convinced me it was worth the extra cost over painted PVC.
Sourcing is straightforward: most big-box stores stock 10-foot lengths, and plumbing supply houses will cut to order if you ask. A tubing cutter runs about fifteen dollars and leaves a clean edge without the debris of a hacksaw. For joints, press-fit or push-to-connect fittings save the soldering step entirely, though purists will tell you a properly fluxed joint lasts longer. What convinced me, reading through a dozen of these builds, was that a hand-tightened compression fitting holds fine for jewelry weight and lets you disassemble later.
The patina question splits people cleanly. Bright copper catches the eye against white or navy walls, but that mirror finish dulls to brown within weeks unless you seal it. A forced patina with salt and ammonia gives you the aged Verdigris look immediately; just know it rubs off on fabric until you wax it. Seal the finish with clear lacquer if necklaces will brush against it daily.
Against exposed brick, copper reads as found architecture. In a soft, furnished bedroom it risks looking like plumbing that escaped the wall, so balance it with wood or leather elements. The material itself does the styling work; keep the geometry simple and let the metal speak.
DIY Necklace Holder

Necklaces tangle the moment they share a drawer, and the fix is simpler than most people build it. A diy jewelry wall setup for chains needs only two things: separation between hooks and enough height variation that a long pendant does not drape across a choker.
The mistake I kept making was spacing hooks evenly in a straight line. Chains of different lengths end up at the same visual level, which looks tidy in a photo and chaotic in daily use. Shorter hooks or pegs along the bottom row, taller ones above, keep each necklace visible and reachable.
A five-hour build with paint or stain lets you match bedroom or closet walls, though the color matters less than the spacing. What convinced me, reading through builds like the one Megan posted back in February 2022, was her point about customization: the wall mount works because it fits the collection, not because it hides it. Frame scraps work too, if the depth gives chains room to hang free of the backing.
The minimal version skips the cabinet or hidden door. One open row of staggered hooks, maybe a shallow ledge below for earrings, and the tangle problem disappears because nothing piles. My judgment: paint the board, not the hooks. Metal against colored wood reads cleaner than coated hardware.
DIY Jewelry Organizer with Farmhouse Charm
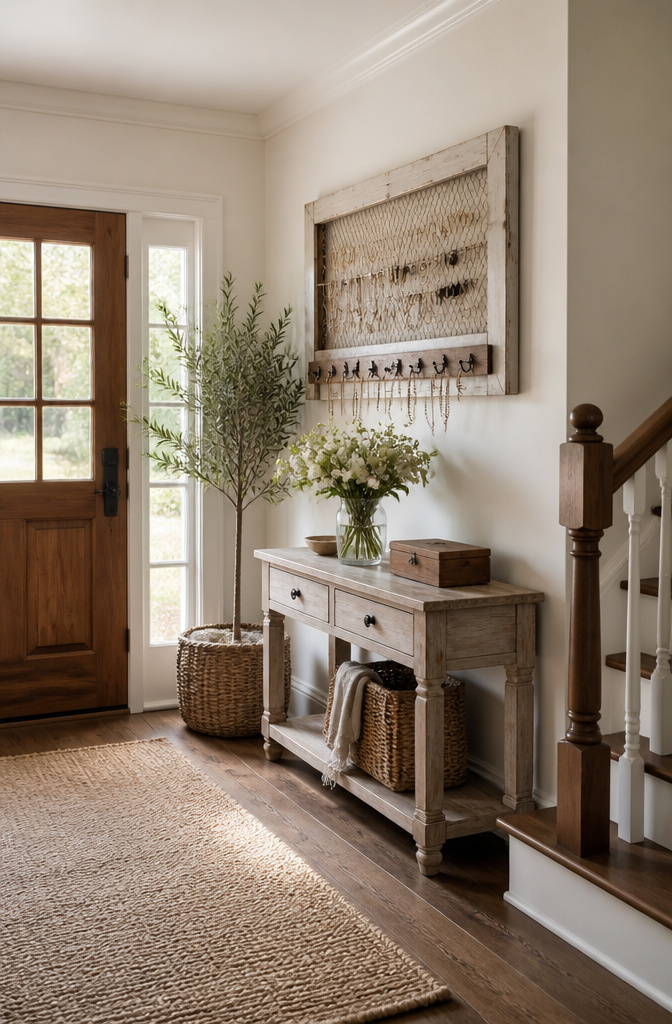
Farmhouse character lives in the tension between rough and refined, and a diy jewelry wall piece in this style makes that tension visible. Reclaimed or distressed wood carries the weight, while chicken wire or a slim dowel rack holds the delicate chains and hoops that hang against it.
The materials that read authentic rather than themed are simple: 1×2 and 1×3 boards, lattice molding no thicker than a quarter inch, and hardware cloth or chicken wire in the 12-by-17 inch range. A 3/4-inch dowel cut to 17 inches gives you a bar for bracelets that sits light against the heavier frame. Cup hooks at 1/4 inch or 1 inch finish the storage without fighting the grain.
Distressing only works when it looks like use, not a weekend project. Skip the hammer and chain unless you want the piece to announce itself as new damage. Better to sand edges where hands would naturally wear the wood over years, let stain settle heavier in grooves, and stop before the piece looks salvaged from a barn that never existed. The contrast between that honest wear and the jewelry itself is the point: thin gold chains against saw marks, pearls against a surface that still smells faint of linseed oil.
Mount it so the wire section sits at eye level and the dowel or lower hooks fall within easy reach. The farmhouse mistake is overbuilding; this needs only enough structure to hold its shape, not a cabinet’s worth of joinery.
Materials and Tools

Wood takes the lead in most of these builds, and the cuts are specific enough that getting them right at the store saves a messy living-room project later. One design that keeps showing up uses 1×3" boards cut into six 16" vertical pieces and one 14" horizontal connector, drilled with pilot holes before assembly. Sanding comes before paint, always, or the finish catches on every splinter.
Paint options split three ways: acrylic, chalk, and spray paint. For a pegboard frame, Rescue Restore Paint in "Little Black Dress" covers glossy surfaces in about three coats. Chalk paint pairs well with stencils if you want pattern on the surface rather than flat color.
Tools stay basic but non-negotiable: a drill with bits sized to your screws, a saw for the lumber cuts, and a sander for prep. The hardware list runs to #8 screws and 1/4" screws depending on the joint, plus cup hooks, D-ring hangers for wall mounting, and hinges if your design folds or opens.
| Material or Tool | Best For | What to Watch |
|---|---|---|
| 1×3" wood, 16" cuts | Vertical necklace bars | Pre-drill pilot holes to prevent splits |
| 14" wood connector | Joining the six verticals | #8 screws hold better than smaller gauges |
| Rescue Restore Paint "Little Black Dress" | Pegboard refresh over glossy surfaces | Three coats typical on slick substrates |
| Chalk paint + stencil | Patterned surface detail | Needs painter’s tape between color blocks |
| Spray paint | Brackets, small hardware | Light passes avoid drips on close work |
| Drill + 1/8" or 1/16" bit | Pilot holes before screws | Bit size matches screw diameter |
| D-ring hangers | Secure wall mounting | Weight rating varies; check packaging |
| Hinges | Fold-out or door-style organizers | Mortise or surface-mount by design |
I skipped the dowel-and-cup-hook combination on my first read-through and regretted it; the brass cup hooks with a wooden dowel running through them make a cleaner earring display than hooks alone, and the dowel costs next to nothing.
Paint and Finish Options

Paint and finish choices turn a functional diy jewelry wall into something that actually belongs in the room. The pegboard project that stuck with me used Rescue Restore Paint in Little Black Dress, a deep black that needed three coats over the glossy factory surface. That gloss is the detail that matters: standard chalk paint or acrylic will slide right off unless you scuff first or buy into a formula built for slick substrates.
For raw wood frames or backboards, acrylic paint gives you control. The industrial-style organizer I studied started with white acrylic as a base layer under metallic gold, which made the final color read brighter than it would have on bare pine. Spray paint handles the hardware, the pipe flanges and T-joints and dowels, with even coverage that brush paint would streak.
Chalk paint sits between those two. It covers pegboard or frame wood without the sanding marathon, though it still rewards a light scuff on anything sealed or varnished. FrogTape or a comparable painter’s tape saves the already-finished surface when you switch colors between board and frame. The mistake to avoid is taping after the first coat is touch-dry but not cured; the tape lifts the paint and you start over.
Rescue Restore Paint earns its place when you are covering laminate, old gloss, or anything that would reject ordinary latex. On standard porous wood, chalk paint or acrylic works fine and costs less per ounce. Match the paint to the surface, not to the mood board.
Mounting and Installation

- Find the studs first. A stud finder keeps the organizer from ripping out under load, and for anything holding more than a few necklaces, this is non-negotiable. The geometric wall organizer lists a 75 lb capacity, which sounds generous until you load it with brass and stone. Plan your layout around that figure as an upper bound, not a target.
- Match the hardware to the weight. Screws into studs handle the heavy pieces; command strips work for lightweight frames but fail the moment humidity shifts or someone bumps the wall. Two D-ring hangers, one at each side of the top, give the balanced support a loaded frame needs. The shadow box style from the hinged build uses this exact placement.
- Hinge side matters. If the organizer opens like a cabinet, attach hinges along one edge and add a magnetic closure to keep it shut. Small cup hooks or square bend screws along the bars hold individual pieces without crowding.
- Step back before you drill. Drywall alone holds almost nothing; a stud-backed screw takes the full 75 lb without drama. The five minutes of finding wood behind the plaster saves the whole project.
Secret Compartments and Hidden Storage

A hidden jewelry cabinet on the wall reads as plain art until someone opens it. That surprise is the whole appeal, but the hinge choice decides whether the trick works or falls apart.
One builder tried mounting a wood sign over a shallow cabinet so the frame sat just 1/4 inch off the wall, completely disguising the storage behind it. The concept was sound; the execution hit a wall. Standard hinges could not make the sign open cleanly while overlapping the cabinet edge. An hour of repositioning later, the fix was to recut the sign to match the cabinet’s exact dimensions and hinge it like a normal door. The lesson: the hidden look only holds if the mechanics cooperate.
The payoff is real when it works. A mosaic metal sheet lining the interior gives earring storage and elevates the piece from utilitarian to finished. For anyone with tangled necklaces in a drawer, the wall-mounted secret means visible organization that never looks like organization. Construction takes extra effort, and the hinge placement is not forgiving. The clean visual line is worth that effort only if the cabinet stays truly slim; anything deeper than picture-frame territory starts reading as suspicious bulk on the wall.
Frequently Asked Questions
What materials do I need to make a DIY jewelry wall organizer?
Common materials include 1×2 or 1×3 boards, cup hooks in brass or your chosen finish, wooden dowels, screws (#8 and 1/4 inch depending on the joint), D-ring hangers, hinges for fold-out designs, and paint or stain to match your decor. A pegboard build adds a standard 24 by 48 inch panel plus FrogTape for clean color blocking. Most builds also need 1/4 inch plywood, chip board, or MDF for backing panels.
How do I hang my jewelry organizer on the wall?
Find studs first with a stud finder, then drive screws directly into the wood behind the drywall. Two D-ring hangers at the top corners give balanced support for loaded frames. Command strips work for lightweight pieces up to about fifteen pounds, but they fail in humid bathrooms and can pull paint loose over time. For anything holding more than a few necklaces, stud-mounted screws are non-negotiable.
Can I customize my jewelry organizer?
Yes. Paint or stain the wood to match bedroom or closet walls, or use Rescue Restore Paint in colors like Little Black Dress for glossy surfaces that reject ordinary latex. Chalk paint pairs with stencils for patterned surfaces. Geometric frames in brass or matte black read as modern wall art, while distressed wood and chicken wire give farmhouse character. The same frame reads minimal or dense depending on how sparsely you fill it.
What tools do I need for this project?
A drill with bits sized to your screws, typically 1/8 inch or 1/16 inch for pilot holes. A saw for lumber cuts. A sander or sanding block for prep before paint. A tubing cutter if you are working with copper pipe. A stud finder for mounting. A small level if you are using Command strips. The builds stay basic; no need for a workshop full of gear.