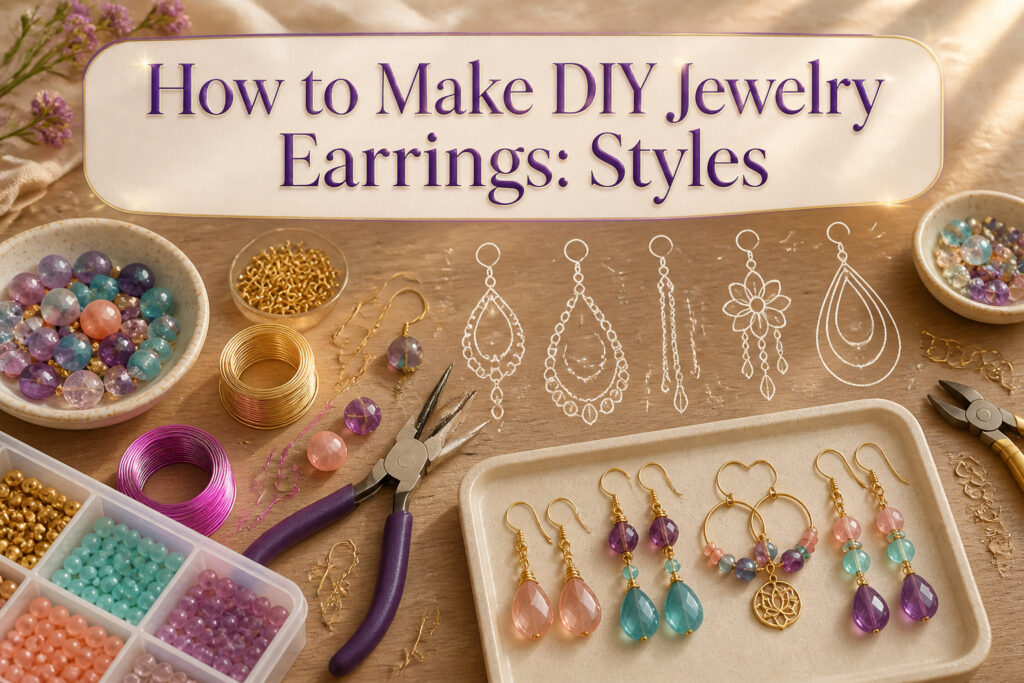
You can build nine finished pairs of diy jewelry earrings for under the cost of a single boutique set, and the only skill you need is the patience to bend a wire loop without rushing it.
Most beginners quit after mangling their first three head pins with fingers instead of round nose pliers. The Michaels bead aisle, with spacer beads sold right beside the strands, is where the hunt usually starts.
How to Make DIY Earrings

Making diy jewelry earrings starts with a few basic findings: earring hooks, flat head pins, and beads. Earring hooks, sometimes called shepherd hooks, attach to pierced ears and carry the body of the earring.
Flat head pins are straight wire pieces with a flat head on one end, coming in different gauges and lengths to hold your bead stack.
Bead shopping can overwhelm a beginner fast. The Michaels jewelry section keeps things simple, with beads usually sold on strings so you can see the full color run.
Grab spacer beads too, the smaller silver or gold-toned rounds that frame your decorative beads and keep the design from looking crowded.
Vintage beads from an old necklace become boutique-looking earrings for a few dollars.
A clear crystal spacer, a green glass bead, and a small silver spacer on an end pin make a pair that works with a black dress or as DIY wedding earrings for a bridal party.
Once the first simple drop pair is done and the compliments start, the bead hunting usually takes on a life of its own.

Fish Hook Style Earrings, Stylish coil And Ball Style. Use the coil and hoop to dangle your items off,Great for making your own earrings. Be used for DIY making, creative earrings, ornaments crafts handmade or other DIY findings

1. Great Value: This is probably the most affordable pack of earring making kit in the market! You can get a total of 600 pcs, including 200 pcs earring hooks, 200 pcs jump rings and 200 pcs earring backs
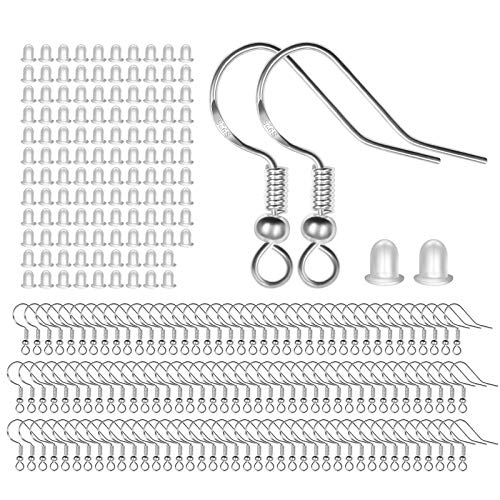
High Quality- These sterling silver earring hooks are made of 925 sterling silver and earring backs are made of clear silicone. The comfortable materials make sure that the earring hooks will perform well in either jewelry DIY or your wearing experiences
1. Flat Nose Pliers, Wire Cutters, Round Nose Pliers

Flat nose pliers, wire cutters, and round nose pliers are the three tools that handle about 90% of beginner earring projects, and buying them first saves the frustration of stopping mid-project because the bead won’t grip or the wire won’t bend clean.
I learned this the hard way after trying to shape a loop with my fingers and mangling three head pins in a row.
Wire cutters trim head pins and wire to length, usually down to roughly a quarter inch for a standard loop. Flat nose pliers hold components steady and bend wire at sharp angles.
Round nose pliers form the loops themselves, their tapered jaws curling wire into neat circles when you roll the end away from you.
A serrated flat nose pair is worth adding later for gripping jump rings without slipping, but the core three get you through dangles, drops, and basic hoops before you need anything else.

Premium Material: Our round nose Pliers are made of durable steel,rust resistant for long time use. The craft plier with a smooth and shiny surface is designed for jewelry making and repairing, without worrying about scratches or leaving marks on the jewelry.
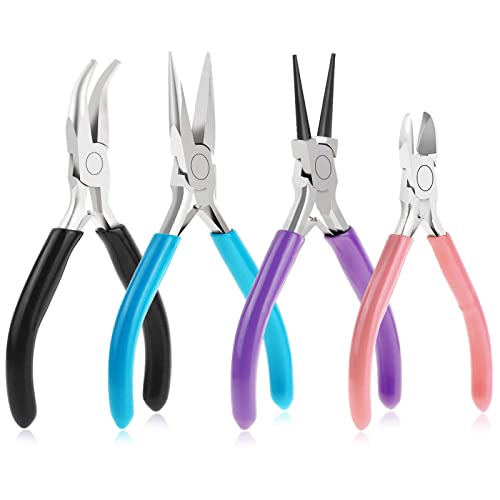
PLEASE NOTE: If the pliers you received have some oil on the head that make it look like dirty, please do not be worry. The jewelry pliers are coated with oil to prevent rust. Please wipe them clean with a cloth before use and apply oil to them before storage, which will help the pliers keep anti-rust
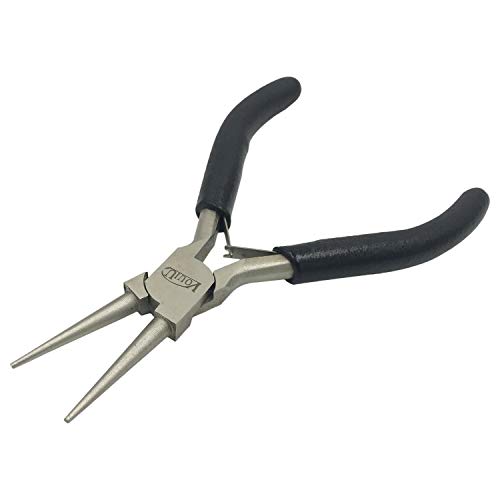
Ideal for earrings, wire wrapping, create loops, eye pins, clasps, jump rings, coils, and curved bends.
2. Earring Hooks, Head Pins, Beads

Earring hooks, sometimes called shepherd hooks or ear wires, are the piece that actually passes through the pierced ear and carries the body of the earring.
Flat head pins are straight wire pieces with a flat stopper at one end, and 22 or 24 gauge is the standard range that fits most bead holes without drilling or forcing.
I keep both on hand because a 22 gauge pin will stand firm in a heavier stone bead, while 24 gauge slips easily through smaller glass or crystal holes and leaves a neater loop.
Beads come in glass, crystal, or stone, and the variety can overwhelm a first trip to the craft store. A single strand from Michaels or a thrift store necklace pulled apart for parts will both work.
I have used old clip-on earrings and broken bracelets for beads that would cost three times as much new.
Spacer beads in silver or gold metal tones are worth adding to the same order, they sit between larger beads to frame them and keep the stack from looking crowded.
One bead on a head pin makes a simple stud-style drop, or you can stack two or three with spacers between for a longer dangle, just leave enough bare wire at the top to form the loop that attaches to the hook.

The Ball Head Pins are widely used for jewelry making or DIY crafting, like earrings, necklaces, bracelets, anklets, and stringing beaded links, or connecting chains. They can be used with a variety of beads, thread, wire, and cord, the sufficient quantity allow you DIY different fashionable and interesting jewelry crafts share with friends.

✔ Spring Loaded Handles, Convenient to Use

Flower arrangement kit includes: a pair of floral wire cutters, 50 long pins, 3 rolls of wrapping tape, 100 pieces of 14.4 inch (36.5 cm) green flower paper wrapped wire, and 1 roll of 75 ft (26 m) green wire( 26 gauge wire ), making it an ideal setup for flower arrangement enthusiasts
3. Thread Beads in Sequence

The flat head at the bottom of the pin is what makes this whole step possible. It sits there like a tiny shelf, catching every bead you slide on so nothing drops through.
I usually start with a smaller spacer bead if the hole in my main bead is wider than the pin shaft, then stack in the order that looks balanced when I hold it up to the light.
Sometimes that means a single bold stone, sometimes three graduated sizes with a metal spacer between each. The design stage is where the earring actually becomes something.
A head pin with multiple beads needs enough bare wire left at the top to form that loop later, about a quarter inch.
Eye pins work differently, with a loop already at the bottom for connecting another bead or jump ring if you want a longer dangle, but the threading itself follows the same logic.
Leave that quarter inch of wire bare at the top, no matter how tempted you are to pack one more bead onto the stack.

Size: Length: 50 mm/2 Inch, pin: 0.7 mm 22 Gauge. Enough length for you to connect many beads to DIY earrings

Size: Length: 50 mm/2 Inch, pin: 0.7 mm. Enough length for you to connect many beads for making earrings

What You Receive: Gets 600 pieces of 2-inch craft pins (including flat head pins and eye pins) in silver, along with 1 plastic storage box. Abundant quantity meets various usage and replacement needs.
4. Bend and Shorten the Head Pin

Bend the head pin to one side about 1/4 inch above the top bead, using the tips of your round nose pliers to get a clean angle.
The wire should sit at a 90-degree angle over the bead, not leaning or wobbling. This bend is what lets the loop sit centered above the earring instead of drifting off to the side.
Trim the excess with wire cutters so roughly 1/4 inch of wire remains above the bend. This is the cut I usually mess up.
Too much wire and the loop ends up oversized and gappy; too little and you cannot roll a full circle with the round nose pliers.
The first pair I made, I eyeballed it and clipped almost flush, then had to start over with a fresh head pin.
Now I hold the cutters perpendicular to the wire and count the width of the cutter jaw as my visual guide, which keeps the leftover length consistent.

Size: about 6~7.5mm in diameter, 2~3mm thick, hole: 1~3.5mm. Different hole sizes can suit many cords strings and wires. Lager hole size up to 3.5mm, can be added to large hole snake chain bracelet.

VARIETY OF BEAD STYLES - This set includes 2300 high-quality gold spacer beads in 6 different styles: 6mm round ball spacer beads, 4mm round ball spacer beads, 4mm heart spacer beads, 6mm star spacer beads, 6mm flat spacer beads, and 4mm pineapple spacer beads. Perfect for crafting diverse and unique jewelry pieces

Package Includes: You will receive 800 pieces of rondelle spacer beads in 10 bright colors. These spacer beads are important components for jewelry making that you can use to make own handmade works, such as handmade necklaces, bracelets, earrings accessories etc.
5. Form the Loop With Round Nose Pliers
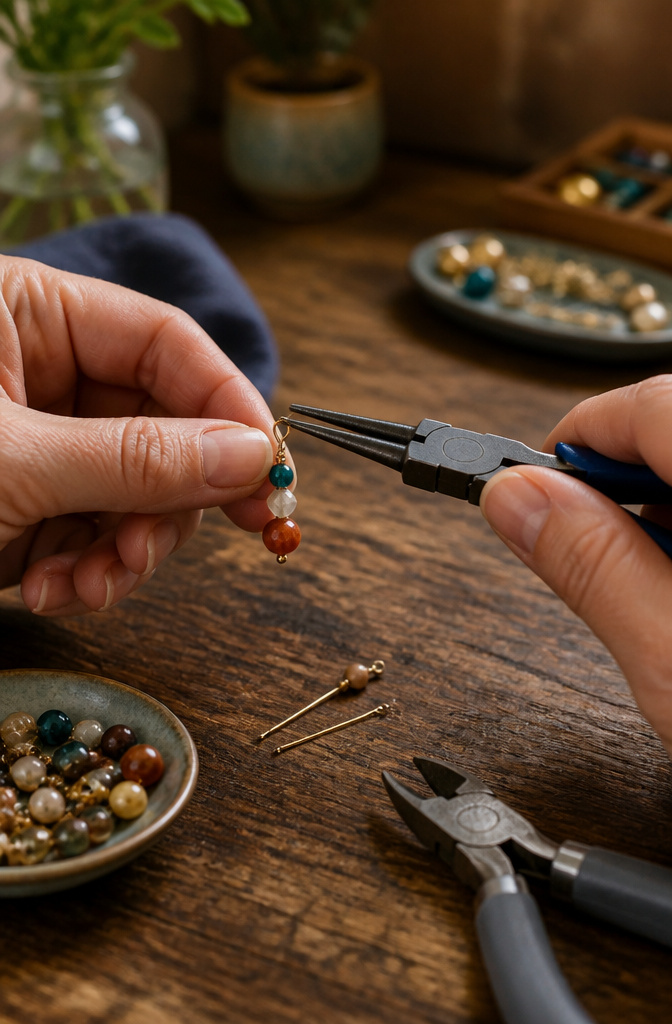
The round nose pliers are where the earring finds its finish.
I grip the trimmed head pin about a quarter inch from the end, the very tip of the pliers clamped tight, and roll the wire away from me in one smooth motion.
The first few tries, my loops came out lopsided or too open, beads sliding off the hook later because I had not closed the gap fully.
The loop must be completely closed so nothing slips free, which means rolling past the point where the ends meet and letting the spring of the wire pull it shut.
I leave the loop slightly open at first, just enough to hook it onto the earring finding, then finish the closure after everything is linked.
Flattening the loop with the center of the pliers or a flat nose pair keeps it neat and seated flush against the hook.
The motion feels awkward for the first dozen pairs, then the muscle memory sets in and the loops start coming out round and uniform.

Earring hooks:The earring hooks and open jump rings are made of 925 silver plated copper,nickel free and Hypo-allergenic.The earring backs are made of clear silicone, the earring silver hooks will make you comfort and make jewelry DIY well

GREAT VALUE KIT: 200pcs stainless steel earring hooks, 200pcs stainless steel jump ring and 200pcs clear silicone earring backs.

Size: about 12mm wide, 22mm long, 2mm thick; pin: 0.6mm.
6. Attach to the Earring Hook

The last move is sliding the finished loop onto the earring hook and closing it securely. I use flat nose pliers for this, not round nose, because the flat jaw grips without adding new curves to the metal.
The hook’s bottom loop stays partially open while you thread the earring body on, then you squeeze it shut the same way you would flatten a crimp bead.
The hook goes through a pierced ear, so any grime on your pliers transfers straight to skin. Wiping the metal with rubbing alcohol before you start takes thirty seconds and saves the wearer a reaction later.
Two ways to play the closure: some makers open the hook’s loop sideways like a jump ring, others prefer to twist the earring’s top loop open instead.
The sideways method wins if your hook is thin and soft, because the earring loop is usually harder wire and less forgiving of repeated bending. Either way, the loop should meet back on itself with no gap.
A thumbnail test, running the edge across the seam, catches a lip you might not see. Close it fully, or the earring leaves the hook somewhere between the car and the grocery store.
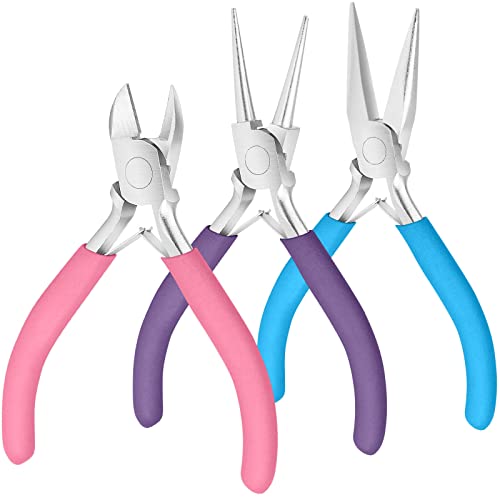
Jewelry Making Supplies: Package comes with set of 3 jewelry pliers including needle nose pliers, round nose pliers and wire cutters. Professional jewelry tools for jewelry making, jewelry repair, wire wrapping, beading and other DIY crafts

Premium Material: Billbotk round nose pliers are made of high-quality hardened steel which maximizes the tenacity, not easy to crack

Package contains: you will receive 1 piece bail making pliers and 1 piece nylon nose pliers in the package, which can meet your various jewelry DIY needs, you can use them for different jewelry making
7. Simple Dangle Earrings

Simple dangle earrings are where most people start, and for good reason.
The same basic moves thread one bead or stack several onto a flat head pin, bend the wire, trim it to about 1/4 inch, roll that trimmed end into a loop with round nose pliers, and slip the loop onto an earring hook cover almost every style you’ll make later.
I spent an afternoon with green glass beads and short ear wires making my daughter three pairs, and the third pair hung straighter than the first. The difference was only repetition.
Spacer beads in silver or gold metal tones help frame the decorative ones if you want a cleaner finish between colors, though a single bead on a short pin still looks intentional.
Michaels sells most beads on a string, which is enough to get you through a dozen pairs without thinking about sourcing. After that, yard sales and flea markets start looking like supply runs.

【HEAVY-DUTY PERFORMANCE FOR RELIABLE REPAIRS】Engineered with industrial-grade hardened chrome-vanadium steel, our clip pliers effortlessly remove stubborn automotive clips, fasteners, and trim panels without bending or breaking - perfect for repeated use on trucks, SUVs, and American-made vehicles.

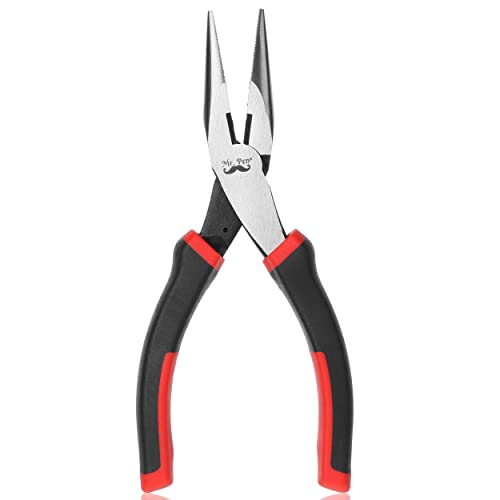
The package includes a 6-inch long nose plier with tempered jaws for working in hard-to-reach areas, which is excellent for working in tight places.
8. Gemstone Drop Earrings

Gemstone drop earrings take the same dangle logic as simple bead designs but swap lightweight beads for faceted stones or genuine gemstones that carry real weight. That extra heft changes what hardware can handle them.
A standard thin head pin bends under an amethyst or quartz drop; sturdier 22-gauge head pins or bail attachments are what keep the stone from working loose over weeks of wear.
Snaptite settings solve part of this cleanly. The back sits slightly smaller than the stone itself, so the claws snap around the faceted edge with pressure alone.
A 6mm amethyst drops straight in, no glue, no prong bending. These settings also come in 10ct gold if you want the metal to match the stone’s presence rather than fight it.
The mistake I see most is matching a heavy stone to flimsy hardware and calling it done. The loop opens, the setting tilts, the earring ends up in a pocket instead of an ear.
Heavier stones need either the snap setting’s built-in grip or a wrapped loop through a solid bail. Anything less and gravity wins.

[What You Will Get] You will receive 600 pieces of 2 inch craft head pins, and 1 piece of plastic box is included in the package; abundant quantity to meet your different uses and replacement needs.

Freedom DIY:Head pins are an essential accessory in jewelry findings DIY creative programs. Especially flat head pins, it's widely used to connect multiple beads, charms, gemstones or pendants, to DIY your unique anklets necklace, bracelet, dangle earrings.

Package includes: You will get about 200 pieces head pins. Enough quantity to meet your various needs of DIY jewelry making or craft creations
9. Beaded Hoop Earrings

Beaded hoop earrings sit right at the sweet spot between simple and finished-looking.
A 24mm diameter is the size that keeps showing up as the practical standard; big enough to let beads move, small enough that the hoop does not swing into your collarbone.
Memory wire or pre-formed hoops save the trouble of shaping a perfect circle yourself. Slide on large-holed beads, amazonite or carnelian or black agate, and the metal shows through in intervals.
The same three tools handle the finishing: wire cutters to trim any excess, round nose pliers to tidy the loop ends, flat nose pliers to grip while you work the closure shut.
The only real choice is whether to string beads along the full curve or cluster them at the bottom. Full curve reads delicate; bottom-weighted reads intentional.
Either way, the build takes under a minute once the beads are picked out, which is why this style tends to become the one you reach for when you need a pair by tonight.

Suitable for home decoration: due to its lovely appearance and gem like luster, it can be used for hair art, fish tank, plant bonsai, mural decoration, etc. Only you can't think, without thing can't do.

Package Included: 300pcs Tibetan spacer beads in a convenient storage box, 6 styles and 2 colors, each 25 pieces, enough for your jewelry making

Package Include: You will receive 300pcs 6 styles alloy spacer beads. The size is about 6~7x2~3.5mm, hole: 1~2.5mm. Perfect size for earrings or spacers for jewelry projects. With lager hole size, these spacer beads accessories are convenient to operate and much easy for the bracelet string to go through.
10. Chandelier Earrings

Chandelier earrings look complicated until you break them into repeated moves. The frame is just a central shape, often a teardrop or diamond, with smaller loops wired along its edges.
Each loop holds a short dangle built the same way as a simple drop: bead, head pin, wrapped loop. The difference is doing it six or eight times and keeping the lengths staggered so the tiers fall cleanly.
What convinced me, reading through a dozen tutorials, is that this is labeled an advanced beginner project for a reason. The technique never changes, but the assembly demands patience.
If one dangle sits even slightly crooked, the whole earring hangs lopsided. Work over a bead mat and lay out every dangle before attaching anything.
Thread all head pins first, trim and loop them, then hold the set against the frame to check balance before you close the final wraps.
Weight matters more here than with single-drop styles. Too many heavy beads on a thin frame and the earring pulls forward on the hook.
Brass or copper frames hold up better than thin plated wire, and they take a patina well if you want that aged look.
11. Threader Earrings

A thin chain or wire threads straight through the ear hole with beads fixed at one end, and that is the whole earring. No hook, no back, no extra hardware.
The weight of the beads keeps it from sliding out, and pulling the chain to a different length changes how it hangs.
About three inches of chain past the bead end gives enough to thread and still leave a tail showing, which is the look that makes these work.
The first pair I tried came out lopsided because I cut the chains equal before threading, not accounting for how much disappears inside the lobe. Now I add half an inch to each piece and trim after a test wear.
This style uses less material than almost anything else in the diy jewelry earrings lineup. A few inches of fine chain, two beads, two end pins to hold them.
The minimalist finish means every cut has to be clean; frayed chain ends catch on skin and ruin the whole point. Flush cutters, not household scissors, are the tool that matters here.
12. Vintage Repurposed Earrings

Vintage repurposed earrings start with anything that already has a hole or a way to add a bail.
Old buttons, broken necklace beads, single clip-on earrings missing their mate: if you can thread wire through it or glue a loop to the back, it hangs.
Thrift stores are where the good material hides. Mass-produced craft beads repeat the same shapes; vintage necklaces and bracelets from estate bins or flea-market tables give you glass, crystal, stone, and pressed shapes you will not find in current stock.
I sort my finds by color and size once I get home, then decide which beads deserve to be singles in a drop setting and which look better stacked in sequence.
The hunt itself teaches you what works. A green glass bead with a drilled hole becomes a simple dangle with a short ear wire.
A cluster of mismatched spacers, flat beads used between larger ones, builds into something larger. If the piece lacks a hole, a glued-on bail converts it, though I trust drilled pieces more for daily wear.
My daughter wears three pairs I made this way, green glass drops among them. The earrings are one-of-a-kind by default, and the cost stays low enough that a mistake is just a bead back in the sorting tray.
13. Snaptite Settings

Snaptite settings solve the one problem that stops most beginners cold: getting a faceted stone to sit straight without glue globs or wobbly prongs.
The back plate is slightly smaller than the stone itself, so the metal claws flex outward as you press, then spring back and grip the girdle with even tension all around.
A 6mm setting takes a 6mm standard faceted stone, full stop; size it wrong and the snap either fails or cracks the stone.
I watched this mechanism described a dozen times before I understood why it works so cleanly. The claws are pre-shaped to the right angle, so you are not bending anything by eye.
You seat the table of the stone face-down on a soft surface, center the setting over it, and push with steady thumb pressure until the metal clicks home. No solder, no open flame, no waiting for epoxy to cure.
The finished face looks like a professional four-prong setting because, functionally, it is.
These come in sterling silver and in 10ct gold if you want the warmer tone without the 14ct price jump.
For someone who wants the crisp geometry of a cut gem but has not yet learned to build a bearing with a bur, this is the honest shortcut.
14. Glue-In Settings

Glue-in settings are the cleanest shortcut to a modern, stone-forward earring when you want zero metalwork beyond the base itself. A sterling silver milled edge earstud cradles the gem; your only job is fixing it in place.
Devcon 5 Minute Epoxy is the adhesive that holds, and the name is worth remembering because not every craft glue survives the flex and skin contact of daily wear.
The process is spare. A thin layer of epoxy goes into the setting’s cup, enough to wet the surface without pooling up the walls.
The cabochon drops in flat side down, and the milled edge does the visual work, giving a finished rim that looks intentional, not improvised.
Blue lace agate is one stone that sits especially well in this format, its pale banding readable through the low profile.
Five minutes is the working window, so placement needs to be steady and final. Full cure takes longer, and the earring stays flat while the resin sets.
The result reads contemporary because the metal stays minimal, almost a frame rather than a feature. For anyone building diy jewelry earrings without a torch or a saw, this is the format that keeps the focus on the stone itself.
Frequently Asked Questions
What tools do I need to make earrings?
You need flat nose pliers, wire cutters, and round nose pliers. These three tools handle about 90% of beginner earring projects.
A serrated flat nose pair is worth adding later for gripping jump rings, but the core three get you through dangles, drops, and basic hoops before you need anything else.
What types of beads can I use for earrings?
You can use glass, crystal, or stone beads.
Michaels sells most beads on strings so you can see the full color run, and thrift stores or old jewelry are great sources for vintage beads that would cost three times as much new.
Spacer beads in silver or gold metal tones are worth adding too, they frame your decorative beads and keep the design from looking crowded.
How do I attach beads to earring hooks?
Thread your beads onto a flat head pin, bend the wire 1/4 inch above the top bead, trim the excess so roughly 1/4 inch remains, then roll that trimmed end into a loop with round nose pliers.
Slip the loop onto the earring hook and close it securely with flat nose pliers. Leave the loop slightly open at first so you can hook it onto the finding, then finish the closure after everything is linked.
What are snaptite earrings?
Snaptite earrings use settings that snap around a faceted stone for easy attachment.
The back plate is slightly smaller than the stone itself, so the metal claws flex outward as you press, then spring back and grip the girdle with even tension all around.
A 6mm setting takes a 6mm standard faceted stone, and these settings come in sterling silver or 10ct gold.
How do I make glue-in settings?
Apply Devcon 5 Minute Epoxy to the setting’s cup, enough to wet the surface without pooling up the walls. Set the appropriately sized cabochon flat side down into the cup, and keep the earring flat while the resin sets.
The milled edge of a sterling silver earstud gives a finished rim that looks intentional, and blue lace agate is one stone that sits especially well in this format.