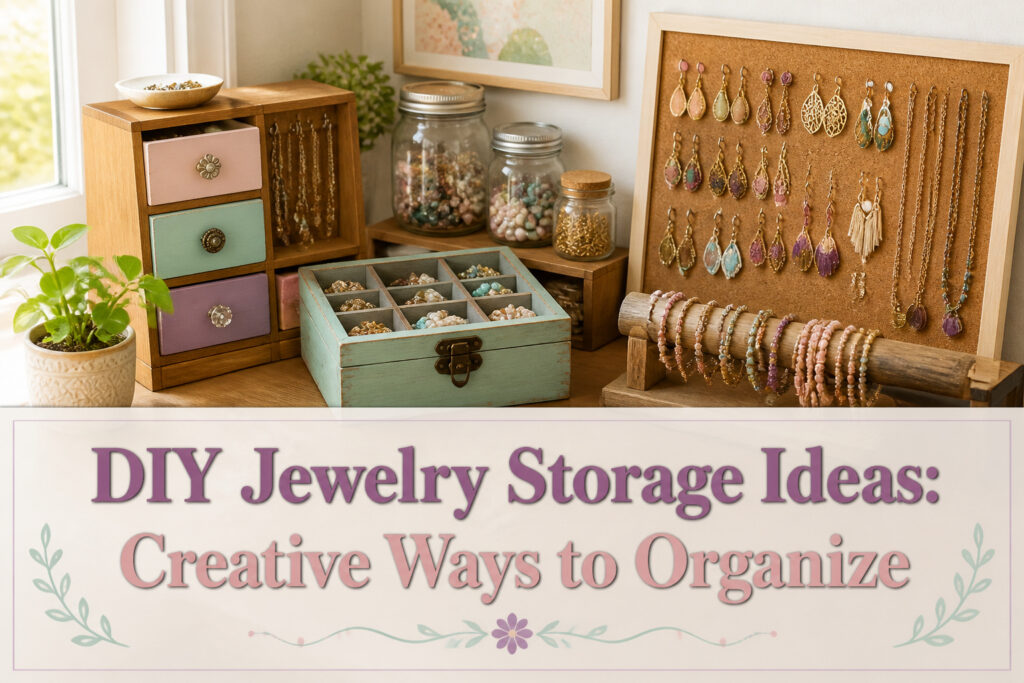
The projects below range from a $20 board of cabinet knobs to scrap-wood builds that cost nothing but an hour.
What separates the one you finish from the one you abandon is not skill; it is knowing which material fails before you start. Hot glue on wine corks, for instance, dries brittle within months, while wood glue holds.
That distinction runs through every build here.
1. Farmhouse Charm Board

A wall-mounted board built from 1×2 boards cut to about 20 inches hits a sweet spot between compact and useful. The real character comes from finishing the face with chicken wire stretched taut across the frame.
That mesh does double duty: it gives the piece its farmhouse look and creates instant storage without buying a single extra hook.
The wire openings are just wide enough to poke earring posts through and let the backings catch on the other side. Studs slide in at an angle; hoops thread through two adjacent diamonds and rest in the gap.
No drilling, no gluing hardware, no measuring spacing between hooks. The irregular grid even forgives sloppy placement, which matters when you are building after work with a handsaw that cuts slightly crooked.
I built one of these for my sister’s bathroom last spring. The boards were scrap from a fence repair, and the chicken wire came in a roll too wide for any project I actually planned.
The whole thing cost the price of a cheap staple gun and an hour of swearing at corners that would not square. Paint helped.
Two coats of white over the knots, then a quick sand at the edges to let the raw wood show through, gave it the weathered look she wanted without waiting years for actual weather.
The limit is weight. Chicken wire supports earrings fine, but a heavy pendant necklace will sag the mesh outward over time.
Keep this one for lightweight pieces, or add a small dowel across the bottom for bracelets if you want the board to handle more.

Keep your memory: The beautiful moment is worth remembering forever. Use the wall grid photo display panel with a mint green wooden frame to create your personal message board, which is neat and beautiful. Record important events or memories that need to be reminded. Also it’s a great way to display your jewelry and ensure all your jewelry has an opportunity to be seen and worn. Keep your jewelry organized without getting tangled or damaged in a box or drawer.

Rustic Premium Material: Crafted from high quality wood and sturdy iron chicken wire mesh, this frame features a coconut brown surface that blends durability with a charming, vintage aesthetic. The natural wood grain and hexagonal wire mesh create a classic, farmhouse-inspired look

STURDY AND DURABLE JEWELRY DISPLAY: The earring display stand is made of 100% pine wood ,which thickness is 0.8Inch.The card holder is durable, lightweight, smooth and artificial carefully polished.
2. Silverware Tray Color Sort

Wooden silverware trays from thrift stores turn into jewelry organizers with nothing more than paint and patience. I picked up three for under $8 total, each already divided into the narrow compartments that keep chains from tangling.
The painting process matters more than the color choice. One board gets your base coat first, blue in my case, with painter’s tape laid down only after that layer is fully dry.
Press the tape edges hard so the second color, gold spray paint, does not bleed underneath. Pull the tape while the top coat is still wet, and the two-tone pattern comes out clean.
Necklaces, bracelets, rings, and brooches each get their own tray, or you can dedicate one compartment per category on a single piece. The divided sections do the anti-tangling work for you, no extra hooks needed.
Painter’s tape applied to dry paint is the step most people rush and regret. Skip it and you will be touching up edges for an hour.

Large Capacity :The Wall jewelry organizer combines a ring display box,earring holder,necklace holder,and storage shelf, providing ample space to store your jewelry.

SPACE SAVER: Save space on your vanity dresser and accentuate your vintage room decor with this wall jewelry organizer where you can see all your cute necklaces, earrings, bracelets, watches, and hair accessories and easily pick out what to wear.

Secure Anti-Tangle Storage: Staggered L-shaped hooks keep everything from delicate chains to substantial statement pieces secure and tangle-free. This thoughtful layout provides ample and accessible space for all your layered necklaces, keeping your entire collection perfectly organized and ready to wear
3. Fabric-Covered Corkboard

Cork grips pins without the gradual looseness that foam boards develop after a few months of use.
The porous structure keeps its hold even with repeated poking, which matters when you are hanging lightweight studs or heavier dangle earrings from the same surface.
Wrapping the board in fabric keeps metal backings from catching on raw cork. Slightly stretchy material works best here; you pull it taut across the face, staple it to the back, and the tension smooths out wrinkles without fighting you.
One commenter noted she used a staple gun and a neutral linen that let the jewelry stand out against it.
That slight give in the fabric means the pin slides through cleanly while the cork beneath still does the actual gripping.
Stud earrings are the one place this setup falls short, since they have no hook to pin through. For everything else, the combination holds necklaces, bracelets, and watches without the sagging that eventually ruins foam-backed alternatives.

Expandable Design for Flexible Fit: This Lifewit silverware organizer adjusts from 8" to 13.8" wide, making it ideal for small to standard drawers. Perfect for everyday forks, spoons, and knives—not designed for oversized utensils. Please measure your drawer before purchase.

24-Piece 4-Style Set, All Storage Needs Covered: Get 24 velvet jewelry trays (4 styles × 6pcs each): 6-grid (bracelets/necklaces), 12-grid (medium earrings), 15-grid (small earrings/rings), 18-grid (tiny accessories). Perfect for statement pieces to dainty jewelry—neat and accessible.

Fits Most Drawers: This kitchen drawer organizer measures 8.6 x 12.5 x 1.5 inches (21.9 x 31.4 x 3.8 cm) and fits easily into most standard and small drawers, providing ample storage space for knives, forks, spoons, and other flatware
4. Cabinet Hardware Hooks

A painted board mounted with drawer pulls and cabinet knobs gives necklaces and bracelets staggered heights that keep chains from tangling. The typical project runs about $20–25, and the finished piece looks more deliberate than its price suggests.
The wood matters less than the drilling. Pine boards around 1×4 inches and 24 inches long are common starting points, sanded to 220 grit before painting.
White chalk paint with lightly distressed edges reads as vintage; dark walnut stain leans farmhouse. Either way, pre-drill your holes to keep the screws from splitting the grain.
Ceramic knobs, turquoise pulls, or crystal styles all thread through the same prepared openings, so the look shifts without changing the build.
Mounting takes two drywall anchors and a level. One board can handle an entire necklace collection, or you can split by jewelry type and hang boards in a row.
Pushpins at the back of thicker statement pieces help them lie flat against the wall instead of jutting forward.

Set of 2 : Perfect for display earrings, necklaces, bracelets rings and other jewelry, keep your jewelry organized and easily accessible

Adjustable Design: The 12-grid layout features dividers, allowing you to customize compartments for different jewelry sizes. Whether you need space for delicate rings, chunky bangles, or long necklaces, this versatile tray adapts to your storage needs. The stackable design maximizes drawer or countertop space efficiently

High Quality: The beige jewelry drawer organizer inserts are made of premium velvet, soft and comfortable, protecting your jewelry from scratches. Made of high-quality MDF, the velvet jewelry trays are sturdy and durable, resistant to deformation or breakage, ensuring long-term use with peace of mind
5. Wine Cork Necklace Rack

A wine cork necklace rack starts with the simplest material: corks sliced lengthwise and glued flat-side-down to a backing board.
The curved outer surface faces out, cradling chains in that gentle arc so they never crease or kink against a hard edge.
Glue choice matters more than most people expect. Hot glue fails within months as the cork dries and shrinks; wood glue or a strong construction adhesive bonds to the porous cork and the board beneath it without going brittle.
The cork itself grips metal better than velvet ever will. Velvet looks elegant, but chains slide against it every time you breathe on the rack.
Cork has that slight give and natural friction; a chain settles in and stays put until you lift it free.
The backing board can be anything rigid: a painted plank, a thrifted frame with its glass removed, a scrap of plywood sanded smooth. Space the cork halves about two fingers apart so necklaces hang without tangling.
The whole thing weighs almost nothing, which means a couple of picture hooks handle mounting without drama. For anyone drowning in chains that currently live knotted in a drawer, this is the project that actually gets finished in an afternoon.

Keep your memory:The beautiful moment is worth remembering forever. Use the wall grid photo display panel with a wooden frame to create your personal message board, which is neat and beautiful. Record important events or memories that need to be reminded. Also it’s a great way to display your jewelry and keep your jewelry organized without getting tangled or damaged in a box or drawer.

Enhanced Display: Our Pinzoveco rotating earring display offers a mesmerizing way to showcase earrings. Featuring 40 hooks suitable for the earring cards size 2.2" W x3.6" H, it provides ample room to exhibit a diverse selection of earrings and captivate prospective customers. Dimensions after assembly 9.5"D x 9.5"W x 20"H

Jewelry Stand: You will receive 1pc wooden earring display stands with 3-slots. The size is about 11.81 inch(30cm) long, 3.05 inch(7.75cm) wide, 0.41inch(1.05cm) high, slot: 0.11 inch(0.08cm). The proper size can meet your jewelry display needs.
6. Tiered Wooden Bracelet Holders

A tiered wooden bracelet holder starts with a weighted base, usually a block of hardwood or a painted concrete paver, so the whole thing does not tip when you slide on a heavy cuff.
Standing dowel rods or split branches in that base gives vertical storage that keeps bracelets visible and sorted by width.
The diameter matters more than you might expect. Bangles need a rod between half an inch and three-quarters of an inch across, narrow enough that the bracelet hangs without slipping but thick enough that the opening does not catch.
Cuffs and wider rigid pieces work better on something closer to one inch, since the weight sits more evenly and the bracelet is less likely to rotate and bang against its neighbor.
Split branches, the kind with a flat face where the wood was halved, add texture and cost almost nothing if you have access to fallen hardwood.
The flat side faces out, the curved side goes against the wall or simply faces backward on a dresser.
Sand the bark smooth or leave it; either way, seal it so oils from skin and lotion do not darken the wood unevenly.
Three tiers, graduated in height, let you see everything at once without the back row hiding. The tallest rod sits at the rear, shortest at the front.
Glue the rods into drilled holes, no deeper than two-thirds of the base thickness, and let the adhesive cure fully before loading it.
A wobbly holder is a dropped bracelet, maybe a chipped one, and that defeats the purpose of building storage in the first place.

Tangle Free Necklace Holder: This necklace organizer is designed for rings, necklaces, and bracelets, especially for longer necklaces that have to be folded up to fit inside the jewelry box, what a mess of necklaces. This necklace holder is perfect for keeping delicate chain necklaces separated & tangle free.
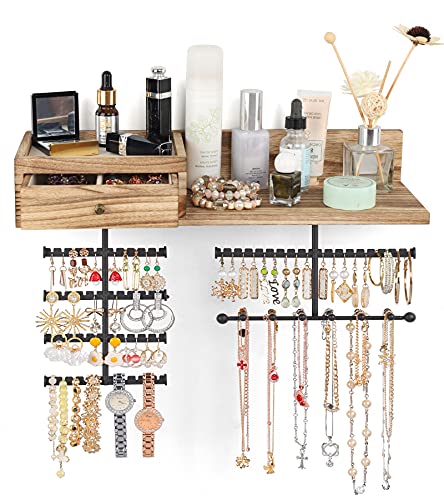
Innovative Improved Jewelry Organizer:Totally 6 rods,allowing you freely place earrings,necklaces,bracelets,watches,eye glasses etc..Large capacity earring organizer:58 slots instead of holes,directly place and fetch;Necklace organizer:branched rods instead of single rod,avoid tangling,directly get the piece you want;Ring&brooches organizer:wood drawer,lined with soft fine linen,divided compartment for rings and brooches;Ample space shelf for storing cosmetic,perfume bottles,display decor items

Material and Style: The wall jewelry organizer consists of a box and a holder. It features a sturdy wooden structure. Velvet lining protects jewelry from scratches; a clear mirror supports daily grooming; a vintage swing latch replaces a lock for easy access. The white finish retains wood grain. Its farmhouse style suits most home decor.
7. Mirror With Hidden Storage
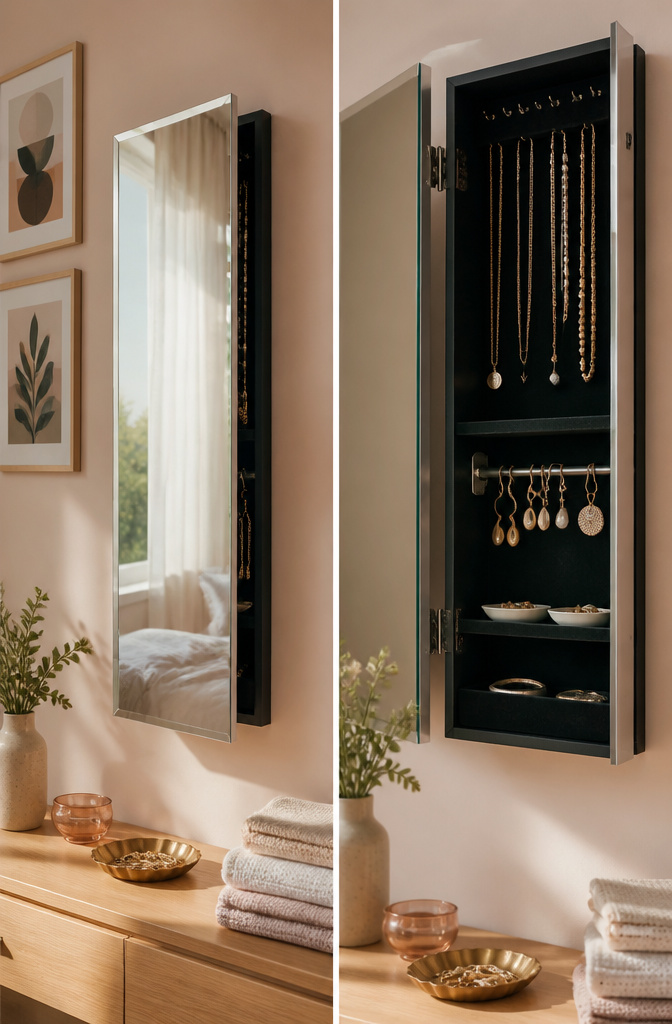
A hinged mirror with storage behind it works best when the cavity stays shallow enough that the glass sits nearly flush against the wall.
Most builds use a standard picture frame or a shallow cabinet box, and the depth limit is usually the width of the frame itself, about two to three inches at most.
Go deeper and the mirror starts to jut like an armoire, which defeats the point of hiding it in plain sight.
The inside is simple: small hooks along the top edge for necklaces, a few narrow shelves or compartments below for rings and earrings. A magnetic catch or simple ball latch keeps the door closed without visible hardware.
Mounting takes a French cleat or sturdy Z-bar bracket, since the mirror side is heavy and the whole unit will be opened and closed often.
What convinced me, reading through a dozen of these builds, is that the mirror itself should be real glass, not acrylic. Acrylic scratches when you clip earrings against it, and the whole door gets handled like a cabinet front.
Tempered glass adds weight but survives the daily motion. The shallow depth does limit bulk storage, so this setup suits a curated collection rather than a packed jewelry box.

12 Grids Jewelry Tray: With 12 separate grids, jewelry tray inserts neatly organizes different jewelry pieces. Sort rings by style, group earrings by pair, or separate small accessories. No more tangling or misplacing—everything has its own spot
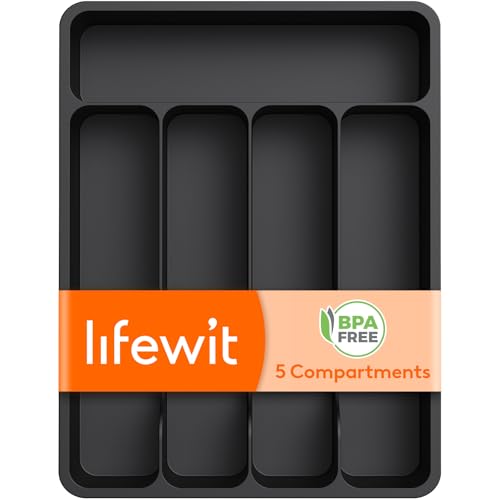
Fit Most Drawers: Measuring 9.1" x 12.6" x 1.6" (23 x 32 x 4 cm), the Lifewit narrow silverware organizer easily fits in most standard and small-sized drawers. This universal utensil drawer organizer helps you maximize storage space efficiently while keeping your utensils neatly organized and easily accessible
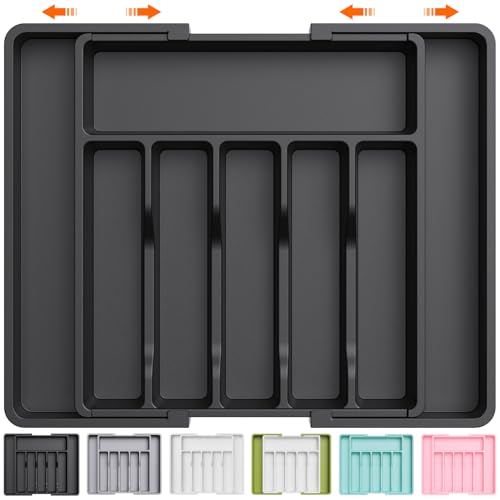
Large Capacity: Organize your kitchen drawer and make more space with the this silverware organizer. Comes with two expandable panels on the left and right to store more silverware, cutlery, and kitchen utensils.
8. Topsy-Turvy Box

A standard jewelry box wastes vertical space and hides half the collection in drawers you forget to open.
The hinge relocation turns the whole box ninety degrees so the lid becomes an angled display easel and the drawers pull from the side, which means earrings and rings stay visible while you work.
The original lid hardware comes off with a small screwdriver. Reattaching it along what used to be the back panel gives the top a sloped face, roughly twenty to thirty degrees depending on the box depth.
That angle matters. Too shallow and bracelets slide; too steep and the easel tips forward when loaded.
The felt or velvet lining already inside most boxes provides enough friction at moderate slopes, though a thin cork sheet glued over it stops heavier pieces from drifting.
Side-mounted drawers need simple L-brackets or a wooden runner screwed to the interior walls. The old drawer faces become the new pulls, now facing left or right instead of upward.
Small items, studs especially, roll less in this orientation because gravity presses them against the back wall of each shallow compartment rather than letting them skate across a flat horizontal surface.
I built one from a thrifted flatware chest with three slim drawers. The hinge swap took twenty minutes.
The real limit is depth: anything over about six inches front-to-back looks awkward on its side and crowds a vanity top. Shallow boxes, the kind sold for silver spoons or tea bags, suit this conversion best.

Set of 4 can hold a dozen of jewelry, allows you to view everything, so much easier and faster to pick up the right items to wear with your outfit, save your time and make your life so much easier; No more tangled necklaces or hunting for a matching earring

★DIMENSIONS:13.78"x1.38"x9.45"/35x3.5x24CM(LxHxW),each compartment 3.15"x2.76"/8x7CM(LxH),You can fit them in a 15"wide x 11"deep drawer or rest them on a dresser or a valet.
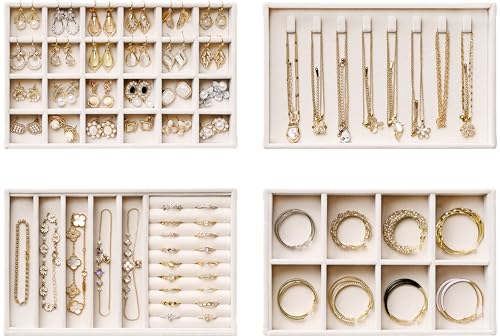
4-Piece Velvet Jewelry Trays Set - This stackable jewelry organizer includes 4 jewelry tray inserts that neatly store and display rings, earrings, necklaces, bracelets, watches, sunglasses and so on. Easily view your collection and find what you need in seconds—no more tangled chains or missing pieces.
9. Pottery Barn Inspired Holder

A wall-mounted bar with S-hooks and a small shelf below replicates a retail look for a fraction of the cost.
The metal finish matters more than you’d think: brass cup hooks spaced about 2 inches apart give that warm, pulled-together tone, while chrome or matte black read as hardware-store afterthoughts.
Match the bar to the hooks, or at least stay in the same family.
The stud-finding mistake cost me an afternoon. I drilled four holes before realizing the wall was lathe and plaster, not drywall, and the stud finder was pinging on every other strip.
Anchor into actual structure, not hope: a 12–18 inch shelf loaded with jewelry will rip straight out of hollow wall if you trust anchors alone.
Toggle bolts work in a pinch, but a stud hit is the only thing I’d trust for daily use.
Wall-mounted hooks keep individual strands separate and safe, not in a heap of messy tangles.
Use wall-mounted decorative hooks as an organized and aesthetic way to display all your bracelets and necklaces.
What this means for the reader: the display is the storage. You will actually reach for pieces you can see, and chains stay tangle-free without extra steps.

Design: Hanging board features a wooden frame with a weathered, distressed finish, at the bottom is a black metal handle. Overall creating a unique and appealing aesthetic that would fit well in a farmhouse, country-themed interior.

Enhanced Display: Our Pinzoveco rotating earring display offers a mesmerizing way to showcase earrings. Featuring 40 hooks suitable for the earring cards size 2.2" W x3.6" H, it provides ample room to exhibit a diverse selection of earrings and captivate prospective customers. Dimensions after assembly 9.5"D x 9.5"W x 20"H

Earring Display Card Holder: Our earring display rack is designed with four levels of grooves, you can insert the earring display card in the grooves so that you can visually display your jewelry, more convenient for you to choose and pick up them.
10. Fabric Pocket Wall Hanging

A canvas or linen panel hung from a wooden dowel gives jewelry a soft landing that rigid organizers cannot match.
The fabric pockets swallow earrings and rings without the clatter of metal on wood, and the whole thing rolls or folds flat for travel in a way a framed board never will.
Pockets need to run about three inches deep if you want studs to stay put. Anything shallower and the posts work themselves through the opening during a car ride or a closet door swinging shut.
I have seen shallower pockets sold as jewelry storage, and they function fine for hoops or dangle earrings that hook over the edge, but studs drop straight through.
The construction is forgiving enough that staples through the back can hold the fabric in place if you do not sew, though folded and stitched edges look neater on a bedroom wall.
Stretchy fabric works but relaxes over time; a neutral linen keeps the jewelry visible and lets silver and gold read true against it.
One reader I noticed keeps two panels, one for each metal, so nothing tarnishes from contact with the wrong alloy.

WALL MOUNTED JELWERRY ORGANIZER:Rustic Wall Mounted Jewelry Organizer with Wooden Barn door Decor.is made out of real wood and 100% handmade. with a brown barn wood finish, and creates a rustic stylish look.Quality crafted with great attention to the slightest detail.this hanging jewelry organizer will add a touch of unique rustic air to your room décor!

【Tangle-Free Necklace Organization】: Say goodbye to the frustration of tangled necklaces. Our wall-mounted jewelry storage hook allows you to hang your necklaces with ease, preventing them from intertwining and making them a breeze to manage. Enjoy the simplicity of a well-organized jewelry display every time.

Secure Anti-Tangle Storage: Staggered L-shaped hooks keep everything from delicate chains to substantial statement pieces secure and tangle-free. This thoughtful layout provides ample and accessible space for all your layered necklaces, keeping your entire collection perfectly organized and ready to wear
11. Lace Hoop Earring Display

Lace stretched inside an embroidery hoop gives stud earrings a display that reads more textile art than hardware store.
The weave needs to sit tight, almost drum-tight, so a post pushes through cleanly without snagging threads or leaving a permanent gape behind it.
Too loose and the fabric relaxes after a few pairs; too tight and the hoop warps or the lace tears at the grain.
I tried muslin first, thinking softer was safer, but the holes closed behind the backs and earrings dropped straight through. Switching to a stiff cotton lace with an open, regular grid solved that.
The tension sweet spot is when you can press a post through with fingertip pressure but feel a slight resistance, like pushing a needle through taut canvas.
Mount three or four hoops in a vertical row at eye level and the set functions as both storage and a color gradient you actually notice on the wall.
12. Shutter Slat Organizer

Salvaged wooden shutters already have the slat spacing most hook sizes need, which saves the measuring step that ruins other projects.
The slats sit close enough that standard earring hooks catch cleanly without bunching, and the depth gives bracelets a ledge that keeps them from sliding off.
I learned the cleaning process the hard way: skipping the sanding leaves old paint dust on everything you hang.
A medium-grit pass followed by a damp cloth, then letting the wood dry fully, takes about twenty minutes and keeps white metal from graying.
For the slats themselves, cup hooks thread directly into the wood without pilot holes if you stay an inch from each end and space them roughly three-quarters of an inch apart.
That density fits most collections without crowding, though heavier necklaces will want the top rail where the frame is thickest.
The bottom ledge, originally built to catch rainwater, now catches bangles and watches; its slight slope actually helps, letting you read labels without lifting pieces.
The 0.75-inch spacing between hooks is the measurement that makes this work for stud earrings and French wires alike. Anything wider leaves gaps, anything tighter and you are fighting the wood grain.
If the shutter paint is chippy, strip it or seal it, but do not pretend the shabby look reads as intentional on a wall organizer.
13. Upcycled Drawer Dividers

Small wooden drawers pulled from discarded furniture make surprisingly good jewelry homes once the original hardware comes off. The real work is in the insert.
Cardboard scored and folded to match your collection, thin wood strips cut to length, or even the drawer itself subdivided with strips of basswood from the craft store.
The insert depth should sit about a quarter inch below the rim so nothing catches when you slide the drawer out.
Stack three or four of matching size on a dresser top and the footprint stays small while the storage multiplies.
Wall-mounted, a single drawer becomes a shallow shelf with the front face still showing its original character, paint layers and all.
Felt lining matters more than it looks like it should. Unlined wood lets silver tarnish faster than you’d expect; the sulfur compounds in oak and some pines actually accelerate it.
Wool felt or a synthetic equivalent laid loose or glued flat creates the barrier. Gray or charcoal hides dust and shows earrings clearly.
White looks cleaner for about a week.
14. Wire Grid Earring Panel

A 16-by-20 inch frame with welded wire mesh or old refrigerator shelving stapled to the back makes a dense grid that holds dozens of hook earrings in clear view. The mesh gauge matters more than most people expect.
Chicken coop wire from the hardware store, the kind with half-inch openings, bends easily and works fine for lightweight studs, but the softer metal will sag under heavier drops or clustered pairs.
For those, refrigerator shelving or hardware cloth with a stiffer 19-gauge wire keeps its shape once framed.
The flattening step is where patience pays off. Rolling the mesh flat and weighting it overnight, a bar stool works, saves the frustration of fighting a coil that springs back while you staple.
Cut to the frame’s cardboard insert as a template, then staple into the groove where glass would normally sit.
A small shelf added to the bottom, about four inches deep, catches studs and posts that do not hang, plus cup hooks underneath for necklaces.
One thing I noticed reading through builds: the shelf is almost always an afterthought, something people add once they realize the wire grid leaves nowhere for the rest of the collection.
Plan for it from the start and you skip the mid-project pause.
What Tools Are Worth Owning

A cordless drill and a 1/16 bit show up in almost every jewelry build, from the 1×2 boards to the 1×4 planks.
Cup hooks and wooden dowels need those pre-drilled holes or the wood splits, and the sources keep the hardware simple: brass cup hooks, rubber-coated hooks that run about a buck for four at Home Depot, or crystal cabinet knobs with their included screws.
The one tool that outperforms its price point is a basic sanding block. Not a power sander, not even an electric mouse, just the handheld block.
The builds all start with common board or plywood, and a sanding block smooths the face grain before paint or stain goes on.
It costs next to nothing, fits in a kitchen drawer, and saves the finish in a way skipping this step never does.
I noticed every tutorial that produced a clean result included it; the ones that looked rushed left it out.
For hanging, D-ring hooks, jute twine, or Command Strips handle the wall side. Wall anchors matter if you are mounting anything heavier than a 12-inch plank with a few knobs.
Wall Mount or Countertop

A 20-inch wall-mounted standard takes up no desk space, which mattered in my first apartment where the only flat surface was a folding table that already held a laptop and a lamp.
The tradeoff showed up fast: earrings and rings were easy to grab, but necklaces tangled against the wall if the hooks sat too close together, and anything heavier than a medium chain made the whole bar sway when I reached for it.
Countertop solutions in the second place solved the sway and the tangle by letting pieces hang free in open air, but they ate twelve inches of depth I did not have to spare.
Dust settled faster on open desktop stands, too, so the daily habit became wiping before wearing, not after.
Wall mounting works better for small collections you wear on rotation, where every piece deserves front view. Countertop wins when you own more than you display, because a shallow tray underneath can hold the overflow without drilling more holes.
The real limit is not the jewelry count; it is whether you remember to look up.
Why Upcycling Beats Buying New

Salvaged wood carries a warmth that factory-finished organizers never match. A scrap of barn board or a drifted branch brings texture and history straight into the build, and the grain does half the decorative work for you.
Vintage wooden spools add the same charm in a smaller package, their flanged edges perfect for keeping chains from sliding into tangles.
The one material I retired after a humid summer is ordinary corkboard left bare. It held earrings beautifully until August, when the backing turned musty and the whole panel smelled of mildew.
If you love the pin-up flexibility, seal the surface first or switch to fabric-covered corkboard with a moisture barrier behind it.
Reclaimed wood and natural branches need only a few cup hooks or small nails to become necklace racks. Mount them on a closet door and they disappear when company comes, or let them live on the wall as found sculpture.
Either way, the cost stays low and the character stays high.
Frequently Asked Questions
How do I organize my jewelry?
Wall-mounted organizers and upcycled materials work best for keeping pieces visible and tangle-free. A 20-inch wall board hits a practical size for most bedrooms, while countertop holders suit larger collections you rotate through.
The key is giving each piece its own hook or compartment so chains never touch.
What materials do I need for a DIY jewelry organizer?
Scrap wood, chicken wire, corkboard, fabric, and basic hooks cover most builds.
A cordless drill with a 1/16 bit and a sanding block are the only tools that show up repeatedly; cup hooks, dowels, and wood glue handle the hardware side without specialty parts.
How can I prevent my jewelry from tangling?
Dedicated hooks or compartments for each piece keep chains separated. Staggered heights on a cabinet-hardware board stop necklaces from overlapping, while divided silverware trays keep bracelets from knotting in drawers.
The wine cork rack uses cork’s natural friction so chains settle and stay put until lifted.