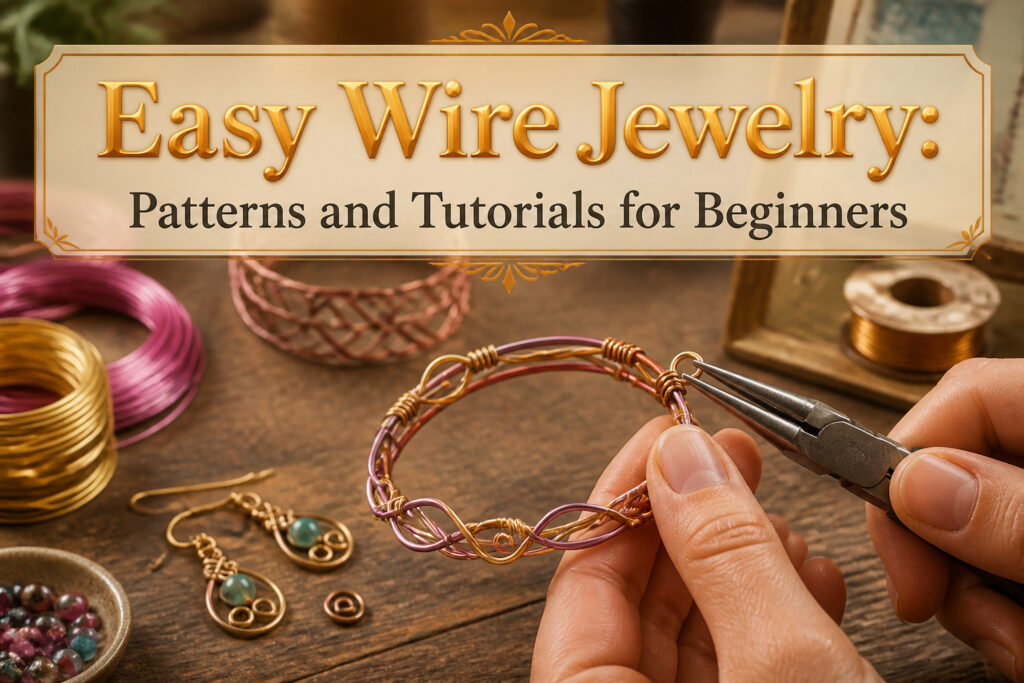
Easy wire jewelry is wire shaped by hand into bracelets, rings, pendants, and earrings without soldering or advanced metalwork. The catch is that gauge choice decides whether you finish in an evening or abandon the piece halfway through.
Twenty-gauge wire runs through nearly every successful project in this guide, from lattice bracelets that flex around the wrist to ear wires stiff enough to hold their shape through daily wear.
Lattice Wire Bracelet

The lattice bracelet taught me that 20-gauge wire is the sweet spot for structure without fighting your hands.
Thicker gauges hold shape but demand pliers and patience; 20-gauge, especially half-hard or work-hardened dead-soft, bends willingly yet keeps its form once woven.
The pattern builds from simple crosses. Two base wires run parallel, and a thinner weaving wire travels over one, under the next, repeating until the lattice locks into a flat band.
Nothing wraps, nothing spirals, just rhythmic over-under that shows progress fast. That visible progress mattered.
Earlier attempts with 18-gauge frames looked right until the clasp went on and the whole thing sat like a cuff on a wrist that was not cuff-shaped. The lattice flexes.
It follows the wrist’s curve because the crossings create natural hinge points.
I finished this one sitting at the kitchen table instead of walking away. The difference was the gauge choice and the honesty of the technique: no wrapped loops to disguise, no frame to force true.
Just wire doing what wire does when you match the thickness to the job.

Metal Type: 99.9% Pure Copper

Metal type: 99.9% Pure Copper CDA #110

【Size Reference】: Thickness 20 Guage (0.8mm,0.032inch); Length 10m (about 33-Feet/11-Yard)
Beaded Butterfly

A beaded butterfly takes maybe twenty minutes and teaches the two things that matter in easy wire jewelry: how much tension to hold while you bend, and when to stop fussing.
The wings are just four loops, two larger and two smaller, pinched together at the center.
Copper wire at 22-gauge is soft enough to shape with your fingers but stiff enough to keep the form, and a full spool costs less than a single silver clasp.
That matters because the antennae will look wrong the first six tries. Mine did.
The beads sit at the wing tips and the body, and their weight actually stabilizes the shape so the butterfly hangs flat instead of twisting. You do not need perfect symmetry.
Slightly uneven wings read as movement, which is the whole point of a butterfly. The real skill here is learning to let the wire tell you when the bend is enough instead of overworking it until it hardens and snaps.

【Certified 99.9% Pure Copper Wire with COA & Polishing Cloth】This ultra-fine copper wire is certified 99.9% pure and comes with a COA & polishing cloth. It’s uncoated, nickel-free, skin-safe, and develops a beautiful natural patina.

【Value Set】Our jewelry making set includes a high quality 22 gauge/0.6mm copper wire (total length 50m/164ft) and multi-function pliers. Tipes: The cutting pliers are coated with oil to prevent rusting, which may make them look dirty and easy to wipe clean.

Available as Individual Spools - Multiple Gauges & Lengths:These 99.9% pure solid bare copper wires are available for purchase as individual spools in practical gauges: 18 AWG (1.0mm), 20 AWG (0.8mm), 22 AWG (0.6mm), 24 AWG, 26 AWG, and 28 AWG. The pure copper material ensures excellent conductivity and ductility. Choose the specific gauge and length that perfectly suits your project needs from the available options.
Adjustable Cup Chain Ring

Cup chain settings sit the stones in tiny metal cups linked together, and that continuous strip is what makes this ring so straightforward to build.
I cut a short length, usually eight to ten cups for a finger, then wrap the ends with 20-gauge half-hard wire to form an open circle.
The half-hard temper matters here: dead soft would deform every time the ring opened, while half-hard springs back and keeps its shape through dozens of adjustments.
The gap between those wrapped ends is what lets the ring expand. A size 7 finger slides in easily, and a size 9 can wear the same piece by spreading the gap slightly.
That adjustability turns a single ring into a reliable gift, since you do not need the recipient’s exact measurement.
I have sent these to friends I only see once a year, and the wire’s slight flex means the fit stays comfortable whether their hands swell in summer or stay narrow in winter.
The wire itself needs to be thin enough to thread through the cup chain’s back loops, which is why 20-gauge hits the right balance.
Any thicker and the bulk shows; any thinner and the structure collapses after a few wears.
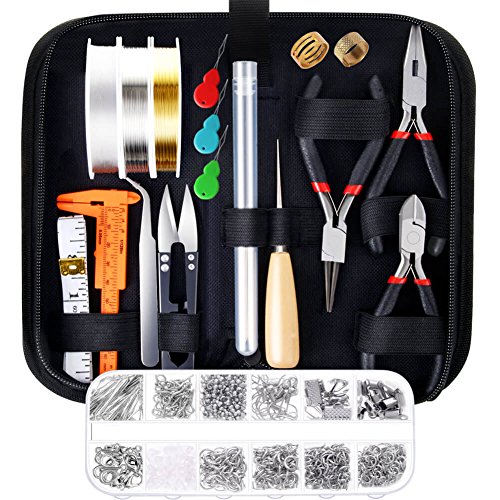
Please Note: If the pliers you received have some oil on the head that make it look like dirty, please do not worry. The jewelry pliers are coated with oil to prevent rust. Please wipe them clean with a cloth before use and apply oil to them before storage, which will help the pliers keep anti-rust.
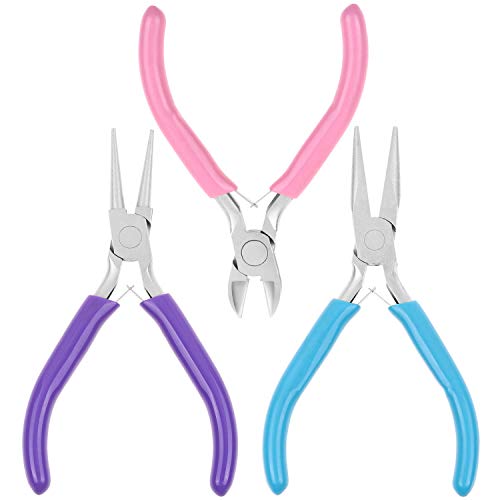
PLEASE NOTE: The jewelry making tools are coated with oil to prevent rust.If the jewelry making pliers you received have some oil on the head that make it look like dirty, please do not worry. Please wipe them clean with a cloth before use and apply oil to them before storage, which will help the pliers keep anti-rust

Package contains: you will receive 1 piece bail making pliers and 1 piece nylon nose pliers in the package, which can meet your various jewelry DIY needs, you can use them for different jewelry making
Wire Roses
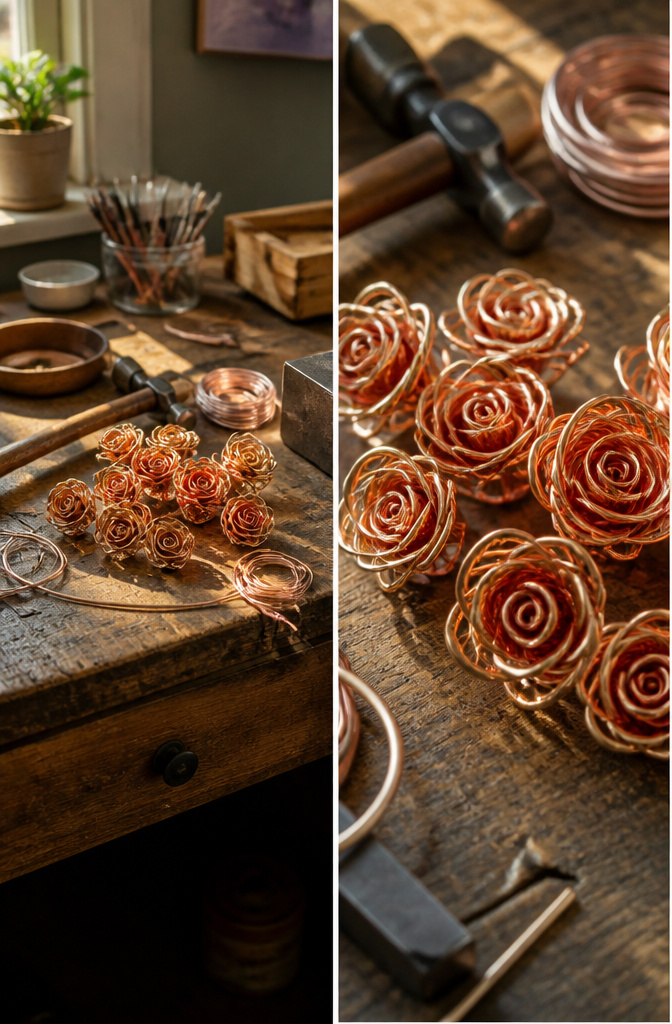
A continuous length of soft wire is the only way to get petals that fold naturally without fighting you.
Dead soft wire bends easily with your hands, which matters because the spiral-and-fold method asks the wire to curve, double back, and tuck under itself in one motion.
Half hard wire resists that flow; it wants to spring open the moment you release tension, and the rose collapses into a coil with gaps.
I learned the tension part by ruining three roses in a row. The first two I pulled too tight, which work-hardened the wire mid-sculpt and left brittle creases where petals should curve.
The third I kept too loose, so the spiral unwound before I could fold the outer loops into petals.
The fourth held because I gripped firmly but stopped short of straining the metal, letting the wire’s own softness do the shaping.
After the fold, the rose still benefits from hardening.
A few light taps with a nylon or rawhide hammer will stiffen it without flattening the petals, though I skip this if the piece is small enough that spring tension alone keeps the shape.

Material: Alloy, 100% brand new and high quality. Quantity: Set of 60 . Size: 0.55" - 1.85" (14 - 22 mm).

Package includes: 14pcs of Small Enamel Butterfly Design Pendants Inlaid Crystals for DIY projects

Package includes: 14pcs of Big Enamel Butterfly Design Pendants Inlaid Crystals for DIY projects
Chain Net Cage Pendant

A chain net cage pendant looks complicated until you break it into two jobs: the frame and the mesh. The frame needs to stay rigid, so 20-gauge wire does that work.
It bends with some effort, but a simple loop in 20-gauge holds its shape under stress.
The net itself is woven from 24-gauge, which is thin enough to coil and spiral without fighting you but still keeps its form once placed.
The weave builds in rings. You anchor the 24-gauge to the frame, loop it around a mandrel to make a consistent circle, then thread the next loop through the last before anchoring again.
Each ring links the previous one, and after a few rows you have a mesh that tightens around whatever stone or bead sits inside.
For months I used a Sharpie marker as my mandrel. The barrel is close enough to most ring sizes, and it was already on the desk.
The problem showed up in the fourth row every time: the plastic gave slightly under pressure, so rings on one side of the net came out a half-millimeter larger than the other.
That unevenness pulls the whole cage off-center once you close the frame.
A steel mandrel with stepped diameters fixes this completely, and it was the first tool I bought specifically for wire work rather than borrowing from the kitchen drawer or the desk.

【What You Get】100pcs x 5 sizes, 2 colors/ size, 50pcs/color, total 500pcs end tips. They are about 3~6mm wide, 3~6mm long, with 1.5~2mm hole. More size details please refer to the third picture.

FASHION FINGER RING: The 3D Cup and Saucer ring.whether you're buying it as a gift for someone special or wearing it yourself, any Alice fan will love cute and comfortable classic gift.It is the perfect addition to your coastal wardrobe. A great holiday gift she'll wear year around.

Our car hanging pendant can add cute atmosphere to your daily life by hanging it on the car mirror.The crystal sparkling pendant can also display it on the bag,to add a fashionable and new look, or it can be used as a hanging decoration in the home, store or office to meet your different decorative imagination. You can also hang the alphabet pendant on your bag, keychain, wallet or water bottle as an identification tag so that you can quickly identify your items at a party.
Flower Bell and Bead Bracelet

A single wire flower unit looks underwhelming on the bench. Six or eight of them, linked with small glass beads between each petal cluster, suddenly read as a real bracelet.
The repetition does the heavy lifting, not the complexity of any one bloom.
My first attempt at this pattern taught me where the real work sits. I spent twenty minutes perfecting the first flower, coaxing each loop into ideal symmetry, then rushed the next five.
The finished bracelet sagged where the inconsistent sizes fought each other. Consistency in loop diameter matters more than the beauty of any single petal.
The eye catches variation, not imperfection.
I assemble these on 18-gauge jump rings, two per connection point. Thinner rings open too easily; the bracelet loosens after a few wears.
The 18-gauge stock gives enough stiffness that the floral line keeps its shape against the wrist, yet the rings still close neatly with pliers. A 5 mm inner diameter leaves room for the bead spacer and both wire loops without crowding.
The bead spacers do more than separate. They add weight that keeps the flowers from flipping, and they let you adjust length in small increments.
A bracelet that falls between flower counts, too short with six and too long with seven, often lands right with an extra spacer at each joint.

Versatile Wire For Wrapping, Beading, Forming, And Custom Jewelry Components: Ideal for wire wrapping pendants, creating loops, setting stones, and forming your own ear wires, jump rings, clasps, and connectors. Whether you're a beginner making simple beaded chains or a skilled wire artist crafting intricate wrapped designs, this wire adapts easily to a variety of jewelry making techniques and tools.

Copper wire size: 20 gauge solid copper wire, 0.8mm diameter, 330ft/100.58m long.Can be trimmed to any desired length.

【Certified 99.9% Pure Copper Wire with COA & Polishing Cloth】This ultra-fine copper wire is certified 99.9% pure and comes with a COA & polishing cloth. It’s uncoated, nickel-free, skin-safe, and develops a beautiful natural patina.
Lariat Necklace

A lariat necklace builds from one long chain that threads through a wire-wrapped loop at the opposite end, letting the wearer adjust the Y-shape that hangs against the chest.
The first time I tried this, I used 20-gauge wire for the loop and the wrapped tips, and the bulk sat like a lump at the throat.
Switching to 22-gauge wire kept the ends neat enough to pass smoothly through the loop while still holding shape under tension.
The construction itself is forgiving. You form a small wrapped loop at one end of the chain, then wrap the raw chain ends at the other side with the same thin wire, leaving enough tail to thread through and catch.
Slight unevenness in those wraps disappears into the overall line; the eye reads the drape, not the individual coil.
That quality makes this a reliable early project, because a wrap that tilts a degree off-center still functions and still looks intentional once the chain is weighted and hanging.
What convinced me, reading through a dozen tutorials, was how many experienced makers still prefer this gauge for lariats specifically. Thicker wire fights the chain, and anything thinner risks slipping.

Material: Polished copper with coating.

Exact Gauge And Length You Can Plan Around: This copper wire spool holds 100ft / 30.48 m of 22 AWG copper wire measuring 0.024inch/ 0.6 mm in diameter. Remember the higher the gauge number, the thinner the wire — if this thickness is not the one your project needs, the size menu above covers 16 gauges from heavy 4 AWG to fine 34 AWG so you can pick by load instead of guessing

Uses: Perfect for wire wrapping jewelry; This high quality wire is available in several colors and gauges for a jewelry, craft, or hobby project that requires wire that holds its shape
Cord Ends and Clasp

Cord ends finished with a tight wire coil do the same job as a glued crimp, but the grip lasts longer and the repair is easier if it ever loosens.
Leather and silk cord both need this finish, since neither holds a knot securely under tension.
A few wraps of 26-gauge wire at each end gives enough bite to anchor the cord without the bulk of a bead tip or the weight of a metal cap.
The same coil technique works on any strung piece, whether ribbon, waxed cotton, or multiple strands of beading thread.
Once the coil is snug, thread on the clasp and wrap the tail back through the last two loops to lock it.
The 26-gauge wire does the gripping without adding noticeable weight, so the drape stays light even on a long cord necklace.

What You Get - You will get a box of crimp beads in 2 colors, including 400 pieces brass crimp tubes beads, 200 pieces crimp bead covers, 60 pieces knot covers, 200 pieces wire guardians, 40 pieces lobster clasps, 300 pieces jump rings, sufficient amount can meet your different needs of jewelry making

Complete Jewelry Making Kit: This set includes 1 Needle Nose Pliers, 1 Round Nose Pliers, 1 Wire Cutters, 1 Bent Nose Pliers, 1 Zipper Pliers, a tweezer, and a jump ring, perfectly suited for all your jewelry crafting needs, from wire wrapping to jewelry repair
Mix O Match Earrings
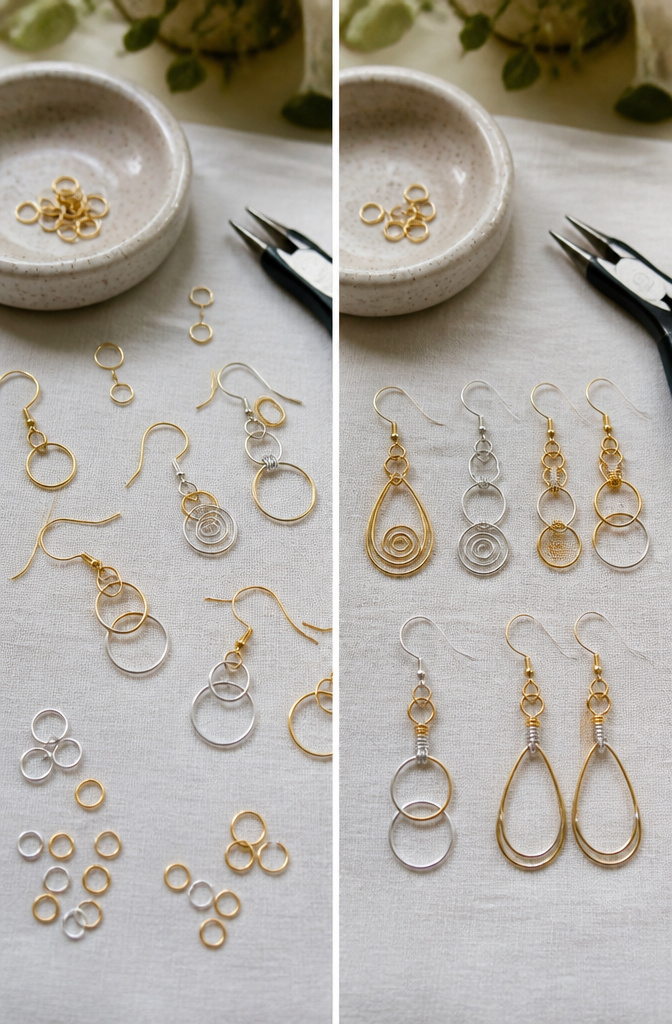
A pair of earrings you can split up and recombine sees more wear than the matched sets sitting untouched in your jewelry box.
Six half-pairs built from simple wire shapes, a loop here and a coil there, give you fifteen combinations instead of three locked-in looks.
The trick is keeping the visual weight similar even when the shapes differ; two spirals of different sizes read as related, while a spiral and a straight drop fight each other.
20-gauge wire makes the hooks stiff enough to hold shape through daily wear without springing open. Anything thinner starts to feel flimsy when you thread it through your ear, and thicker gauges fight the pliers and leave sore lobes.
I learned that last part the hard way after a batch of 18-gauge hooks that looked beautiful and wore like tent stakes.
The components swap on small jump rings, or you can wire-wrap a tiny eye directly into the top of each shape.
Either way, the connection point has to sit at the same height on every piece or the mismatched lengths tilt and tangle. Keep a ruler at your bench and check before you snip the tail.

Package includes: 100PCS Butterfly Spacer Beads

Kit Include: There are many kinds of jewelry accessories sets, 700pcs total, 1 roll wire, 200pcs sapcer beads, 200pcs jump rings, 50pcs lobster claw clasps, 200pcs crimp beads, 50pcs crimp beads covers, all placed in a plastic storage for easy storage and carrying.

Package includes: 14pcs of Small Enamel Butterfly Design Pendants Inlaid Crystals for DIY projects
Springtime Ear Candy

Clustered earrings look complicated but come together fast once you stop treating each bead like a solo project. Threading several small wire-wrapped elements onto one ear wire builds volume without the fuss of a single large focal piece.
The first time I tried this, I used 20-gauge wire for every wrap and the pair dragged on my lobes by noon.
24-gauge wire keeps the clusters light enough to wear for a full day. The thinner metal means smaller coils and tighter wraps, so you can fit five or six elements where two bulky ones would crowd each other.
I count out my beads and coils on the bench before touching any wire; the ear wire becomes your assembly line, and the order matters because you cannot slide past a finished wrap without starting over.
Start with a simple trio: one central bead flanked by two tiny coils. The weight stays negligible, the movement catches light from every angle, and the whole pair takes under an hour once your wraps get consistent.

MUTIPLE APPLICATION — The best to use for holding glue, pigment, ink, remover or lash primer during application of eyelash extensions and tattoo applications

Practical Function: This lighter leash protects your lighter from scratches, extending its service time. Featuring a sturdy metal clip, it securely holds the lighter in place for easy access when attached to a belt or pocket, removing the need to search for it
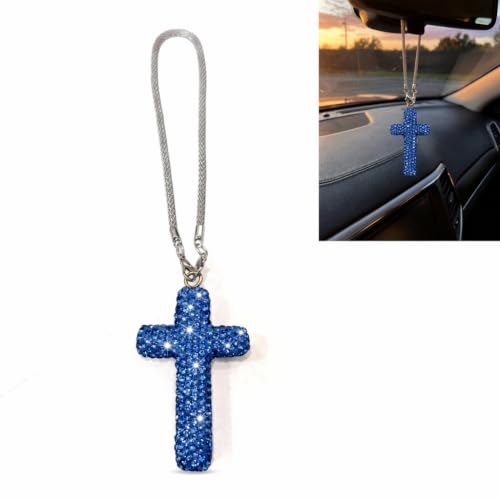
Sparkling Design: This rearview mirror charm features a cross design, with the surface fully encrusted in high-transparency rhinestones. The stones are evenly cut and have a rich luster; they sparkle brilliantly when light refracts inside the car, exuding a luxurious feel and effortlessly brightening the interior.
Thigh Chain

A thigh chain sounds intimidating until you realize it is just a longer bracelet with more room to drape. The first one I measured sat too tight because I matched my thigh exactly, forgetting that skin moves when you walk.
Add two inches to your actual thigh circumference so the chain hangs rather than cuts in.
For the decorative stations, 20-gauge wire hits the right balance. A simple loop in this gauge holds up well under stress, and it is still thin enough to wrap beads without looking bulky.
I tried 18-gauge first, thinking thicker meant sturdier, but the links fought me and the finished stations looked clunky against the finer chain.
This project was supposed to be my reason to finally learn soldering. I set up the torch, arranged the third hand, and promptly fused two jump rings into a lump of brass.
Wrapped links took their place, and I have not looked back. A wrapped loop takes thirty seconds longer than a soldered joint, holds just as well for light wear, and forgives a wobble in placement.
For easy wire jewelry that you actually finish in an evening, the wrap wins.
Front-Back Necklace
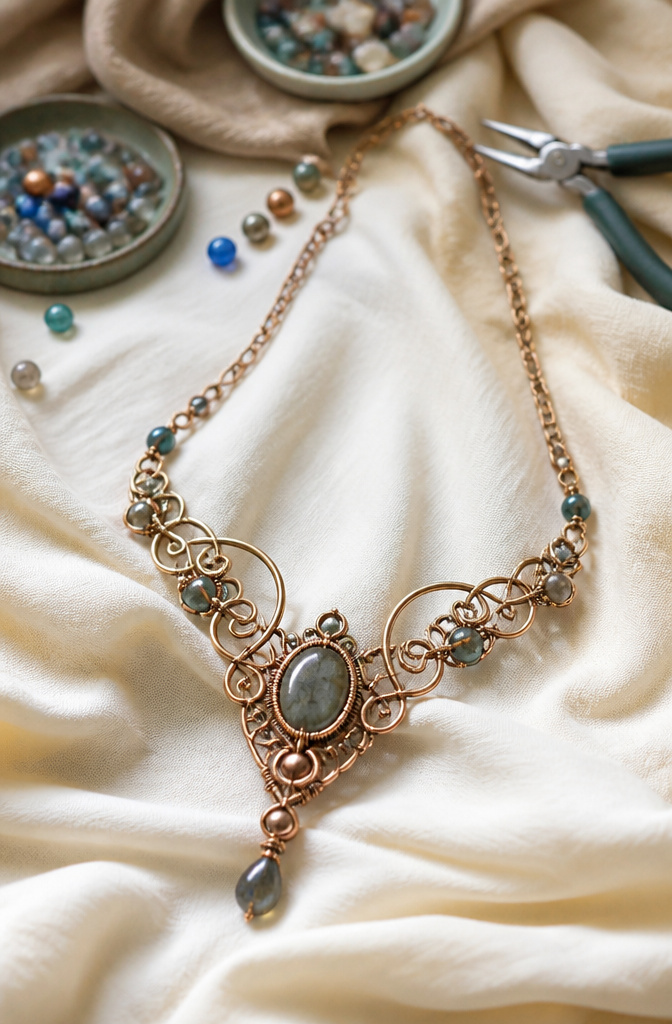
A front-back necklace looks like far more metal than it actually uses. The trick is letting wire shapes extend past the chain so decorative elements show from behind the neck, not just in front.
18-gauge wire holds the structural curve without collapsing against skin or hair, which is why lighter gauges disappoint once the piece is worn.
I started with too-short extensions on my first try; the back details tucked under my collar instead of framing the neckline.
Now I plan for roughly three to four inches of visible wire past the clasp point, enough to catch light from behind without snagging.
The style works especially well with openwork loops or small forged spirals, since both sides read as finished from any angle.
What surprised me was the material efficiency. Because the eye travels the full silhouette, front and back combined, the piece fills visual space that would normally demand a much larger pendant or heavier chain.
You are essentially borrowing neck real estate to make less wire do more work.
Hippie Dippie Stackable Wire Bangles

Thin bangles need a mandrel if you want them round and the same size. I learned that after hand-bending my first three and ending up with ovals that nested like spoons.
A steel ring mandrel marked with ring sizes lets you wrap five or six coils, slide them off as a spiral, and saw through the stack. Each cut yields a matching circle.
16-gauge dead soft wire is the right starting point here. Dead soft bends easily around the mandrel, so the coil forms without fighting you.
The trick comes after: a chasing hammer or ball-peen hammer flattens the wire while it work-hardens, stiffening the metal so the bangle keeps its shape on your wrist.
A nylon hammer will harden without flattening if you prefer the round wire look, though I like the slight facet the chasing hammer leaves. It catches light when the stack moves.
Five skinny bangles together read as one bracelet, but with a shimmer and rattle that a single thick band never gives.
The gaps between them let skin show through, and the movement draws the eye more than a solid cuff would. Sixteen-gauge is sturdy enough that each ring holds its form, yet thin enough that the pile stays light.
Filled Heart Earrings
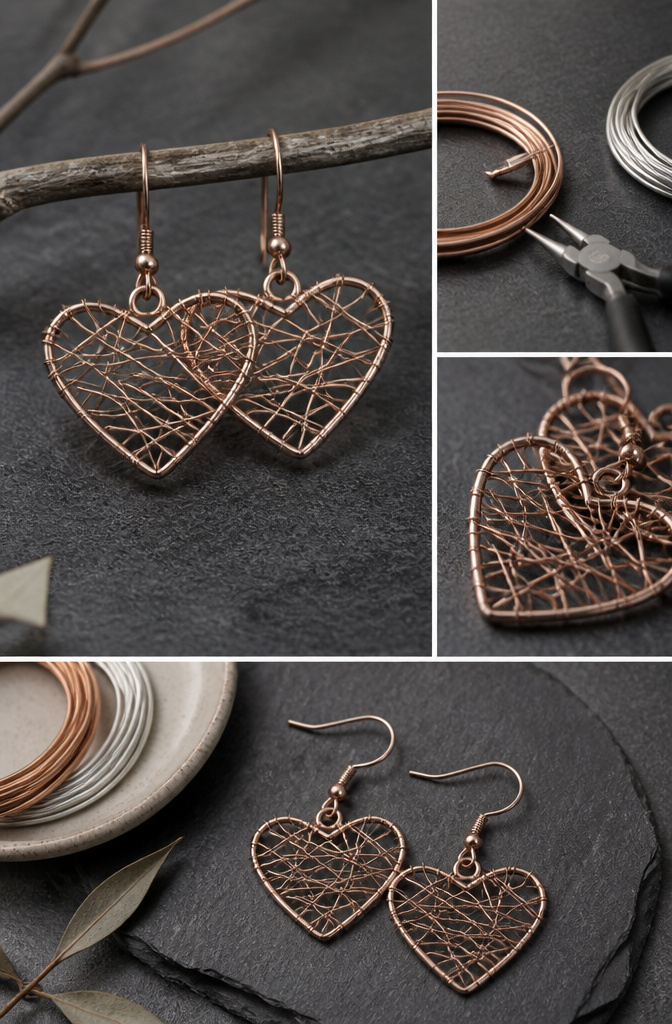
A heart frame needs enough backbone to survive being handled, which is why 20-gauge wire does the job. The fill inside that frame is a different job entirely; 28-gauge wire weaves through without fighting the shape you already set.
My first pair collapsed halfway through because I grabbed the same spool for both jobs. The frame bent under the weaving tension, and the whole earring twisted into something closer to a lopsided pretzel.
20 gauge for the outline, 28 gauge for the interior wrap; the eight-number gap between them is what lets the frame hold while the fill stays fine enough to look delicate.
The gauge scale runs opposite to instinct: higher numbers mean thinner wire. Twenty-gauge wire measures about .032 inches in diameter under the American Wire Gauge standard used for copper, brass, and silver, while 28-gauge drops to roughly half that.
The thin fill wire is easy to work but loses its shape under stress, exactly why it belongs inside a sturdier border and not in one.
Heartbeat Earrings

The heartbeat earring design lives or dies on smooth, continuous plier work with no kinks or flat spots breaking the line.
Each zigzag bend flows into the next through a single unbroken motion; stop to reposition your pliers mid-bend and the wire picks up a telltale pinch mark that reads as a skipped beat rather than a clean EKG spike.
20-gauge half-hard wire carries this particular design. Dead soft would shape easily enough at the bench, but the sharp angles straighten under their own spring after a few hours of wear.
Half hard holds those peaks and valleys through the day without needing to hammer the finished piece, which would distort the slim line that makes the silhouette readable from a few feet away.
The gauge matters too: anything thinner than 20 and the earrings turn flimsy, anything thicker and the zigzags start looking like mountain ranges instead of a quick pulse on a monitor.
Wrap It Up Earrings

Heavy wire-wrapped drops teach restraint fast. The first pair I attempted used nearly two feet of 24-gauge wire on a single 10mm bead, and the result looked like a bird’s nest with a marble trapped inside.
About 18 inches of 24-gauge wire for a 10mm bead sits right at the limit before the wrap starts competing with the bead for attention.
The mechanical reason multiple wraps work without glue is friction distributed across several contact points. Each pass around the bead creates its own grip; four to six snug loops share the load so no single point bears all the stress.
Glue can yellow or crack over time, but a tight wire cage simply holds.
There is a tipping point where the wrap becomes the entire point of the piece. A plain round stone with dense, deliberate wrapping turns into something closer to a small sculpture.
The bead becomes a captive element rather than the star. That shift is not a mistake, just a different design.
For beginners though, the lesson is recognizing which one you are making before you cut the wire.
Threader Earrings
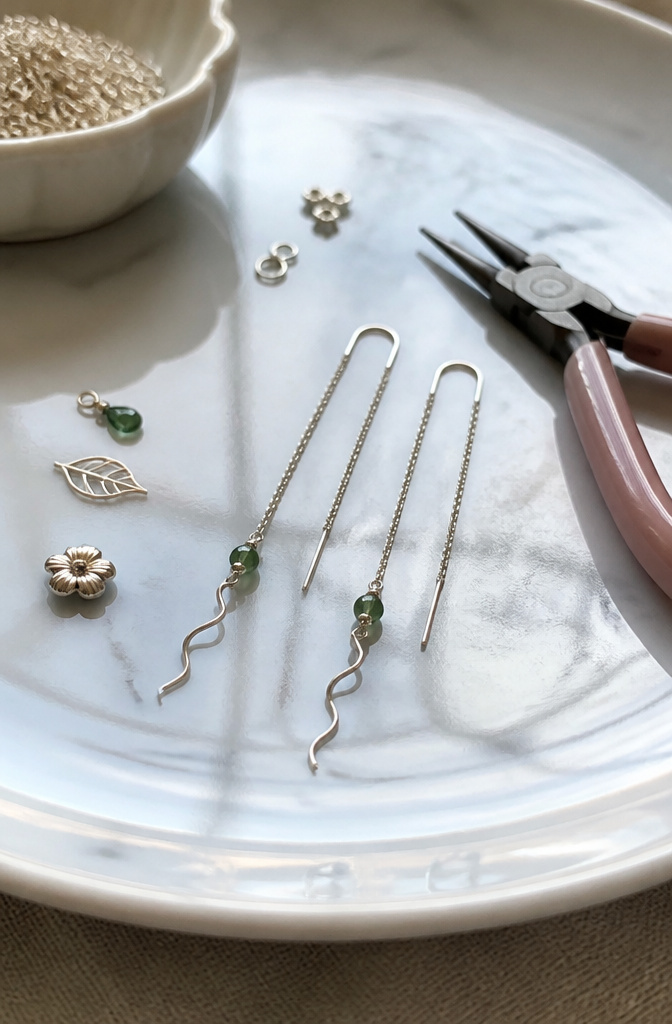
Threader earrings look impossibly delicate, which makes them feel advanced, but the construction is almost embarrassingly simple. A thin chain or bar passes through the piercing, threads out the back, and hangs suspended on both sides.
The trick is length. Anything shorter than about two and a half inches total won’t clear the lobe and loop back with enough tail to stay put.
Go shorter and the front piece flops forward or the back end slips through entirely.
For the threader itself, 22-gauge wire strikes the right balance. Anything heavier fights its way through the piercing or irritates the hole; anything lighter kinks when you handle it or fatigues after a few wears.
I learned the weight lesson the hard way on an early pair where the front charm was a heavy brass drop and the back chain was feather-light sterling. They slid out within an hour of wearing them.
The front and back elements need to weigh roughly the same, or the heavier side pulls the whole piece through until it catches on the post bend or falls out completely.
A small bead or short chain tail on the back end usually corrects an imbalanced design without adding visible bulk.
Double Link Chain
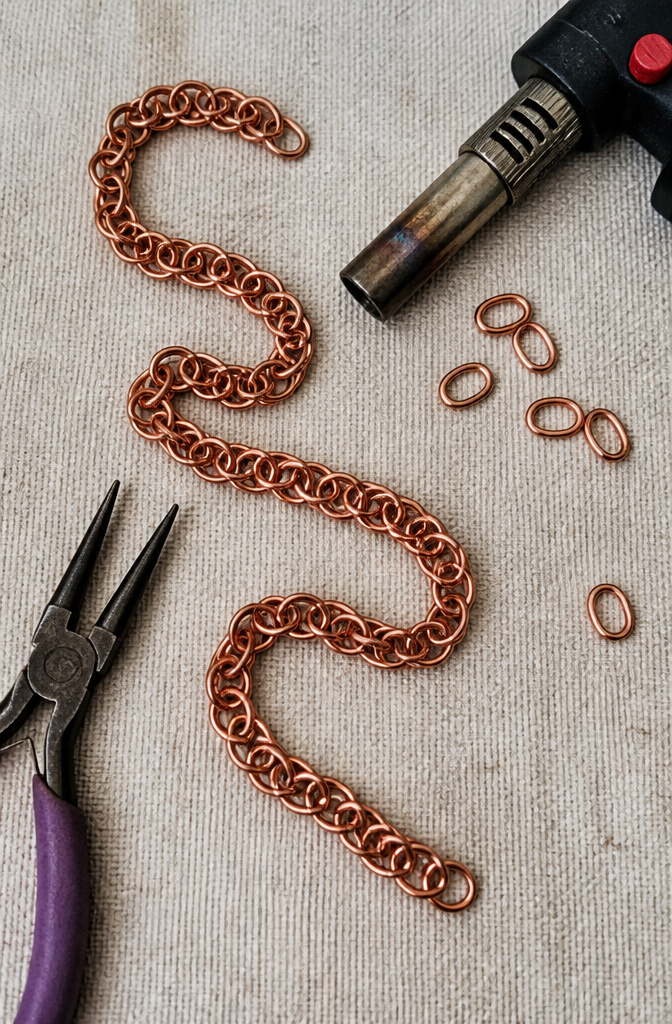
Paired loops of 18-gauge copper wire make a chain that looks involved but comes together with two repeated moves.
The figure-eight link method shapes each wire piece into an eight, then hooks the next eight through the last before closing the loop.
Consistent loop size matters more than chasing perfect circles; a chain of slightly oval but uniform links lies flat, while mismatched sizes kink and twist no matter how round each one looks.
My first run at this, a 24-inch chain, cost under four dollars in wire.
The copper work-hardens as you handle it, so stopping every few links to soften the metal with a quick pass from a torch or even a gas-stove burner keeps the wire from snapping at the crossover point.
That burnout, watching a link crack in half because I kept bending without annealing, taught me the rhythm better than any warning.
Hearts and Flowers Charms

Small wire charms live or die by their scale. Under one inch, hearts and flowers sell; they tuck neatly beside pendants and cluster well on bracelets.
Over an inch, the same shapes hang better as solo drops where weight and sway matter more than density. The difference is worth deciding before you cut your first length.
20-gauge wire hits the sweet spot for detail at this size. Thicker gauges like 18 fight back on tight curves, and anything finer than 22 starts to feel flimsy once shaped.
A simple loop in 20-gauge, work-hardened, holds up under the stress of daily wear without needing wrapped coils.
Dead soft temper gives you the pliability to form petals and lobes; the bending itself stiffens the metal enough for a charm that keeps its shape.
Speed comes from repetition, not rushing. The first three hearts take twenty minutes.
By the fifteenth, the pliers find the angle without your eyes checking. Making twenty at once means one setup, one mood, one consistent tension in your hands.
The twentieth looks enough like the first to sell as a set, and the time per piece drops by half.
Boot Chain

A boot chain sounds like easy wire jewelry until the clasp chews the leather or the hooks straighten out on step three.
The grip mechanism matters more than the decoration: a pair of small C-shaped hooks that press against the boot shaft from behind, tension holding them in place without teeth or screws that would mark the surface.
Sixteen-gauge wire forms those hooks because anything lighter will deform when you pull the chain snug; anything heavier looks clunky against the eyelets. The real mistake, and I made it twice, is measuring the boot while sitting.
The ankle joint flexes when you stand, the shaft settles lower on the calf, and a chain that looked perfect at the desk gaps or drags at the heel.
Stand up, weight on both feet, then wrap the wire around the boot where you want it to sit. Add half an inch for the clasp overlap, cut, and shape the hooks last so the tension matches the living measurement.
Frequently Asked Questions
What tools do I need to start making wire jewelry?
Basic wire jewelry calls for wire cutters, pliers, and a mandrel. A steel ring mandrel with stepped diameters beats borrowed markers or kitchen items, since plastic and wood give slightly under pressure and throw off your loops.
Files, jigs, and a nylon or rawhide hammer for work-hardening round out the kit as projects grow.
What types of wire are best for beginners?
Copper wire is the practical starting point; a full spool costs less than a single silver clasp, and you will ruin lengths while learning.
The article reaches for 20-gauge so often because it bends without fighting your hands yet keeps its shape once set. Move to sterling silver or gold-filled only after the tension and gauge instincts settle in.
How do I wire wrap beads?
Wire wrapping means coiling wire around itself and the bead to create grip through friction across several contact points.
For a 10mm bead, about 18 inches of 24-gauge wire sits at the limit before the wrap starts competing with the bead for attention.
Four to six snug loops share the load so no single point bears all the stress, and the bead stays captive without glue.