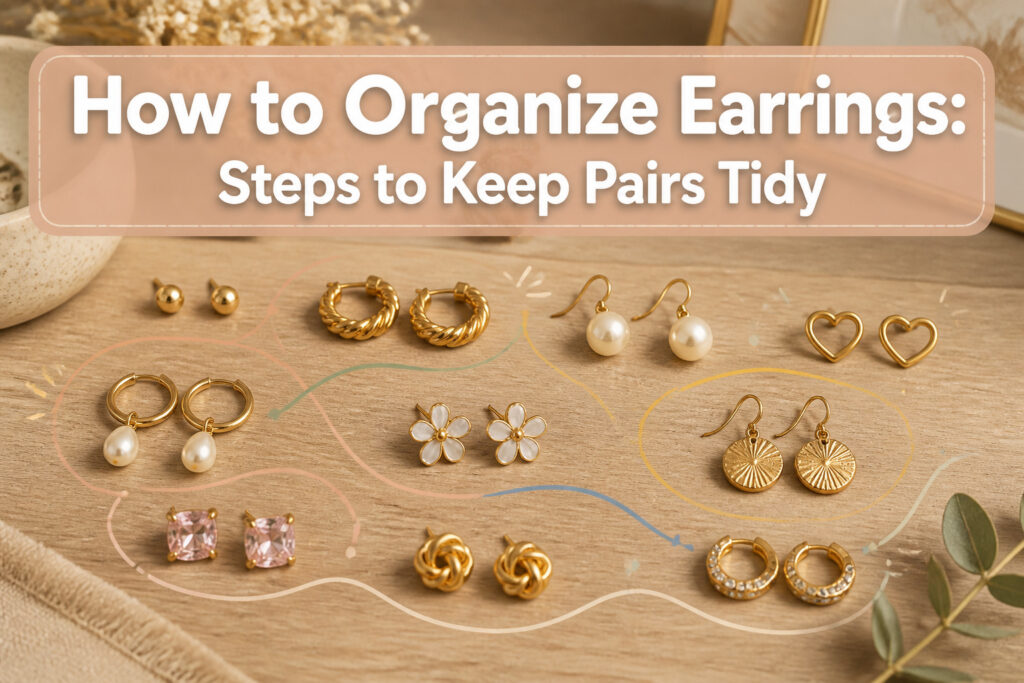
An organized earring collection costs about twenty minutes of honest sorting and the willingness to let go of pieces that no longer fit who you are.
Most people skip the declutter and jump straight to buying a pretty box, which is exactly how hooks end up braided into knots you avoid dealing with.
The bacteria count on worn earrings is what changed my routine: 485 bacterial growths on a single pair after one week. Cleaning before storing is non-negotiable if you want the metal to last.
1. Declutter Your Collection

Earrings multiply faster than socks vanish. Sorting through the pile means accepting that the pair you loved in 2019 might read as costume now, and that is fine.
Start by laying everything out. Touch each pair and notice which ones your hand reaches past.
Those are the candidates to donate, regift, or sell. Platforms like Facebook Marketplace, Etsy, or eBay work for pieces that still hold value.
Someone else will wear them.
Sentimental earrings, the heirlooms and meaningful gifts, stay. The point is not to purge everything; it is to stop hiding what matters in a drawer.
A jewelry shadow box turns those pieces into something you actually see.
The hard part is the emotional weight. Letting go of earrings from a phase you have outgrown, or from a person you were, feels like admitting failure.
It is not. It is making room for the earrings that fit who you are now.

【5-Tier Jewelry Holder Organizer】:Clear jewelry stand organizer with 212 holes and 212 grooves.Holds a lot of jewelry and can rotate to display it

The size of the earrings holder: the Holder is approximately 8 x 5 x 11 cm / 3.1 x 2 x 4.5 inches, 2mm thick, with a sturdy base to give your jewelry a well-balanced supply

💎Double Rod Clothing Rack Design: This earring holder boasts a unique double-tiered 'clothes hanger' design, providing two levels to stagger and showcase earrings of varying lengths, ensuring your collection is displayed beautifully.
2. Choose a Storage Solution

Acrylic stands hold over 100 pairs and keep earrings almost floating against the clear material, so the storage reads more like decor.
That footprint matters if a dresser top is already crowded: closed, the stand is no bigger than a hardcover book.
For studs and smaller posts, compartmentalized trays or shallow boxes keep each pair in its own cell, which is the only way to prevent the slow migration of backs and stones into a single tangled layer. Dangles need height.
Wall organizers with hooks or a driftwood branch mounted behind it let longer pieces hang freely without catching on what sits below.
Embroidery hoops stretched with mesh or ribbon work for a lighter earring load, and antique tins or picture frames can be repurposed if the goal is matching the solution to the earring type you actually own, not the one you wish you collected.
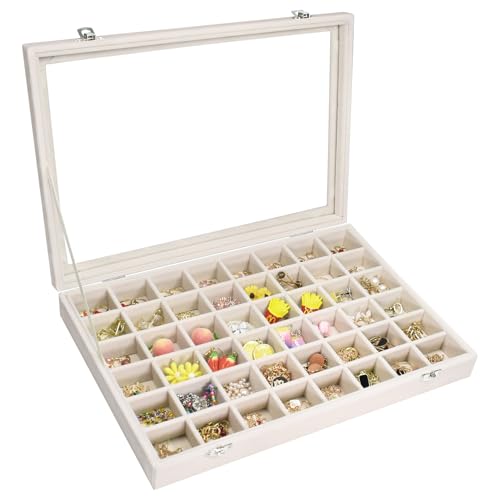
Product features: The Vicoter 48 grid jewelry display storage tray is wrapped in high-quality velvet fabric and replaced with durable composite board instead of ordinary cardboard, making the product suitable for long-term use. Meanwhile, the use of high-density long velvet fabric ensures that the jewelry display box can effectively protect your jewelry from scratches.

Set of 2 : Perfect for display earrings, necklaces, bracelets rings and other jewelry, keep your jewelry organized and easily accessible

48-Grid Storage Solution: The jewelry tray is precisely measured at 13.8"*9.5"*2" and features 48 compartments, each measuring approximately 1.5"*1.38". It is designed to hold rings, earrings, cufflinks, small pendants, and other jewelry items
3. Organize by Categories
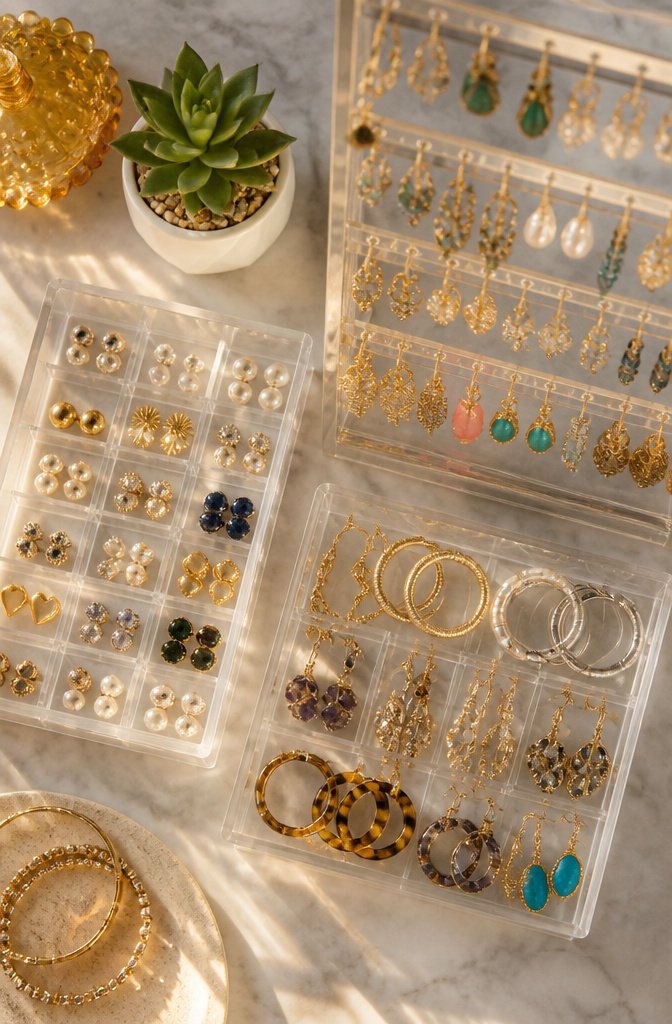
Sorting by style, size, or how often you reach for a pair turns a jumbled box into something you can actually use. Grouping by style worked after color-coding failed me, because studs, hoops, and dangles need completely different storage.
When I tried organizing by color first, the delicate chains on my dangles still wrapped around everything else while I hunted for a single silver stud.
Style-based sorting keeps the physical shapes apart, which is what actually prevents tangling. Dangling earrings stay vertical in hanging space, while studs sit flat in small separated compartments.
If you wear the same three or more earrings together across multiple piercings, storing that complete set in one spot saves the morning rummaging.
Frequency of wear is the other method worth considering. The pieces you grab weekly deserve front-and-center placement; the occasional statement earrings can live further back.
Color grouping looks prettier on display, but for daily function it slowed me down more than it helped.

At a Glance: Hanging earrings and other jewelry on the wall, you can see all the jewelry at a glance and quickly find the style you need, avoiding the trouble of rummaging through the box and saving you time.

Wall-Mounted Jewelry Organizer with 28 Hooks & Space-Saving Design: This 2-pack wooden necklace holder features 14 sturdy hooks per board (28 total) to store necklaces, bracelets, earrings and rings tangle-free. Keep your bedroom, bathroom vanity or closet clutter-free while decoratively displaying your entire collection. The vertical jewelry storage solution ensures quick access to favorite pieces without messy searches – ideal for small spaces like dorms or apartments.

Large Capacity:6 Tiers hanging earring organizer, totally 123 holes,115 earring grooves and 14 necklace grooves to hold your jewelries. With this earring holder, see every piece at a glance and quickly find the style you need—no more rummaging through boxes, saving you time
4. Implement a Visible System
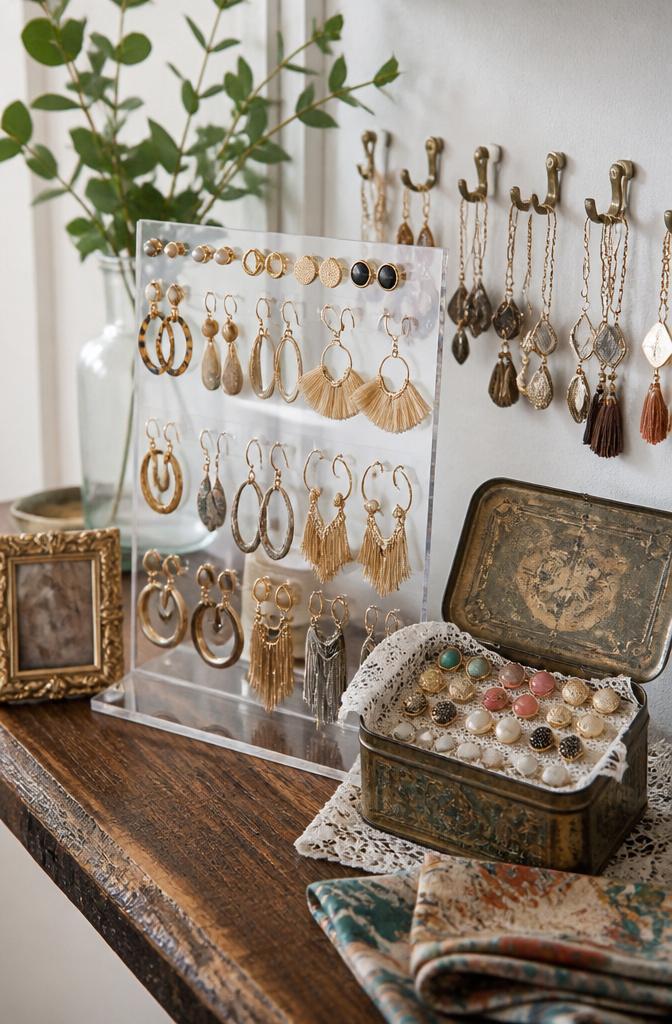
What you actually wear lives in plain sight.
Acrylic stands keep pairs upright and facing forward without eating counter space, and the same logic turns a shallow jam jar or an ice cube tray into a stud holder you can scan in a glance.
Divided trays work too, but the wall-mounted options with hooks and small shelves do double duty: storage that reads as decor, especially for dangling styles that tangle the moment they touch.
The DIY route is sturdier than it looks.
Cut plastic canvas 1/4 inch shorter and 1/4 inch less in width than your box interior, sandwich it between two felt layers cut to the full box size, and add a 3 1/2 inch by 1 inch tab folded in half along one short edge.
Felt edges do not fray, so finishing is unnecessary. Stitch three sides, slide the canvas in, close the bottom, then poke through the felt into the canvas holes with a seam ripper.
Earring posts slip through and hold. For a softer look, lace doilies or napkins layered inside a repurposed antique tin or picture frame give the same visibility with less construction.
The principle holds either way: if the pair is out of sight, it stays unworn.

Elevate your memories with a display that’s anything but ordinary. Featuring a classic black finish and soft felt back, this shadowbox picture frame showcases your photos, awards, or keepsakes with elegance and protection.
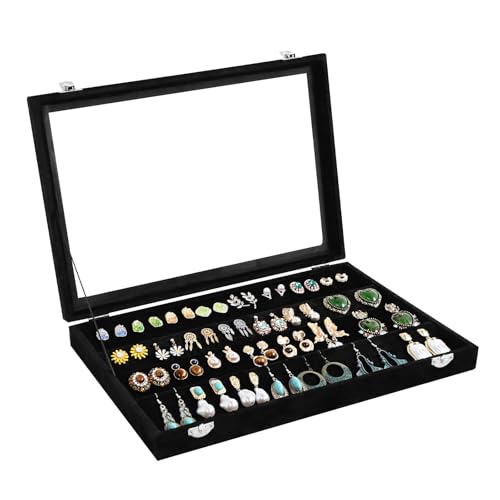
Good-quality material: The Wudygirl earring organizer tray is made of a solid wood composite with a surface covered with soft velvet to effectively protect your jewelry from friction. The top of the jewelry display case comes with a clear glass window that allows you to quickly find what you want

Overall Size: The shadow box's overall size is 8"x10"x2.17", and its inner size is 6.8"x8.8"x1.57". It can stand on the table or hang on the wall. Suitable for displaying photos or other items smaller than 6x8 inches.
5. Clean Before You Store
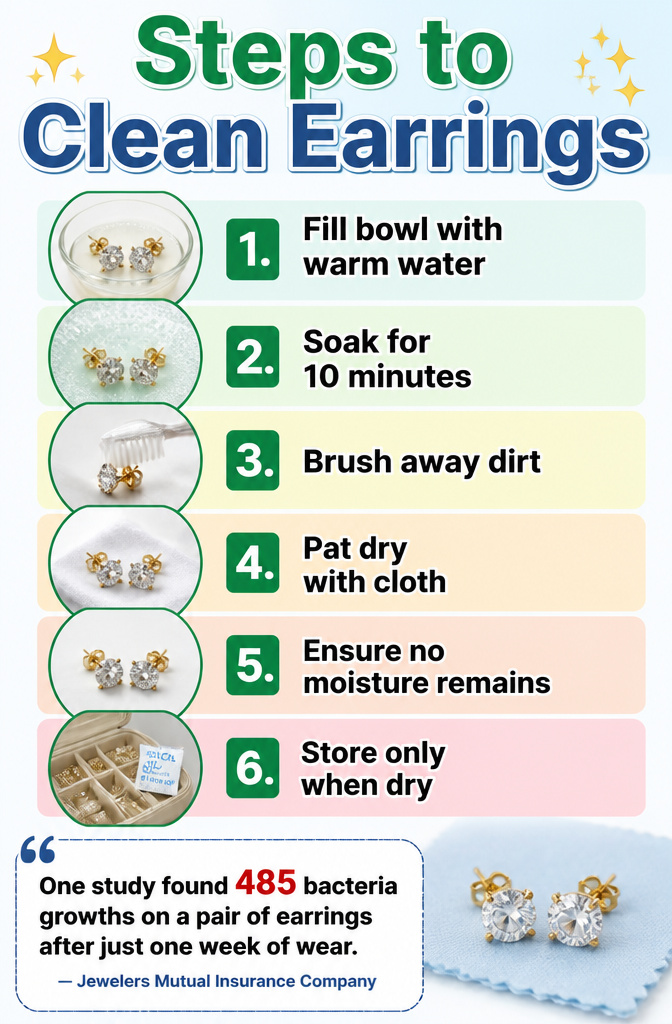
The bacteria count on worn earrings surprised me when I first read it. One study found 485 bacterial growths on a single pair after just seven days of wear.
That number alone convinced me to change my routine.
Here is the simplest method that works for most earrings:
- Fill a small bowl with warm water and add a few drops of dishwashing liquid.
- Submerge the earrings and let them soak for 10 minutes.
- Gently brush or wipe away loosened oils and dirt.
- Pat completely dry with a soft cloth.
- Leave them out until no moisture remains, especially around posts and backings.
- Store only once they are fully dry.
One study found 485 bacteria growths on a pair of earrings after just one week of wear.
That figure is why I never skip the drying step. Moisture trapped in a jewelry box causes tarnish faster than most people realize.
A silica gel packet tossed in the storage container helps if you live somewhere humid.
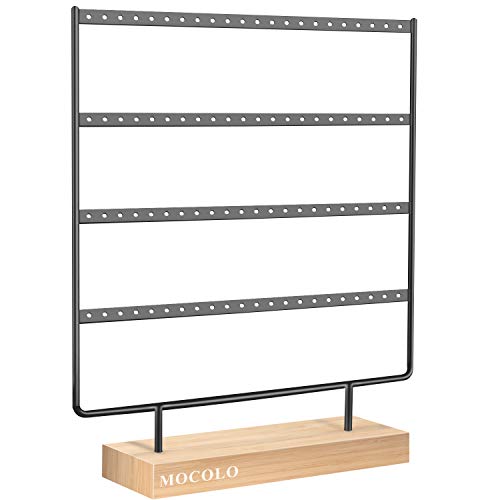
✔ ECORATIVE EARRING HOLDER STAND: Elegant design suits any room decor. Perfect for jewelry organization or professional display in retail stores or trade shows. An elegant metal jewelry tree featuring a classic white finish.

✔ ECORATIVE EARRING HOLDER STAND: Elegant design suits any room decor. Perfect for jewelry organization or professional display in retail stores or trade shows. An elegant metal jewelry tree featuring a classic white finish.
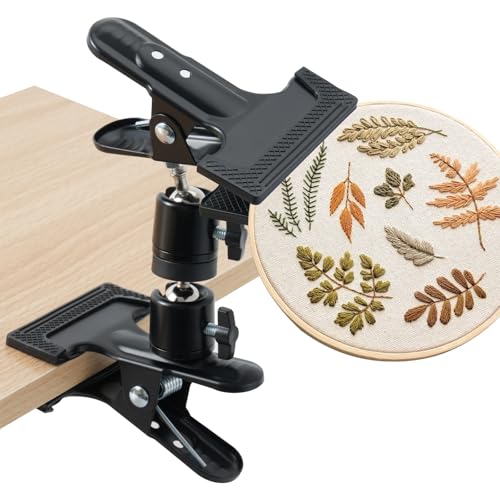
【Hands-Free Dual Clamp Design】This embroidery hoop stand uses dual swivel clamps to secure your table and hoop, freeing both hands for stable, comfortable cross stitch, embroidery, and needlework.
6. Store in a Dry Environment

Moisture is the quiet killer of jewelry organization. I learned this the hard way after opening a velvet-lined box I’d kept under the bathroom sink for two years.
The silver posts had darkened to a dull gray, and a pair of brass hoops had developed a powdery green film that no polishing cloth could fully remove.
Silica gel packets, the kind that ship with shoes and electronics, belong in every earring container you own. Tuck two or three beneath the lining, or tape one to the inside lid where they won’t snag delicate wires.
Airtight containers limit the air exchange that carries humidity in the first place.
Glass jars with rubber seals, small food-storage boxes with locking lids, even resealable bags pressed flat work better than the decorative open trays that look pretty on a dresser.
The tradeoff is access: you open the container, you close the container, every single time. Skip that step and you might as well leave them on the counter.
Bathrooms are the worst offenders, but basements and exterior walls in older buildings run close behind.
If your bedroom closet stays cooler than the rest of the house, check the back wall for condensation before you commit to storing anything precious there.

Keep Jewelry Oorganized: Jewelry stand & Earring organizer can keep your jewelry organized, saves space. You can find jewelry quickly and easily, no more searching through jewelry box or messy drawers, all of your jewelry. Necklace holder suitable for your vanity table or countertop, easy to put and also match the great for rooms of all color or theme
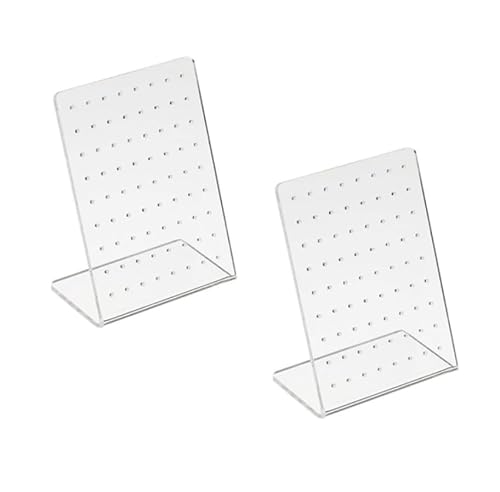
PACKAGE CONTENTS: Set of 2 clear acrylic earring display stands, each featuring 72 holes for organizing and showcasing studs and earrings
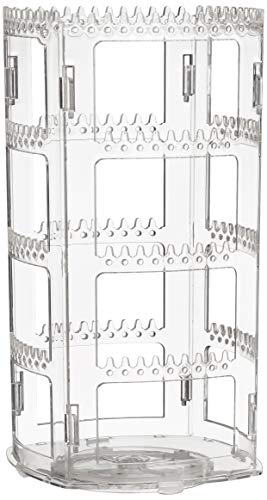
HOLDS 78 PAIRS: The 4 tiers has 156 easy access holes so it will display a total of 78 pairs (or 156 single earrings). 160 grooves will display necklace, bracelet, or ring. It works well as a dangle or stud earring organizer
Storage Options Compared

The right storage lives or dies on whether you actually see the earrings you own. A clear acrylic stand keeps everything upright and visible without eating counter space, roughly the footprint of a hardcover book.
Wall-mounted holders use zero surface area and work best for dangles you want to treat like decor. Compartmentalized boxes and trays hide studs and hoops away, which suits a drawer but risks out-of-sight, out-of-mind.
Travel organizers with dedicated compartments beat tossing jewelry into a pouch that turns into a tangled hotel-bathroom project.
| Storage Option | Visibility | Space Use | Best For |
|---|---|---|---|
| Acrylic stand | High | Compact surface | Studs, dangles |
| Jewelry trays / compartmentalized boxes | Low (closed) | Drawer or counter | Studs, hoops, clip-ons |
| Wall organizers | High | Zero counter | Dangling earrings |
| DIY holders (tins, frames, driftwood) | Varies | Varies | Mixed, custom fit |
| Travel organizers | Medium | Small, portable | All types, temporary |
| Shadow boxes | High | Wall space | Statement pieces |
What convinced me, reading through these, is that visibility beats cleverness. A divided drawer insert protects fine pieces but only works if you open that drawer.
My call: acrylic for daily rotation, wall mount for the pairs you grab to finish an outfit, and a travel case that empties back into its home spot the day you return.

Premium Material: This tray's frame is made of composite board which is very sturdy,and the velvet wrapped on the composite board is soft enough to protect your jewelries from scracthes and other damage.That's why our jewelry tray can better protect your jewelry and accessories

Product features: The Victor Jewelry Display Organizer Tray is wrapped in high-quality velvet fabric and replaced with regular cardboard through durable composite boards, making the product suitable for long-term use. At the same time, it ensures that the jewelry display box can effectively protect your jewelry from scratches.

48-Compartment Organized Jewelry Storage : This velvet earring jewelry organizer box measures 13.8 × 9.5 × 2 inches and features 48 individually divided compartments, designed for stud earrings, dangle earrings, rings, bracelets, brooches, necklaces, watches, gemstones, and other jewelry accessories. The jewelry organizer tray allows each piece to be neatly separated and clearly arranged, making everything easy to see at a glance and eliminating clutter
DIY Earring Holders

Driftwood branches work if you drill small hooks straight into the grain for hook-style earrings, but the branch has to be thick enough to take the bit without splitting.
A piece shorter than about eight inches tends to tip when the weight sits on one side.
Embroidery hoops with lace doilies or thin napkins stretched across are faster and lighter. The weave holds post earrings if the holes are small and tight; loose lace lets studs slip through after a few removals.
A 1/8 inch seam allowance is the usual finish on the fabric edge, which leaves just enough overhang to keep the tension even.
Plastic canvas inside felt pages is the method that held up longest in daily use.
The grid lets you feel where the hole is, so you are not stabbing blind, and pairs stay aligned when you layer the tabs on opposite sides instead of stacking bulk on one edge.
The canvas starts to soften at the corners after roughly two weeks of being slid in and out of a drawer, though the earrings themselves never tangle.

ANTI-TRANGLING: With this wall mounted jewelry organizer, you'll never have to worry about your necklaces and bracelets getting tangled again. It saves time and adds a simple yet stylish touch to your home decor.

Neatly Organized: With space for up to 20 piece of Jewelry, our organizer keeps everything at your fingertips. No more tangled chains—just a beautifully arranged dresser.
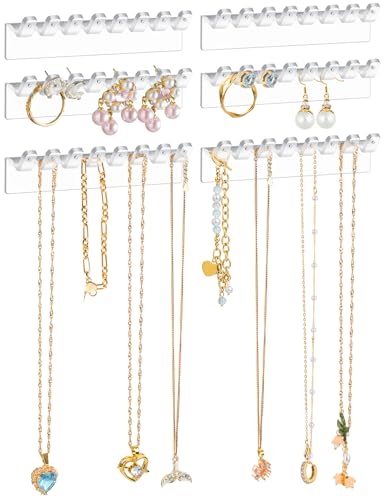
Ample Storage Capacity: Includes 6 compact wall-mounted racks with 8 hooks each—perfect for organizing earrings, necklaces, bracelets, rings, and more in one convenient place.
Travel Storage

A zippered case with individual slots is the only travel method that keeps pairs from mating into a single knot of metal and stone. Everything else, in my observation, eventually surrenders to the physics of a bouncing suitcase.
Once, opening a soft jewelry pouch in a hotel room in Chicago, I found three pairs had braided themselves into something that took twenty minutes and a pair of tweezers borrowed from the front desk to separate.
Two of the backs had scratched the face of a third pair. That was the last trip I trusted anything without rigid, separate compartments.
The slot cases run small, usually under six by four inches, and zip flat enough to tuck into a carry-on side pocket.
Felt lining helps, but the critical detail is that each pair sits in its own channel, unable to reach its neighbors. For short trips, a single-layer case handles eight to twelve pairs.
Longer travel, or anyone who packs options, needs the double-layer models.
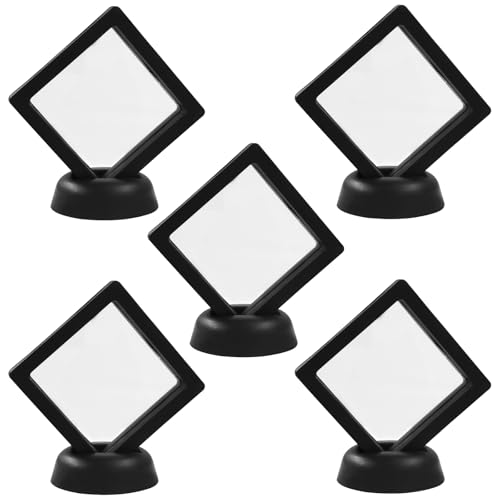
Complete 5 pack display set: This set includes 5 floating display cases, each with its own stand. Perfect for showcasing multiple collections at once—arrange them on shelves, desks, or gift them separately to fellow collectors

Structure: A 0.25-inch thick foam backing board, covered in white linen fabric, seamlessly complements your artwork. Utilize the included push pins to create a delightful display

Structure: A 0.25-inch thick foam backing board, covered in white linen fabric, seamlessly complements your artwork. Utilize the included push pins to create a delightful display
What Not to Do

Most of the mistakes I made came from wanting the result to look neat rather than work well. Tossing everything into one pretty silver box sounds tidy until the hooks tangle and you stop wearing half of what you own.
I kept mine on the dresser for years and the collection only grew more frustrating to dig through.
- Storing earrings while damp warps metal and dulls finishes. A quick wipe with a cloth after wearing takes ten seconds and saves the piece.
- The decorative organizer that hides everything behind a lid or in a drawer looks great in a photo and fails the moment you need one specific pair by 7:45 a.m.
- Skipping the declutter step means you organize earrings you will never wear again. One source mentioned white cardboard boxes and plastic door hangers as the graveyard where forgotten jewelry goes to live; I had both, and the earrings in them had not seen daylight in years.
Leave breathing room between pairs. Cramming hooks into the first few rows of any stand turns organization back into a jumbled mess, and spacing is what keeps the system alive.

Embroidery Hoop Set: 3.6 inch/9.2 cm, 4.8 inch/12.3 cm, 6.3 inch/16 cm, 7.9 inch/20 cm, 9.5 inch/24.2 cm, 10.7 inch/27.1 cm. Different sizes of embroidery hoops with 16 embroidery needles (3 sizes) to meet your needs

Package include: 1 piece wall mounted earring hanging organizer and 20 pieces black S hook help you easy to hang jewelry(earring organizer and S hooks only, the jewelries are not included)

Adjustable embroidery hoops holder ,appropriate for round, square and other universal embroidery hoops.Suitable For phone holder.
Frequently Asked Questions
What is the best way to organize statement earrings?
The best method is anything that lets you see every pair at a glance.
A clear acrylic stand keeps earrings upright and visible while taking up about as much space as a hardcover book, though a divided drawer, wall-mounted holder, or shadow box works too.
Visibility is what keeps you actually wearing them instead of forgetting they exist.
How do you keep earrings from getting tangled?
Give each pair its own spot and leave a little space between them. Grouping by style and size helps most, since studs, hoops, and dangles need completely different storage to stop chains from wrapping around posts.
Store longer dangles up top or on wall hooks so they hang freely and cannot catch on the pairs below.
How do you store statement earrings in a small space?
Look for a compact, vertical option. A clear acrylic stand holds over 100 pairs with roughly the footprint of a hardcover book, and wall organizers with hooks use zero counter space at all.
Embroidery hoops stretched with mesh or ribbon work for a lighter load if you want something that hangs flat against the wall.