Handmade jewelry ideas span from five-minute knotting projects to afternoon wirework sessions, and the one that sticks depends on whether you already own the right pliers.
Most beginners stall not from lack of creativity but from buying the deluxe tool set first and freezing; a starter kit of basic pliers runs about $12 and handles ninety percent of what the first six months demand.
The real confidence builder, across every technique in this list, is testing fit and durability before calling a piece finished.
1. Beaded Bracelets

Beaded bracelets remain the project most beginners actually finish. A length of beading wire or elastic cord, a handful of beads, and a pair of needle-nose pliers or a crimping tool are enough to start.
I like 0.8mm to 1mm elastic for stretch bracelets and tiger tail wire when I want something more secure with a clasp.
The real confidence builder is laying out your pattern before stringing anything. Glass, wood, metal, semi-precious stones, spacer beads for rhythm, a small charm for personality: the combinations are immediate and visible.
Elastic needs only a surgeon’s knot and a dot of clear-drying glue. Wire needs crimp beads squeezed flat with pliers.
Both methods let you test fit and durability before calling it done, which matters more than any design theory when you are starting out.
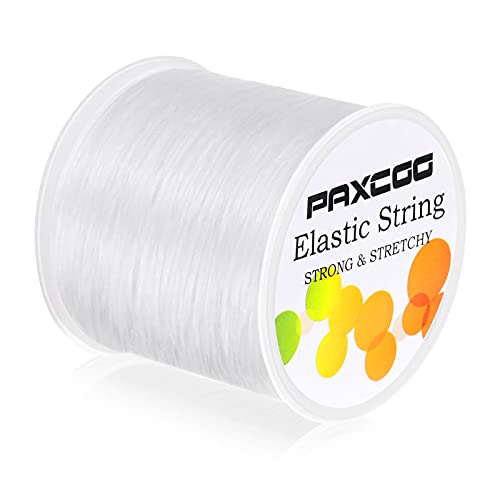
EASY TO TIE KNOTS: The elastic thread for bracelets is very flexible and can be threaded through both small and large beads, and is suitable for beads of all materials. The bead string is very simple to tie a knot to secure your bracelets and easily hide the knot among the beads

0.5mm Elastic String: Comes with a roll of 70m/230ft clear elastic string with a diameter of 0.5mm. 0.5mm fits for double stringing the beads, especially when using heavier or large beads and 70m length is enough for bracelets and necklace jewelry making and the roll is lightweight and portable that you can take it to school or gathering and bead with friends.

ELASTIC CABLE QUANTITY MATCHING SALE:JULIMAIDONG Bracelet Elastic Cord comes with a roll of elastic cord in 60M/200ft length, perfect for bracelet making, jewelry making, beading, necklace making and other craft projects. And this roll of elastic cord is lightweight and portable, you can take it to school or party and bead with your friends.
2. Wire Wrapped Jewelry
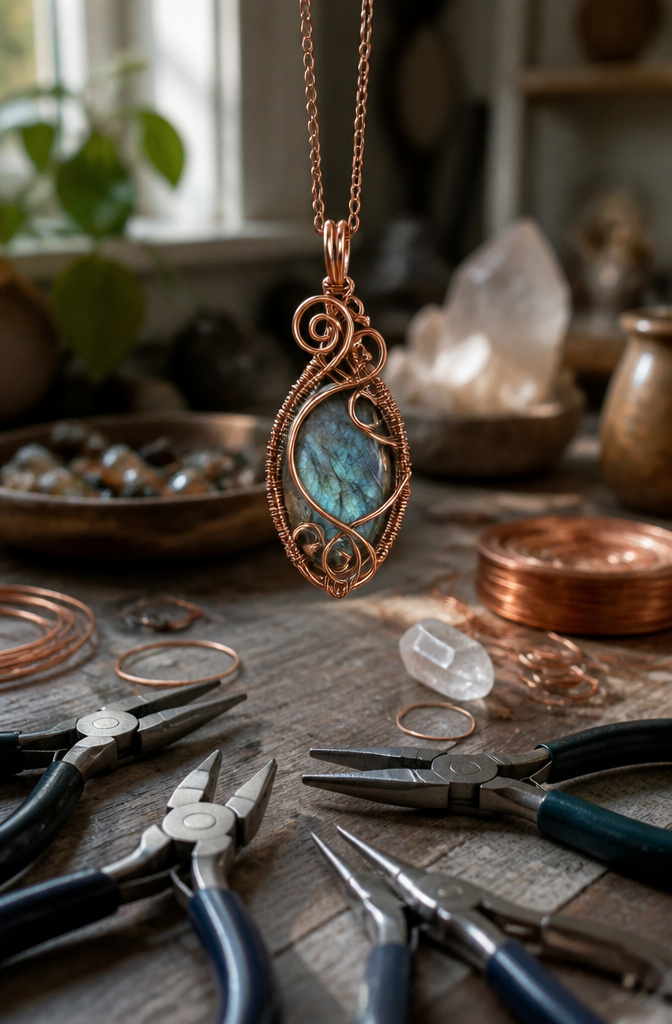
Wire wrapping lets you secure stones, crystals, and beads without soldering, which means a pair of round nose pliers, chain nose pliers, flat nose pliers, and wire cutters are the only tools standing between you and a finished piece.
The round nose pliers curl the wire into loops, the chain nose pliers squeeze those loops shut against head pins or eye pins, and the flat nose pliers hold everything steady while you work.
I started with a basic loop: bend the wire back at a 90-degree angle about 1 cm from the top, curl it with the round nose until it nearly touches the other side, then pinch it closed with the chain nose.
The real payoff is personalization. A single larger bead or gemstone becomes the focal point, and you build the surrounding wirework to frame it, using different gauges and wrapping styles until the piece feels like yours.
No two come out identical even when you try. The same technique rescues old jewelry too: a broken pendant gets new life with fresh wirework around it.

STRETCH CORD FOR JEWELRY MAKING: Elastic cord designed for slip-on jewelry such as bracelets, rings, and anklets. Provides flexible stretch for comfortable wear without clasps while supporting clean professional-looking designs.

HIGHEST QUALITY: Stretch Magic is a strong, durable, non-fraying material, with great elasticity and resiliency. Consistent diameter throughout the entire spool. The perfect stretch cord for making jewelry that's easy to wear and remove!

MATERIAL: BEADNOVA craft wire is made of Polyurethane, it stretches just the right amount. The crystal looking make it prefect as bracelet string, beading thread or for jewelry making.
3. Friendship Bracelets

Friendship bracelets sit at the center of handmade jewelry ideas because the whole project runs on simple knotting. DMC cotton thread, doubled back and worked in repeating patterns, builds a bracelet that stays colorfast through daily wear.
No pliers, no glue, no special setup: just the thread, something to anchor it, and about twenty minutes of practice until the rhythm sets in.
What moved this from childhood craft to something I still reach for was seeing how the same macrame structure scales up.
The zig zag pattern I once made at summer camp turns out to be legitimate knotwork, and ribbon crimps with clasps at the ends let it close like grown-up jewelry.
Four forward knots followed by four backward knots is the whole engine; everything else is color placement.
Minimal tools make this the honest entry point. Sources vary on whether to tape the anchor end to a table or safety-pin it to a pillow, but both work.
The thread costs little, the mistakes unravel in seconds, and the finished piece carries the slight unevenness that signals a human hand.

Package contains: you will receive 1 piece bail making pliers and 1 piece nylon nose pliers in the package, which can meet your various jewelry DIY needs, you can use them for different jewelry making

MULTI-FUNCTION JEWELRY PLIERS: 2-in-1 bail making & wire looping pliers with 2-9mm adjustable stepped jaws, designed to accommodate various wire gauges-micro wire looping pliers for DIY jewelry making supplies
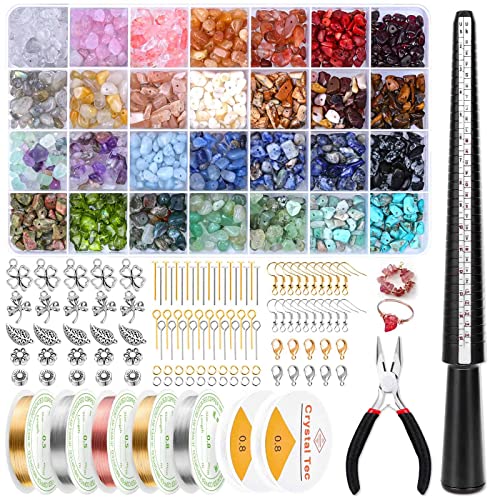
28 COLORS CRYSTAL BEADS KIT: This stone beads for jewelry making kit includes 28 colors jewelry beads, 5 rolls of copper wire, 2 rolls of elastic thread, 25 charms, 1 flat nose jewelry pliers, 1pcs instruction, 20pcs jump rings, 10pcs lobster clasp, 60pcs earring making supplies and 1pcs plastic ring sizer mandrel for jewelry ring crafts making
4. Leather Jewelry

Leather jewelry sits at the sweet spot between rugged and refined, and the barrier to entry is lower than most people assume.
A basic set of pliers, some cutting tools, and a few leather-specific implements will carry you through most beginner projects without the sticker shock that intimidates newcomers.
The material itself is forgiving; it shapes under pressure, takes dye well, and pairs naturally with elements you might already have on hand.
Memory wire, beads, and small metal findings turn a plain leather strip into a personalized cuff bracelet that reads as far more expensive than its parts.
The wire gives structure, the leather gives warmth, and the combination means you are not locked into any single aesthetic.
For something lighter, a narrow leather band woven with crocheted thread makes a ring that survives salt water and sand, unlike its metal counterparts.
These fabric rings work as statement pieces for travel because they handle moisture without tarnishing or turning skin green.
The real advantage is modularity. Start with leather and a few basics, then add wire-working tools or stamps as the next project demands.
Build the stash project by project rather than buying out a catalog upfront. That is how the kit stays manageable and the skills stay sharp.

Ideal for electrical work, jewelry design, beading, all wire crafting projects

What You Get - You will get a box of crimp beads in 2 colors, including 400 pieces brass crimp tubes beads, 200 pieces crimp bead covers, 60 pieces knot covers, 200 pieces wire guardians, 40 pieces lobster clasps, 300 pieces jump rings, sufficient amount can meet your different needs of jewelry making

Value Set: You will get a box of crimp beads supplies in 2 colors, including 400 pieces brass crimp tubes beads, 200 pieces crimp bead covers, 60 pieces knot covers, 200 pieces wire guardians, 40 pieces lobster clasps, 300 pieces jump rings, a crimping Pliers, 1 roll of stainless beads wire and 1 roll of elastic string, sufficient amount can meet your different needs of jewelry making
5. Polymer Clay Jewelry
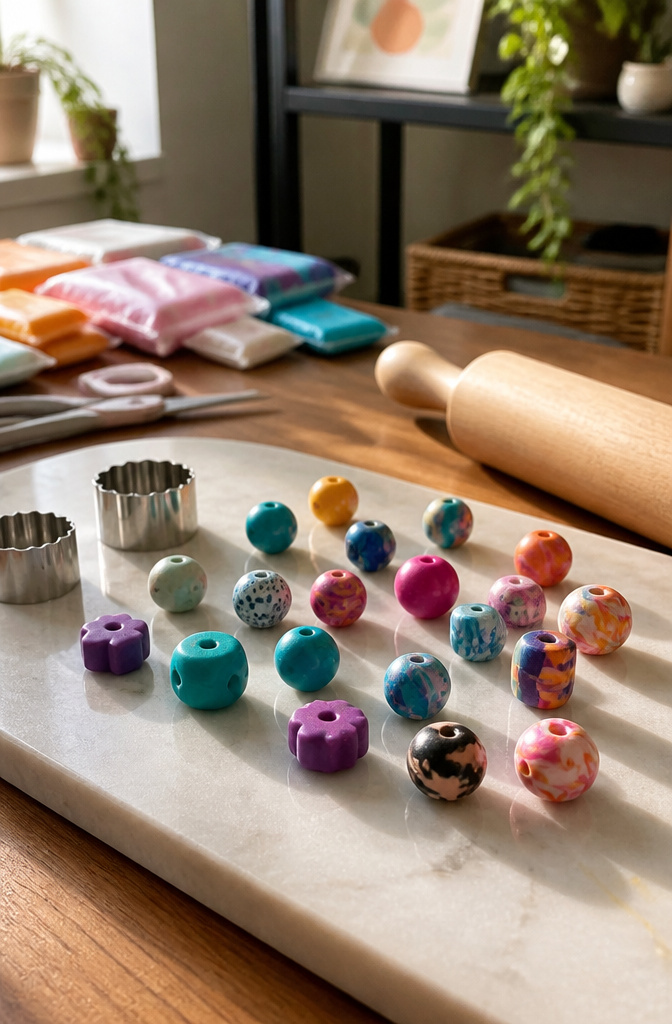
Polymer clay sits in a strange middle ground between modeling clay and plastic, and that ambiguity is exactly what makes it so useful for jewelry.
You bake it in a home oven at low temperatures, it hardens into something durable enough for daily wear, and the color possibilities are basically unlimited because you can mix your own shades from a handful of base blocks.
A single project runs about £5–£20 per piece once you have the basics down, and most beginner pieces take 30–60 minutes to shape and bake, not counting cooling time.
The real draw is the shape freedom. Sources describe everything from simple rounded beads to full statement earrings with crystal accents pressed in after baking.
You can roll it thin for lightweight dangles, build it up for dimensional pendants, or imprint texture with whatever is lying around, a leaf, a button, a piece of lace.
The mistake most beginners make is handling it too much, which warms the clay and blurs fine detail. Work in cool hands, bake on parchment paper, and let pieces cool fully before drilling or attaching hardware.
Cost stays low because a few standard color blocks mix into dozens of custom shades, and the same clay works for pendants, beads, earring components, or small charms.
Compared to metalwork or even quality glass beads, the entry barrier is almost nothing, which matters if you are testing whether jewelry making sticks as a habit.

50 different rainbow colors. Contains all the colors, blue, green, red, orange, pink, yellow, gray, black, white, etc., to meet your need for color
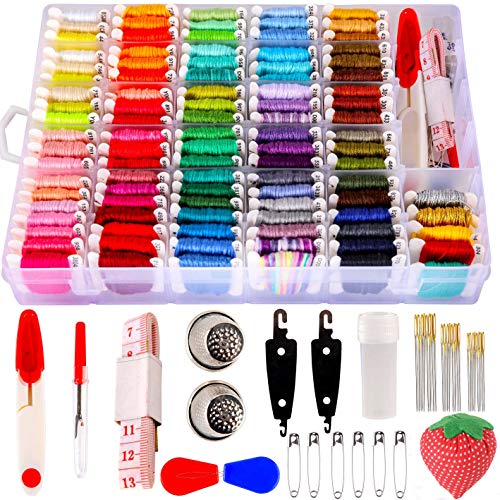
【EMBROIDERY FLOSS KIT】- Friendship bracelet string kit includes 100colors 8m six-strand mercerized embroidery floss Re-wound on bobbins+100 embroidery cross stitch tools that is great for friendship bracelets making and Embroidery&DIY project .

CAREFULLY HAND PICKED - DIY FRIENDSHIP BRACELET KIT - EASY TO CARRY - ALL-IN-ONE COMPACT BOX: 36 colors108 Pre-wound threads on bobbins for easy crafting.
6. Resin Jewelry

Resin jewelry keeps winning space in my search results because the finished pieces survive daily wear better than softer materials.
A properly cured resin pendant or pair of earrings resists scratches and moisture, which matters when you’re embedding something fragile inside it.
The real draw is what you can trap in that clear shell. Pressed flowers, tiny shells, wood fragments, and thin stone slices all suspend permanently without crumbling.
The resin hardens around them, so the organic material stays protected and visible from every angle.
Bluestreak Crystals lists resin-set pressed flower pendants as a top beginner project, and I see why: the technique looks complex but the materials cost roughly £5–£20 per piece once you have the basics down.
The mistake is rushing the pour. Bubbles cloud the finish, and uneven layers leave visible seams that no amount of sanding fixes.
Most tutorials run 30–60 minutes of active work, but that assumes you already know how to degas your resin and time your cures.
My advice is to start with flat open-bezel pendants rather than deep molds; they forgive temperature mistakes and let you see problems before the resin sets solid.

STRETCH CORD FOR JEWELRY MAKING: Elastic cord designed for slip-on jewelry such as bracelets, rings, and anklets. Provides flexible stretch for comfortable wear without clasps while supporting clean professional-looking designs.

HIGHEST QUALITY: Stretch Magic is a strong, durable, non-fraying material, with great elasticity and resiliency. Consistent diameter throughout the entire spool. The perfect stretch cord for making jewelry that's easy to wear and remove!

HIGHEST QUALITY: Stretch Magic is a strong, durable, non-fraying material, with great elasticity and resiliency. Consistent diameter throughout the entire spool. The perfect stretch cord for making jewelry that's easy to wear and remove!
7. Stamped Jewelry

Metal stamping turns a plain disc or bar into something that carries a date, a set of initials, or a short phrase someone will wear for years.
The technique is straightforward once you gather the right tools: a brass hammer, a nylon or rawhide hammer for finishing, a metal bench block for your work surface, and a set of metal stamps with the characters you need.
I started with just those four items and a pair of basic jewelry pliers to connect stamped pieces to chain with jump rings.
The real value is in the meaning you can press into the metal. A charm stamped with coordinates from a first home, a pendant with a child’s initials, a tag with a wedding date.
These pieces shift from accessories to keepsakes because the engraving is permanent and personal. The metal itself becomes the record, not a setting for something else.
You will mis-strike. The stamp slips, the letter lands half off the edge, the spacing looks wrong once you step back.
Brass practice blanks cost less than silver and let you work out your rhythm before committing to the final piece. The hammer weight matters more than speed.
A single confident blow beats three tentative taps that wander.
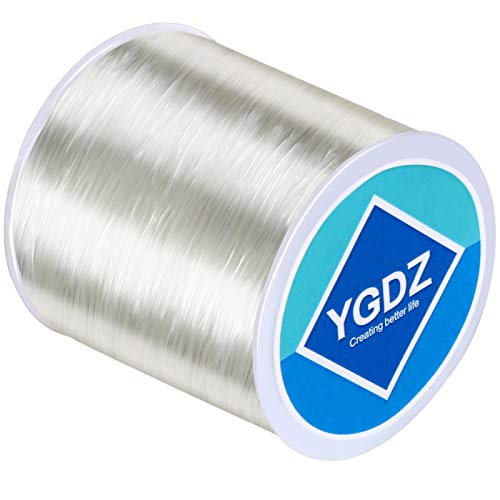
Stronger & More Stretchy: YGDZ elastic bracelet string is made of high quality rubber , very strong and sturdy, keep stretch after a long time use, Wear resistant, hard to break
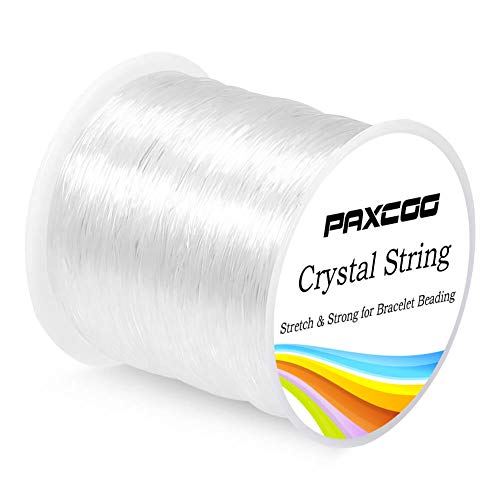
VALUE PACK OF ELASTIC STRING: Paxcoo bracelet string comes with a roll of 120 m / 131 yd elastic cord, ideal for bracelet making, jewelry making, beading, necklace making and other art craft projects

【Clear Stretchy String for Bracelets】Includes 1 x 0.4/0.5/0.6/0.7/0.8/1mm round transparent crystal elastic string cord. Ideal bead string for clay beads, pony beads bracelet making, friendship bracelet beads, seed beads, crystal beads, letter alphabet beads, number beads, glass beads, kandi beads, clear beads and more.
8. Upcycled Jewelry

A wooden bangle covered in torn strips of old book page paper, colored with ink and sealed with gloss varnish, costs next to nothing and looks like nothing else in the room.
That is the point of upcycled jewelry: the material was already paid for, often already worn out, and the transformation costs less than a single new clasp from a craft store.
I have watched the math on this again and again.
Old broken chains, single earrings with no mates, beach glass worn smooth by years of tide, these sit in drawers because they are too sentimental to trash and too damaged to wear.
Wire-wrapping sea glass into a pendant takes practice, but the glass itself is free and the story attached to it, where you found it, whose walk that was, is not replicable at any price.
Glue-on bails work too for a faster route.
The creative constraint is what makes the pieces interesting. You are not choosing from a catalog of findings; you are solving for what a broken clasp or a faded wooden bangle can become.
The spray varnish needs several thin coats with drying time between, which is patience, not skill. The result is personal in a way store-bought settings rarely manage.
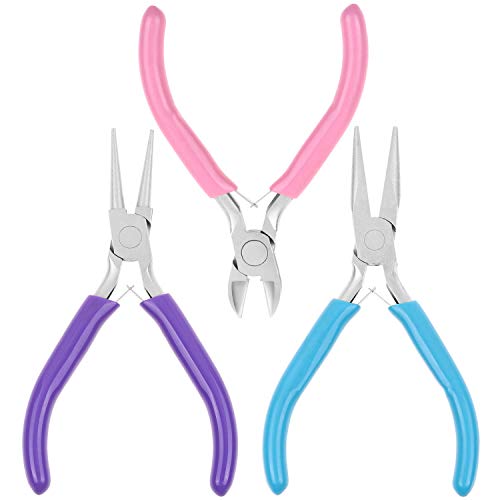
PLEASE NOTE: The jewelry making tools are coated with oil to prevent rust.If the jewelry making pliers you received have some oil on the head that make it look like dirty, please do not worry. Please wipe them clean with a cloth before use and apply oil to them before storage, which will help the pliers keep anti-rust
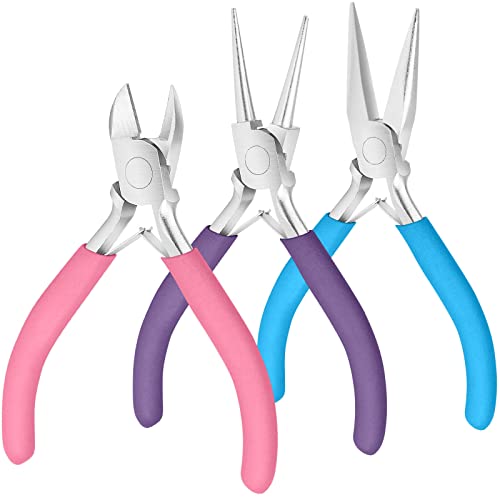
Jewelry Making Supplies: Package comes with set of 3 jewelry pliers including needle nose pliers, round nose pliers and wire cutters. Professional jewelry tools for jewelry making, jewelry repair, wire wrapping, beading and other DIY crafts
9. Macrame Jewelry
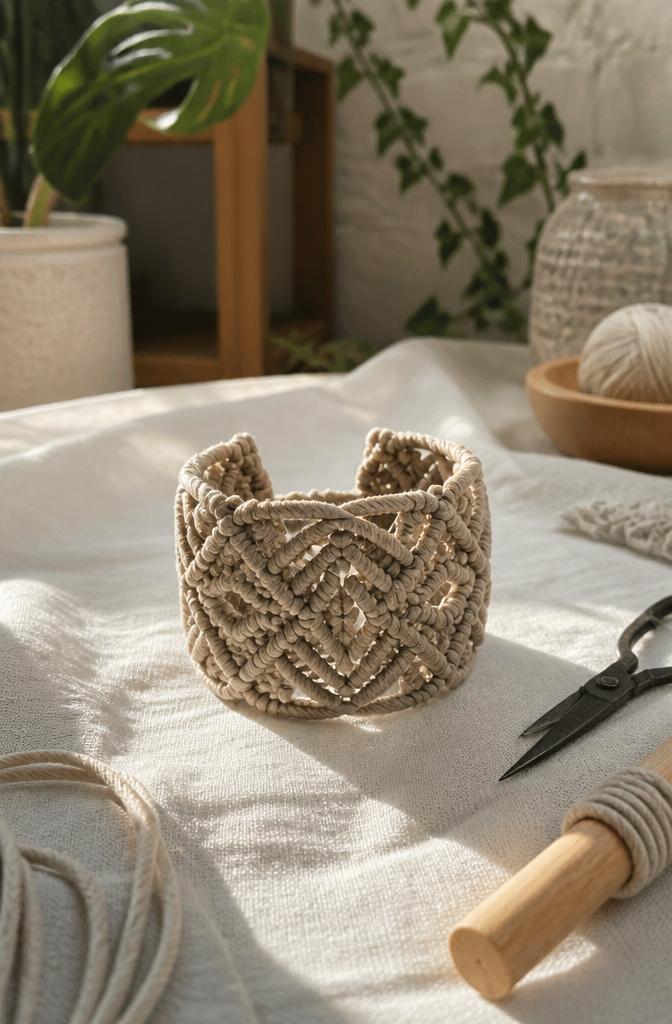
Macrame jewelry has climbed back into view, and this time it is not the summer-camp version. The same square knots and half-hitches from friendship bracelets now serve as foundation skills for necklaces and cuffs with real weight and structure.
Ribbon crimps with clasps replace the old tied-loop closure, which is the single upgrade that moves a cord piece from dorm-room to dinner-out territory.
Chunky macrame cord gives the work immediate presence; watching the knots lock into repeating geometry still carries the satisfaction it did at fourteen, only the patterns run more intricate now.
Zig-zag and layered designs build on what the hands already know from braiding thread, but they ask for tension control the loose bracelet never required.
That jump in complexity is exactly why the technique ranks as a genuine craft rather than a nostalgia trip.
10. Beaded Earrings
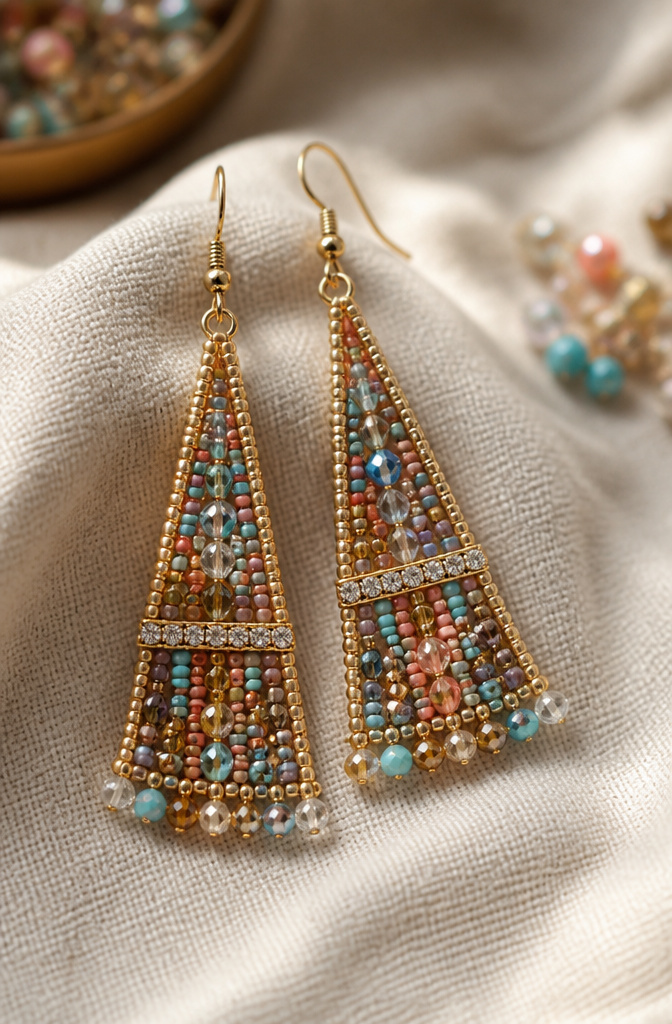
Beaded earrings are where a lot of bracelet skills quietly transfer over. The same thread tension, the same pattern reading, the same finishing knots.
What changes is the scale and the hardware.
A simple trapeze style works well for beginners. The beads do the visual lifting, and the construction stays straightforward.
Five to ten minutes per pair is realistic once your hands know the motions, though early attempts run longer.
Glue-in settings open another path. These take flat-bottom cabochons, turquoise or amethyst or lapis, and hold them without tools.
The fit matters exactly: an 8mm stone wants an 8mm setting, no wiggle. For adhesive, Devcon Epoxy Glue sets clear, fills gaps, and bonds fast enough that you are not holding components together for half an hour.
Half-drilled beads work in a few of these settings too. The product description on each one tells you which.
The personalization is immediate. Color for color’s sake, or a stone that matches a birth month, or just what you already have from bracelet projects.
The skills build on each other. The earrings just hang from a different finding.
11. Cuff Bracelets

Memory wire changed how I think about cuff bracelets. The hardened, silver-plated stainless steel keeps its coil shape, so the bracelet wraps around the wrist without needing a clasp.
That single difference separates it from strung beaded bracelets, which rely on thread or cord and some kind of fastener to stay on.
For construction, you cut the wire to length with a small overlap, slide on beads with holes slightly larger than the wire diameter, and finish each end with a small loop using round-nose pliers.
The loops keep beads from slipping off and give you a place to add charms or dangles. A half-drilled bead glued onto the end works too.
The fit is what sells this as a cuff rather than a bangle: it expands to go on, then springs back to hug the wrist. Strung bracelets drape and move; memory wire holds its shape and stays put.
Beginners like the minimal tool count, and the quick turnaround makes it practical for statement pieces you actually want to wear the same day.
12. Tassel Earrings

Tassel earrings sit at an odd intersection that took me a while to appreciate. The fiber work looks like something from a craft store aisle, and the metal findings belong to the jewelry bench.
Getting them to cooperate means threading embroidery floss or silk through a cone or cap that hides where the two worlds meet.
The movement is what sells these. A rigid earring catches light once; a tassel catches it dozens of times as each strand shifts.
What convinced me, reading through a dozen tutorials, was how much the weight matters. Too heavy and the earwire tilts forward; too light and the strands splay like a cheap curtain.
The sweet spot is about three grams of fiber per tassel, which most makers hit by wrapping fifty to sixty strands around a cardboard template.
Construction follows a clear sequence. You wind, tie off the center, cut the loops, then fold the bundle over a jump ring before crimping it into the cap.
The fiber technique is fringe-making; the jewelry technique is securing that fringe so it survives daily wear. Thread sealant on the knot keeps the whole thing from unraveling the first time someone pulls an earring through a turtleneck.
Color blocking works better here than in almost any other handmade jewelry idea. A metal cap in brass against navy thread, or gunmetal against mustard, gives the piece its finished look without extra components.
Tools That Stay Useful

A pair of round nose pliers, chain nose pliers, and flat nose pliers handle about ninety percent of what a beginner needs. Wire cutters and a basic crimping tool round out the starter kit.
I watched too many newcomers, myself included, buy the deluxe set first and stall out before touching half of it.
A starter set of basic pliers runs from about £10, which is roughly $12–13, and that is enough to make beaded bracelets, wire hoop earrings, and cord necklaces.
Stretch elastic bracelets and tied cord pieces need no tools beyond scissors, using 0.8mm or 1mm elastic cord for bracelets and 1mm–2mm waxed nylon cord for necklaces.
The surgeon’s knot with a dab of clear-drying glue finishes those clean.
Tiger tail wire with crimp tubes, jump rings, and clasps moves you into stronger strung pieces. Memory wire and a cutting plier handle cuff bracelets without needing a full kit.
Starting small lets you learn how silver wire feels under your fingers before the investment grows.
Skills That Transfer

Three core techniques carry most beginners from first attempt to finished piece without buying a workshop full of equipment.
Beading, wire wrapping, and glue-in settings for cabochons form a natural ladder where each rung teaches hand control the next one demands.
Stringing beads on flexible wire builds the eye for color spacing and tension that later keeps wrapped coils even. A simple beaded bracelet takes 15 to 20 minutes once the rhythm sets in.
Wire wrapping adds the ability to secure stones without solder; a basic pendant runs 20 to 40 minutes depending on how fussy the coils get.
Glue-in settings skip tools entirely, flat-bottom stones pressed into pre-made mounts with epoxy, a 10-minute pendant necklace that still looks intentional.
The progression matters more than any single project. Beading teaches you how materials behave under tension.
Wire wrapping forces you to hold that tension while adding shape. Glue settings let you place focus on stone choice and design when hand skills are still catching up.
None of these techniques dead-ends. That same wire wrapping repairs broken chains or re-secures stones in old pieces.
The epoxy you used for cabochons works for half-drilled beads too.
Start with what fits your morning: twenty minutes, a kitchen table, no flame. The skills accumulate faster than the tool collection.
Making It Yours

A charm bracelet from a big-box store sits on the wrist the same way yours will, but the weight of meaning lands differently.
A tiny metal tag engraved with a date, a set of initials, a short phrase — that is what turns wire and beads into something the wearer will not donate in a year.
The sources point to three ways this happens. Charms that map to specific interests or trips give the wearer a private index of memory.
Engraved pendants or tags freeze a moment in stamped metal. Materials with built-in story, like sea glass shaped by actual tides, carry narrative without the maker having to spell it out.
What persuaded me, reading through these ideas, is that personalization is not decoration added at the end. It is a decision made at the start that changes every choice after.
A sea-glass pendant demands a setting that does not compete. An engraved surface needs negative space around the lettering.
The personal detail becomes the design brief, not the finish.
The risk is overloading the piece. One meaningful element carries.
Three become clutter, and the story drowns in noise.
What Each Project Costs

Upcycled materials and simple supplies keep costs well below boutique price tags. A broken chain or single earring you already own becomes wire, beads, or accent pieces without a trip to the store.
Starting with basics matters more than buying everything at once: one set of pliers handles most beginner work, and tools like wire working or leather crafting supplies get added project by project rather than upfront.
The quantity you receive for what you pay means a single supply purchase stretches across multiple pieces. Square pendant necklaces work well here because they can be bulk-made, spreading material costs across several finished items.
The real scaling happens in materials. Base metals and cotton cord stay cheap.
Gemstones and precious metals climb fast. Leather and polymer clay sit in the middle, reusable and forgiving when a first attempt fails.
Cost-effectiveness shows up most clearly in comparison: a handmade piece built from salvaged parts and basic wire runs a fraction of what similar boutique jewelry sells for, and the gap widens as skills improve.
Picking by Skill Level

The first time I sorted a dozen project ideas into actual skill tiers, half landed in the wrong bucket. Beaded stretch bracelets and memory wire cuffs look beginner-friendly, but memory wire takes proper cutter technique to avoid sharp ends.
Simple strung beads on flexible cord really are the starting point. Wire-wrapped raw crystal points sit further up; the technique looks forgiving until you try to seat the wire so the stone does not spin.
From what I have mapped, beginner projects cluster around assembly rather than forming: basic beading, stacked memory wire once you own the right cutter, and resin-set pressed flowers that mostly wait for cure time.
The 30–60 minute estimate applies after technique, not including the learning curve.
| Project | Skill Level | Core Technique | Time Once Learned | Materials per Piece |
|---|---|---|---|---|
| Simple beaded bracelets | Beginner | Stringing and crimping | Under 30 min | £5–£10 |
| Memory wire stacked bracelets | Beginner | Assembly with proper cutters | 30 min | £5–£15 |
| Resin pressed flower pendants | Beginner | Pouring and curing | 45–60 min | £10–£20 |
| Wire-wrapped crystal points | Intermediate | Wrapping and tension | 30–45 min | £8–£15 |
| Seed bead embroidered earrings | Intermediate | Embroidery stitch discipline | 45–60 min | £10–£20 |
| Polymer clay statement earrings | Intermediate | Forming and baking | 45–60 min | £8–£18 |
Seed-bead embroidery and polymer clay both read as accessible in descriptions, but embroidery demands even tension across dozens of stitches and polymer clay needs thickness control to bake without cracking. I would not start there.
The honest split: if the project requires only pliers and patience, it is beginner work. If it needs you to shape or tension the material yourself, budget for ruined first attempts.
Frequently Asked Questions
What are some easy DIY jewelry making ideas?
Beaded bracelets, wire wrapped jewelry, and friendship bracelets are the easiest entry points.
Beaded bracelets need only elastic cord or wire and beads; wire wrapping secures stones without soldering; friendship bracelets use simple knotting with cotton thread and no tools at all.
Each lets you finish a piece in under an hour and build confidence before moving to more complex techniques.
How do I start making jewelry?
Pick one simple project and buy only the tools it requires. A starter set of basic pliers runs about $12–13 and handles beaded bracelets, wire earrings, and cord necklaces.
Stretch elastic bracelets and tied cord pieces need nothing beyond scissors. Starting small teaches how materials feel under your fingers before the investment grows.
What materials do I need for jewelry making?
Round nose pliers, chain nose pliers, flat nose pliers, wire cutters, and a basic crimping tool form the core kit.
For specific projects: 0.8mm to 1mm elastic cord for stretch bracelets, tiger tail wire with crimp tubes for strung pieces, memory wire and cutting pliers for cuffs, and DMC cotton thread for friendship bracelets.
Add supplies project by project rather than buying everything upfront.