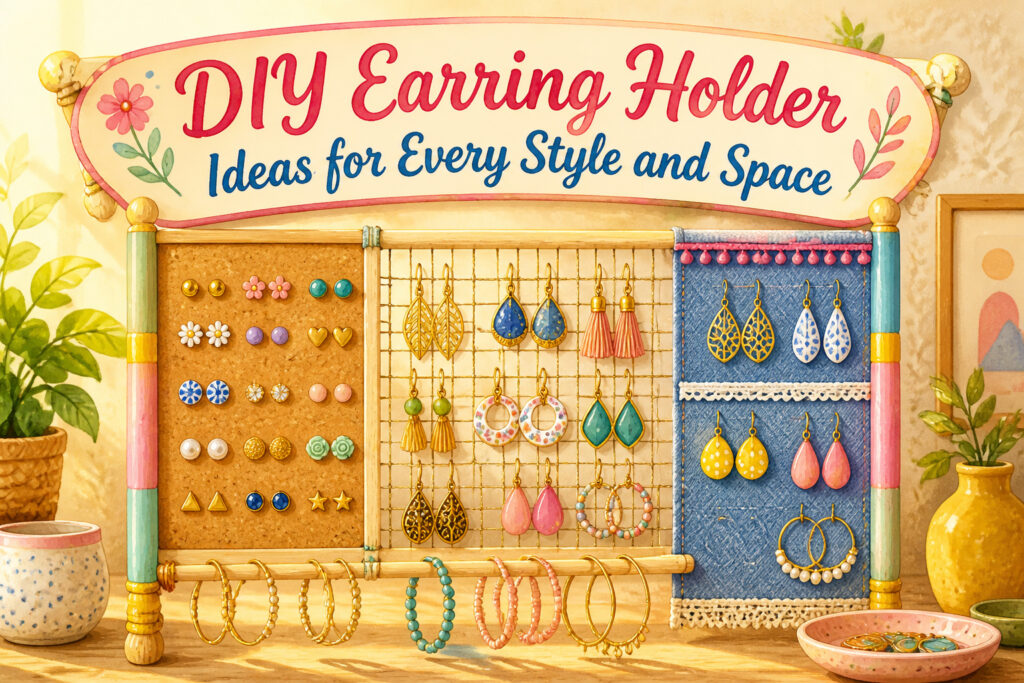
A diy earring holder is any frame, board, or found object fitted with mesh, fabric, or cork so earrings hang visible and untangled.
The catch is matching the material to the earring type: studs need cork or tight weave, hooks need open grid, and hoops without posts need a ledge or they tumble.
One build tracked here used an 8" x 10" artist’s panel, dowels, and a dollar-store t-shirt for $9.75 total.
Picture Frame Earring Holder
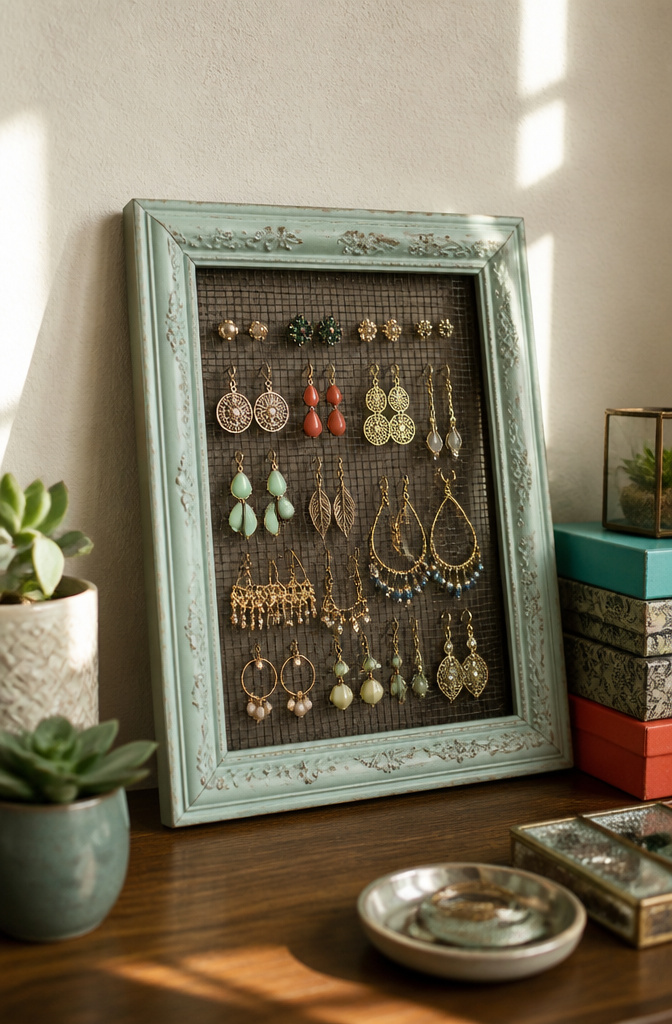
Old picture frames, especially the 5" x 7" or 8" x 10" sizes that gather dust in thrift bins, make the most natural earring holders. The 8" x 10" gives enough room for a real collection without crowding the studs.
Mesh or a flat woven fabric stretched across the back turns the opening into a display grid, and the frame itself is already finished so the project stays simple.
Cut your material slightly larger than the opening so you can pull it taut. Staples, tacks, or tiny nails along the back edge hold it in place.
Wire mesh lines up easier if you watch the grid; fabric forgives more but sags if you leave it loose.
Either way, taut material is what keeps earrings hanging straight and the whole thing from looking like a craft project gone wrong.
Paint the frame before you attach anything, or leave it as found for the vintage look. One build I tracked used an 8" x 10" artist’s panel, dowels, and a dollar-store t-shirt, coming in at $9.75 total.
That number assumes the frame itself costs next to nothing, which it should, since the point is using what you already have or what the thrift shelf forgot.

Elegant Design: This Giftgarden 8x10 frame, with its sleek black design, enhances any photograph, print or small artwork you put in it. The minimalist black picture frame can effortlessly blend with any interior decor.

Modified Magnetic Frame: The picture frame is not only magnetic but also has adhesive backing. Recommended picture size is 8x10.

【Dual-size Display】The photo frame accommodates 8x10 without mat or 5x7 picture frame with mat. This frame adapts to your preference. Mount it horizontally or vertically on your wall, or display it beautifully on your table.
Wire Mesh Earring Holder

Hardware cloth, the same material they use for rabbit cages and garden fencing, makes a rigid backing that holds earrings without sagging.
The 1/2" x 1/2" grid, sometimes sold as chicken wire in rolls 36 inches wide, is small enough for stud posts but open enough that hooks slide through cleanly.
Heavier drops and statement pieces hang straight instead of pulling the mesh out of shape the way fabric would.
A frame from any thrift store or lumber bin works as the border. Cut the mesh with tin shears or wire cutters, though a cut-off wheel saves your hands if you have access to one.
Leave roughly an inch overhang past the frame edge, two rows of wire, so you have material to staple down.
A commercial-grade staple gun loaded with 3/8" staples does the fastening; hammer each staple flush from the back so the front stays smooth and nothing snags.
Keep the mesh tight enough to ring slightly when you flick it, or earrings will tilt and cluster at the low spots.
Studs push through from the front and take butterfly backs on the reverse. French wires and lever-backs slip into the same square from the front and stay put by their own weight.
The open grid leaves your pairs visible at a glance, which is the whole point of a display over a drawer.
Paint the frame matte black and the mesh copper if you want warmth, or leave both raw for something that reads more workshop than boutique.
Either way, the thing costs less than a drugstore organizer and survives a move without the backing tearing free.

Package include: 1 piece wall mounted earring hanging organizer and 20 pieces black S hook help you easy to hang jewelry(earring organizer and S hooks only, the jewelries are...
Fabric and Cork Board Organizers

Cork covered with fabric gives stud earrings something to grip that mesh and wire simply don’t.
The fabric layer keeps the cork from crumbling over repeated pokes, and the combination ends up looking warmer than bare hardware on a bedroom wall.
Size scales with your collection. An 8" x 10" artist’s panel works well as a base for a modest set, though the same build applies to anything larger.
The panel keeps the weight down, which matters when you’re hanging it with a simple nail or adhesive hook in a rental where you can’t drill.
Studs push straight through the fabric and hold in the cork behind. Dangles work too if you angle them through so the post anchors in the cork while the decorative part hangs clear.
Ribbon strips or thin elastic stretched horizontally across the surface add spots for necklaces or bracelets, turning the organizer into something more useful than a single-purpose board.
The fabric choice does the heavy lifting visually. Solid colors read modern; patterns read bohemian.
Either way, the fabric protects the cork from wear, which is the detail that determines whether this lasts two years or ten.

Keep your memory: The beautiful moment is worth remembering forever. Use the wall grid photo display panel with a mint green wooden frame to create your personal message board, which is neat and beautiful. Record important events or memories that need to be reminded. Also it’s a great way to display your jewelry and ensure all your jewelry has an opportunity to be seen and worn. Keep your jewelry organized without getting tangled or damaged in a box or drawer.

48-Grid Storage Solution: The jewelry tray is precisely measured at 13.8"*9.5"*2" and features 48 compartments, each measuring approximately 1.5"*1.38". It is designed to hold rings, earrings, cufflinks, small pendants, and other jewelry items

Keep your memory: The beautiful moment is worth remembering forever. Use the wall grid photo display panel with a wooden frame to create your personal message board, which is neat and beautiful. Record important events or memories that need to be reminded. Also it’s a great way to display your jewelry and keep your jewelry organized without getting tangled or damaged in a box or drawer.
Upcycled and Creative Earring Holders
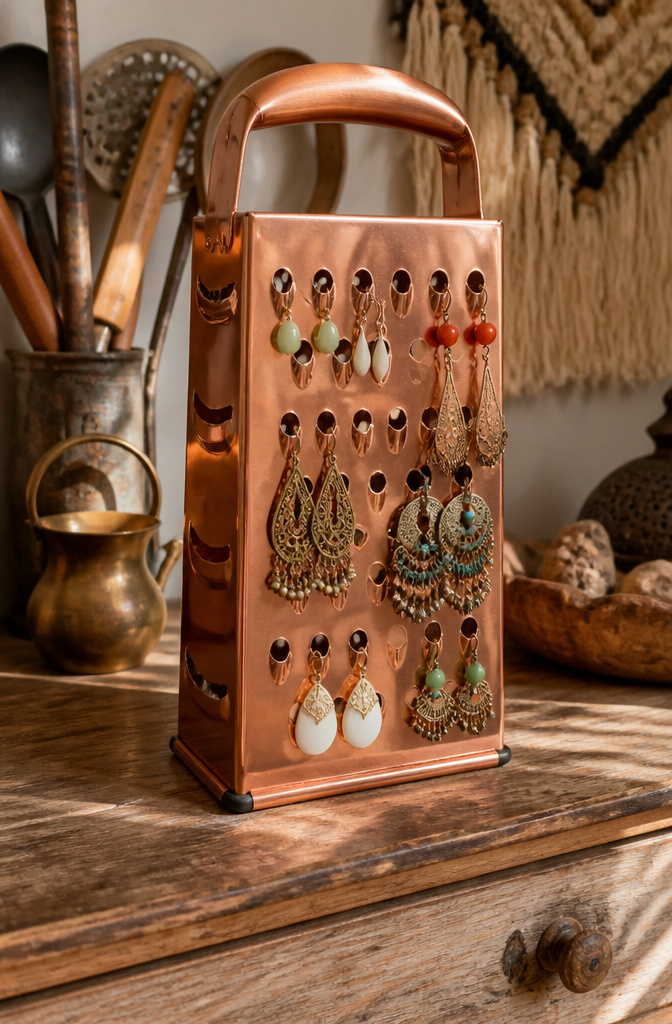
A cheese grater stands upright on my dresser, spray-painted copper, and the holes hold dangle earrings better than anything I bought new.
The metal was headed for recycling until a friend mentioned her grandmother had done the same with a vintage kitchen tool.
That is the appeal of these holders: the material already exists, already carries history, and costs nothing but a can of paint and an hour of sanding.
Driftwood works the same way. Pieces collected from a beach walk, cleaned and sealed, become natural hangers for hoops with an irregular shape no factory would replicate.
Branches from a backyard, mounted horizontally or set into a base, give the same organic look while keeping the wood out of a chipper.
Wire cooling trays and antique keys fit the same logic. Their existing holes and curves suit earring hooks without modification, and the vintage-industrial mix looks intentional rather than improvised.
A repainted rack inside a frame can double as a stand for both earrings and small necklaces.
What separates these from store-bought organizers is not just the sustainability, though that matters. Each piece carries a story that a mass-produced board cannot replicate.
The cheese grater came from somewhere. The driftwood came from a specific afternoon.
The holder becomes part of the jewelry’s story, not merely its storage.

Large Quantity: you will get 20pcs clear acrylic earring display cards, about 29mm/1.1" wide, 59.5mm/2.3" long, 2.5mm thick, hole: 2mm. Can be placed on wood base with 2mm slots. Enough quantity for your personal earring display or photo prop needs.

Elegant Stud Earring Display: Beautifully showcase stud earearrings and small jewelry pieces on this premium white PU leather display tray. The flat, clean surface makes earearrings stand out perfectly for display and photography.

Ample 12-Piece Set with 3 Practical Sizes for Versatile Display: This T-bar earring display stand set includes 12 pieces in 3 different sizes (16.5×6.5cm, 15×6.5cm, 11.5×6.5cm), with 4 pieces for each size, providing sufficient options to display and store earrings of various lengths, as well as necklaces and bracelets, meeting daily use and replacement needs
Jewelry Boxes and Stands

Compact jewelry boxes and stands solve the space problem wall-mounted organizers ignore entirely. My bathroom counter is maybe fourteen inches deep, and a wall hook would mean leaning over the sink every morning.
A wooden box with velvet or felt lining sits right on that surface, studs in small compartments, hoops in medium ones, dangling pieces in the tall slots.
The lining matters more than people think; unlined wood scratches delicate posts over months of daily opening and closing.
Jewelry stands trade protection for visibility. Carved wood, metal rods, tiered designs, even rotating versions or tree shapes turn the collection into something you actually notice.
The tradeoff is real. Dust settles on open displays, and a stand takes more horizontal room than a box.
But a stand keeps pairs together in a way closed storage never does; out of sight really does become out of mind when the lid snaps shut.
Removable dividers are the detail that saves a box from obsolescence. Collections grow, shrink, change shape.
Fixed compartments lock you into the earring habits you had when you built the thing.
Paint or stain matches the box to your space, small hooks inside the lid hang chains or long earrings, recycled wood or metal rods shift the feel toward rustic or industrial.
For renters or anyone with a crowded vanity, these are the portable, wall-free options that actually fit.

[Galvanized T50 Staples] Our T50 staples are constructed of premium galvanized steel with strong rust & corrosion resistance,this staple gun staples suitable for use in a wide range of environments. Offering quality strength and durability, 3/8” crown staples are sturdy and not easy to break, ensuring long-lasting performance.

RELIABLE PERFORMANCE – Deli staples set a higher standard for reliable performance over comparable staples. These heavy duty staples help you stay organized.

READY FOR ACTION These staples are used for all heavy duty stapling applications from installing insulation housewraps and roofing underlayment
Wine Cork Earring Holder

A wine cork earring holder sits somewhere between functional storage and rustic decor. The cork grips post backs firmly enough that earrings stay put, yet releases them without the tug-of-war that harder materials demand.
The build starts with a strip of scrap wood and a 20mm drill bit, or anything that cuts a 20mm hole to that width.
A drill press keeps the holes straight and clean, though a handheld drill works if your aim is steady.
Sink the holes to whatever depth leaves the cork sitting flush or slightly proud, then glue the corks in place or leave them loose for replacement later.
What sells the look is the material itself: the stained ends, the occasional vineyard name still legible, the way light hits the rounded tops at uneven heights.
It reads as intentional imperfection, the kind of rustic aesthetic that pairs with farmhouse vanities and weathered mirrors without trying too hard. For studs and post earrings, the grip is the point.
Cork compresses around the post back and holds through drawer slams and morning rushes. Drop earrings and hoops need a different solution entirely, which keeps this holder honest about what it does and for whom.

Sturdy & Delicate Frames Set :Fisnish 8x10 picture frame is made of solid MDF wood material, which will not be easily damaged and deformed like plastic materials, and can perfectly protect the photos you put in it. The frame uses high-quality high-definition plexiglass (covered on both sides with a protective peel-off film). It can be slightly bent, so there is no need to worry about accidentally dropping it to the ground and causing the risk of breakage. The lightweight frame is more suitable for wall hanging.
Multiple Frames & Sturday Material: Set of 3 pieces in the same sizes for neat and uniform wall decoration. Lightweight but well made, comes with high definition glass, better protection from scratches.
SLEEK DESIGN – FrameStarr’s Harmony Collection frames have a streamlined design and flat finish that works with any room décor; With heat-strengthened glass which is scratch and damage resistant
Framed Organizer With Chicken Wire
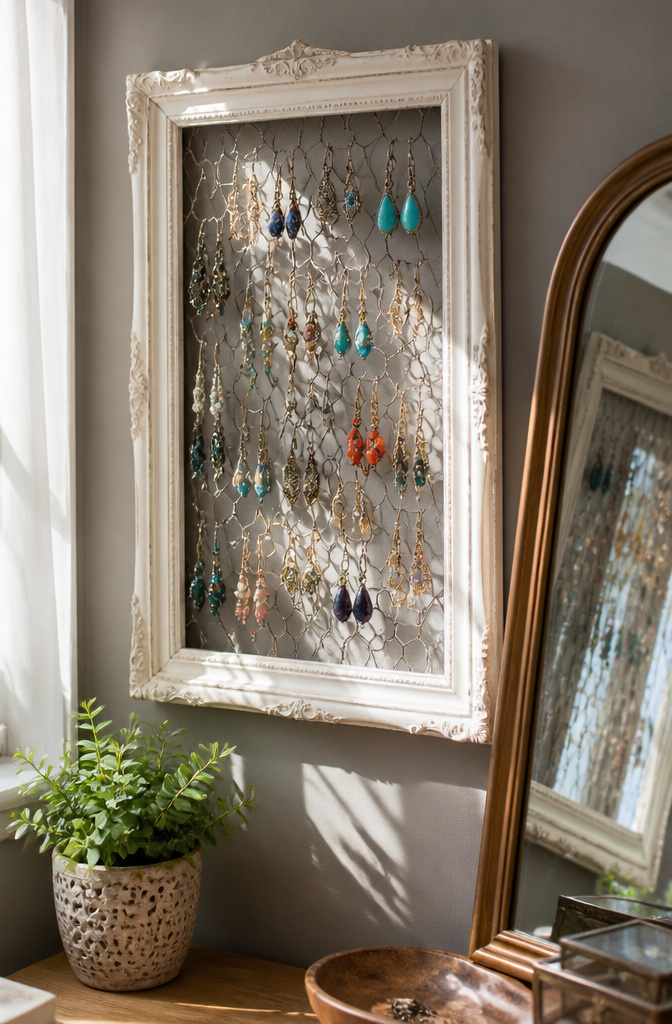
A 1/2″ × 1/2″ chicken wire with its small square spacing grips earring hooks cleanly without letting posts slip through, and the farmhouse texture reads warmer than the industrial flatness of plain wire mesh.
The roll from the hardware store runs 36 inches wide, so one piece usually covers a standard frame with an inch of overhang around the edge, about two rows of wire for reference.
Tin shears or wire cutters will cut it, though a cut-off wheel saves the most hand strain.
A commercial-grade staple gun loaded with 3/8″ staples anchors the mesh, and the trick is keeping tension tight enough to eliminate ripples before you drive anything.
Stapling across corners gives the best hold, then a few taps with a hammer seats each staple flush without splitting the frame back.
Lay the frame face-down on a towel first so the wire does not scar whatever surface you are working on.
The finished piece lands around $15 if you start with a frame you already like, which is where the style lives or dies. A ornate thrifted frame pushes the farmhouse look toward vintage; a cleaner painted one keeps it quieter.
Minimalist Removable Earring Holder
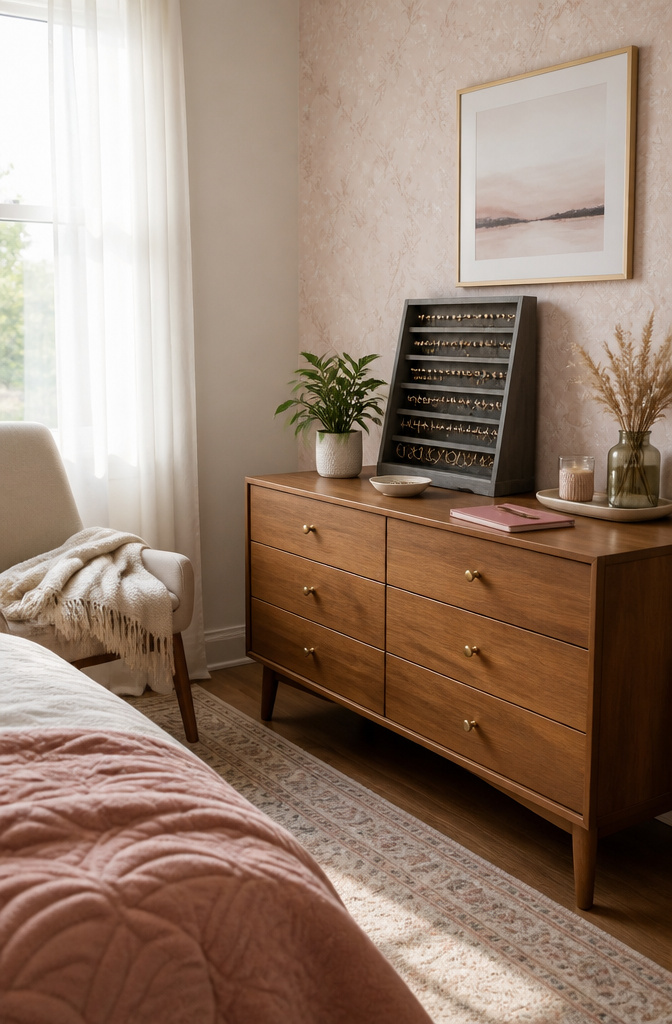
A shoe rack turned on its side gives you instant, damage-free earring storage. The MACKAPÄR runs under $20 and slots together without tools, so the whole thing lifts off the shelf when you move.
No brackets, no patched drywall, no landlord headaches.
The shallow depth is the feature that matters. Earrings sit flat against the mesh instead of dangling into chaos.
Studs hook through the grid, hoops rest across the rungs, and nothing tangles because nothing hangs free.
Renters have two ways to play this. Keep it freestanding on a dresser and the unit travels with you.
Or mount it temporarily with removable strips if you want wall access without the commitment. The freestanding version wins if your lease is strict or your bathroom lacks a single stud where you need one.
The IKEA frame hack clocks in under $3 and under five minutes, but it needs a hook or nail.
For anyone who has already lost a security deposit to picture holes, the shoe rack pays for itself in peace of mind alone.

Practical Display Shelf for Wall Grid: Perfect for storage and display small things like small plant , framed photo on the wall grid.

【Package includes】Pack of 3 hanging wire baskets,each size is 9x3.9x3.1 inches.

Package Includes:2 pcs Grid Wall Basket+20 pcs hooks
Brass Pyramid Earring Holder
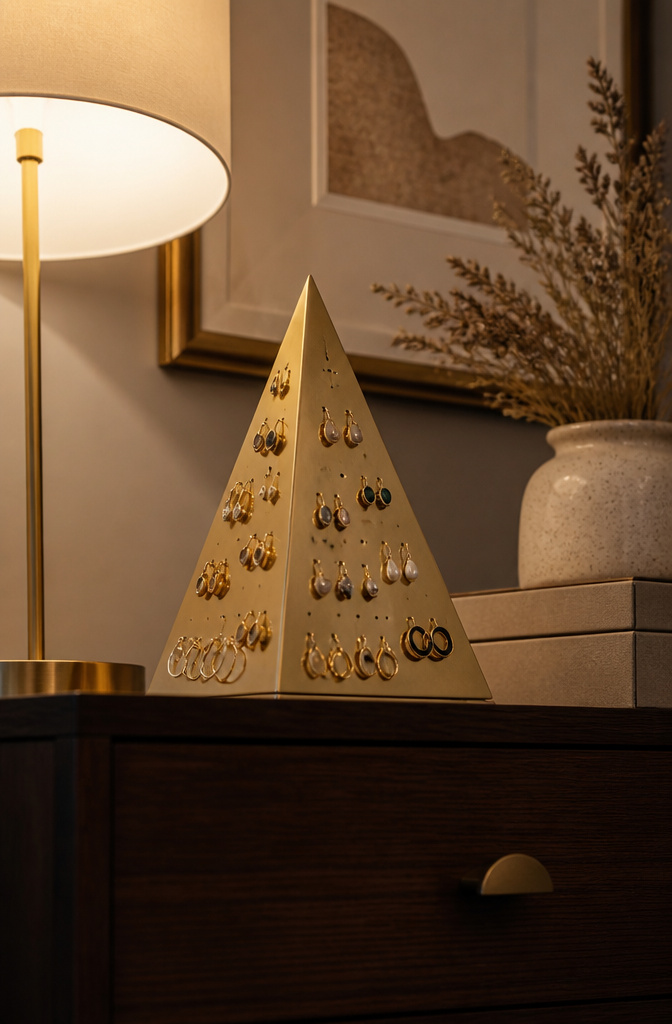
A brass pyramid turns the holder into something you would leave on the dresser even without earrings on it.
The four triangular faces each slant at the same angle, so the slope itself becomes the hook: studs press straight into the metal where the face meets the base, and hooks and drops catch on the edges where two faces meet at the ridge.
The geometry sorts the earrings without any planning. Shorter posts sit lower on the face where the angle is gentle, while dangles hang from the sharper upper ridges and spin slowly when someone walks past.
A three-inch base fits most nightstands; a five-inch version starts to need its own corner of the dresser.
Brass darkens to a soft brown in about six months unless you polish it. That patina hides fingerprints but also dulls the reflective quality that makes the pyramid read as jewelry rather than hardware.
I leave mine alone and let the metal age, though if your earrings run silver-toned the warm brass can clash against them in a way that a matte black or raw steel pyramid would not.
Weight is the real limit. A solid brass pyramid at four inches tall already pulls more than a pound, enough that felt pads under the base are non-negotiable on anything softer than oak.

EARRING STAND - A beautiful way of displaying your fabulous earrings. Adjust the angle by bending the stand.

EARRING PUFFY CARD TRAY: The earring display tray features a soft, flocked plastic insert, providing an elegant base for your jewelry. With 50 spacious compartments and 100 earring puff cards included, it provides a versatile solution for showcasing a variety of earrings. This padded design enhances visual appeal while protecting your earrings

Jewelry Earring Displays: The earring organizers have 72 holes to hold and display up to 36 pairs of earrings totally, 6pcs of earring holders totally, enough for your various needs.
Embroidery Hoop Earring Holder

Lace stretched across an embroidery hoop makes a diy earring holder that takes under five minutes to assemble. The holes in the mesh accept hook earrings naturally, so pairs hang in place without extra hardware.
An 8-inch hoop found at any craft store holds enough lace for a modest collection, though sizing up works if wall space allows.
What sold me on this method was the speed. The whole project runs faster than digging through a jewelry box for the mate to a single earring.
Tighten the hoop, trim the excess fabric, and it is ready to mount. Hook styles are the obvious fit here, and the open weave means you see your pairs at a glance.
The finished piece reads as decorative even when empty, which matters if you rotate earrings seasonally or simply do not own that many yet.
Paint the hoop or leave the wood raw; either way, it costs less than a store-bought organizer and weighs almost nothing on a nail.

3-in-1 Application : It fits 3 kinds of different staples/nails such as D type staples, U type staples and T type nails; It's suitable for general models: T50, T18, Brad nail gauge 18
Materials That Make These Work

Most of these builds start with a picture frame, and the sweet spot is finding one you already own or picking up a thrifted piece for a couple of dollars.
A standard 8-by-10 or 11-by-14 frame gives enough real estate for a modest collection without dominating the wall. The backing comes out, the glass gets set aside, and the empty rectangle becomes your skeleton.
For the mesh layer, 1/2-inch chicken wire on a 36-inch roll handles the weight of earrings better than finer hardware cloth, though both work.
Cut it with tin snares or a cut-off wheel if you have one, and leave about an inch of overhang past the frame edge so you can fold and staple it tight with a commercial-grade staple gun and 3/8-inch staples.
The wire will ripple if you let it, so staple close and hammer each one flush.
Fabric and cork fill the same role for a softer look.
A strip of fabric wrapped around a dowel and glued with a hot gun costs almost nothing, and a wine cork sliced lengthwise and screwed to a scrap wood strip makes a stud holder that sits on a vanity or hangs inside a closet door.
The whole wine-cork build runs about five corks per strip, plus a pair of eye screws and L-brackets for mounting.
Accessibility is the point. One maker spent $9.75 total on dowels, fabric, and a small artists panel, and that figure sticks with me because it proves how little is actually required.
The materials are already in most houses or available at any hardware store without a special order.
Matching the Holder to Your Space
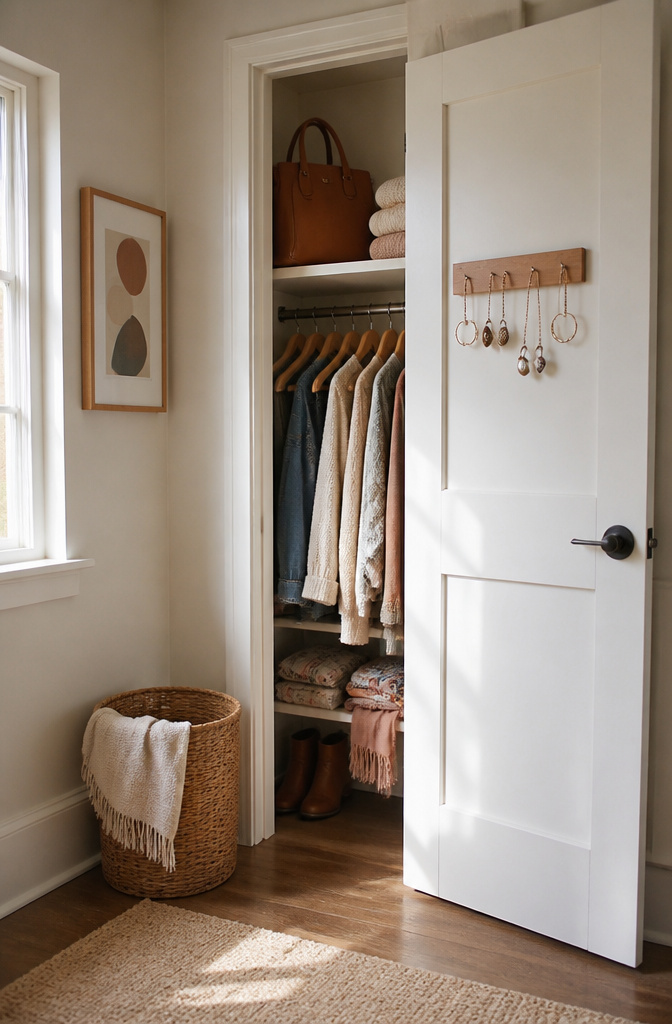
A strip of wood slightly wider than 23 mm fits the back of a closet door without adding bulk that catches on hanging clothes.
I mounted one there after measuring the space between the thicker border rails, 39 cm in my case, and the corks sat flush enough that the door still closed cleanly.
Small apartments reward vertical storage. Wall-mounted memo boards or repurposed frames climb upward instead of spreading across a vanity, and shared bathrooms need the same logic: one person’s countertop is three people’s clutter.
A frame organizer with wire or mesh inside keeps pairs visible and dry, which matters when steam lingers.
For travel, the projects that rank as cheap and quick, under five minutes and a few dollars, are the ones worth scaling down.
A pocket-sized cork strip or a folded mesh square slips into a toiletry bag without the weight of a jewelry box.
The mistake I made early was building a beautiful wall piece and having nowhere to put it when I moved; now I keep one holder that hangs and one that travels, and neither cost enough to mourn.
What I Paint and What I Leave Alone
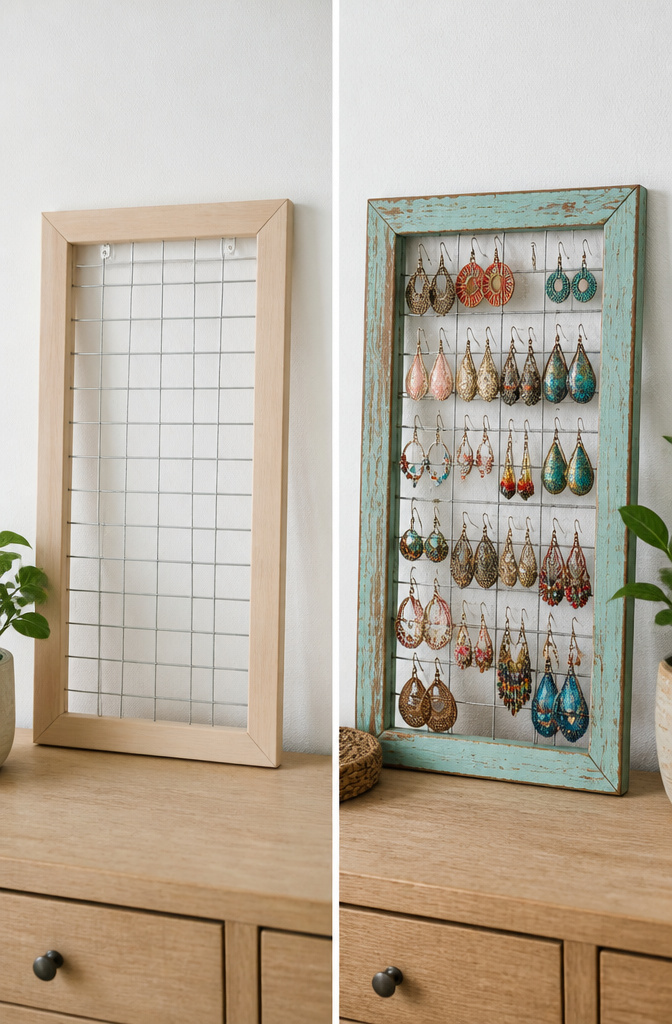
Paint color on a frame is where most of us get carried away.
I learned this the hard way watching a gold frame turn brassy, then too silver, before landing on Modern Masters Warm Silver over Gold Rush, which is the kind of trial and error that actually teaches you something.
Match the wall when you want the jewelry to star, and go bold when the holder itself needs to pull a room together.
A canvas painted the exact shade of your wall disappears until the earrings read as floating color, which is elegant until you repaint the room and that match becomes a clash.
Fabric and cork boards give you the same choice from another angle. Solid colors read modern; patterns turn the board into the accent.
Either way, the fabric protects the cork from wear, which matters more than it sounds if you are pushing studs through daily. The finish on the frame, meanwhile, is where cheap projects betray themselves.
A yard-sale frame with the original stain intact looks intentional; the same frame with one sloppy coat of craft paint looks like a mistake you are hoping no one notices.
I leave frames alone now unless I have the patience for two coats and a day of drying between them.
Earring Types and What Holds Them

Studs sit flat against fabric or cork, their posts pushed straight through and secured with a butterfly clutch on the back.
The material grips the post enough that pairs stay paired, though dense cork beats loose-weave felt if you do not want to fish for lost backs every morning.
Dangles need mesh or perforated metal. The hook slides through the grid and hangs free, which keeps chains from tangling and lets you see the full drop.
Tight mesh, around a quarter-inch spacing, works better than chicken wire for lightweight hooks that might slip through wider gaps.
Hoops and clip-ons are the ones that trip people up.
A hoop without a post has nothing to push into cork, and clip-ons need solid backing behind whatever mesh or ribbon you choose or the hinge mechanism simply has nothing to bite.
I learned this the hard way with a pair of vintage clips that kept tumbling off a ribbon board onto the dresser below.
Solid backing behind open mesh solves the clip-on problem, and a narrow shelf or ledge beneath the display area catches hoops that do not hang at all.
Match the support to the hardware, not just the aesthetic, or you end up with a pretty board that half your collection cannot use.
Frequently Asked Questions
How do I make a DIY earring holder?
The simplest build uses a picture frame with mesh or fabric stretched across the back: cut your material slightly larger than the opening, pull it taut, and secure it with staples or tacks along the rear edge.
Keep the material tight so earrings hang straight and the finished piece looks intentional rather than improvised. Other options include wire mesh stapled inside a frame, cork boards covered in fabric, or even upcycled items like cheese graters and driftwood.
What materials do I need for a DIY earring holder?
Most builds start with a thrifted picture frame in 8-by-10 or 11-by-14 size, plus 1/2-inch chicken wire or mesh on a 36-inch roll, or fabric and cork for a softer look.
A commercial-grade staple gun with 3/8-inch staples handles the fastening, and tin shears or wire cutters cut the mesh.
One maker spent $9.75 total on dowels, fabric, and a small artist’s panel; a framed chicken wire organizer lands around $15 if you already own the frame.
How can I customize my earring holder?
Paint the frame to match your wall when you want jewelry to star, or go bold when the holder itself needs to anchor the room. Fabric choice does heavy visual lifting too: solids read modern, patterns read bohemian.
For warmth, paint the frame matte black and the mesh copper; leave both raw for a workshop feel.
The wine cork version leans into rustic imperfection with stained ends and vineyard names still visible, while a brass pyramid becomes sculptural decor even without earrings on it.