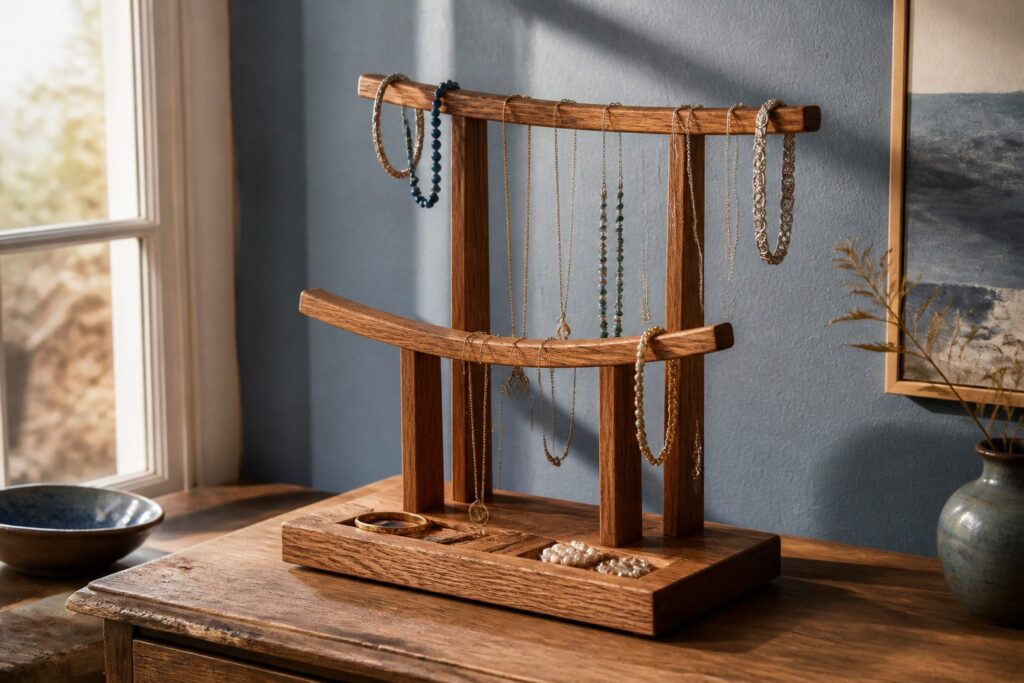
A finished wooden jewelry holder takes about a weekend and less than $30 in lumber, but most builds wobble within months because the base and sides are joined while the glue is still wet.
The fix is simple: clamp square for thirty minutes, then wait the full hour before you touch it again.
I use ¾-inch oak or maple, cut a hair long, and sand to 220 grit before assembly so the morning light catches clean grain instead of tearout.
1. Prep the Boards
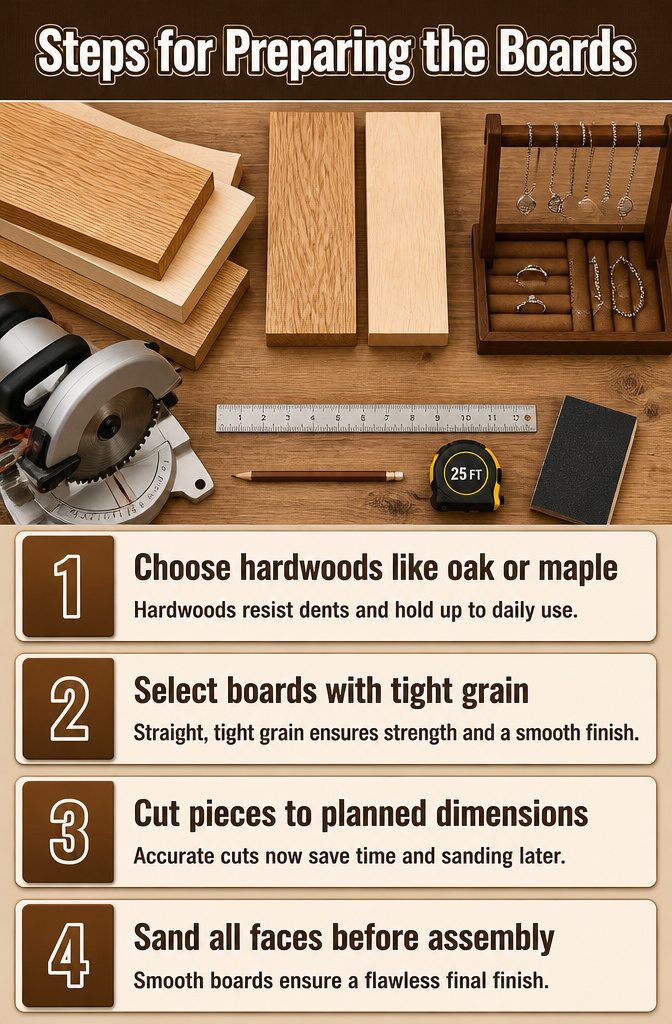
- Hardwoods like oak or maple earn their place in a wooden jewelry holder design because softwoods dent every time a bracelet clasp hits the edge. I reach for poplar only when the budget is tight; it sands smooth and takes stain well, but expect dings within a year of daily use.
- Grain that runs straight and tight matters more than color at this stage. Open grain, like red oak’s, telegraphs through clear finishes and catches dust in crevices you did not plan for. I pick boards with the fewest knots visible on the face that will show; fill or cut around anything larger than a dime.
- Cut every piece to the plan’s list before moving on. A miter saw with a sharp blade leaves cleaner ends than a circ saw on small stock, and clean ends mean less sanding later. I cut lengths a hair long, test the fit dry, then shave to final size; you cannot stretch a board that came up short.
- Sand every face through 120 grit before assembly, and 220 if the finish is oil or clear lacquer. Raised grain after the first coat looks careless on a piece this small, and fingers run across these boards every morning. I sand in the direction of the grain, never across it, even when a random orbit tempts you to cheat.
2. Shape the Edges
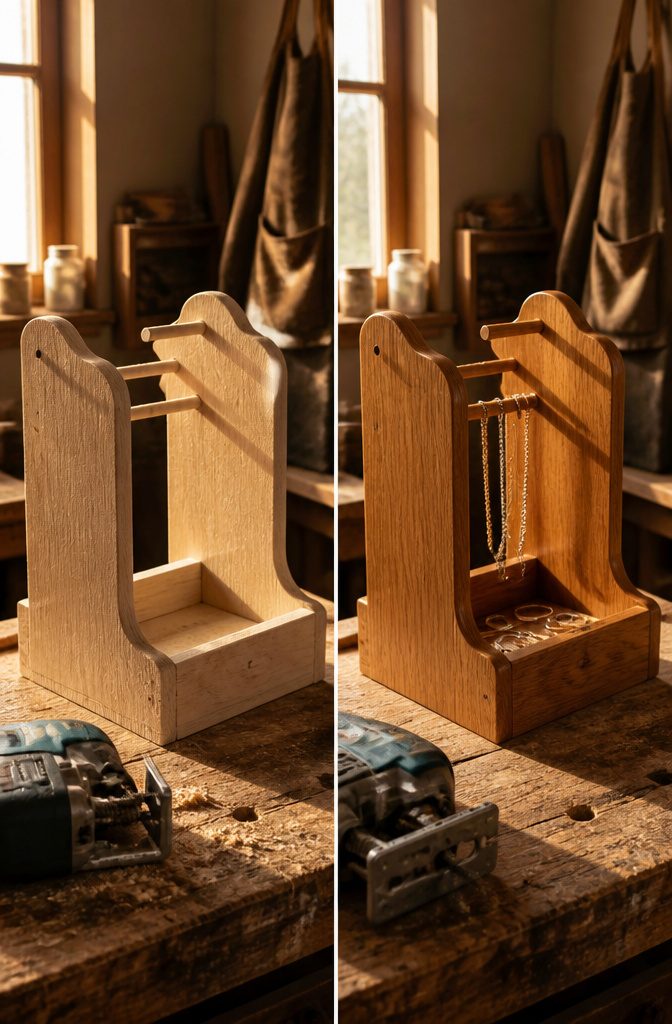
- Draw a gentle arc across the top of each side piece, then cut along the line with a jigsaw. The curve softens the silhouette and keeps the holder from reading as a plain slab of lumber.
- If you own a router, load a 1/4 inch roundover bit and ease the edges on both faces of the end pieces plus the top edge of the base. The cut is shallow enough to feel friendly to the hand without turning the piece decorative.
- Skip either step and the holder still functions; the arc and the rounded edges are finish details, not structure. I would still run the roundover if the base will sit on a dresser where hands brush it daily, but a wall-mounted build or a first project can move straight to assembly without apology.
3. Make the Holes in the Base
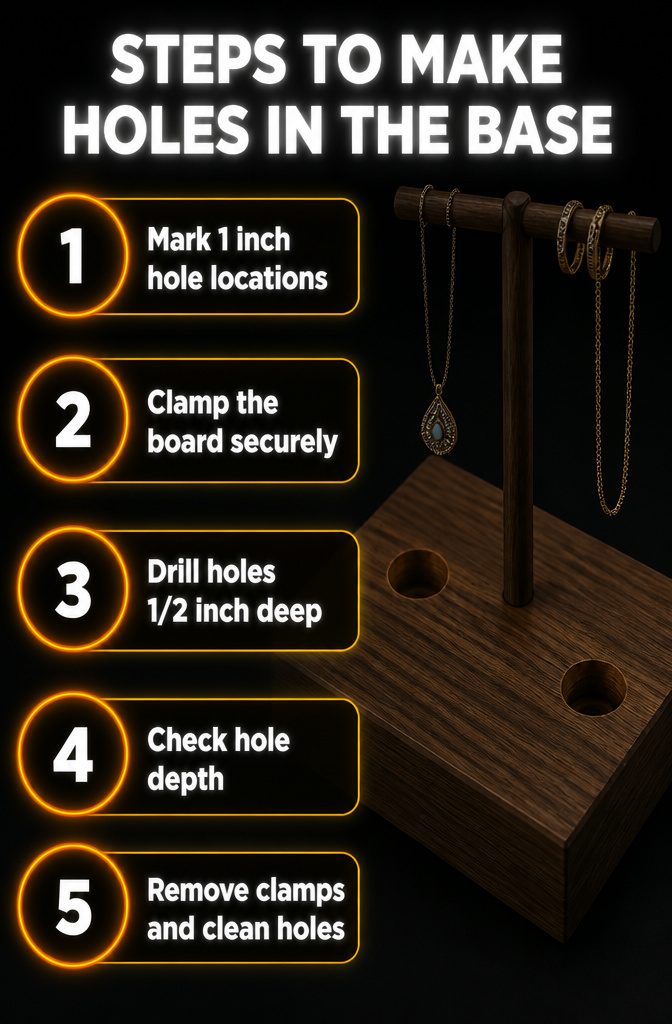
- Mark the locations for the two 1 inch wide holes in the base. These pockets are what hold the dowels upright once the holder is assembled, so measure carefully and mark dead center where you want each upright to sit.
- Clamp the board firmly before you start. Forstner bits can catch and spin the wood if the piece shifts even slightly, which ruins the clean edge you need.
- Drill each hole 1/2 inch deep using a 1 inch Forstner bit. That depth gives the dowels enough purchase to stand straight without making the base so thin it weakens. Stop and check depth as you go; a piece of tape wrapped around the bit at the right height works as a quick visual guide.
4. Add the Dowels
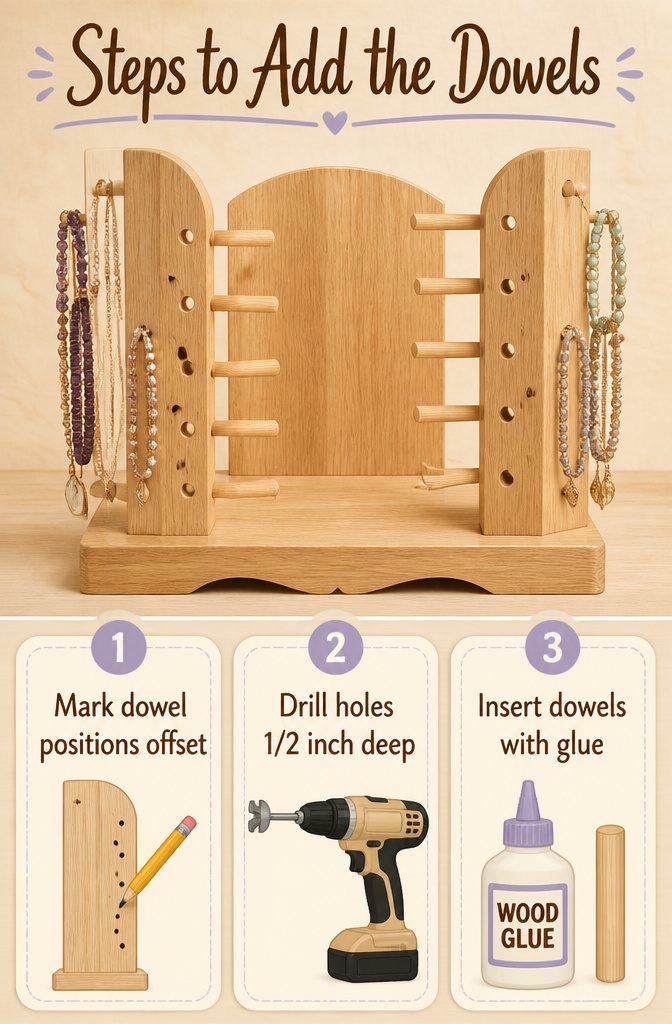
- Mark the dowel hole positions on both side pieces, offsetting the rows so necklaces or bracelets on one dowel clear the other instead of tangling against each other.
- Drill each hole 1/2 inch deep using a 3/8 inch Forstner bit. That depth leaves enough wood for a solid glue bond without punching through the face.
- Add wood glue to each hole and insert the dowels. A friction fit usually holds fine while the glue sets; if a hole feels loose, a brad nail from the backside fixes it, though I would not bother unless the dowel spins freely.
5. Assemble the Jewelry Holder
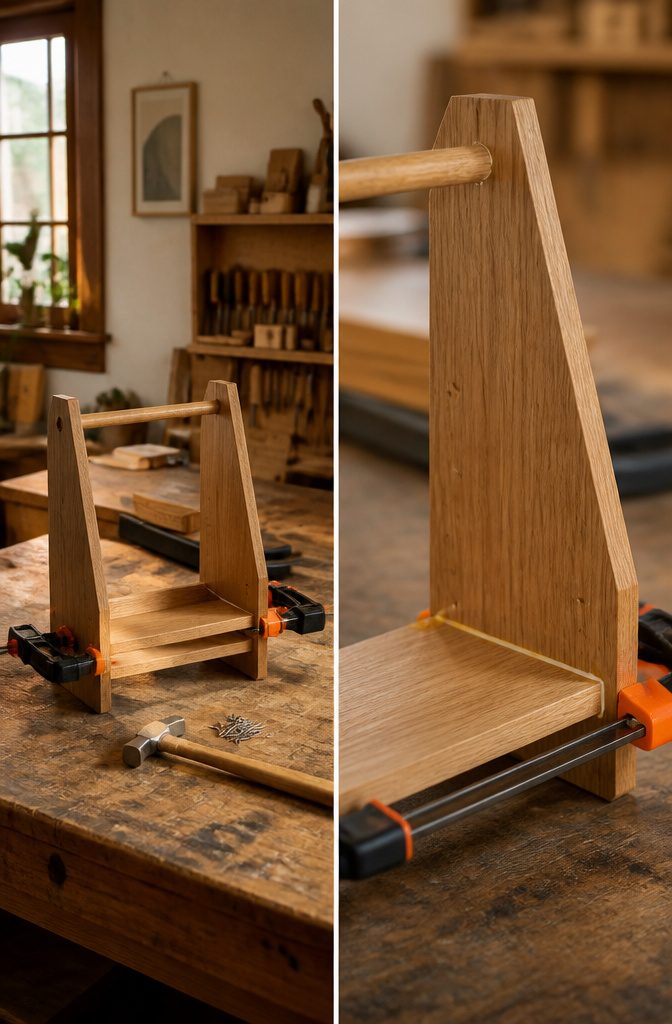
- Run a thin bead of wood glue along the bottom edge of each side piece, press it to the base, and clamp it square for at least thirty minutes. The glue does the holding; the fasteners just keep it from shifting while the joint cures.
- Drive 1-1/4 inch finish nails through the sides into the base, or use trim head screws if you prefer a cleaner look and easier disassembly later. I keep the spacing to about every 4 inches.
- Wipe squeeze-out with a damp rag before it skins over. Dried glue blocks stain and finish, and it shows through clear coats no matter how careful you are later.
- Let the assembly dry a full hour before removing clamps, and wait overnight before you start routing holes or adding dowels. Rushing this step is the mistake that turns a square holder into a wobbly one.
6. Apply Finish
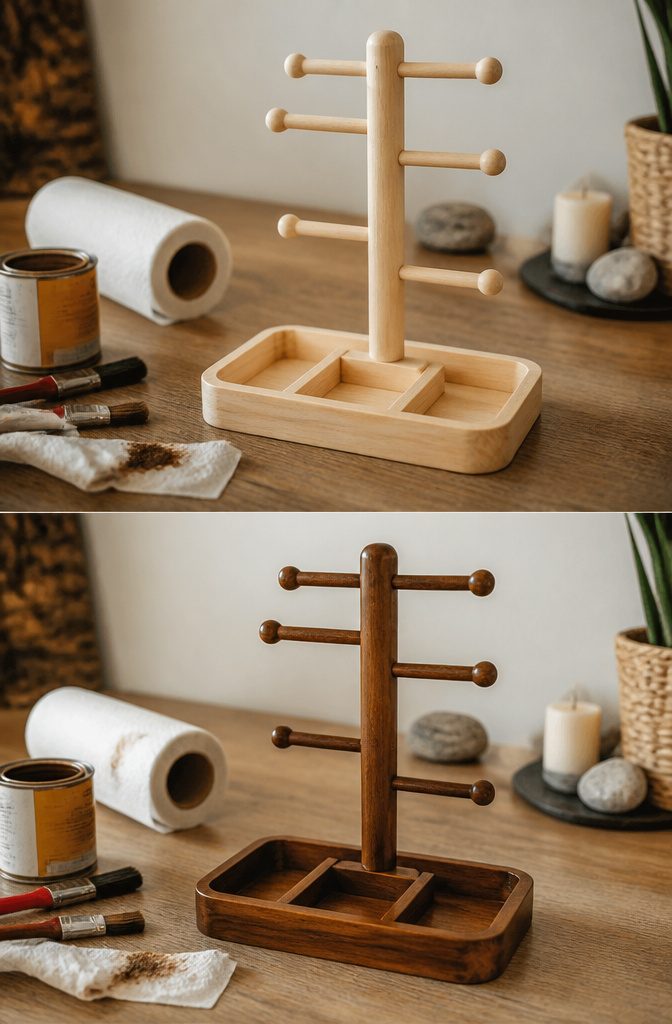
- Stain deepens the grain and gives the holder a warm, furniture-grade look that reads as intentional rather than homemade. Oil-based stains penetrate harder woods like oak and walnut more evenly than pine, which tends to blotch; a pre-stain conditioner fixes that for a couple of dollars. Water-based stains dry faster and smell less, but the color sits more on the surface and can wear at high-touch spots like bracelet bars.
- Paint hides the wood entirely and works best when you want the holder to match a wall color or read as an accent piece. Chalk paint needs a wax topcoat to resist the oils from hands and jewelry; latex holds up better on its own but shows brush marks unless you sand between coats. Either way, paint buys you forgiveness on imperfect joints.
- A clear topcoat leaves the raw wood visible and is my usual choice for holders that will sit on a vanity where the grain should show. Polyurethane gives the hardest shell; wipe-on versions are thinner and easier to control around dowels. Shellac dries in minutes but alcohol in perfume can soften it over time, so I skip it for anything near a dressing table.
- Drying time before you load jewelry: oil-based finishes need 24 hours minimum, water-based poly is usually ready overnight, and shellac is touch-dry within an hour though still fragile. I give any finish a full day past the can’s label before hanging earrings that would be a pain to clean if the surface transfers tack.
7. Tabletop Jewelry Holder
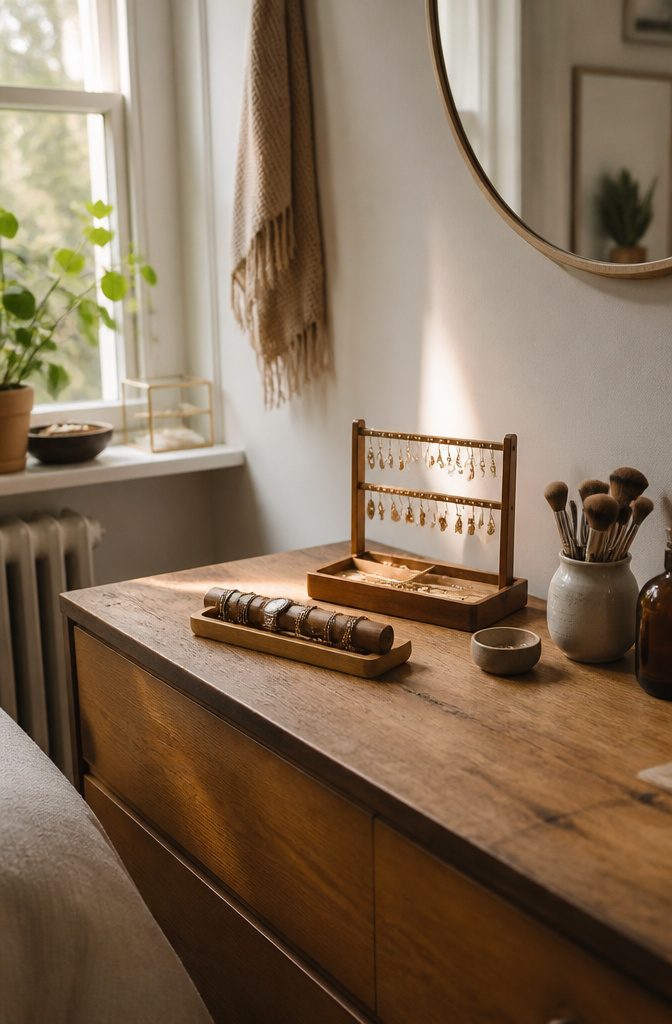
A tabletop wooden jewelry holder design suits dressing tables where surface space is tight and the mirror already dominates the wall.
Most builds run 10 to 14 inches wide and 6 to 8 inches deep, low enough that your eye passes over it to the glass but tall enough that earrings hang clear of spilled powder and bracelets rest above the clutter.
I favor a shallow base plate with two staggered rows of brass pins or thin dowels set at a slight angle, back row taller than the front.
That spacing lets you hook 8 to 12 pairs of earrings without tangling, and a small trough or half-moon cutout across the front catches bracelets or a watch band.
The whole thing stays under a pound in soft maple or poplar, so you can shift it when the table needs to become a desk.
Where this style wins is in rentals and shared bedrooms. It needs no wall anchor, collects no dust like an open grid, and travels in a tote bag when you move.
Capacity is the catch: once you own more than two or three bracelets, the trough fills and you are stacking, which scratches softer metals.
For that reason I treat the tabletop holder as the daily rotation, not the full collection, and keep overflow in a drawer below.
8. Wall-Mounted Jewelry Holder
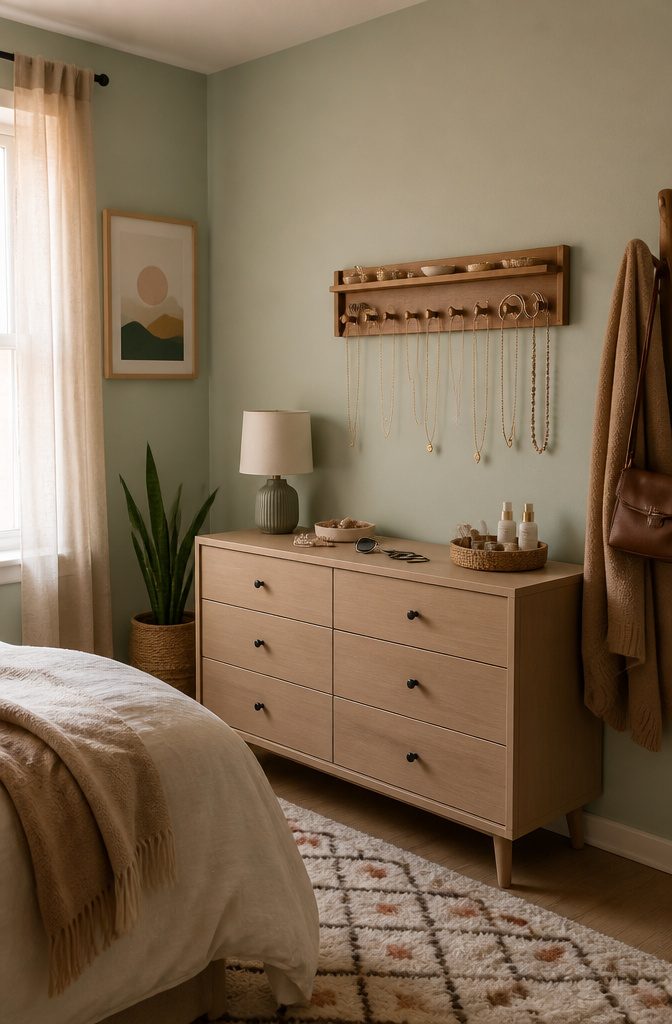
A wall-mounted wooden jewelry holder design turns dead wall space into storage that actually earns its keep.
The best versions combine a shallow ledge for rings and small trays with a short row of pegs or small hooks for necklaces and bracelets.
Mounting hardware matters more than the wood itself: a stud-mounted French cleat or two lag bolts into framing will carry the load where adhesive strips or small drywall anchors eventually sag under a full load of metal and stone.
Weight builds up faster than most people guess. A loaded holder with several pairs of earrings, three or four necklaces, and a watch or two can pull 5–8 pounds, all of it cantilevered away from the wall.
I place these at eye level or just above, where the pieces are readable as decoration and the bottom edge clears a dresser or vanity by at least 6 inches.
Bedrooms work, but the spot just inside a closet door often makes more sense: the jewelry stays visible and reachable, yet the morning clutter of choosing does not colonize the wall you face while dressing.
You do have to drill into a door or its frame, which not every renter wants to explain later.
9. Tiered Jewelry Organizer
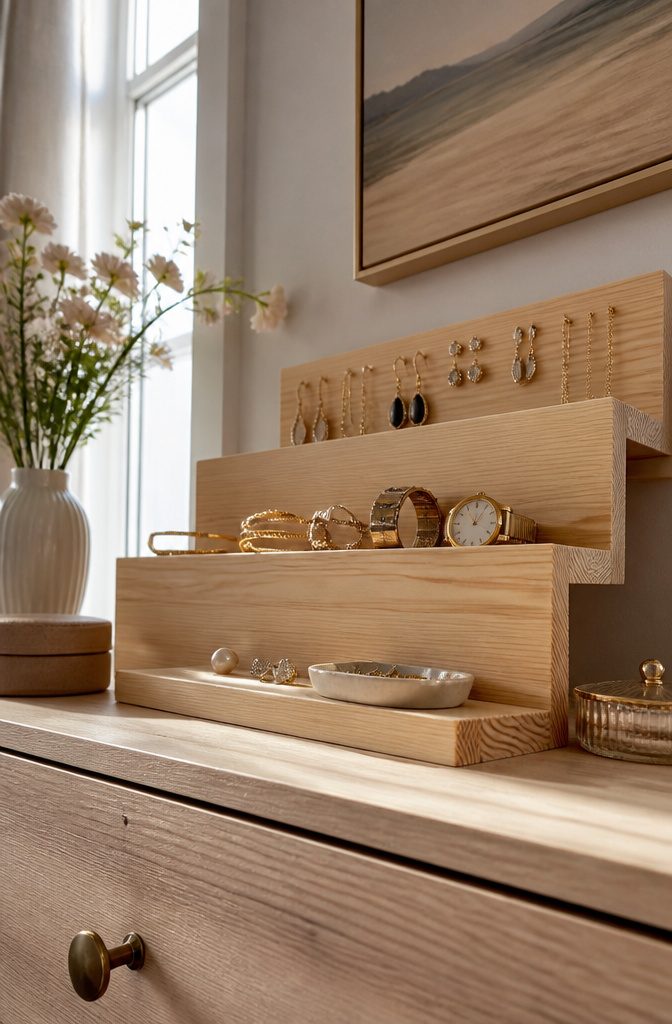
A tiered wooden jewelry holder design makes the most of vertical space when your dresser surface is already crowded.
Three or four stepped levels let you sort pieces by type, earrings on top where they are easiest to see, bracelets and watches on the wider lower shelves where weight sits steadier.
The front-to-back depth of each tier matters more than total height; 4 to 5 inches per level keeps necklaces from tangling without pushing the whole unit so far back that you lose things behind it.
What sells me on this style is how it cuts footprint by half compared to laying the same pieces flat.
A 12 by 8 inch base holds what would sprawl across 18 inches of tabletop if you spread it. Height is the obvious downside, and dust settles on lower tiers where air moves less.
If you wear the same five pieces daily, the front edge of each shelf should sit slightly lower than the back so pieces angle toward you; occasional-wear items store flat behind them.
Pine works fine here since the tiers hide most of the grain, though I would spring for oak on the top level if it faces a window and takes the light.
10. Box-Style Jewelry Holder
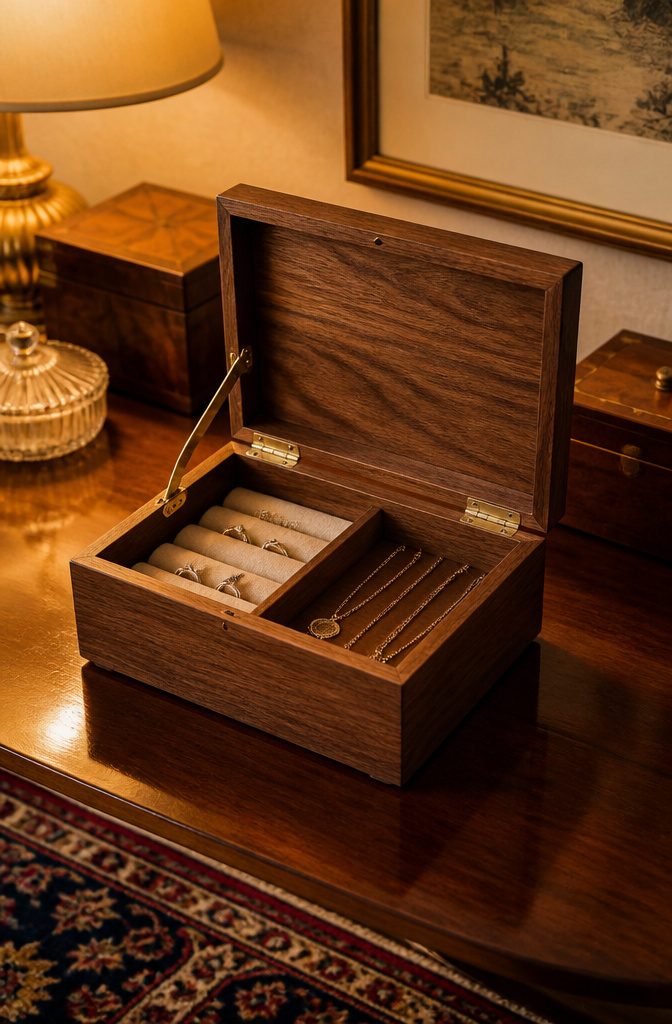
A box-style wooden jewelry holder design closes the loop that open racks leave open.
Dust and sunlight are the two slow killers of fine metal and soft stones, and a lidded box stops both at the door. I reach for this style when the pieces inside cost more than the wood that houses them.
The lid is where the choice sits. A simple hinged top, maybe with a brass quadrant stay, opens and rests at 95 degrees while you sort.
A lift-off lid, no hardware at all, gives cleaner lines and a surface you can stack, though you trade one-handed access for that look.
Glass panel inserts in the lid let you see what you have without breaking the seal against dust. I skip those for pearls and opals; light still gets through glass.
Inside, the layout should match what you actually own.
Ring rolls, maybe 2 inches wide, keep bands from knocking. A shallow upper tray that lifts out, sitting on a deeper well below, doubles your real estate without doubling the footprint.
Velvet or suede lining is the usual move, but unlined raw cedar works if you want the moth-repellent edge and do not mind the occasional snag on a delicate chain.
This is the wooden jewelry holder design I point people toward for vintage inherited pieces or anything with a soft stone that scratches. The trade is speed: you open a lid, you lift a tray, you find what you want.
Open racks win for grab-and-go mornings. Boxes win for pieces you mean to keep for someone else to wear.
Materials and Tools
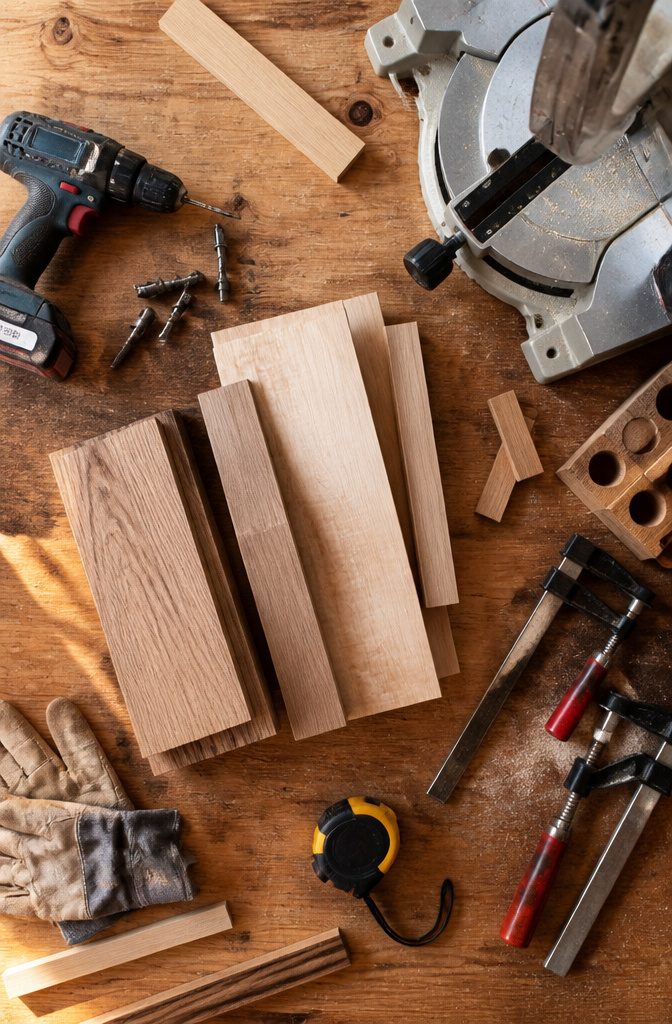
The lumber for a wooden jewelry holder design runs thin enough to keep the piece light on a dresser or wall. I reach for stock between ¾ and 1 inch thick, which gives the frame rigidity without bulk.
1¼ inch finish nails or trim head screws hold joints cleanly; trim head screws sit nearly flush and save filling work later. Wood glue does the real bonding, so I spread it thin and clamp until set.
A miter saw squares the ends fast, and a drill with Forstner bits bores the cupped holes for earrings or bracelet posts.
The ¼ inch round over router bit softens edges if you own a router, though a jigsaw handles any curved profiles just as well. A random orbital sander smooths tearout before finish.
None of these tools demand years of practice; the miter saw fence and the drill press keep cuts square for anyone, and a few test pieces on scrap build confidence before you touch the good lumber.
Customization Options
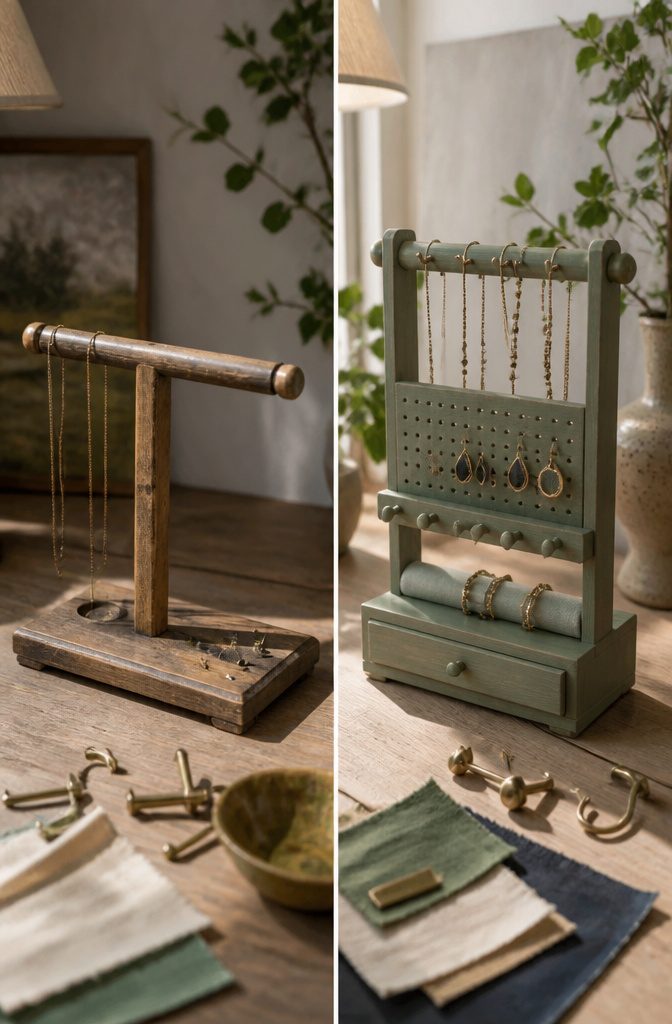
A wooden jewelry holder design wins because it adapts so readily to what you actually own and where it lives.
- A compact earring stand needs only a 6-inch base if your collection is small, but doubling that length adds maybe an hour of cutting and sanding and keeps bracelets from overlapping. I would size for the collection you expect in three years, not the one you have now.
- Stain reads as furniture; paint reads as accent. Dark walnut or espresso blends into most bedroom setups, while a soft sage or dusty rose turns the holder into a deliberate decor piece. Paint hides grain but saves you a sanding step, and in my view that trade costs more than it saves on anything you will handle daily.
- Carved details, routed edges, or small brass hooks from the hardware store lift a basic build into gift territory. Each decorative layer adds time: carving before assembly, hardware after the final coat, never between. Plan for that sequencing or the finish gets scratched.
- Hardware choice is where I get picky. Cup hooks work but look utility-grade; small brass knobs or leather loops cost a few dollars more and change the whole impression. The install is the same ten minutes either way.
Gift and Care Notes
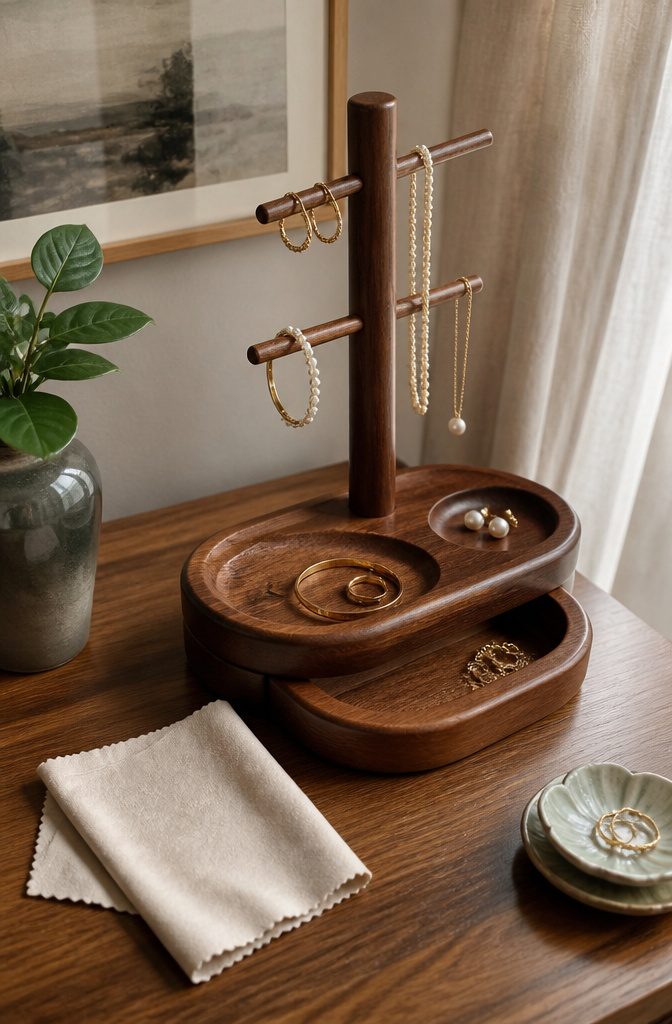
A handmade wooden jewelry holder lands differently than something pulled from a shelf. The grain pattern you chose, the exact spacing of the dowels, the finish you wiped on by hand; those details signal time spent, not money spent.
For a birthday, an anniversary, or a first apartment, that distinction matters. I tend to give the simpler designs, the single-tier tabletop holders, because they fit most vanities without dominating the space and they travel well if the recipient moves.
Dust the piece weekly with a dry microfiber cloth, nothing damp. Moisture is the enemy of any wooden jewelry holder design left in a bathroom, and even a steamy shower routine will raise the grain over time.
If the surface starts looking dull or water no longer beads on it, that is your cue to reapply the same oil or wax finish you started with.
A thin coat, buffed off after twenty minutes, restores the protection without building up a sticky layer. Skip the reapplication and you will watch the wood gray and the hardware tarnish faster than it should.
Frequently Asked Questions
What materials do I need to build a wooden jewelry holder?
You will need lumber between 3/4 and 1 inch thick, 1-1/4 inch finish nails or trim head screws, and wood glue.
Optional tools include a miter saw, drill with Forstner bits, a router with a 1/4 inch roundover bit, jigsaw, and random orbital sander.
How can I customize my wooden jewelry holder?
Size it for the collection you expect in three years rather than what you own now.
Choose stain to read as furniture or paint to match decor; dark walnut blends into bedrooms while soft sage or dusty rose turns it into a deliberate accent.
Add carved details, routed edges, or small brass hooks and leather loops from the hardware store to lift a basic build into gift territory.
What are some designs for wooden jewelry holders?
Tabletop holders suit dressing tables and need no wall anchor. Wall-mounted versions turn dead wall space into storage and work best inside closet doors.
Tiered organizers cut footprint by half using stepped levels for sorting pieces by type. Box-style holders with lids protect fine metal and soft stones from dust and sunlight.





