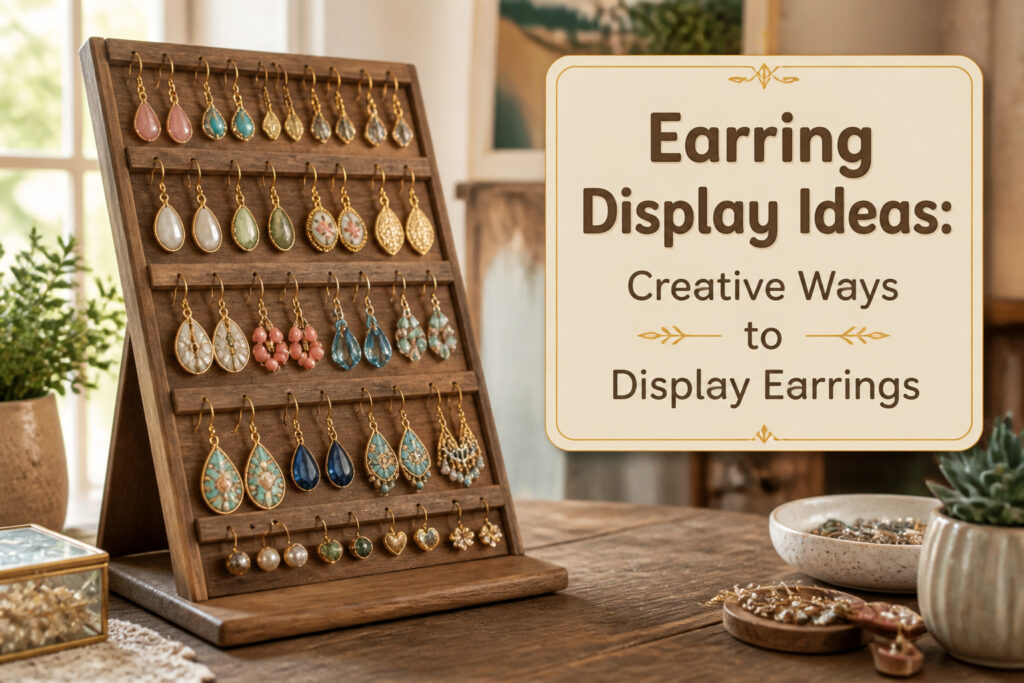
How you display earrings creatively depends almost entirely on whether you need them to sell, photograph, or survive daily rummaging without tangling.
The same forty pairs that disappear in a basket become inventory that moves when each pair stands alone at eye level, between 18 and 24 inches off the floor where a standing shopper actually notices them.
That single shift from flat to vertical does more than any material choice, and it costs nothing.
1. Floating Jewelry Illusion

Clear acrylic stands and glass shelves do something clever: they disappear. Light passes straight through, so the material itself never competes with what it holds.
The earrings read as suspended, floating in whatever space surrounds them, and that suspension flatters almost any style. Studs look like tiny planets held in air; drops gain motion they would lose against a solid surface.
The effect works because the eye has nothing else to anchor on. A velvet bust or wooden block carries weight and era and taste; acrylic carries nothing but the shape you give it.
That neutrality becomes its own statement, though it took me several tries to see it. My first acrylic stand sat on a painted dresser, and the color underneath fought the whole point.
Against white or pale wood, the stand vanished properly. Against dark walnut, it turned ghostly in a way I liked even more.
Glass shelves mounted on thin hardware achieve the same trick at larger scale. One narrow ledge above a vanity, lit from below or behind, turns a morning routine into something closer to gallery placement.
The hardware matters: visible brackets break the spell, so I learned to hunt for the near-invisible kind, the ones that clamp from beneath and leave no lip above the glass.
Both materials share one limit. Dust shows immediately, and smudges read as flaws on the jewelry rather than on the stand.
Wiping down becomes part of the display habit, not an afterthought.

💎Double Rod Clothing Rack Design: This earring holder boasts a unique double-tiered 'clothes hanger' design, providing two levels to stagger and showcase earrings of varying lengths, ensuring your collection is displayed beautifully.

Size: the Holder is approximately 3.5 x 4.45 x 8.15 cm / 1.3 x 1.7 x 8.15 inches, with a sturdy base to give your jewelry a well-balanced supply.

Complete 3-Piece Acrylic Earring Display Stand: This set includes 3 clear acrylic L-shaped earring holders in 3.5, 4.3, and 5.1 inches tall. Each earring display stand features 2 large holes designed to hold studs, hoops, pendants, and clip-on earrings securely. Perfect as a jewelry display for craft shows, vendor booths, product photography, and home vanity organization.
2. Vintage Tea Cups
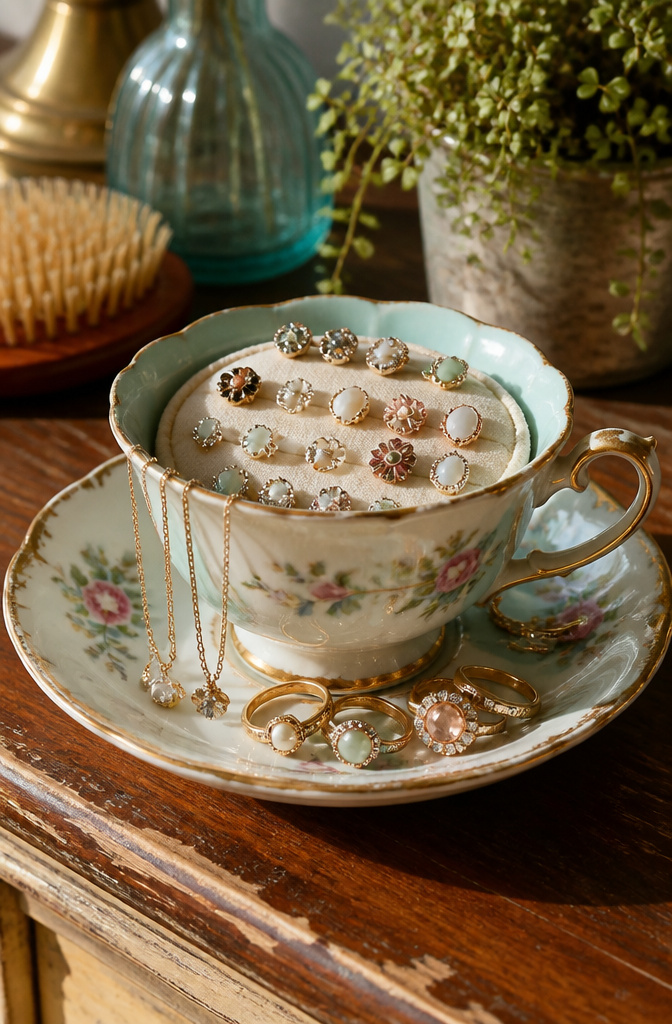
A chipped antique teacup with a matching saucer makes an unexpectedly practical jewelry station. The cup’s curve cradles stud earrings and posts upright, so pairs stay paired and the backs don’t scatter across a dresser.
Drape delicate chains over the rim or coil them inside the saucer, where the slight depression keeps things from sliding.
What separates the pieces that work from the ones that frustrate is weight. A thick-walled porcelain cup with a wide foot sits steady; thin, top-heavy styles tip when the chain load shifts.
At thrift stores, flip the piece over and check for a glazed foot ring, the unglazed circle that grips the shelf.
If the cup tapers to a narrow base or the handle throws the balance off, leave it for display only.
The saucer catches more than chains. Rings pool in its center like a tiny dish, though the original source mentions signet rings specifically.
Pearl earrings drop into the cup and look deliberate rather than temporary, the china lending them a dressing-table elegance that acrylic organizers never quite match.

【5-Tier Jewelry Holder Organizer】:Clear jewelry stand organizer with 212 holes and 212 grooves.Holds a lot of jewelry and can rotate to display it

Perfect size: 9"Lx2"Wx9.5"H, take little space on you dressing table.
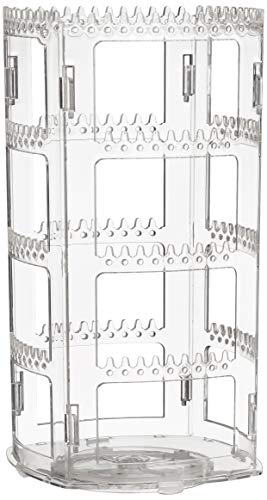
HOLDS 78 PAIRS: The 4 tiers has 156 easy access holes so it will display a total of 78 pairs (or 156 single earrings). 160 grooves will display necklace, bracelet, or ring. It works well as a dangle or stud earring organizer
3. Branch Display

A mounted branch turns the wall into something between a jewelry holder and a small sculpture. The natural forks do the work of hooks, catching hoop wires and pendant loops without any hardware added.
Wood choice matters more than you’d think. Soft woods like pine split when you drive screws through bark, and damp birch rots against plaster.
Oak or beech branches that have seasoned for a year or two hold fasteners without cracking. Drill pilot holes before you sink wall anchors, especially near a fork where the grain runs two directions.
Securing it takes two approaches depending on weight. A lighter branch screws flat through the back with two-inch brackets spaced every eight inches or so.
Heavier pieces need a base, the way you’d stand a coat rack, a painted wood plaque with a plate holder behind it.
One maker I followed skipped the base and regretted it; her branch pulled free on day three when a customer tried to lift a pendant.
The spray-paint question splits people cleanly. Gold reads as deliberate, almost gallery-like against white walls.
Raw bark keeps the thing feeling found and casual. Either works, but the paint needs a clear coat or jewelry snags on the grain.

PE film anti-oxidation: Highly resilient and non-breakable high transparent PE film, highly sealed to block air to prevent scratches and oxidation discoloration caused by open-air storage of jewelry. It is tough and can be used repeatedly. Even if the film is propped up and deformed, please wait for it to recover on its own, or you can use a hair dryer to remove the folds.

【High Quality Glass Shelf】 T-304 premium-grade stainless steel for protect against corrosion & rust.

Product Info -Dimensions(LxWxH): 6.5" x 6.5" x 8.1"/16.5 x 16.5 x 20.5cm, It is simple yet classic, applicable for any occasions, perfect for home decoration. Packing included: 1 x 3 Tier Clear Glass Display Box (Accessories are not included.Please pay attention to the size before purchasing)
4. Shadow Boxes
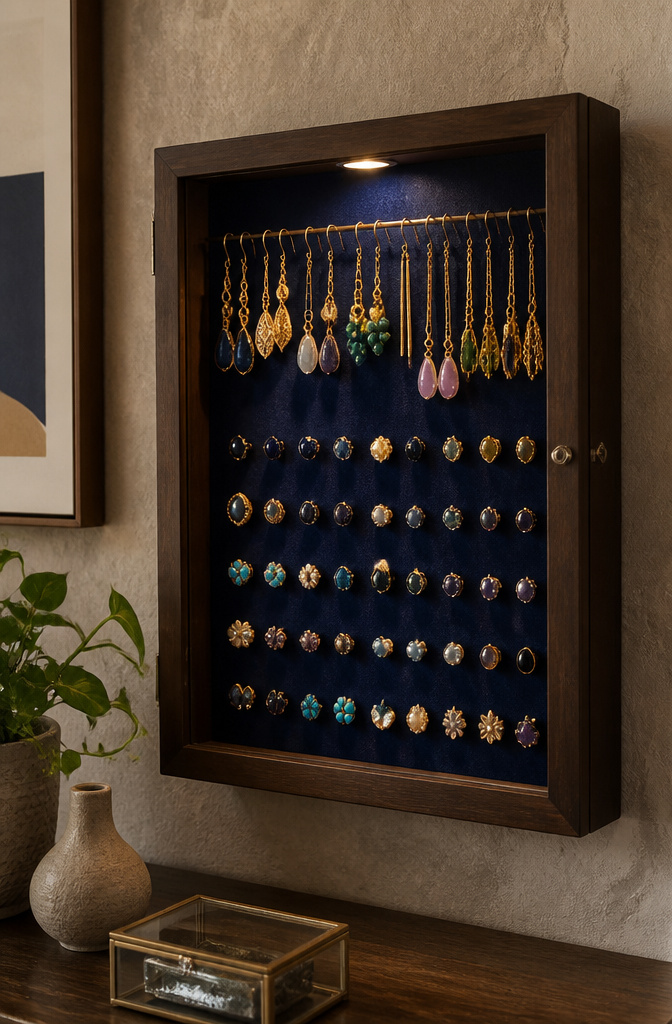
Shadow boxes give earrings the breathing room drawer organizers never could. The depth matters more than most people realize at first.
An inch and a half of interior space keeps post backs and lever wires from pressing against the glass, which is what turns a display into a maintenance headache over time.
I line the backing with velvet because the nap grips posts without needing foam pusher pads that bulk up the profile. Brooches pin straight through that same lining, so the box handles mixed collections without looking like an afterthought.
Studs sit on the velvet surface in front; dangles hang from the upper frame behind them. The layering lets you see everything at once instead of digging past one row to reach another.
The mistake I made early was buying a frame-depth box, the kind sold for ticket stubs and dried flowers. The glass sat half an inch from the backing and every pair with a butterfly clutch pushed forward and smudged.
For earrings, interior depth is the spec that actually matters, not the outer frame dimension that reads bigger on the shelf.

Space-Saving Stackable Design: Maximizes cabinet and shelf space with vertical storage organization

Wall mounted decorative horizontal display shelf for small plates and coffee mugs or teacup and saucer sets

Display Your Cup & Saucer Together - Showcase your favorite tea sets beautifully with this teacup and saucer display stand. The upright design keeps the saucer positioned behind the cup, allowing both pieces to be fully visible while creating an elegant display for your collection.
5. Decorative Trays

A framed decorative tray on the wall works beautifully for bracelets and bangles, turning your jewelry into something like functional art. The raised edges keep pieces from sliding off, and the flat surface lets you see everything at once.
For earrings, though, this setup falls short. The tray’s depth and horizontal plane bury studs and hooks where they tangle or disappear entirely.
What I do instead is keep earring pairs together on a shallow ceramic dish beside the tray, or hang them on a small brass grid mounted at the same height.
The grid keeps posts visible and matched, which matters more than you’d think when you’re rushing out the door.
The tray and grid read as one intentional display rather than two separate systems, and both stay within the same arm’s reach above my dresser.

All Inclusive Jewelry Display Kit: This package includes 1 necklace display bust, 1 T bar bracelet holder, 2 velvet ring finger holders, and 2 T Shape Earring Stand, offering ample space to organize and showcase your jewelry collection in an elegant and visible way

Velvet Necklace Stand: Package includes 6 pcs of black velvet necklace display stand. The height of the display stand is about 14 inches, It is tall and large enough to fit most sizes of necklaces, it's perfect jewelry displays stand. Please check the sizes before purchase

Multiple Stands for Multi Functionality: the package includes 6 velvet necklace display stands, reinforcing usefulness and versatility for customers; This abundance provides room for variety and perfectly caters to jewelry collectors' needs
6. Hollowed Books
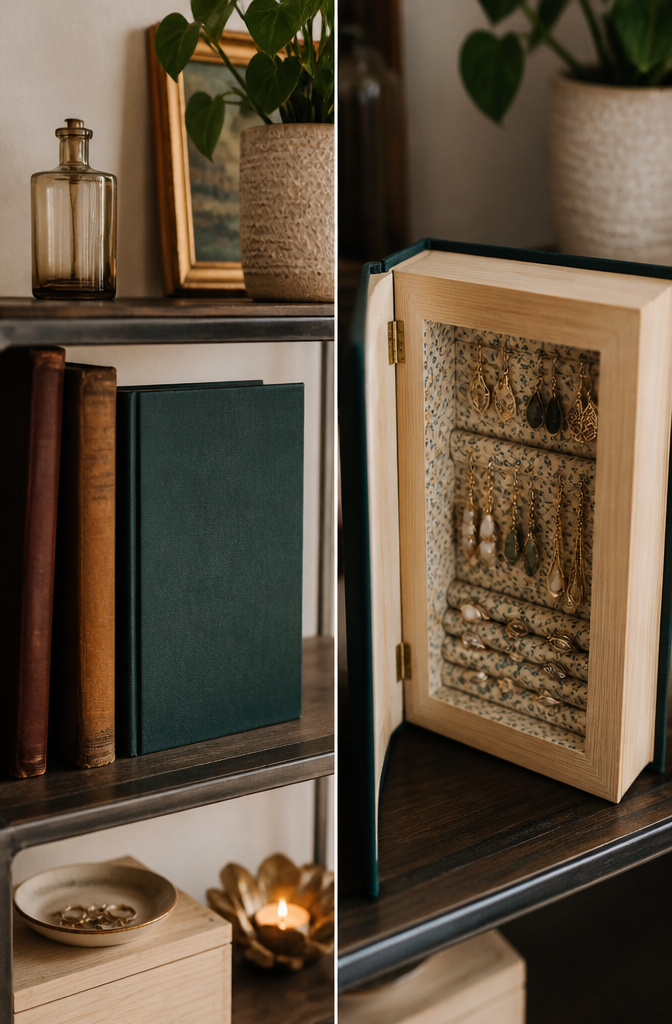
A hardcover book you will not read again gives the project its cover and its weight.
The knife work starts at the back cover and cuts a rectangle through the pages, leaving a margin of about an inch on all sides so the cavity does not weaken the spine.
I work in layers of ten to fifteen pages, pulling each out with the blade until the depth matches what I need for rings and earrings.
Line the cavity with fabric glued to the paper edges, or small posts and butterfly backs slide between pages and disappear forever.
The gluing matters more than the cutting; white craft glue thinned slightly with water brushes on cleaner and dries harder. Clamp the closed book under weight for twenty-four hours so the pages do not bow.
The result sits on a shelf like any other book, which makes it stealthy in a way glass displays are not, though it hides rather than showcases what is inside.
For retail, this works best tucked among props on a styled table; a customer has to pick it up to discover the stock, which creates a moment but slows browsing.

Clear Earring Display for Vendors: This set includes 3 L-shaped acrylic earring holders, each earring display for photos featuring 2 large holes to securely hold studs, dangles, and hoop earrings. Perfect for vendors, boutiques, and online sellers seeking a clean, professional presentation to boost sales.

You will get 6 pcs acrylic earring display stand in 3 heights: 5", 4.2", 3.5". There are 2 holes on each L-bar, so you can hang 6 pair earrings on these earring stands, the are good for ear studs, dangle earrings.
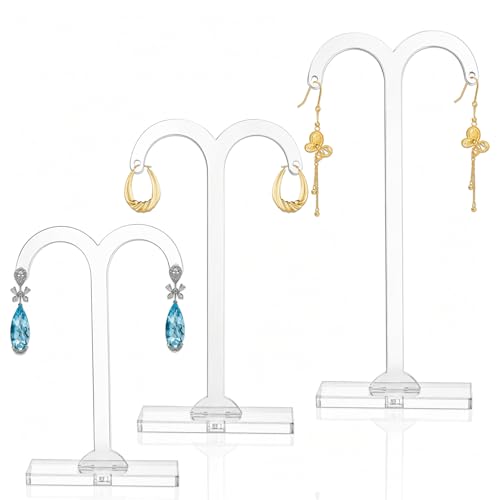
Complete Set: This set includes three acrylic earring display stands of varying heights (11.5cm, 9.4cm, and 8.2cm), providing an ideal solution for showcasing earrings of different styles and sizes.
7. Velvet-Lined Display Tray
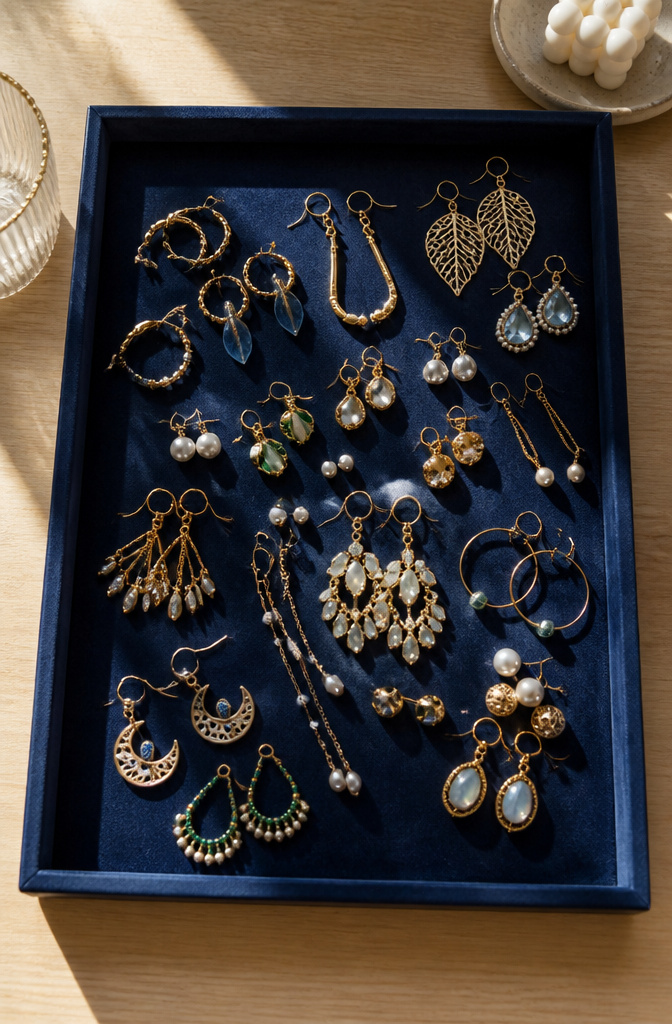
A velvet-lined tray turns a dresser top into something that looks considered rather than cluttered.
The material matters: cotton velvet catches light softly and keeps metal from sliding, while suede-backed polyester holds up longer if you are opening and closing the tray twice a day.
There are two builds worth knowing. A flat pad with no divisions lets you lay earrings in whatever grouping makes sense to your eye, which is what I reach for when I am photographing pieces for the site.
The slight overlap reads as abundance, and the camera picks up the texture without competing lines.
Individual slots keep pairs separated and upright, which is the only way I can maintain any order once the tray lives on my bedside table. A flat pad photographs better; slotted trays survive actual daily use.
Depth is the detail that separates useful from frustrating. Anything under half an inch and post backs push the lining loose within a month.
Three quarters of an inch gives stud posts room without letting hoops roll.
Most trays run 14 by 10 inches, which sounds generous until you set out four pairs of chandeliers and realize you have committed to a system that only holds eight.
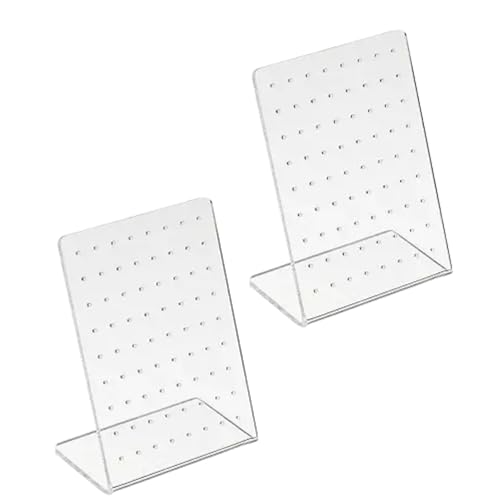
CAPACITY: Features 72 holes for organizing and displaying earrings, perfect for both stud and dangle earrings storage
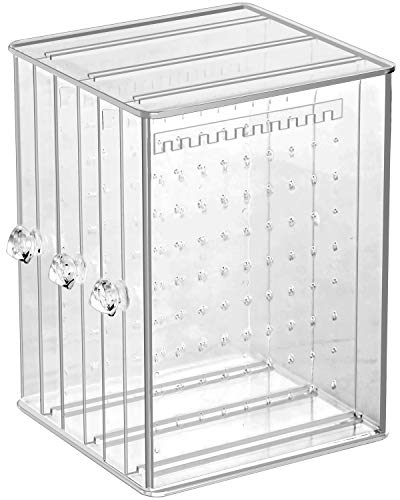
Jewelry Holder: Each drawer panel has 72 holes for earring and 11 grooves for necklaces. It can hold your necklace, bracelets, rings, earrings, cuff links, chains, brooches and other jewelry
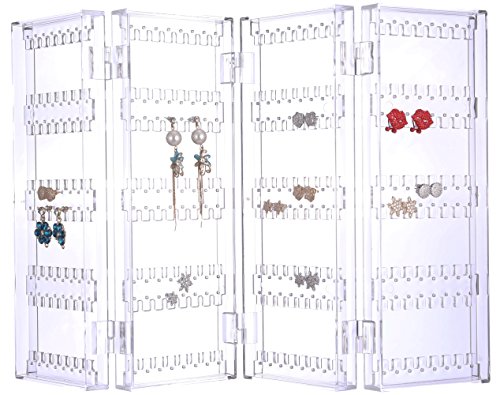
HIGH CAPACITY: 256 optimized pre-punched holes to organize and display 128 pairs of long earrings and studs, suitable for bracelets and necklaces
8. Magnetic Strips

Magnetic strips inside a closet or vanity drawer turn stud storage into something almost invisible. The earrings cling in a neat row, huggies included, and the whole thing costs less than a single Oscar Heyman setting.
Neodymium strips rated around N42 handle heavier silver posts without sagging, but titanium studs barely register a pull, so weaker ferrite strips work fine and cost half as much.
The mistake I made was mounting one strip on painted drywall with the adhesive backing still attached. By morning it had slid six inches down the wall, taking twelve earrings with it.
Painted drywall needs mechanical support: a small screw through the strip’s pre-drilled holes, or at minimum a command strip rated for the actual weight of metal plus jewelry.
Inside a drawer, the factory adhesive usually holds because the surface stays flat and untouched, but I still anchor the back end with a brad nail after the slide I had.

【High Quality Material】: Our handbag wallet display stand is made of high quality acrylic material, lightweight, durable, high transparency and not easy to break, it can be used for a long time. Firmly placed and won't fall off, the acrylic wallet display stand can support the displayed items more stably.

Package Contains: A set of three floating display cases, each accompanied by a round base, designed to meet your daily jewelry storage needs, minimize clutter on your countertop and ensure easy access to your jewelry

💗Product Info -Dimensions(LxWxH): 7.9" x 3.9" x 11.8"/20 x 10 x 30cm, It is simple yet classic, applicable for any occasions, perfect for home decoration. Packing included: 1 x 3 Tier Clear Glass Display Box (Accessories are not included.Please pay attention to the size before purchasing)
9. Glass Cloches
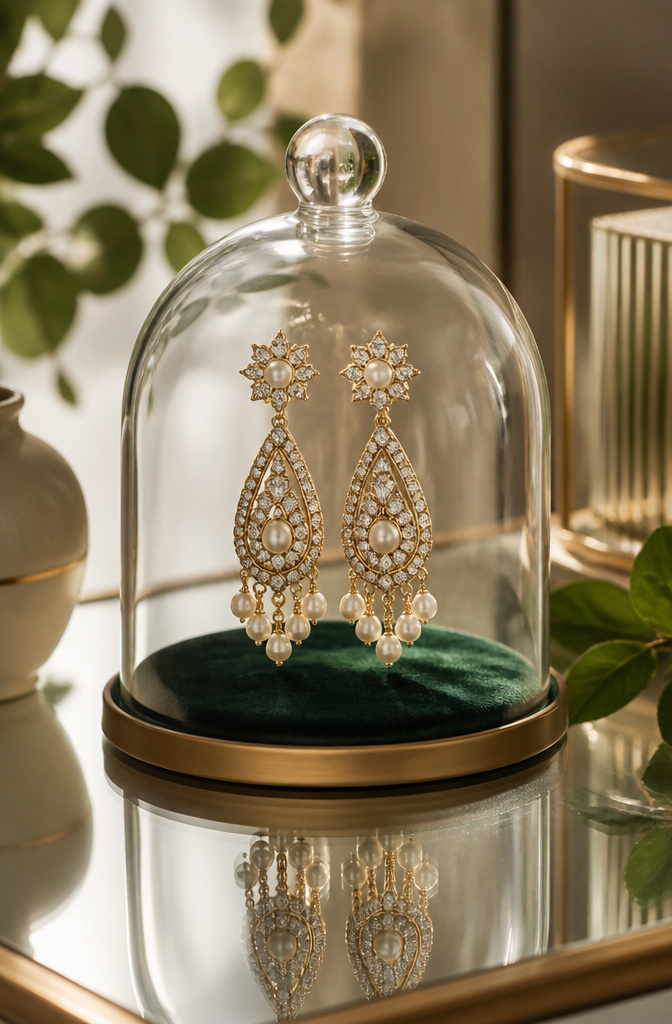
Glass cloches work best for the one pair you want to treat like an artifact.
The dome protects against dust while turning an earring into something a visitor pauses at, but the height inside matters more than most people account for.
Leave at least an inch between the earring wire and the glass, or the arc bends against the curve of the dome every time you lift it.
I learned that after flattening a pair of silver hooks against the glass and having to reshape them with pliers.
What sits underneath matters almost as much. Cork grips the post or the back without sliding, which keeps the pair centered under the dome where you placed it.
Velvet looks richer and photographs better for a shop display, though heavier drops can sink in and tilt.
For my own pieces, I use a thin cork circle with a velvet scrap laid over it, held with a dot of glue. That gives the stability and the look without the drift.

Exquisite Design and Material: Crafted from premium metal with gold coated, these display stands add a touch of elegance to any setting.

SIZE: 3 x 2.75 x 4 inches (height x width x depth)

Elegant Gold Finish: Enhances your tea collection display with a premium twisted gold metal structure
10. Jewelry Vanity

A dedicated vanity gives earrings the one thing a drawer never will: a chance to compete for attention in real light.
Height separates the studs from the drops so nothing hides behind something else, and the mirror does the actual selling when someone tries a pair on.
The mirror matters more than the table. Anything under about 14 inches wide sits too far back to frame both ears at once; shoppers end up bobbing and tilting just to check a fit.
A mirror you can actually use, one that fills the view without gymnastics, turns the vanity from storage into a decision point.
Lighting belongs right at the mirror, not overhead where it casts shadows down onto the cheekbones. LEDs tucked along the frame edge keep sparkle visible from every angle; dull overhead bulbs flatten the stones and the sale along with them.
Mismatched stands read as clutter, so the vanity either commits to one material or it looks like a rummage bin. Velvet, acrylic, brass: pick one and let the earrings be the color.
The rest is editing. Rotate pieces in and out, keep breathing room around each pair, and the collection starts to feel like a boutique rather than a pile someone is trying to unload.

Foldable easy to enstall. Beige velvet is very beautiful color.

Versatile Jewelry Showcase – Display full sets (necklaces, rings, bracelets & earrings) on one elegant bust, unlike single-purpose displays that only hold necklaces. Ideal for vendors showcasing coordinated collections.
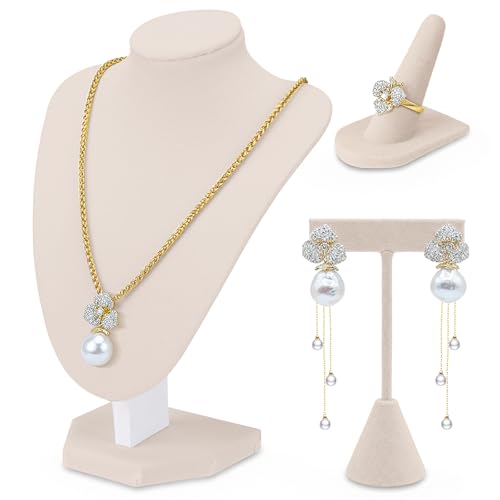
Package Includes: this jewelry display set comes with 1 necklace display bust, 1 T bar earring holder and 1 velvet ring finger jewelry holders; This ensures that you have ample space to organize your favorite jewelry neatly and visibly
Build Vertical and at Eye Level

Vertical display is the single biggest shift you can make if you are still laying earrings flat on a table.
The band from 18 inches to 24 inches above the floor catches the eye of most standing viewers, which means pieces in that zone get noticed from across a room rather than demanding someone hover directly overhead.
Flat surfaces hide your work from anyone more than a step away, and most people walking past a booth or a dresser top simply will not take that step.
Separation matters just as much as height. Crowded earrings tangle into one visual mass and read as cheaper than they are.
Vertical busts, risers, or tiered stands give each pair its own space so a shopper’s eye lands on one design, registers it, and moves to the next with intention.
The same forty pairs that disappear in a basket become inventory that sells when each pair stands alone at eye level.
Light It Right

Battery-powered LED puck lights and clip-on spotlights pull more attention to an earring display than ambient room lighting ever will.
The first time I set up a booth under fluorescent hall lighting, the gemstones looked flat and the metal read dull gray. Warm-to-neutral white light fixes this.
It flatters gold and silver without washing out colored stones the way cool daylight bulbs do.
Placement matters more than brightness. Angle lights to hit your hero pieces directly, especially any stones that catch light.
Position them above and slightly in front so the sparkle reaches the customer without glare shooting back into their eyes. A display that glows from a distance draws traffic, but the goal is inviting someone closer, not making them squint.
DIY for Under $20
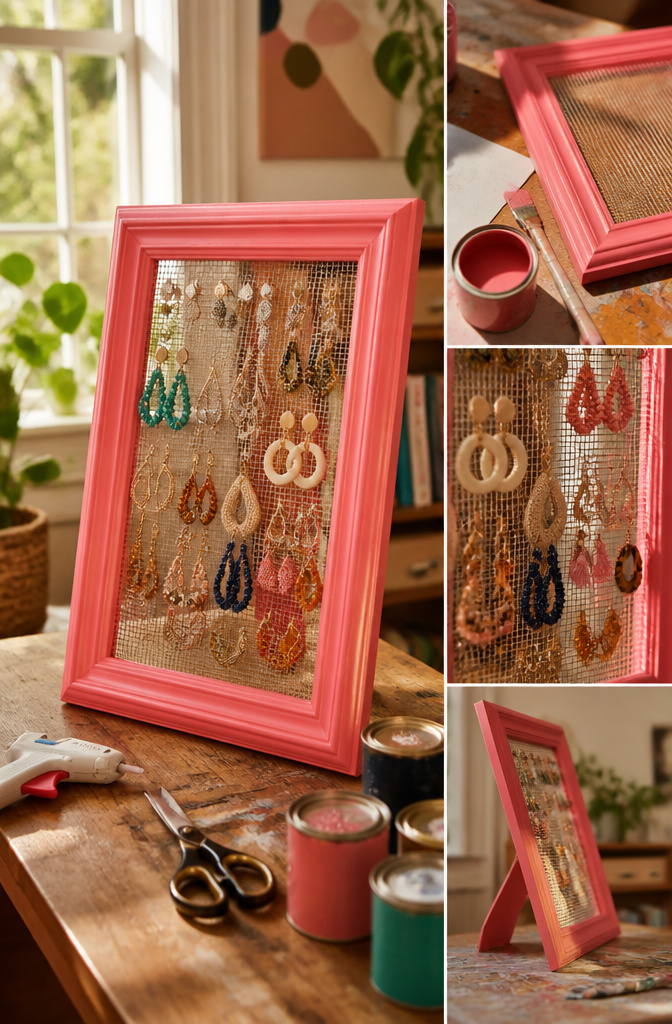
Thrifted picture frames with mesh backing are the easiest win I have found. Spray paint the frame in one color, staple mesh across the back, and earrings hang straight through the grid.
The paint matters more than the frame; one or two colors unify everything so a mix of upcycled pieces reads intentional rather than random.
I built a full display for $14. The frame came from a garage sale for $3, mesh was $4 at a hardware store, spray paint ran $5, and the remaining $2 went to sandpaper for roughing up the frame before paint.
A wood slab from a fallen branch in the neighborhood, cut and painted to match, became the base riser.
Cork blocks work the same way for studs, and vintage crates stacked at different heights add depth without costing more than the paint to cover them.
Dollar store candlesticks glued under flat trays build instant tiered risers for a few dollars. The glue joint is the weak point; use a construction adhesive and let it cure overnight before loading it with weight.
Painted wood slabs and cake stands do the same job with more stability if you have the space.
Frequently Asked Questions
How do you display jewelry to sell more at a craft fair?
Get pieces vertical and separated so shoppers can see and compare them from a distance. The band from 18 to 24 inches above the floor catches the eye of most standing viewers.
Flat surfaces hide your work; vertical busts, risers, or tiered stands give each pair its own space so a shopper’s eye lands on one design, registers it, and moves to the next with intention.
How can I display jewelry on a budget?
Make DIY displays from thrifted picture frames with mesh, painted wood slabs, cork blocks, vintage crates, or dollar store candlesticks turned into risers. Spend under $20 and unify everything with one or two paint colors so the mix looks intentional.
A full earring display can cost as little as $14: a $3 garage-sale frame, $4 of mesh, $5 spray paint, and a free neighborhood branch cut for a base riser.