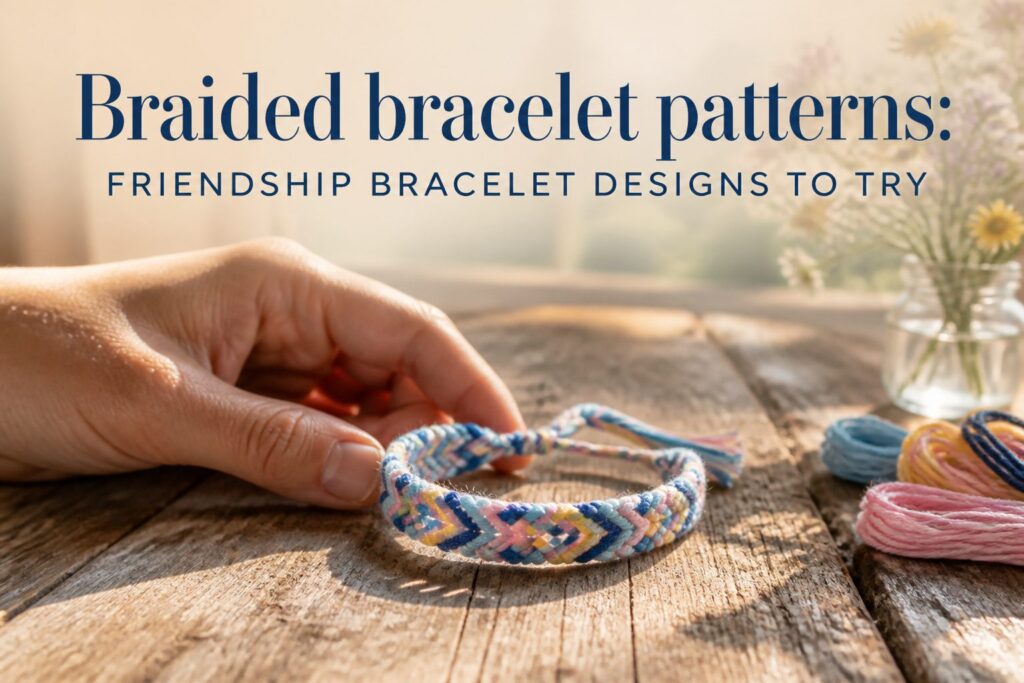
Braided bracelet patterns are knotted designs worked by hand from embroidery floss, with each pattern built from nothing more than forward and backward knots stacked in sequence.
The difference between a bracelet that holds its shape and one that frays loose comes down to tension control at the knot itself, not the pattern you choose.
A standard six-strand setup with 32-inch lengths and two complete knots per crossing will carry you from the simplest candy stripe to an eight-strand arrowhead, provided you anchor the work to a table or clipboard so the pull stays consistent row to row.
1. Candy Stripe
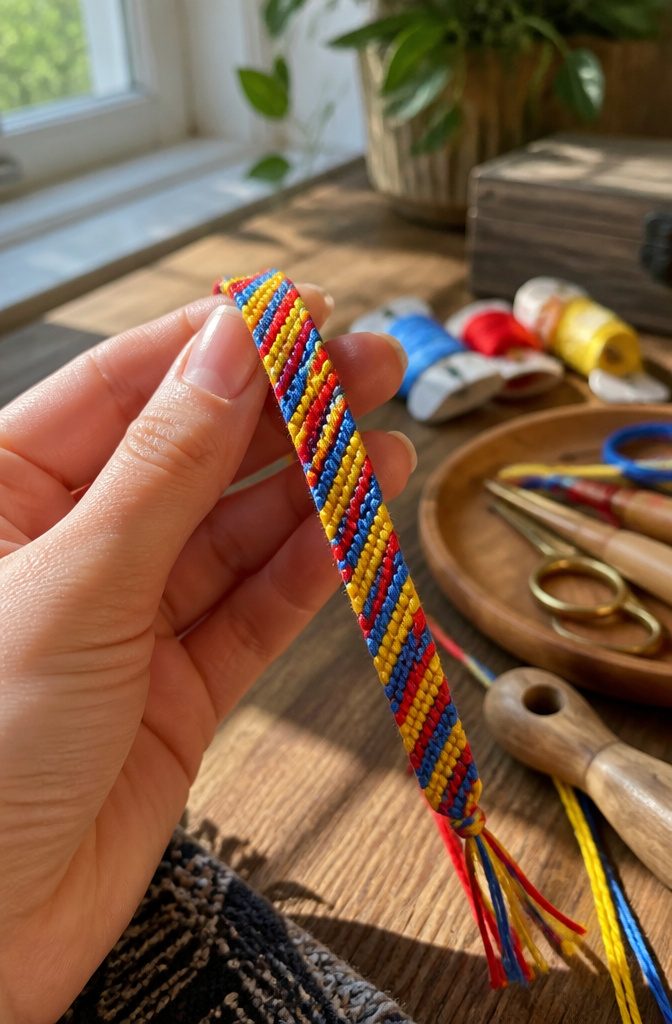
Candy stripe is where every braided bracelet pattern starts, and for good reason.
The entire bracelet uses nothing but forward knots, repeated in the same left-to-right order, so the technique drills itself into your hands without any switch in direction to trip over.
Each strand becomes one diagonal stripe as it travels across the row and drops to the bottom, waiting its turn to work back to the right edge again.
Most bracelets look right at six strands of embroidery floss; four is too thin to read as a proper stripe, eight gets bulky.
Four strands makes a string-thin band that twists too easily, and eight pushes toward lanyard territory, especially once you stack two knots per pair.
Six strands also means your working time sits at a comfortable hour or two, where eight strands doubles the row count without adding enough visual difference to justify it.
Tape your threads to a table or clip them to a clipboard so tension stays honest, and cut each strand to about 32 inches to leave room for a 2.5-inch finishing braid.
Two complete knots per crossing, pulling each tight and upward toward the anchor, builds the rhythm you will need for every pattern after this one: chevron, diamond, anything.
2. Chevron
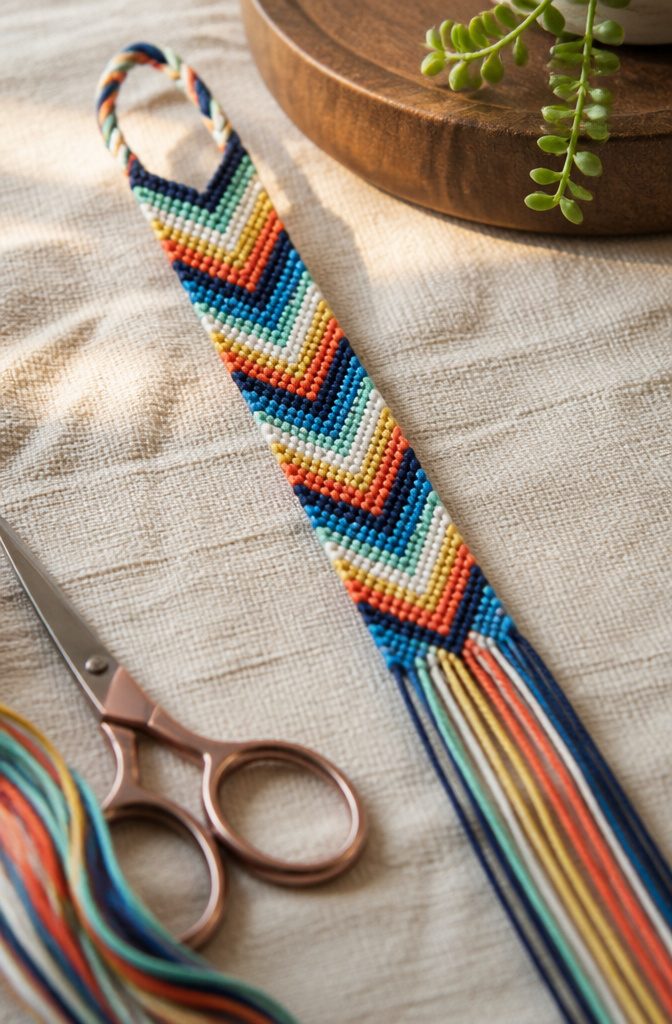
The chevron pattern is the first braided bracelet design where you work both sides of a V instead of a straight line.
You need 8 strands, split into two groups of 4, and this is where most crafters first encounter a backward knot after learning only forward ones.
The left half builds the V’s right wing with standard forward knots; the right half builds the left wing with backward knots, both halves traveling inward toward center.
Where the two outer strands meet in the middle, you tie them together, and that join becomes the visible point of the V.
The even strand count is non-negotiable because the pattern is mirror-symmetric. An odd number would leave a single strand with no partner at the center point, breaking the V formation or forcing an awkward jog in the line.
At 4 colors, each wing carries 2 strands of 2 colors, giving a bold, graphic stripe. At 8 colors, each strand is a different shade, and the V reads as a rainbow meeting its reflection.
The 8-color version demands more attention to keep the color order consistent on both sides, but the finished bracelet looks far more complex than the skill it requires.
3. Spiral Staircase
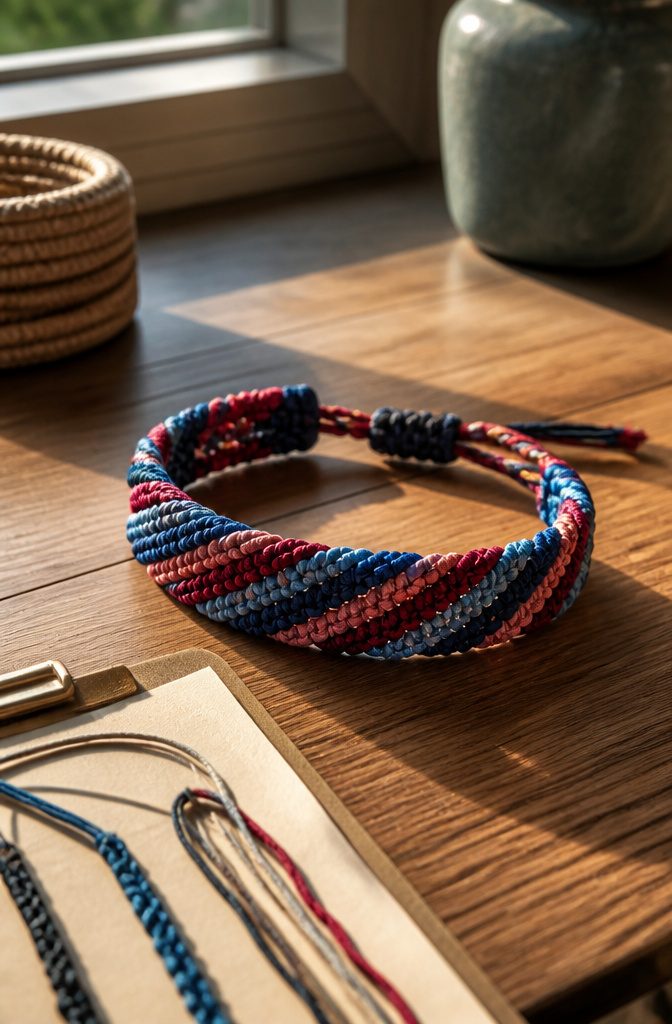
The Spiral Staircase pattern is one of those four-strand designs that looks far more complicated than it actually is. Every knot moves the same direction, and the twist builds naturally as you work.
I think of it as a barber pole flattened into a bracelet: the diagonal lines layer over each other in a continuous helix that shifts color as new strands come to the front.
The curl is the real enemy here.
Left alone, the bracelet twists into a rope and refuses to lie flat against your wrist. Stop every inch or so, hold the work taut, and let it untwist counter to the knot direction before you continue.
Some makers pin the bracelet to a board as they go; I find that slows me down, but it does remove the guesswork about when to reset.
What surprised me most about this pattern is how little floss it consumes. The single-direction knotting keeps strands traveling short distances rather than crossing back and forth across the full width.
You will use noticeably less thread than a chevron of the same length, which makes the Spiral Staircase a smart choice when you are working with leftover skeins or a color you can not easily replace.
4. Three Strand Braid
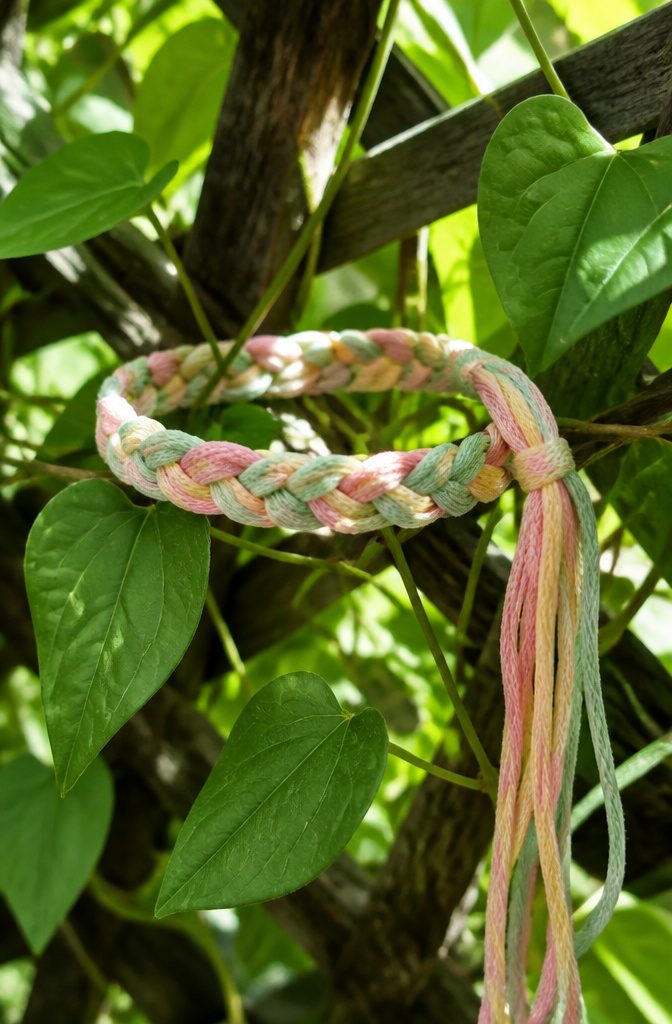
The three-strand braid is the same pattern most people learned for hair, carried over to six strands of embroidery floss folded in half.
It works as a bracelet base because the structure is flat, sits comfortably against the wrist, and shows off color combinations through the clear left-middle-right rhythm of the weave.
Finish by tying two knots at the end; string a pony bead over the tails and tie another double knot to lock it in place, then trim the excess.
This braid earns its keep as a central panel. Surround it with square knots on either side and it becomes the calm center of a busier design, letting the eye rest while the edges carry the detail.
The limitation is real: on its own it is quick but plain, better for stacking than for standing alone. Use it when you want the colors to speak and the technique to stay out of the way.
5. Zipper Bracelet
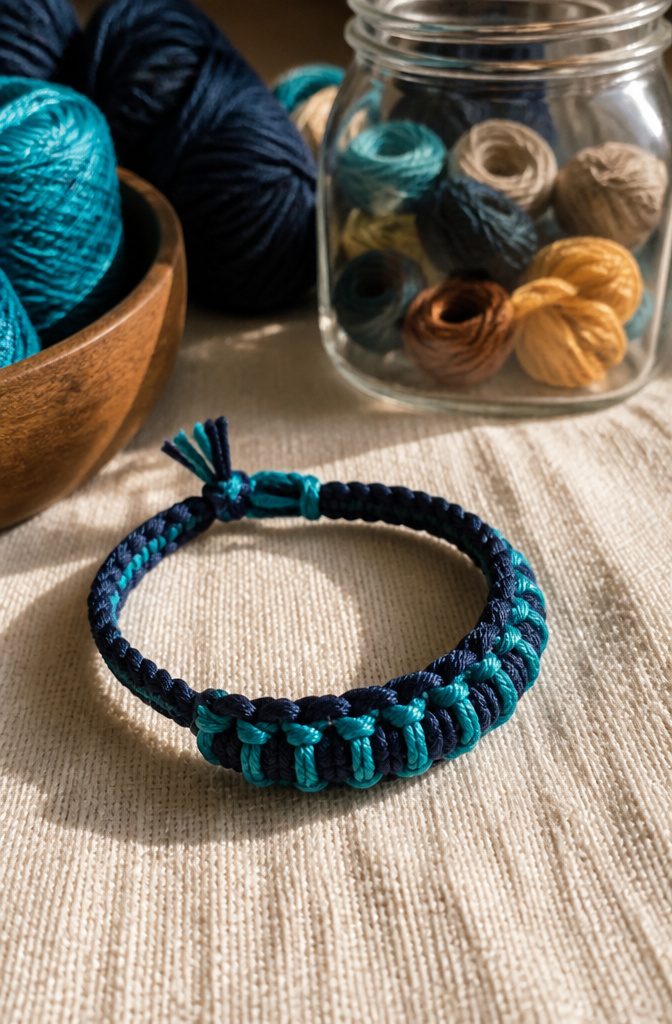
Three strands, one dominant shape running down the center. Two outer strings do the active work, while one base strand sits still and takes the hit of every knot.
That base strand does not travel; it absorbs tension and pushes each knot upward, and that upward pressure is what forms the raised ridge.
The zipper effect comes from those paired knots stacking in a line, each pair mirroring the last so the ridge reads like closed teeth.
Tension here runs higher than in flat patterns because the ridge needs every knot to bite the base strand at the same angle.
Slack lets the ridge wander or flatten out, so the outer strings need steady pull after each knot.
Embroidery floss gives a clean, narrow ridge; hemp or yarn thickens the whole bracelet and turns the ridge into a more pronounced band.
I would not start here on absolute day one, since the feedback is subtle, slow down and the ridge smears, pull too hard and the base strand bows.
But among three-string options, this one rewards patience with the most sculptural result.
6. Diamond Pattern
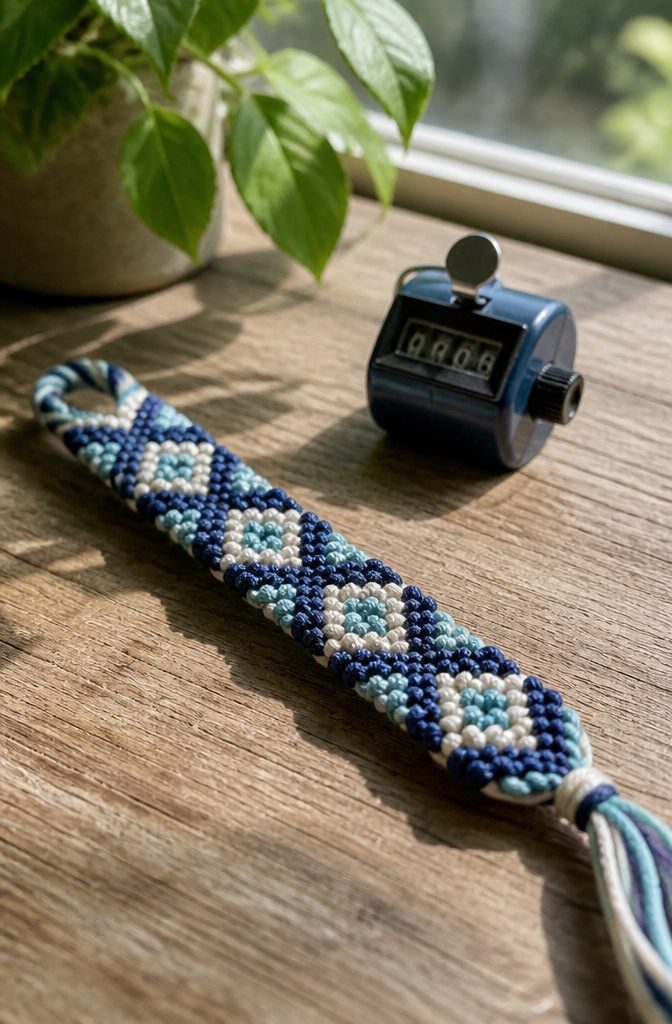
The diamond pattern builds from the same 6-strand setup as a chevron, but the knot sequence flips at specific intervals to interrupt the V and create a repeating diamond lattice.
Each diamond is two chevron halves mirrored top and bottom, with the meeting point at the widest part of the shape.
This is where the pattern starts to demand real attention to counting. A standard chevron lets you settle into a rhythm, but diamonds require you to mark the exact row where the knot direction reverses.
Miss that reversal by even one knot and the geometry skews; the diamonds stretch into uneven ovals or collapse back into chevrons. I keep a small row counter handy, though a simple tally on paper works just as well.
To keep the shapes regular, tension at each knot must stay identical across the entire band. Diamonds expose loose knots more brutally than stripes or spirals because the high and low points create natural stress lines.
Pull the first knot of each new row snug against the preceding row, then ease off slightly for the knots that form the points themselves. Too tight and the points pucker inward; too loose and the whole field looks wobbly.
That precision gives you a bracelet that reads as genuinely structural rather than decorative. I would not recommend this as your first 6-strand project, but it is the logical next step once chevrons feel automatic.
7. Zig Zag
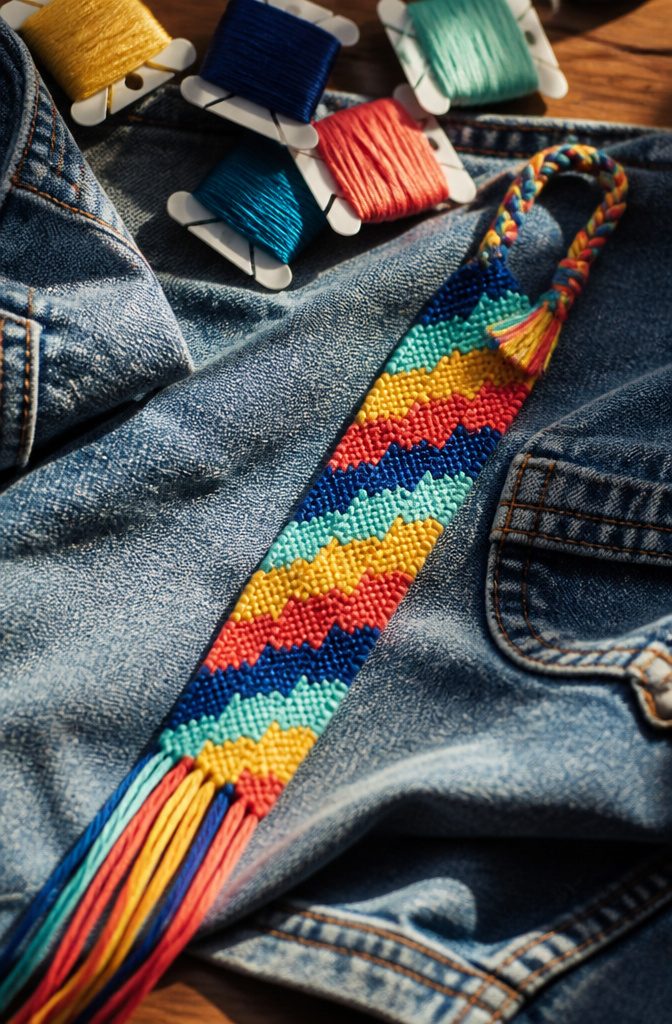
The zig zag pattern builds from a staggered start that offsets each color block by a single knot.
That diagonal shift forces every thread to travel in a wave rather than a straight line, and the pattern locks only when each row completes the full alternating sequence.
Miss one knot’s color placement, and the break shows instantly: the diagonal breaks into a stair-step, because the eye reads the zig zag as a continuous line and any interruption jumps out.
This is where the pattern differs most from a chevron. Chevron stacks two mirror-image halves that meet at a center point; the symmetry hides small tension flaws because both sides pull against each other.
Zig zag has no center seam and no opposing force to even things out. Each knot sits in open sequence, so uneven tension tilts the whole band.
Start colors from left to right in repeating order, but begin each new row one thread earlier than the last, shifting the active set by one position each time.
That rotation creates the diagonal drive. Choice of thread matters here: embroidery floss in six strands gives the clearest color blocks, and splitting to three strands thins the wave too much for the pattern to read well at bracelet width.
8. Heart Pattern
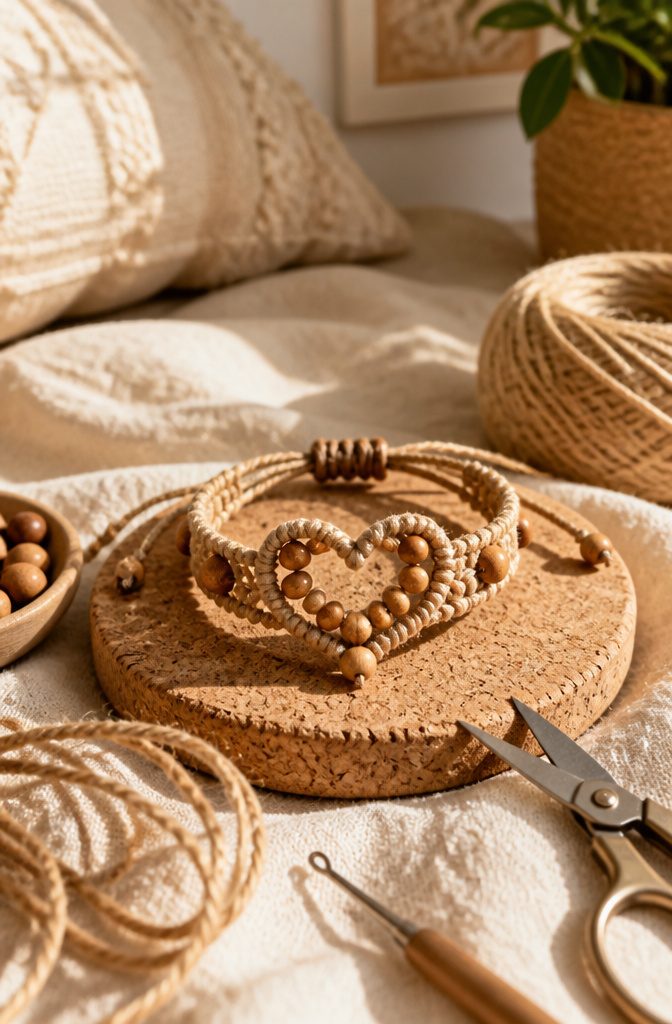
The heart pattern in braided bracelet patterns relies on negative space to do the visual work. Empty cord forms the outline while surrounding knots press inward, defining two rounded lobes and the point where they meet.
I prefer this design with jute cord and wooden beads because the heavier scale suits the motif. Thread versions feel too delicate; the heart gets lost in fine fiber.
Wider spacing separates this pattern from thread-only braids.
Each heart needs room to breathe, so the knots framing the shape sit farther apart than standard friendship bracelet density allows. Compress them and the negative space collapses into a vague blob.
Beads anchor the rhythm. I place wooden beads at the bottom point of each heart and at the outer corners where lobes curve, typically three per motif.
One marks the center join, two flank the upper arcs. Without them, the bracelet reads as abstract chevron; with them, the silhouette reads instantly as heart at arm’s length.
It does make the bracelet stiffer.
Jute holds shape but lacks the drape of embroidery floss, so sizing matters more. I’d avoid this pattern for wrists under 6 inches measuring flat, the beads add bulk that can turn stiff into awkward.
9. Ladder Stitch
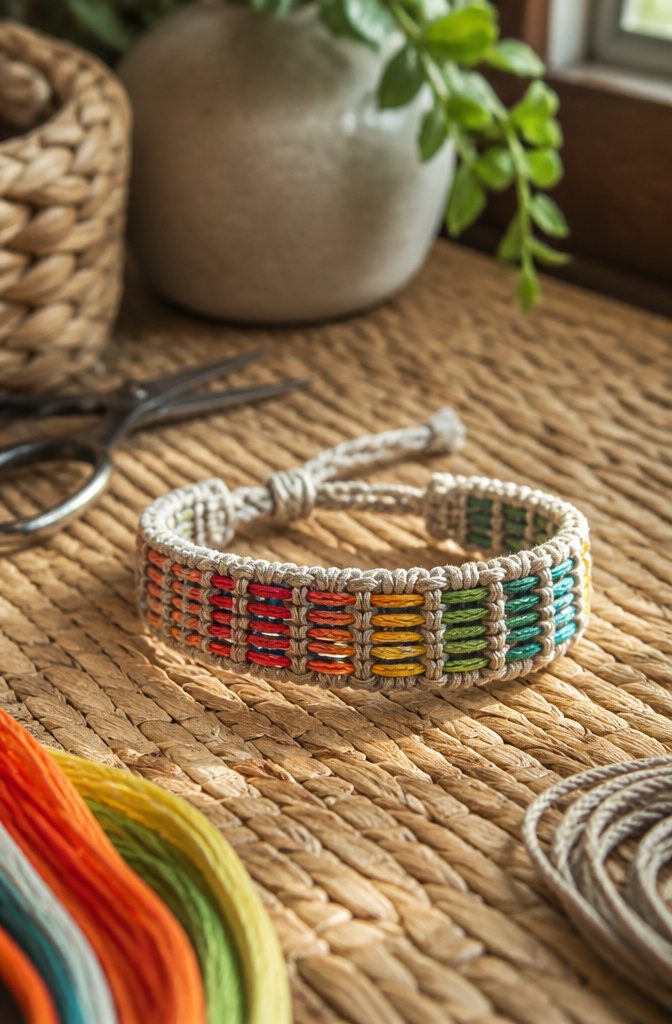
The ladder stitch is a 4-strand pattern built like its name: two outer rails stay mostly still while two inner strands, the rungs, weave back and forth between them.
Those rung strands do the active looping, passing over one rail and under the other in alternating rows to create the stepped horizontal bars that give the design its structure.
The rails need steady, moderate tension throughout, enough to hold the bracelet’s edges straight without pulling the width narrow.
The rung strands work better with slightly looser tension so they can arc across the gap and sit flat rather than bowing the rails inward.
If you pull the rungs as tight as the rails, the bracelet pinches in the middle and loses its ladder shape entirely.
This pattern rewards contrast between the rails and the rungs. Two muted tones for the rails and two brights for the rungs, or vice versa, make each horizontal step visible from across a room.
I would skip pairings that sit too close on the color wheel; the weaving motion already subdivides the surface, and similar tones turn the whole thing muddy where you want clean geometry.
10. Chain Link
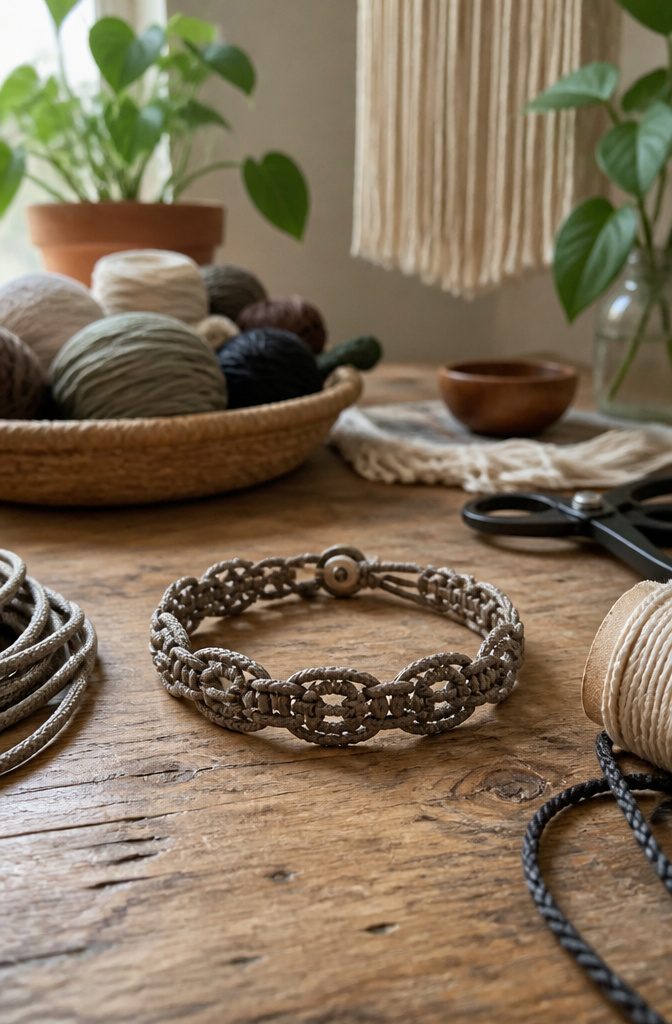
Chain link is the pattern that fools the eye into reading soft cord as hard metal.
Each loop in the braid passes through the previous one and locks with the next, so the finished band hangs in flat oval links exactly like a watch chain, except it bends against your wrist.
Where this pattern gets tricky is in the blocking stage after the knots are tied. Macramé chain, the commercial technique, is woven on a loom with warp threads under constant tension, so every link opens to the same width automatically.
Hand-tied chain link has no loom holding it open; the loops relax and shrink as the last knot tightens.
Lay the bracelet on a padded surface while it is still damp, stretch each link to its full span with a blunt needle or a crochet hook, and pin it in place until it dries completely.
Skip this and the pattern collapses into a dense tube that reads as a plain spiral.
The surface texture gives away the difference at a glance. Real macramé chain has a smooth, almost woven face because the thread passes straight through each link.
Hand-tied chain link carries the telltale diagonal ridges of forward knots marching in pairs, so the links read slightly raised and faceted, more like a rope chain than a box chain.
Pick it for the bracelet you want to look deliberately homespun, not for one that needs to pass for factory-made.
11. Watermelon
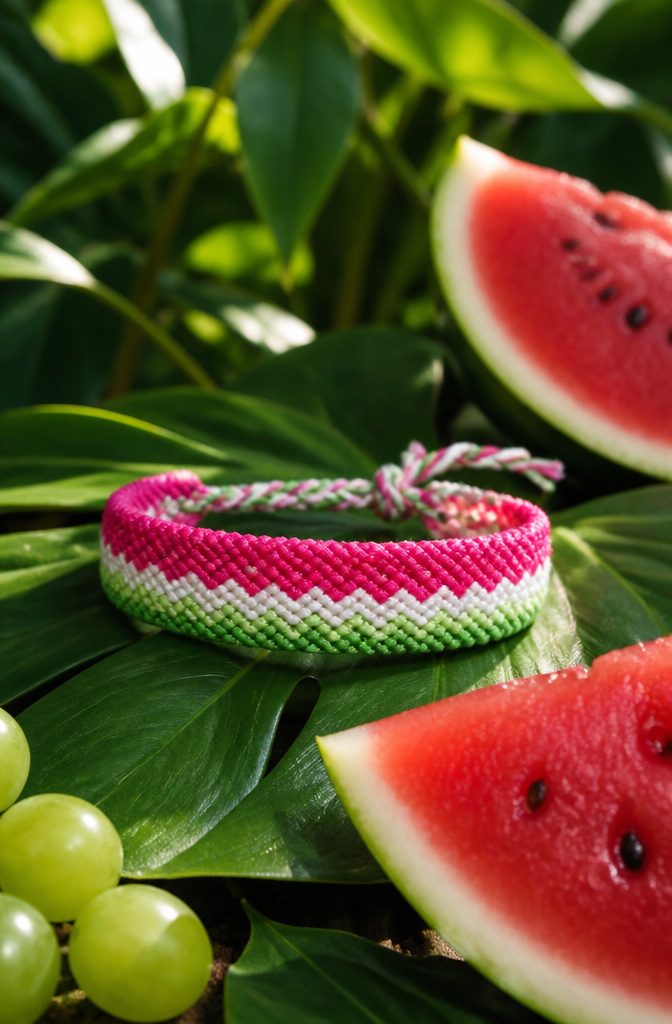
The watermelon pattern divides a bracelet into three horizontal bands that sit stacked from edge to edge, each band carrying one color in the palette.
Green anchors the outer border, white runs the middle strip, and pink or red fills the center core, a sequence that copies the rind-to-flesh structure of the actual fruit.
Because the design is read from its cross-section, the three color groups must stay clearly distinct; any fade or blend between them collapses the illusion into muddy stripes.
Forward knots carry each color across its assigned zone, and the stripe widths stay even only if the thread count is split exactly.
The green gets roughly one third of the total strands, the white another third, and the pink or red the remainder, with the middle white band sometimes narrowed slightly to keep the red from reading as an afterthought.
When I set this up, I plan the color blocks before the first knot rather than letting them emerge, because rethreading mid-bracelet leaves visible knots that break the clean edge the pattern depends on.
12. Arrowhead
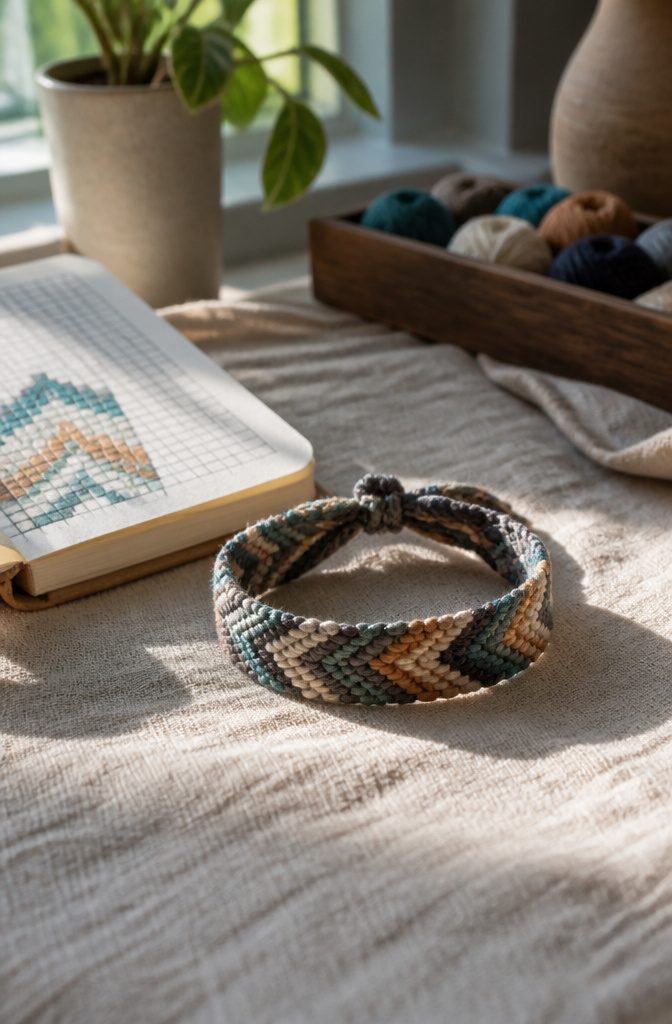
The arrowhead pattern builds directly on the chevron technique but with one deliberate change: the peaks are offset so the center line no longer runs straight down the bracelet.
Where a classic chevron stacks identical V-shapes in a clean column, arrowhead miscenters each row by one knot so the points march diagonally across the band, forming what reads at a glance as a flying wedge rather than a stacked chevron.
That diagonal flight is what makes the design click, and it is also why this pattern demands 8 strands minimum.
With the standard 6-strand chevron setup, offsetting the center throws the knot count off by half a loop; the structure collapses because there is no true center pair to split the pattern across.
Eight strands give you two center threads to work with, letting you shift the peak left or right of true center while the remaining pairs rebalance on each side.
Think of it as two chevrons interleaved, with the shared spine hiding in the middle.
Color choice matters more here than in straight chevron, too. A single contrasting strand carried through the center makes the arrow point pop; without that contrast, the offset just looks like a wobbly chevron someone miscounted.
The deep V the eight-strand build allows gives the arrow its bold directionality, and that is the detail that separates a bracelet that looks intentional from one that looks mistaken.
Forwards and Backwards Knots
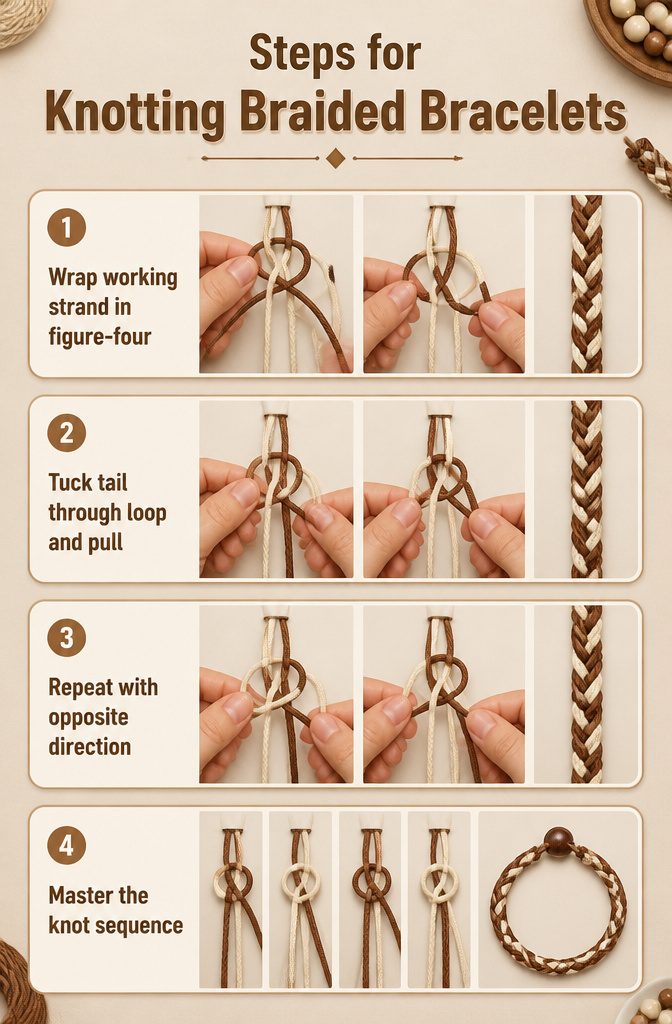
- The forward knot wraps the working strand in a figure-four over the neighbor strand, then tucks the tail through the loop and pulls upward. The working strand ends up on the right, and the knot itself travels left. Tension lives in the upward pull, not the grip on the tail; pinch too hard and the braid buckles, too soft and it collapses into a loose spiral.
- The backward knot reverses the motion: same figure-four, but the working strand starts on the right and wraps left, tucking through from the opposite side. After the pull, the working strand sits on the left. Most beginners muscle this one because the hand position feels awkward, which is exactly why the braid goes wavy.
- Every pattern above, stripe to arrowhead, stacks two of these knots using the same pair of strands. A forward knot followed by another forward knot is the base. A forward knot followed by a backward knot, or the reverse, is what turns a line of knots in the opposite direction. Call them forward-backward and backward-forward knots; they are the only way a chevron points back on itself or a diamond closes its center.
- Mastering these two removes the beginner ceiling because every bracelet is just a sequence of direction changes you now recognize instead of memorize. The pattern diagrams stop looking like cryptic grids and start reading as left, right, switch, repeat.
Materials for Braided Bracelets
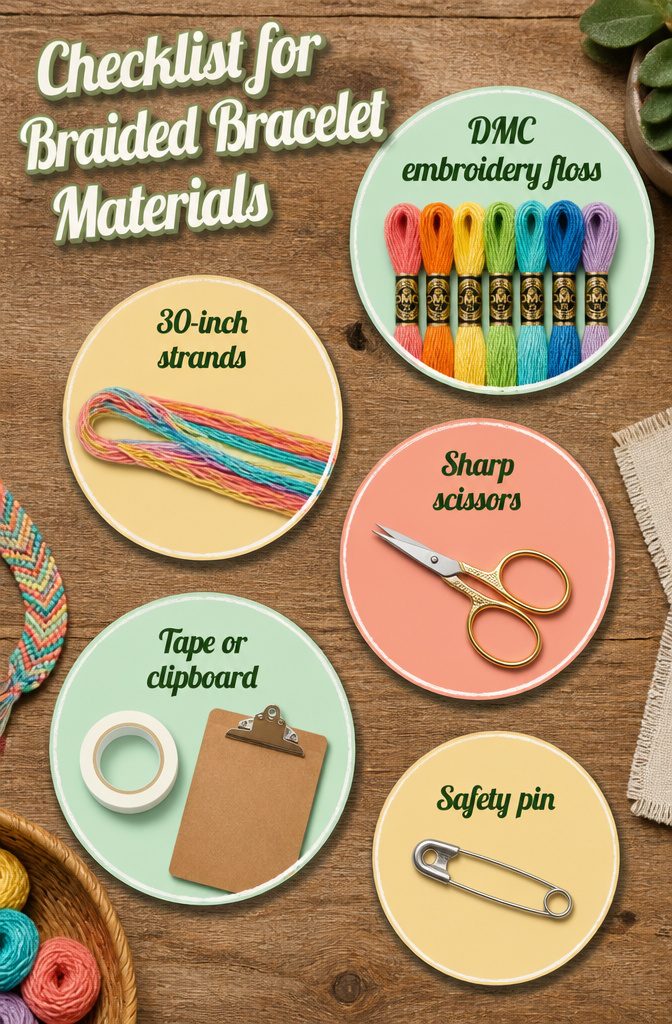
DMC embroidery floss is the standard for braided bracelet patterns, and the difference against craft yarn is real.
Floss sits flat, knots clean, and the color range runs far enough that matching a birthstone or a mood is straightforward. Yarn fuzzes and thickens the braid past what fine patterns allow.
A few things to gather before starting:
- Cut each strand roughly arm’s length, about 30 inches, or the repeated knotting eats your working length faster than you’d guess. For a bracelet that fits most adult wrists, six strands of this length gives you enough to finish with a tidy tail.
- Scissors that slice cleanly. Frayed ends from dull blades make threading the starting knot a headache.
- Tape or a clipboard to anchor the work. Tape to a table if you work at one; a clipboard travels better and keeps tension even.
- A safety pin through the top knot and into your jeans, a bag strap, or a pillowcase. The tension stays consistent, and you can braid on a bus or a couch without the whole setup collapsing.
That is the full kit. No special tools, no starter packs worth buying.
Reading Bracelet Patterns
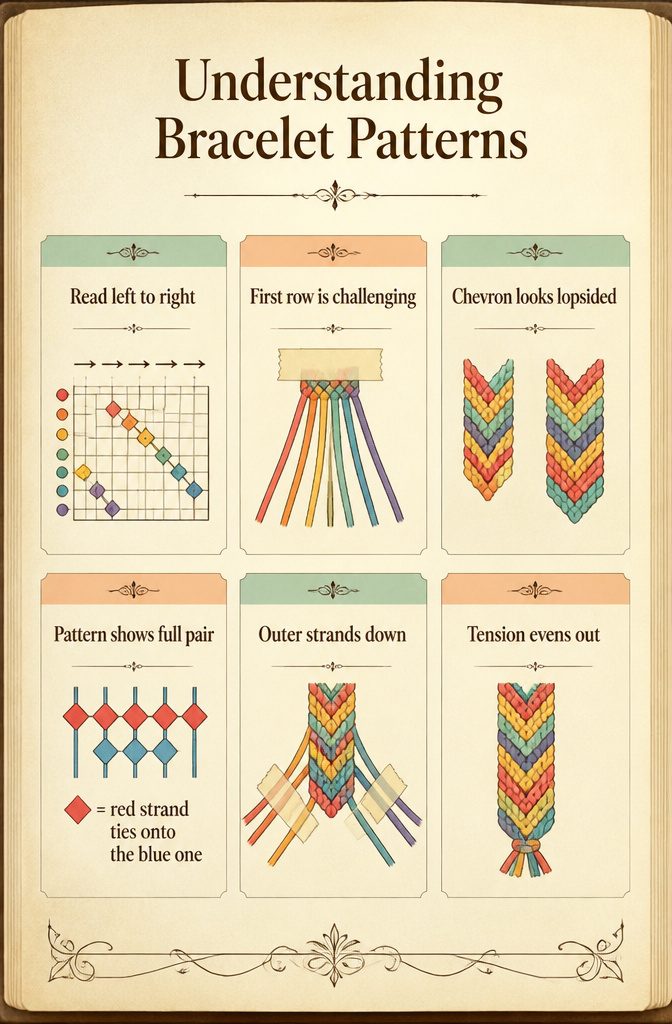
A grid reads left to right, but your hands work from the center outward, and that mismatch is what trips most people up on their first bracelet.
Each row on the page is one complete pass across the strands, not one knot.
The color symbols tell you which thread is active and which strand it wraps around, so a red diamond over a blue line means the red strand ties onto the blue one, not that the finished knot shows both colors equally.
The first row is always the hardest because the threads hang loose and shift.
I hold the outer strands down with masking tape on my work surface until the base is wide enough to grip itself. After three or four rows, the tension evens out and the pattern becomes readable in the fabric itself.
Your eyes will lie to you. Early on, a chevron row looks lopsided before the matching half is tied, and the instinct is to yank the knot tight to "fix" it.
Trust the diagram instead. The pattern accounts for the full pair; one side always looks wrong until both sides are complete.
If the chart says forward-backward and the result looks off, finish the row. The correction builds into the next pass.
Where Friendship Bracelets Come From
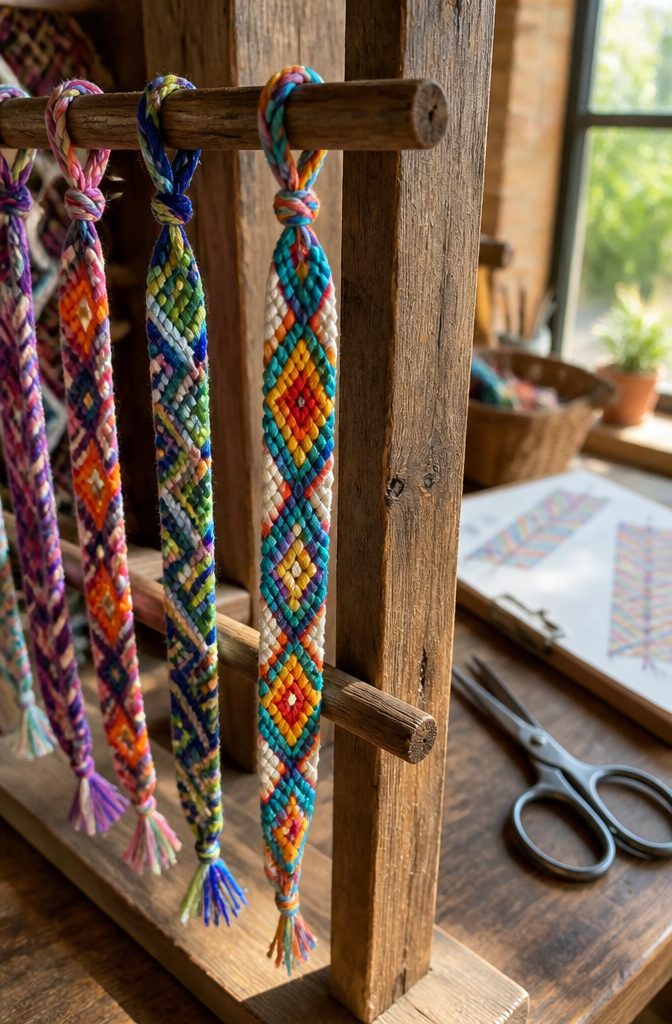
Friendship bracelets reached the United States from Guatemala in the 1970s, carried by the same craft tide that turned macrame into a household word.
The technique itself, all finger-worked knots without a loom or needle, belongs to Central American weaving traditions that treat the pattern as the message.
The ritual still matters for anyone picking up embroidery floss today. You tie the bracelet onto a friend’s wrist; they make a wish while you knot the final loop; the bracelet stays on until it falls off naturally.
The falling off is the point — that is when the wish, in the tradition, comes true. The expectation is that no one unties it early.
This history shapes how braided bracelet patterns work in practice.
The designs need to survive showers, summer heat, and daily wear for weeks or months. A pattern that loosens or frays defeats the purpose, since the bracelet is supposed to hold until it gives out on its own.
That durability standard, built into the gift from the start, is why the classic knots stay worth learning even among flashier techniques.
Frequently Asked Questions
What are some easy friendship bracelet patterns?
Candy Stripe, Chevron, and Spiral Staircase are the three best starting points. Candy Stripe uses only forward knots in a repeating left-to-right order, so the technique drills itself into your hands.
Chevron introduces backward knots for the first time but still follows a clear mirror structure. Spiral Staircase looks more complex than it is; every knot moves the same direction and the twist builds naturally.
How do you make a friendship bracelet?
Start by cutting six strands of embroidery floss to about 32 inches each, then tape or clip them to a flat surface so tension stays honest.
Every pattern stacks two knots per pair of strands: forward knots move the working strand to the right, backward knots move it to the left.
Pull each knot tight and upward toward the anchor, and finish with a 2.5-inch braid at the end.
What materials do I need for friendship bracelets?
DMC embroidery floss is the standard; it sits flat and knots clean compared to craft yarn.
You also need sharp scissors, tape or a clipboard to anchor the work, and a safety pin if you want to braid on the move.
Cut each strand roughly arm’s length, about 30 inches, because repeated knotting eats working length faster than you would guess.
What is the history of friendship bracelets?
Friendship bracelets reached the United States from Guatemala in the 1970s, carried by the same craft wave that made macramé a household word. The technique belongs to Central American weaving traditions that treat the pattern itself as the message.
You tie the bracelet onto a friend’s wrist, they make a wish, and the bracelet stays on until it falls off naturally; that falling off is when the wish, in tradition, comes true.
What are some different braid styles for bracelets?
Each builds on the same two knots but changes direction, strand count, or tension to create a different structure. The three-strand braid itself works best as a central panel surrounded by busier edges, or stacked with other bracelets.
What string to use for braided bracelets?
DMC embroidery floss is the standard for braided bracelet patterns. It sits flat, knots clean, and comes in a color range wide enough to match birthstones or moods.
Craft yarn fuzzes and thickens the braid past what fine patterns allow. For the Heart pattern specifically, jute cord and wooden beads suit the heavier scale better than thread.
What are some patterns for cord bracelets?
The Heart pattern uses jute cord and wooden beads rather than embroidery floss, with the cord’s heavier scale forming the outline while knots press inward.
Chain Link also works well in cord, though it needs blocking after knotting: stretch each loop to its full span while damp, pin it, and let it dry completely or the pattern collapses into a dense tube.
How to make those braided bracelets?
Secure your strands to a flat surface with tape or a clipboard, or pin them to your jeans with a safety pin for portable braiding.
Master the forward knot first: wrap the working strand in a figure-four over its neighbor, tuck the tail through, and pull upward.
Every pattern above stacks two of these knots per pair. Finish by tying two knots at the end, string a pony bead over the tails if you want, and tie another double knot to lock it in place.





